Creating a Curriculum Vitae with LaTeX
Last updated: March 18, 2024


1. Introduction
In the competitive job market landscape, a well-crafted curriculum vitae (CV) can make a remarkable difference in securing our dream career opportunity. The content and presentation of our CV play a vital role in grabbing the attention of potential employers and highlighting our skills and qualifications effectively.
While various tools are available for creating CVs, one approach that stands out for its professionalism and aesthetic appeal is using LaTeX . In this tutorial, we’ll study step-by-step how to create a CV with LaTeX using ModernCV – one of the most common and powerful package for creating CVs.
2. Install the ModernCV Package
Before installing ModernCV, let’s ensure we have LaTeX on our computer . If not, the following will show how to install MikTeX, the core of LaTeX.
If we’re using Windows, we can run the following commands in administrator mode to install the package MikTeX:
With Ubuntu and other Linux distros, the install process is less complicated. We can just copy and run these commands:
After the installation of MikTex, we can run the following command to install ModernCV:
3. Setting Up Our Document
First, we need to define the preamble of the LaTeX document. This starts with the declaration of the class moderncv . Then we can choose the theme for the CV, i.e., the style of the PDF result after compiling the LaTeX document.
The following describes the typical preamble for a LaTeX document using ModernCV:
4. Style Configuration
There are several options we can modify:
| Parameter | Option |
|---|---|
| paper_size | a4paper, a5paper, b5paper, letterpaper, legalpaper, executivepaper, landscape |
| font_size | 10pt, 11pt, 12pt |
| color_option | nocolor (for black-and-white CVs) |
| theme_name | casual (default), classic, banking, oldstyle, fancy |
| color | blue (default), green, red, orange,grey |
| encoding | utf8, latin1, ascii, … |
| language | english, vietnamese, chinese, japanese, korean, … |
4.1. Page Size and Fonts
We can freely change the format (page size, text size, etc.) of the CV. For example, if we want to have a CV in the A4 paper size, default text size 10pt, support color printing, and that’s draft, we can define the documentclass as follows:
If we want a CV to be in letter paper size with a landscape look, default text of size 12pt, black-and-white printing, and the file is the final version, here is the config:
There are five available themes, as indicated in the above table: casual (default), classic , banking , oldstyle , and fancy . Here is what they look like after compiling:

Additionally, we have five available color options for themes (the color of titles and some bars and lines in the CV):

4.2. Margins
The margin of the CV can also be modified. The below table lists the optional parameters for margins:
| Margin parameter | Description |
|---|---|
| scale | Defines the content space is equal to scale % of the page’s space |
| top | Defines the top margin |
| bottom | Defines the bottom margins |
| left | Defines the left margins |
For example, if we want a CV to have a scale of about 25% of free paper space, here is the command:
Or we can manually set each margin parameters ( top , bottom , left , right ) with this command:
4.3. Encoding
With this line, we can change the file’s encoding. We usually use the utf8 encoding:
4.4. Language
In this line, we can define the language of the CV. If our CV will be in English, here is the command:
4.5. Disable Page Numbering
For multi-page CVs, we can add this line to disable page numbering :
It is commonly recommended to summarize a CV in one page. A résumé, on the other hand, can have multiple pages.
5. Fill in Personal Information
Once all the configurations are done, we can start writing the content of our CV—our personal information. We can use the following lines to define them:
6. Customizing Sections
To open or close a section or subsection, we can use the following commands:
The command to open a new section is \section{<section_title>} . Every section can be divided into subsections with \subsection{<subsection_title>} . When needed, we can close the section with \closesection{} or create an empty section with \emptysection{} .
The following lines demonstrate the use of the above commands:
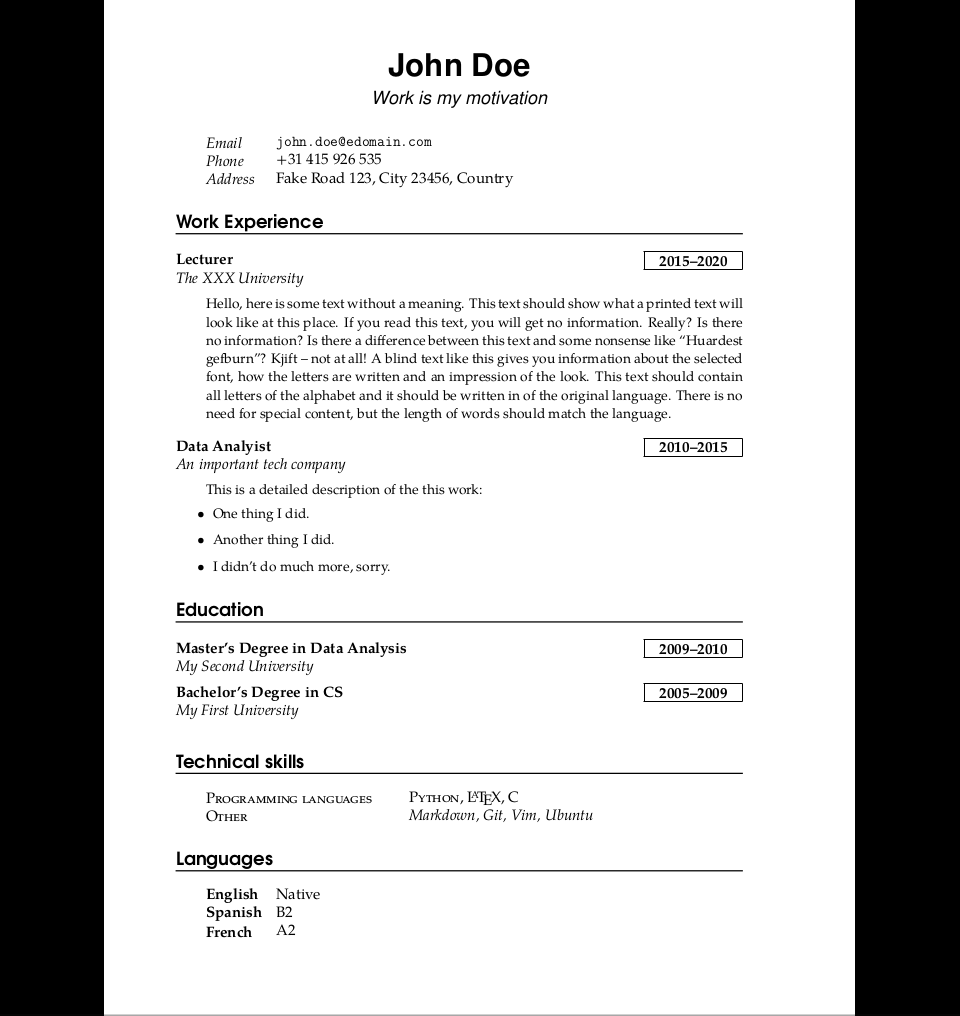
This results in the below figure:

6.1. Customizing Items
We can add items of many different types inside sections depending on our purpose.
To describe our education or job experiences, we can use the following command (note that the last three arguments are optional):
There is also a language section for any language certificate that we achieved:
The computer skill section contains some parameters as follows:
We can also add a skill entry with rating:
To insert a line with a hint on the left, we can use the following command:
To create a pair of two-item sections, we can use the command \cvdoubleitem . This command is often used to present information in two columns, such as a skill and its corresponding proficiency level, or a qualification and its date of completion:
For example, if we want to add a section for “Computer Skills” with multiple categories, we can write:
This will generate the following result:

To insert a list item inside a section, we need the following line:
We can also insert a section that list all of our publications . These data need to be stored in a BibTeX file ( *.bib ):
The name of the section title can be changed by the command \renewcommand{\refname}{<new_name>} .
6.2. Further Customizations:
We can modify the symbols used for personal data highlighting by redefining them as follows:
For command_name , the available options are: phonesymbol , emailsymbol , addresssymbol , mobilesymbol , faxsymbol . For new_symbol , we can use any possible symbol in LaTeX, such as \star or \rightarrow .
In addition, it is possible to change the symbol of the lists:
The following code sums up all of the above commands:
The result is shown in the below figure:

Many distances definitions are used by ModernCV, and all of them can be customized with the command:
The available options for the parameters length and new_value in the above command are:
- length : quotewidth , separatorcolumnwidth , maincolumnwidth , doubleitemcolumnwidth , listitemsymbolwidth , listdoublwitemmaincolumnwidth
- new_value : any distance value that LaTeX can understand
In particular, the first column can be set to any width in two ways:
To indicate the creation date of our CV, we can add the date that our CV was produced with the command \today .
To add some lines at the bottom of the CV, we can drop out the layout of ModernCV and push the line at the end.
7. Final Result
Once we’ve done all of these above steps. It’s time now to compile the LaTeX file and see the result PDFs:

8. Alternative Options to Create CVs in LaTeX
Besides ModernCV, there also exists other packages to create a CV/Resume in LaTeX, such as EuropassCV , Scott Clark CV , EuroCV , friggeri-cv , and so many others. It is worth noticing that some of them do have documentation and sample codes, and others don’t.
9. Conclusion
This article has provided a fast way to create a CV with LaTeX using the ModernCV package. Whether we are a seasoned LaTeX user or new to this remarkable typesetting system, this article will equip us with the knowledge and skills to create a standout CV that opens doors to exciting career prospects.
LaTeX-Tutorial.com
How to write a minimalistic cv in latex: step-by-step guide, learn how to write and customize a minimalistic curriculum vitae in latex. understand the logic behind every macro, and also how you can make modifications to customize it..
If your goal is not to become a TeXnician, but instead to have an easy way to write a CV in LaTeX, I am sure this tutorial will also be useful to you. You will find a fully working LaTeX template to write a CV and a detailed explanation that can serve as a reference when you want to change any aspect of the template. If you don’t care about the Technical details, you can jump straight to the last section , in which you will find a high-level and user-friendly use of the macros, to quickly produce a professional CV.
Without further introduction, let’s start writing our professional and minimalistic CV in LaTeX.
Required packages for typsetting a CV in LaTeX
1. document class.

As an optional argument, we will choose the font size of the document to be 12pt. Thus the first line of our document is:
2. Language and encoding
Next, we have to load the packages we will use. To begin with, let us load some basic packages:
3. Set the document font
In our example, the main font of the document is not LaTeX’s default font Computer Modern ; instead, we load the package:
which sets as default font the TeX Gyre Pagella.

4. Specify the CV margins
As you can see, the configuration command \geometry is very straightforward and lets us easily modify the size of the left, right, top, and bottom margins, setting them to the TeX dimension we want. Note that in our example we leave the default right and bottom margins, that’s why those lines are commented out (any margin that is not specified as the default length).
5. Remove headers, footers and page numbers
The page layout configuration is finished with the following command:
which empties the page from other elements like headers, footers, page numbers, margin notes, or anything like that.
6. Modify sections style to meet CV style
We change the font of the sectioning commands in the following ways:
- We make the font smaller: instead of using the \Large default font size it uses \large.
- We change the font family: instead of the font set for the entire document, for the sections we use the font \TeX Gyre Adventor, which can be loaded with the font code qag.
- Finally, we print a horizontal rule 5pt below the title, with a thickness of 1pt.
Once we have loaded the packages we will need, we have to define the macros used to write each of the entries in the document.
2. The macros
It is important to define macros for this purpose, instead of writing the text directly in the main document, for at least two reasons.
- First, the code becomes much shorter and cleaner, since we don’t have to specify the font size, type, etc. each time we want to write a new entry.
- Second, the code becomes much more reusable, because this way the user doesn’t need to understand what’s working behind, he can simply use the macros to write his CV without knowing any LaTeX at all.
Before writing our first macros, we need to define a new length, which will be used to align text on the same line (for example, in the entries for personal information, or to write the duration of each work entry):
1. Predefined lengths for space boxes
As you can see, we set this new length to be equal to the width of the box formed by 123456789. It is also convenient to define a macro to easily insert the same vertical separation between entries each time:
2. Name macro
Now it is time to write the macro that prints our name at the top of the CV:
This macro does the following:
- First, it sets the \Huge font size , so that our name outstands in the document.
- Next, it changes the font family. In this case, we chose the Helvetica font family, with font code phv .
- Following that it prints the name (which is passed as the first and unique argument to the macro) centered and using the boldface .
- After all of this, it ends the paragraph with \par and sets back the default size and font .
3. Slogan macro
A similar macro is used to define the motto, or slogan, of the candidate:
The only thing that changes with respect to the \name macro is that the font size is now \large, and the text is printed with a slanted font.
4. Personal details macro
Once we have the heading of our CV, we want to print the personal details of the candidate (contact information, address, and the like). Thus we define a macro to write each of these personal entries:
Let’s break down what this macro does since it is pretty different from the ones defined before:
- Before the contents of the macro, note that it will be passed to parameters: the first one will specify the name of the (personal information) entry, while the second will specify the contents of that entry. We separate these two so that we can give different format to each of them, and also set some separation.
- For this entries we set a specific indentation from the right margin. We first delete the default indentation with \noindent , then set our custom indentation with \hangindent , and finally indicate for how many lines we want this indentation with \hangafter (zero means that all the lines will have this same indentation).
- Now we create a paragraph mode box with \parbox of size \spacebox as was defined previously. Inside this box we want to have the entry name slanted.
- Finally, we print the entry contents using the default font and end the paragraph with \par .
If you get what this macro does, and understand what each command means, the remaining macros will be a piece of cake, since the structure is very similar.
5. Skills macro
To introduce skills and language levels we have the macros
As you can see, these are essentially the same as the \info macro , but let me make you aware of some differences.
- First the entry name space for the \verb|\skill| command is \verb|3\spacebox| instead of \verb|\spacebox|, since we want one of the skills to be “Programming languages” which doesn’t fit in a single line of width \verb|\spacebox|. I suggest you too adjust these lengths to fit the needs of your entries.
- What also changes is the font type of the entry names: for the skill it is smallcaps, and for the languages is boldface. These are, of course, arbitrary choices, and you can set them as you like the most.
6. Education macro
Finally let’s have a look at the two most complex macros, designed for education and work entries. First the macro for education entries is
This may seem a lot to get your head around to, but let me break it down for you into small steps:
- This macro has four arguments: the first specifies the name of the studies, the second the duration, the third the institution, and the fourth a more or less brief description.
- We write the name of the studies with no indentation in bold text.
- Then we use the \hfill command to write at the right the duration of the studies. This duration is written inside a \parbox of width 6em , is centered inside the paragraph box with \centering , and written in bold. Finally, the box is wrapped with a frame, using the \framebox command.
- Then we start a new paragraph with \par , and with no indentation we write the institution using italics. Again, we end the paragraph and start a new one.
- Finally, we leave 0.5em of vertical space, and with the same custom indentation as the one used for the personal, technical and language entries, we write in small text the description of the studies. Finally, we go back to the normal text size and end the paragraph.
7. Work macro
The work entry for our curriculum is essentially the same as the education entry:
But we wrote a separate macro in case you wanted to customize its appearance.
The main document
Now all of the hard work is done. It is time to see a small implementation of the previous macros, that is to say, a small example of how to use these macros, so that we can produce the example below.
Of course, every snippet that will appear in this section is no longer part of the preamble of our document; instead, it is all written inside the document environment .
First let’s write our name, motivation, and personal information:
- Note the need for the adequate vertical spacing each time: to get the motto closer to the name, we deleted 10pt of vertical space, which in our opinion made the title look better.
- We also added a \sepspace between the title and the personal info, and wrote the email with the typewriter font type, to make it look more professional.
Following this we have the work experience:
As you can see, between each entry we use a \sepspace . Similarly, we have the education section:
In this case, the education entries need no description. For this reason, we don’t use the \sepspace between entries, since they seem to look fine this way. However, this is just a matter of taste, so it is your final decision how it should look like.
And to finish the curriculum we have the sections with skills and languages:
In this tutorial we have seen a comprehensive explanation of the source code needed to compile the example of CV shown above.
- Along the way, we have explained several LaTeX commands to modify spacing , indenting , font size , font types , etc. that I hope will be useful to you in your LaTeX life beyond this project.
- We have seen some external packages, such as geometry or sectsty , used to customize the appearance of our document, that may also be useful in other kinds of documents.
Therefore I hope this tutorial has not only helped you typeset a professional CV, but that you have also gained some more insight into how LaTeX works with a practical example.
Recent Posts
Typesetting Multiple Choice Questions in LaTeX
n this tutorial, we will see how to write a multiple-choice exam in LaTeX, using the exam document class. This document class provides multiple tools to easily typeset exams in LaTeX, and we have...
How to denote the dot product in LaTeX?
In this post, we will learn how to denote the dot product in LaTeX and which commands can be used!
:necktie: A collection of cv and resume templates written in LaTeX. Leave an issue if your language is not supported!
Latex cv and resume collection.

:necktie: A collection of simple and easy to use, yet powerful LaTeX templates for CVs and resumes. All of them are self designed and self implemented and not copied from template collections.
Now with support for Chinese, Japanese and Korean character encoding. Setup is only two lines of code! Read more here .
| Classic | Modern | Two Columns |
|---|---|---|
| Sidebar | Sidebar Left | Row Layout |
|---|---|---|
| Infographics | Infographics 2 EN | Infographics 2 FR |
|---|---|---|
Great first impression
Point out with a progressive layout. Give decision makers and HR only the most important information about you on one single page.
Beginner friendly
Pick a template, replace the content, compile, done. If that’s not enough you can easily customize colors, fonts and layout. The templates are documented directly in the code.
Minimal environment
You need a minimal tex-live distribution to compile the templates. No XeTeX or LuaTeX required. No other SDKs or environments required.
How to build?
Using docker.
We now have a Dockerfile you can use to build your latex environment. For this you need to have Docker installed on your system.
Get Docker: https://docs.docker.com/get-docker/
We provide scripts for building the image and running the containers, so you should fine by simply running the build.sh script:
You should now be able to build CVs simply by providing the folder name:
Constraints: You need to be in the top-level folder of this project and the image has been created (see prior step).
You can also run a daemon and pass through build commands, suitable if you build many times in sequence:
This has originally been implemented by https://github.com/blang/latex-docker/tree/master
Manual build
The following guide just briefly describes the requirements and build procedure as there are many ways to install a LaTeX distribution on various OS. Please create an issue, if this part is not helpful.
Build Requirements
You will need some minimal Texlive distrubution (The full texlive distribution is nearly 2GB large but you will need only a part of it). A good starting point is here: https://www.latex-project.org/get/#tex-distributions
If you want to install texlive from tug.org instead, you can use this guide: https://tug.org/texlive/
Users of various Linux distrubutions can also install texlive from their repositories.
This repo also contains a texlive.profile file in the project root, that can be used to install the minimum required texlive packages when manually installing texlive.
Build Procedure
- Clone or download this project.
- Change to a template folder, which contains a main.tex file do
- Edit the main.tex according to your CV credentials, optionally change settings and colors etc.
- Run pdflatex (build/compile)
- The main.pdf should show the output.
Contribution
Contributors are very welcome . You want to contribute? Awesome! Please check the contribution guidelines first to make it a success.
:heart: Thanks a lot to all sponsors of this project, your contribution will help to keep this project going:
The MIT License (MIT)
Copyright (c) 2014-2021 Jan Küster
Permission is hereby granted, free of charge, to any person obtaining a copy of this software and associated documentation files (the “Software”), to deal in the Software without restriction, including without limitation the rights to use, copy, modify, merge, publish, distribute, sublicense, and/or sell copies of the Software, and to permit persons to whom the Software is furnished to do so, subject to the following conditions:
THE SOFTWARE IS PROVIDED “AS IS”, WITHOUT WARRANTY OF ANY KIND, EXPRESS OR IMPLIED, INCLUDING BUT NOT LIMITED TO THE WARRANTIES OF MERCHANTABILITY, FITNESS FOR A PARTICULAR PURPOSE AND NONINFRINGEMENT. IN NO EVENT SHALL THE AUTHORS OR COPYRIGHT HOLDERS BE LIABLE FOR ANY CLAIM, DAMAGES OR OTHER LIABILITY, WHETHER IN AN ACTION OF CONTRACT, TORT OR OTHERWISE, ARISING FROM, OUT OF OR IN CONNECTION WITH THE SOFTWARE OR THE USE OR OTHER DEALINGS IN THE SOFTWARE.
- Resume Templates Simple Professional Modern Creative View all
- Resume Examples Nurse Student Internship Teacher Accountant View all
- Resume Builder
- Cover Letter Templates Simple Professional Modern Creative View all
- Cover Letter Examples Nursing Administrative Assistant Internship Graduate Teacher View all
- Cover Letter Builder
14 Top LaTeX resume Templates
All-purpose LaTeX resume templates
Latex resume templates for it workers, latex resume templates for recent graduates, latex resume templates with a splash of color, hybrid-style latex resume templates.
Since you’re accustomed to using LaTeX for your publishing needs, why not use it for your resume? If you’re an expert, it may be to your advantage, but if you’re not proficient already creating a LaTeX resume is not an easy task. For one thing, it has a steep learning curve and while you may know exactly how to format your scientific papers, you may find formatting a resume a bit different.
The solution is LaTeX resume templates.
But even if you decide to go with a downloadable LaTex resume template, you may want guidance for the content. In that case, the resume guides and resume examples for 350+ professions offered by Resume.io will provide the support you need.
This blog includes our top 14 LaTeX resume templates choices and will cover the following topics:
What is a LaTeX resume template?
How to use latex resume templates, 14 latex resume template examples.
Before we answer what a LaTeX resume template is, let’s define LaTeX itself. LaTeX is a document preparation system (not a word processor) that allows users to input plain text that is then formatted and designed within the system. It is most often used for high-quality scientific or technical publications, but can also help you create a resume.
LaTeX resume templates are the same as any other resume template in that they are pre-formatted and designed. This allows you to focus your attention on the all-important content of your resume and not fret over making a professional vision impression.
One of the benefits of LaTeX is that if you understand how to use it, you will have more control over all the elements of your design, which means you can personalize it as much or as little as you choose. The downside, of course, is that you have to take the time to learn LaTeX if you don’t already know it.
You’re already here
If a LaTeX resume template doesn’t suit your needs, Resume.io offers expertly-designed resume templates accompanied by an AI-enhanced resume builder tool .
As we mentioned above, getting started with a LaTeX resume template requires some work up front. LaTeX is designed for inputting text that the LaTeX program then formats. While Resume.io’s resume template are cut-and-paste boxes that are highly intuitive, the LaTex templates. For example:
- This is the coding for a summary within an Overleaf template:
%%% SHORT SUMMARY %%%
\section*{{ \LARGE \color{myblue} Summary}\xfilll[0pt]{0.5pt}}
\vspace{-15pt}
\vspace{1.5mm}
Describe your professional self in a few lines
\vspace{-8pt}
- But, the top of the resume template contains 23 lines of coding that look like this:
\documentclass[10pt]{article}
\usepackage[a4paper,bottom = 0.6in,left = 0.75in,right = 0.75in,top = 1cm]{geometry}
\usepackage{graphicx}
\usepackage{amsmath}
\usepackage{array}
\usepackage{enumitem}
You have to know to scroll down to find where you will begin to fill in your own text. We recommend a straightforward, simple design that works for any profession, such as SDE_Template_Sharath .
To use the LaTex template for your resume, you must carefully insert the text within the coding and then recompile the document.
Just as with any other type of resume template, LaTeX offers a variety of designs that are suited to different careers and levels of work experience. We do not recommend using any template that veers too far from the standard resume sections or offers too much information about your life outside work. If you have a hobby or interest that enhances or dovetails with your professional skills, you may choose to mention it in your cover letter or during your interview.
In most cases, a resume written in reverse chronological order and containing a summary, employment history, skills, and education section is the right choice. Some careers may require a project or publication section and others may want to include an awards and accolades heading. All the LaTeX templates below are suitable for these resume objectives.
- Curriculum Vitae LaTeX . A clean design with a bit of color that gives recruiters what they are used to seeing. This one includes extracurricular activities, which we recommend only including if you need to fill space and are directly related to the job you seek. For instance, a social studies teacher who was on Model UN or a social media marketer who has a successful TikTok channel.
- Harbishbar’s resume . Simple, block-style resume that will allow you to easily reorder the sections and expand or contract them as needed. Don’t discount simple. Your goal is to get information to the HR department. They don’t want to have to hunt for details or strain their eyes through bright colors or fancy fonts.
- Readable resume . As the name says, this one is very readable, a key requirement of any resume. There are no flashy graphics or icons, only your important data. This one tells a recruiter that you are serious and looking to get attention with your content, not an overly-fussy design.
WIthin the world of IT, your education may matter much less than the projects you’ve successfully completed. Choosing a template that gives you the freedom to list those projects, and link to your portfolio, can make all the difference.
- Resume-Developer . This LaTeX template emphasizes your IT projects by creating a section just under your summary for all your major work. It also bumps your skills to the top so you can list the languages and technologies you have expertise in. To create that space, your employment history section moves to the bottom of the page.
- Tech Resume . This one, also from Overleaf, organizes your information with your education up top, followed by experience and personal projects. This is an excellent order if you are a recent graduate and have a portfolio of work you would like to link to. It also works if you have been in the workforce for several years and have more than one employer to list.
- Alta resume . If you prefer fewer words, or have a plethora of tech stack and learning knowledge, this is the resume template for you.
When you’ve just entered the job market, it can be tough to create a resume that looks fleshed out without embellishing. The right resume template can help.
- Plasmati resume . Because it pushes more white space to the margins, this template requires fewer entries within the employment history section. It also includes a scholarship section and allows you to detail the classes you took that are directly relevant to your career.
- Seignovert . This is a great choice for an academic researcher, since it offers extensive space for including your research internships and, within the education section, your thesis information.
- A Customized CurVe resume . If you’re a researcher, doctoral candidate, or recently-minted PhD, this LaTex template may do the trick. There’s plenty of room for your publications (publish or perish!) and conference presentations.
Yes, you want a resume template that looks professional and organized, but that does not mean you can’t include some color especially if you’re in a more creative field. Just keep it to a minimum and make sure it doesn’t interfere with the legibility of your text.
- Lime resume . Although this one offers a spot for your portrait, we suggest leaving that out. Many HR departments don’t like photos because they can lead to bias. In addition to the not-quite-lime green color, this template has icons that add a design element and uses filled in dots to signify your level of expertise in different skills.
- Jan Küster’s Modern resume. This classic reverse chronological resume template inserts bars of color to delineate the section headings. You could add a summary section if you have fewer jobs or academic degrees to list.
- Lean LaTeX Resume . Along with the two-column design, this resume template uses two different colors, one for section headings and one for details. It also uses icons to bump the visuals up an extra notch.
Hybrid-style resumes allow you to expand the sections that you want to highlight and de-emphasize others. For instance, if you are a career-changer, you may want to focus the recruiters attention on your transferable skills, not your experience. If you are beginning your career, an extended summary may help give insight into why you deserve a chance.
- Cies . This LaTeX template serves up a large block of text at the top that you can use to explain your career change, entice employers with your many achievements, or offer examples of how you will enhance the company as an employee.
- Antkr10 . This style is easily adaptable to focus on your hard and soft skills (here called professional and personal skills) by pushing them to the top of the page. You can also add a summary if you don’t want to take up a quarter of the page with your language fluency information.
Key takeaways
We’ve narrowed down the field of LaTeX resume templates, but now you have to decide whether they are right for you at all.
- LaTeX has a steep learning curve that may take time away from your objective of entering the job hunt.
- A resume template is usually a good idea for anyone who is not an expert designer, and even designers who don’t want to take the time away from their focus on the content of their resume.
- LaTeX templates to suit the needs of any career professionals can be found online and one of the benefits of this format is that the user has much more control over the formatting—making them infinitely customizable.
- Although LaTeX has its benefits, isn’t ease of creation the biggest benefit of all when you want to begin looking for another job? We think so. That’s why Resume.io has developed a set of tools, including resume templates, a resume builder and writing guides for all your job hunting needs.

Stack Exchange Network
Stack Exchange network consists of 183 Q&A communities including Stack Overflow , the largest, most trusted online community for developers to learn, share their knowledge, and build their careers.
Q&A for work
Connect and share knowledge within a single location that is structured and easy to search.
LaTeX template for resume/curriculum vitae
If you have a TeX'ed resume, did you use a template or make your own? Are there any useful packages? What looks the most professional? How about special considerations for different areas of work (e.g. in academia)?
- 34 An article pointer and discussion at Hacker News, Why I do my resume in LaTeX , will interest some people here, I think. – Charles Stewart Commented Feb 21, 2011 at 9:13
- 1 You could look at How to show off TeX skills with a TeX-typeset CV? . – Clément Commented Oct 7, 2015 at 13:06
- A friend of mine built a CV similar, I made some updated to work in French an I have add a cover letter. The source code is here . – David Beauchemin Commented Jun 2, 2017 at 23:11
32 Answers 32
For my current CV, I ended up using moderncv . It doesn’t have many features but it is very easy to use and yields a very elegant output.
However, I also want to mention its drawbacks: customising it isn’t easy, especially since it doesn’t really use a clean, semantic markup. For example, to specify multi-column properties, you actually need to specify the items in an odd order (namely line by line instead of column wise).
- 16 Another vote for moderncv. To my eye (after having read hundreds of CVs over the past year's hiring), it presents the information in a way that makes it easy for the reader to find what they are looking for. This is critical to getting past the first pass. – KeithB Commented Jul 26, 2010 at 20:28
- 54 I’m attempted to downvote my own answer. I’ve recently had to change my CV slightly and it was imperative that everything fit on one page, which, from the available space, wasn’t a problem in principle. However, moderncv simply doesn’t accomodate such wishes. I ended up rewriting large parts of it, in an extremely quick&dirty way since I didn’t have a lot of time. In hindsight, creating my own class from scratch would have cost me less time. As soon as I’ve got time I’ll rewrite my CV without any template. – Konrad Rudolph Commented Jan 27, 2011 at 19:06
- 11 moderncv actually has a new feature (or a related package) since yesterday: moderntimeline . – raphink Commented Sep 30, 2011 at 13:36
- 3 @Konrad Any chance you could elaborate on the issue? Normally, you can simply change the margin of the pages through geometry, or decrease the inter-element spacing through the optional parameter of every command. – Xavier Commented Feb 23, 2012 at 0:54
- 1 @Xavier Changing the margins wasn’t an option, and changing the inter-element spacing proved to be a major pain in the *ss. In particular though I tried putting some of the elements in two columns next to each other and that didn’t go down well with the package. – Konrad Rudolph Commented Feb 23, 2012 at 7:57
I made my own. In the end, it was much easier that way; you get what you want. Especially if you have situations in which you need to quickly prepare e.g. a 4-page CV, you know how to tweak your own layout to meet the requirements.
Some key tools:
article class
geometry package for margins
hyperref to have a nice PDF (e.g., DOI hyperlinks in the list of publications, proper PDF metadata)
enumitem for tweaking list layout; titlesec for section headings
cite , url , microtype , babel , ...
Keep layout and content separated; easy to do something like \input{layout2}\input{content} to produce yet another version with a different layout.
multibib to get multiple lists of references in the CV (one for journal papers, another for conference papers, etc.):
The "nocite" lists, etc., are automatically generated from a source file by using a Python script. The lists are actually in a separate file that I \input .
A tweaked version of the unsrt Bibtex style: I added things like DOI links, etc., by using some ugly hacks.
JabRef + some scripts to maintain the Bibtex database.
Rubber (with % rubber: module pdftex ) for compiling everything. It works OK with multibib.
- 82 Could you share an example of this, and typical output, please? – Forkrul Assail Commented Oct 1, 2012 at 13:17
- 12 +1 on the previous comment: unless your answer is an imperative: "Do it yourself!", I think it would be really nice to see (at least) an MWE... +2 on inputting layout, seems like an elegant way! – nutty about natty Commented Jul 9, 2013 at 10:52
- 3 In 2020 you could check overleaf.com/learn/latex/… – Krzysztof Commented Feb 19, 2020 at 12:37
ShareLaTeX provides a list of CV/Resume Templates , including:
ModernCV Oldstyle

ModernCV Casual

ModernCV Classic

ModernCV Banking

Classic Thesis Style - CV

Academic CV

Professional CV

Two-Column CV

ECV Curriculum Vitae ( English or German )

Cies Breijs Resume

Deedy Resume

Extended Fancy CV (Carmine Benedetto)

Designer's CV

Thomas Jansson CV

Indian Institute of Technology Bombay Resume

Academic Researcher CV

- I second @Diego! Thank you @werner and +1 for the pictures! – Amar Commented Sep 28, 2016 at 23:51
- 7 Wow, great collection with samples! I scrolled back the half-mile to upvote. – lmat - Reinstate Monica Commented Apr 30, 2020 at 10:26
- How do you use teh overleaf ones? I copy and pasted the code into TexShop but it wont typeset – user71207 Commented Sep 11, 2021 at 8:30
- @user71207: Since they are templates, they may require style and class files, all of which are contained within the Overleaf project/template. You should download them all (the entire project) and maintain the Overleaf file structure (which could include subfolders), then you should be able to compile the main file. – Werner ♦ Commented Sep 12, 2021 at 15:58
There are lots of resume examples here with source: http://rpi.edu/dept/arc/training/latex/resumes/ .
Google can show a thousand other examples, but that's a good place to start.
- that's the one i use... pretty nice. – Mica Commented Nov 12, 2010 at 3:30
- 12 Actually, these are all extremely space-y. Anything more compact? P.S. A google search puts this page at the top... – cheshirekow Commented Aug 28, 2012 at 19:00
- I didn't like the samples too much. Too simple and colorless! :) – Hosein Rahnama Commented Nov 28, 2017 at 11:17
I like europass and everyone seems impressed when they see the results... specially for Europe applications!
- The link is dead @YuppieNetworking. Can you post it somewhere else? – alekhine Commented Dec 24, 2012 at 7:39
- 2 Updated the link for @alekhine – YuppieNetworking Commented Dec 27, 2012 at 11:16
- 7 When you use it —and I wholeheartedly recommend it— just be sure to leave out the original "Europass" logo. If not, the Brits will have a good laugh with your Europ ass... – Serge Stroobandt Commented Aug 25, 2013 at 21:06
I will second the Taraborelli CV templates at http://nitens.org/taraborelli/cvtex . In the past I've used the curve and moderncv packages but, in the end, found the combination of his elegant templates + xelatex to be the simplest and most flexible solution. I wasn't constrained by particular sectioning, etc.
Personally, I use the Hoefler Text+Optima. I also like the Caslon.
The TeX Catalogue list CV packages in a category:
- Writing Applications for a Job / CV
By the way: I wasn't satisfied by the results of such packages. So, I used scrartcl and tabularx to typeset my CV. This way I could match it to the design of my application letter done with scrlttr2. I used tabularx in macros, allowing easy adjustments for all parts of the CV at once. Simple and elegant, no fancy colored lines and the like.
Copied from here to this topic following a request.
EDIT: The original link to the TeX Catalogue was dead. The TeX Catalogue might be superseded by https://ctan.org/topics/highscore , especially https://ctan.org/topic/cv for CV.
- 4 The link is not working anymore. – Roman Commented Feb 25, 2014 at 12:06
- @Roman (and Stefan, of course), I took the liberty of updating the link for a functional one. I hope it's OK. – Gonzalo Medina Commented Jan 28, 2015 at 23:47
- I don't know if this is a mirror of the link above, nonetheless here it is: texcatalogue.ctan.org/bytopic.html (Last modified: 10 June 2016) – Amar Commented Nov 19, 2016 at 13:42
This strikes me as a particularly good example of a CV or vita . The latex code can be seen here . As an example, see the author's vita .
For typesetting bidirectional resumes in languages other than english, the bidi package provides bidimoderncv2 class for typesetting resumés, which is the modified version of moderncv class. Two examples are presented in the doc folder of the package, namely test-casualcv.tex and test-classiccv.tex than you can look and learn how you can use it.

Take note that both are taken from examples of the package and are typeset in persian, but works fine in any other languages (whether ltr or rtl ).
- Can you tell me how can I compile the test-classiccv.tex file? should it be with pdfLatex or XeTex? – Ehsan Commented Jun 4, 2014 at 20:41
- It should be with xelatex, since it is based on bidi , and it only works with xelatex. – Hasan Zakeri Commented Jul 27, 2014 at 11:04
Recently added document class, cv4tw by Geoffrey Gouez, offers a "LaTeX CV class, with extended details".
The class offers entries for assets and social networks; customizable styles are provided. The class comes with no documentation, but a worked example offers some guidance.
This package is still under development but it shows great progress. Here is a sample screen shot of an example made using the class file.

Here is a direct link to the example above: sample-jules-verne . Note this requires XeLaTeX or LuaLaTeX to run. Also note that the example given does not compile directly because the samplepic.jpg file is not provided; just replace it with your own or download it here from GitHub under examples.
- 4 It's a fantastic new solution for CV writing in Latex (+1). Unfortunately there is no reasonable documentation available. – Roman Commented Feb 25, 2014 at 18:25
- 2 This is really a power house of new template. As a former moderncv user, it feels so much more versatile. – ojdo Commented Jun 12, 2016 at 11:12
I can offer you a video tutorial I made recently, which covers this topic using the article class. I just got hired for a lectureship position last week, so I think it is pretty good!
- TeX Tutorial 9: Formatting & CV Design Part 1
- TeX Tutorial 9: Formatting & CV Design Part 2
- The video was removed from youtube because it was too long. You should probably upload it somewhere else and update the link. – bodo Commented Jul 10, 2012 at 21:09
- 1 I just noticed that and fixed it. Should be ready to go by the time you see this again. – Jonathan Komar Commented Jul 10, 2012 at 21:54
- Many Thanks! :) I think the best way is to use the article class since you can do what ever you want. :) – Hosein Rahnama Commented Nov 28, 2017 at 11:28
- That would be nice if you provided the source .tex file too. :) – Hosein Rahnama Commented Nov 28, 2017 at 13:20
Ted Pavlic's CV templates are minimalistic, uses the hyperref package extensively and elegant!
http://www.tedpavlic.com/post_resume_cv_latex_example.php
Overleaf lists a whole host of CV Templates , including:
Modern CV and Cover Letter

Your new CV

A Designer CV

Single Column Deedy CV/Resume Template

Plantilla CV Español

Recent Grad Resume Template

Recent Grad CV - with photo

Resume Template (short CV)

Friggeri CV Template

Awesome CV Template

Awesome CV Cover Letter

My two column CV

Material CV

Twenty Second Curriculum Vitea in LaTeX

Jan Küster's Modern-looking CV

I also ended up making my own style, however, I added one twist: I actually store my CV in XML format and then use an XSLT transform to convert it into a .tex file. While this required a lot more work upfront, the benefit is that I can use the same XML file to generate plain text, HTML, abridged, &c. versions without having to maintain n separate files. If you end up making your own LaTeX style for your CV, I would also suggest you seriously consider investing the time to use the XML/XSLT technique. You can see the results of this technique here (scroll to the bottom of the page to see the XML and HTML versions). It would take me a bit of time to clean them up, but I'd be happy to share my XSLTs with people if anyone is interested. This is an open source project that does something similar , however, it was started after I created my technique and I've never used it.
- 1 I looked at the XML Resume Library a while back and noticed that it seems to be dead: last "news" is dated 2004. I also looked at HR-XML but then I decided I was spending too much time and used curve instead. :-) – Matthew Leingang Commented Jan 30, 2011 at 18:22
I've been using a lightly tweaked version of Michael DeCorte's res.cls . No idea if it is best of breed (nor why I chose it), but if it ain't broke. . . .
I found CurVe to be a nice package. Used it to get two student jobs and apparently, it worked :). The only drawback is that the default structure of the CV may need adjustments to your specific purposes.
For my current one I just rolled my own. I use fancyhdr for the header and footer, and lastpage so that I can display page x/y in the footer (so that the person reviewing it would know if they lost a page).
The entirety of the rest of the document is built from nested customized list s.
- +1 on fancyhdr . – Hober Commented Jul 26, 2010 at 21:48
Here's an example of a nice-looking "home-made" CV: http://nitens.org/taraborelli/cvtex
If you'd like to use LaTeX along with BibTeX, I have a template here:
http://pointsofsail.org/wikka.php?wakka=LatexCV
It is based on Dario Taraborelli's template (http://nitens.org/taraborelli/cvtex) and uses bibtex and the bibentry package to make the publications section.
Here is a Hacker News thread with many examples of resumes and CVs in (La)TeX:
- http://news.ycombinator.com/item?id=3013654
I ended up making my own, but it took a while. Expect to have to fight LaTeX's defaults on a lot of things. That said, it's worth it. I learned a lot about LaTeX and have a good resume that I can say I wrote.
I wouldn't be surprised, but it seems like if you're going to use LaTeX for your resume, be prepared to answer truthfully whether you used a template or not, and be comfortable with the answer.
- 6 It shouldn't be a problem even if you used a template, the purpose of the resume is to present the professional skills, not the low-level LaTeX skills. – wishihadabettername Commented Aug 11, 2010 at 15:05
I used curve to create my CV:
http://www.mhelvens.net/cv
Quite customizable by itself. But I added several hacks and convenience macros of my own:
- nicer rubric-title underlining
- separate bullet-shapes for [ongoing], [notable] and [other]
- separate year-styles for [period] and [event]
- separate year-styles for [past], [ongoing, known end-year], [ongoing, open end]
- hyperlinked cross-references
- hyperlinked e-mail and url
- for specific projects and papers: hyperlinked www or doi
- when printing, cross-refs, urls and e-mail are black; www and doi links are invisible
Someday soon I should make the code public. But for now it's a bit too chaotic to release.
I have made my CV using predominately BibLaTeX . I have gone way beyond just using BibLaTeX for my publications, but have added a number of custom entry types (e.g., funding, service, teaching, presentation, education), modified the biber data model to allow for new fields and written bibliography drivers to handle the formating of these new entry types. Everything except my contact information is stored in a bib file (and technically my contact information is stored in the @preamble entry). Each version of my CV is produced by a tex file that sets a few BibLaTeX booleans and defines a bunch of \defbibfiler and \defbibcheck .
I find this makes it much easier for me to reorganize/reorder my CV. Previously it was easy to move my "teaching" section before my "service" section, but with BibLaTeX I can have my teaching in a big list or divide it into undergraduate and graduate or University A and University B. Similarly I can divide my research presentations into internal/external or into talk/poster.
- 4 Intersting approach! I would love to see the code for this :-) – Daniel Commented Jul 4, 2013 at 5:52
I have made this by adapting some parts of other curriculum, like the one called Alice. I used tcolorbox for the content. I also had great help from Alan Munn. Feel free to modify and use.

Save this file with this name: CV_g_Contents
Content file:
Then the layout page:
I adapted the resume class found in http://www.iro.umontreal.ca/~csuros/latex.html .
LaTeX Templates showcases several templates, ranging from conservative to fancy.
I ended up using Classicthesis-Styled CV . It caught my eye as most esthetically pleasing. And even with my poor LaTeX skills was very easy to adapt to my needs.
I maintain a Latex template targetted for Engineers on Github, you can find it at https://github.com/sb2nov/resume

As I haven't seen it here yet, I would like to mention limecv which is shipped with TeX Live (development on GitHub: https://github.com/opieters/limecv ). Apart from your CV you can create a cover letter in a similar design with that package.
The following pictures are taken from the documentation.

For a professional looking CV there is Plasmati CV, good for banking, consultancy careers. ModernCV is colored works for serious and less serious careers (communication management etc... and Friggeri CV is the template for designers etc... ModernCV is used at CVsintellect and the 3 are used in seeveeze
- 2 Welcome to TeX.SX! You can have a look at our starter guide to familiarize yourself further with our format. – Symbol 1 Commented Mar 20, 2015 at 2:48

You must log in to answer this question.
Not the answer you're looking for browse other questions tagged packages templates cv ..
- Featured on Meta
- We've made changes to our Terms of Service & Privacy Policy - July 2024
- Introducing an accessibility dashboard and some upcoming changes to display...
Hot Network Questions
- Sums of exponentials joint probability
- How do I rigorously compute probabilities over infinite sequences of coin flips?
- WW2 Bombers continuing on one of 2 or 4 engines, how would that work?
- Will a spaceship that never stops between earth and mars save fuel?
- Can a train/elevator be feasible for scaling huge mountains (modern technology)?
- A funny Fantasy short story about a telekinetic who loses his power when he thinks about it
- Emphasizing the decreasing condition in the Integral Test or in the AST (in Calculus II): is it worth the time?
- Inverse relationship between Stirling numbers of the first and second kind via generating functions
- apply shift to nodes defined in foreach loop
- Statistically, which is more of a severe penalty on a d20 roll, Disadvantage or a -10 penalty?
- Why do I see different declension tables for the same noun in different sources?
- Is there a reason SpaceX does not spiral weld Starship rocket bodies?
- Interview disaster
- Would a manned Mars landing be possible with Apollo-era technology?
- How can flipflops sense the edges of the signals?
- Flashlight and 6 batteries
- LaTeX error when formatting external data with siunitx
- Best (safest) order of travel for Russia and the USA (short research trip)
- If it's true that a reservation fee for a cruise ship is non-refundable, then what happens if somebody cancels?
- How do I resolve license terms conflict when forking?
- Generating a mesh with fine elements around certain areas
- Server Error: self-signed certificate During local setup of Sitecore Headless SXA with Next.js
- How do I connect an LED with two cathodes and two anodes?
- In Norway, when number ranges are listed 3 times on a sign, what do they mean?
No Search Results
How to write a LaTeX class file and design your own CV (Part 1)
Part 1 | Part 2
Author: James Allen (March 2011)
Everyone wants a professional looking CV and there are no shortage of LaTeX templates that will give you one. If you're like me though you'll want to own your CV and make it your own. That means you need to be able to customise the look and feel yourself which can be notoriously difficult in LaTeX. In this series of blog posts I hope to guide you through creating your own custom class file and show you that it can be easy to format your CV exactly how you want. We'll focus on a CV style but the methods will be identical for any sort of document.
What is a class file?
When you write \documentclass{article} in your LaTeX file, you are including the class file article.cls . This defines all the commands like \section and \title which go into structuring your document. It also configures how these commands affect the format and layout of the page.
Setting up your own class file
The neatest way to customise the format of a document is to keep all that information in a personal class file. This keeps the structure of your document cleanly separated from the formatting and allows for easy reuse. It's easy to set this up so create a document called cv.tex with the following content:
This is trying to load your custom class file my_cv.cls , which doesn't exist yet. Create my_cv.cls in the same directory as cv.tex and write the following line in it:
If you compile your document now you should see the headers in the default article style.
So what has happened here? Class files need to contain a lot of formatting information and internal setup to make LaTeX work properly, but we don't want to have to enter it all manually. Instead we can base our new class file on article.cls . We use \LoadClass to include article.cls and load all of the commands and styles defined in it. Note that we don't use the usual \documentclass command to include article.cls because \documentclass should only ever be called once at the very beginning of your LaTeX document.
Telling LaTeX about your class
All class files should start with two lines similar to the following, which you should add in at the top of my_cv.cls now:
The \NeedsTeXFormat commands tells the compiler which version of LaTeX the package is for. The current version of LaTeX is LaTeX2e and almost all distributions use this.
The \ProvidesClass command gives the compiler some information about your package. The first argument should match the filename of your class file and tells LaTeX what your package is called. The second argument is optional and provides a description of your class which will appear in the log and other places. The description must begin with a date in exactly the format above and it should be the date the package was last modified. This can be used when including the class to check that you have a recent enough version of it. For example if you include it via \documentclass{my_cv}[2012/01/01] with a date which is newer than the date in the class description then a warning will be shown saying that the class is outdated.
Modifying the section headers
The standard article section headings don't really suit a CV so we'd like to replace them with something neater. To do this, we can redefine the \section command to output a custom header.
Fortunately there is already an excellent package called titlesec which provides an easy way to customise our header styles. Include this in your class file with:
Notice that we should use \RequirePackage rather than the usual \usepackage command because we are in a class file. The \RequirePackage command makes sure that each package is only loaded once, even if called multiple times from different style and class files.
The titlesec package provides the command \titleformat which lets us customise our section headings. Add the following at the end of my_cv.cls to customise the format of the heading:
If we compile cv.tex now we will see that we have some main headers more appropriate for a CV:

We can customise the \subsection headers as well:
The sub-sections are now in the same style:

You should try out some of the formatting options available to see what you like:
- \bfseries , \itshape : make the heading bold or italic;
- \scshape :small capitals;
- \small , \normalsize , \large , \Large , \LARGE , \huge , \Huge : set the font size;
- \rmfamily , \sffamily , \ttfamily : set the font type to serifed, sans serifed or typewriter respectively.
Adding dates to section headers
We can define some new commands which let us include dates in our section headings. Include the following in your class file:
This defines two new commands \datedsection and \datedsubsection which take two arguments: the section name as before, and a date which will be typeset on the right-hand side of the page. The \hfill command tells LaTeX to fill as much space as possible and so pushes the second argument ( #2 ) to the right of the page. Modify cv.tex to use these commands:
Our CV now contains dates:

Conclusions
That's all for part one of this guide, but hopefully I've covered enough for you to go away and start making useful class files. It hasn't taken many commands to create what already looks like a reasonable CV template and we've only scratched the surface of what else we could customise. In the next few parts of this guide I will talk about passing options to your class to configure it, creating a nice title and how to set some general layout options.
Thanks for reading!
Note that I am relatively new to creating class files myself, so if anyone can point out better ways to do the things I have mentioned here, please let me know.
- Documentation Home
- Learn LaTeX in 30 minutes
Overleaf guides
- Creating a document in Overleaf
- Uploading a project
- Copying a project
- Creating a project from a template
- Using the Overleaf project menu
- Including images in Overleaf
- Exporting your work from Overleaf
- Working offline in Overleaf
- Using Track Changes in Overleaf
- Using bibliographies in Overleaf
- Sharing your work with others
- Using the History feature
- Debugging Compilation timeout errors
- How-to guides
- Guide to Overleaf’s premium features
LaTeX Basics
- Creating your first LaTeX document
- Choosing a LaTeX Compiler
- Paragraphs and new lines
- Bold, italics and underlining
Mathematics
- Mathematical expressions
- Subscripts and superscripts
- Brackets and Parentheses
- Fractions and Binomials
- Aligning equations
- Spacing in math mode
- Integrals, sums and limits
- Display style in math mode
- List of Greek letters and math symbols
- Mathematical fonts
- Using the Symbol Palette in Overleaf
Figures and tables
- Inserting Images
- Positioning Images and Tables
- Lists of Tables and Figures
- Drawing Diagrams Directly in LaTeX
- TikZ package
References and Citations
- Bibliography management with bibtex
- Bibliography management with natbib
- Bibliography management with biblatex
- Bibtex bibliography styles
- Natbib bibliography styles
- Natbib citation styles
- Biblatex bibliography styles
- Biblatex citation styles
- Multilingual typesetting on Overleaf using polyglossia and fontspec
- Multilingual typesetting on Overleaf using babel and fontspec
- International language support
- Quotations and quotation marks
Document structure
- Sections and chapters
- Table of contents
- Cross referencing sections, equations and floats
- Nomenclatures
- Management in a large project
- Multi-file LaTeX projects
- Lengths in L a T e X
- Headers and footers
- Page numbering
- Paragraph formatting
- Line breaks and blank spaces
- Text alignment
- Page size and margins
- Single sided and double sided documents
- Multiple columns
- Code listing
- Code Highlighting with minted
- Using colours in LaTeX
- Margin notes
- Font sizes, families, and styles
- Font typefaces
- Supporting modern fonts with X Ǝ L a T e X
Presentations
- Environments
Field specific
- Theorems and proofs
- Chemistry formulae
- Feynman diagrams
- Molecular orbital diagrams
- Chess notation
- Knitting patterns
- CircuiTikz package
- Pgfplots package
- Typesetting exams in LaTeX
- Attribute Value Matrices
Class files
- Understanding packages and class files
- List of packages and class files
- Writing your own package
- Writing your own class
Advanced TeX/LaTeX
- In-depth technical articles on TeX/LaTeX
Get in touch
Have you checked our knowledge base ?
Message sent! Our team will review it and reply by email.
Email:
- Enterprise Java
- Web-based Java
- Data & Java
- Project Management
- Visual Basic
- Ruby / Rails
- Java Mobile
- Architecture & Design
- Open Source
- Web Services
Your resume is quite possibly the most important tool you will use to gain employment as a developer. Without an eye-catching resume , it can be hard to stand out from the rest of the programmers and software engineers applying for the same position you are. Fundamentally, your resume should consist of information about your qualifications and technical skills, as they relate to a developer job.
Read: Top Tech Companies Hiring Right Now.
A programmer’s resume has one simple goal: to land them an interview. For the purposes of this article, though, we will focus on the actual creation of the resume document, which is often overlooked. We will be using a document preparation technology called LaTeX .
LaTeX is typically used for high-quality typesetting. It can be used for a variety of different documents, from long scientific reports to the common resume. LaTeX is all about document design – it separates the design and the text that occupies the document. LaTeX is an extension of the TeX typesetting system, which is a programming language. Don’t worry, we’re not expecting you to know how to code in TeX – that’s what templates are for!
You can develop a document using LaTex through Overleaf , an online LaTeX editor that is free and easy to use right through your Internet browser. One of the most frustrating aspects of creating a resume is making sure the format and spacing are consistent and even. LaTex takes care of that for you, ensuring your document is uniform and visibly pleasing. You can select from hundreds of beautiful resume templates within Overleaf’s gallery . There are also numerous categories for document templates on Overleaf, including cover letters and thesis papers.
Overleaf LaTeX Editor Example
Once you have a resume template selected, click “ Open as template ”. If you have not already, you will need to create an account in order to save your work. When your template opens, you will notice that the interface is split in two – the source code on the left and the view of your document on the right.
Read: Top Java Job Interview Questions.
The text in the source code directly affects what appears on your document, so all of your editing will be done there. This makes it so you do not need to know how to code in order to create your document; you just need to know what to change and where it is located in the source code. Most templates even have notes laid out within the source code to help guide you.
That is all there is to it. Simply replace the information in the template’s source code with the information you want to include on your resume. The more you do this, the more you will get familiar with the code and learn how to manipulate it. You may also pick up a few tricks along the way, such as how to include hyperlinks or change the color of your text.
LaTeX Document Creation Tips
Here are a few tips to get you started using LaTeX for your document creation:
- If you change the source code and do not see the document view being changed, click “ recompile ” in the upper toolbar of the Document View . You can also click the arrow next to the recompile button to do this automatically.
- To include an “ & ” symbol in your resume, you will need to put a forward slash (/) in front of it (this may or may not work depending on what packages are installed in the template).
- Do not be afraid to copy and paste sections of the document that you want to duplicate; just be sure to notice where the section begins and ends when selecting which text to copy.
- If you make a mistake, don’t worry – you can Undo with CTRL+Z on Windows ( Command+Z on Mac).
When you are comfortable with the look of your resume, click “ Save as PDF ” in the upper toolbar of the Document View . Now you have a resume that is beautiful, consistent, and pleasing to read!
Looking for a developer or programmer job? Check out Technology Advice’s Hiring page to see open jobs in the technology field. Be sure to tell them Developer.com sent you!
Get the Free Newsletter!
Subscribe to Developer Insider for top news, trends & analysis
Latest Posts
What is the role of a project manager in software development, how to use optional in java, overview of the jad methodology, microsoft project tips and tricks, how to become a project manager in 2023, related stories, 3 best bug tracking tools for java in 2023, 14 tips for working with visual studio, visual studio code review 2023 | a comprehensive look.
This is what it looks like after 8 months of hard work (as of November 2023), still a dashboard with a form on the left and a resume preview container on the right, but this time the dashboard is much more powerful.

The Powerful Dashboard
As mentioned above, PPResume provides an intuitive and powerful dashboard that can guide you through the tedious process of writing resumes.
Real-Time Input Validation
PPResume has real-time input validation that helps avoid common, simple low-level mistakes. All form fields are validated as you type.
Rich Set of Input Controls
Filling out long forms is tedious but not that hard in PPResume. PPResume offers a variety of input controls, such as Select to choose an option, Month Picker to enter start and end dates, Multi Select to enter keywords or courses, and Rich Text Editor to enter many text. You can enter a variety of information with peace.
Structural Editing
PPResume also provides you with powerful and intuitive structural editing to refine your resume, allowing you to duplicate, delete and rearrange items with ease.
Customizable Layout
Last but not least, PPResume gives you options to customize the layout, such as font size and margins.
Once we have a solid foundation for top tier typesetting with high quality PDF output, we will put more effort on content and delivery.
For example, we could integrate grammarly (opens in a new tab) to help users improve syntax and grammar. We could also integrate AIGC tools to generate content based on user's prompt to give users more inspiration.
Stay tuned and give PPResume a try (opens in a new tab) for free!
IMAGES
COMMENTS
So, next time you need to create a resume, consider using LaTeX instead of Microsoft Word. P.S. If you don't have the time or skillset to make a LaTex resume, I can create one for you for a ...
Abstract. Creating a professional CV or resume is quick and easy with Overleaf and writeLaTeX. With this free template you can start editing online instantly, and download a PDF version to send to employers and recruiters when you've finished. Here we use a great template produced by howtotex.com, and if you're looking for a different style why ...
Preparing a resume in LaTeX can decrease the overall complexity required for formatting the document; hence, it is utmost necessary for every professional to know the basic LaTeX syntax for resume building. In this tutorial, I would cover several aspects for creating a powerful and effective resume which would cover mostly each element of an ...
Professional CV/Resume Template with BibLaTeX This LaTeX document is designed to help you create a professional CV or resume with ease. It uses as little fancy LaTeX functionality or custom functions as possible to maximize its long-term durability and flexibility. The document is structured into multiple sections, each loaded from separate ...
A resume template which is forked from and modifies Awesome CV, a LaTeX resume template. It is easy to customize your own template, especially since it is re... An online LaTeX editor that's easy to use. No installation, real-time collaboration, version control, hundreds of LaTeX templates, and more.
Learn how to make an academic CV/Resume using LaTex open-source software --- Overleaf.Guide to Overleaf: https://www.overleaf.com/learn/latex/Bold,_italics_a...
2. Install the ModernCV Package. Before installing ModernCV, let's ensure we have LaTeX on our computer. If not, the following will show how to install MikTeX, the core of LaTeX. If we're using Windows, we can run the following commands in administrator mode to install the package MikTeX: winget install MiKTeX.MiKTeX.
1. Document class. The first thing to do when writing a LaTeX document is to choose the document class. For our CV we will choose the article document class since it is the most versatile class to work with short documents. As an optional argument, we will choose the font size of the document to be 12pt.
LaTeX is one of the most powerful word-processing tools available for creating a professional document like a resume template or CV template, but it's also one of the most complex.. It takes significantly longer to create a resume or CV in LaTeX compared to Microsoft Word or Google Docs. If you don't know how to use the editor, your best option for creating a LaTeX resume is to download ...
:necktie: A collection of simple and easy to use, yet powerful LaTeX templates for CVs and resumes. All of them are self designed and self implemented and not copied from template collections. Now with support for Chinese, Japanese and Korean character encoding. Setup is only two lines of code! Read more here.
Last Updated. 5 months ago. License. Creative Commons CC BY 4.0. Abstract. This is a simple way to generate your resume. Tags. Résumé / CV. Find More Templates.
In this live session, I will demonstrate to you step-by-step how to create a stunning resume using the popular online LaTeX editor, Overleaf. Whether you're ...
This LaTeX template emphasizes your IT projects by creating a section just under your summary for all your major work. It also bumps your skills to the top so you can list the languages and technologies you have expertise in. To create that space, your employment history section moves to the bottom of the page.
4. For a professional looking CV there is Plasmati CV, good for banking, consultancy careers. ModernCV is colored works for serious and less serious careers (communication management etc... and Friggeri CV is the template for designers etc... ModernCV is used at CVsintellect and the 3 are used in seeveeze.
The \NeedsTeXFormat commands tells the compiler which version of LaTeX the package is for. The current version of LaTeX is LaTeX2e and almost all distributions use this. The \ProvidesClass command gives the compiler some information about your package. The first argument should match the filename of your class file and tells LaTeX what your package is called.
How to write a professional CV or resume using LaTeX in Overleaf. I will show you how to set up the template and edit the content. You will be able to write ...
Make a great looking CV (or resume) using LatexNote - There is now an updated version of this video, you can check it out here:https://youtu.be/WSOy0_YRlvwWi...
First, let's start by creating a basic document in LaTeX. If you are using Overleaf and followed the setup instructions from above, you should get this: \documentclass{article}\usepackage[utf8]{inputenc}\usepackage{titlesec}\title{resume instruction manual code}\author{Sofie T. Ware}\date{January 2022}\end {document}
Using LaTeX for resume building offers a host of benefits, from achieving consistent and professional layouts to gaining flexibility in design. Although LaTeX might seem intimidating at first, its ...
Overleaf LaTeX Editor Example. Once you have a resume template selected, click " Open as template ". If you have not already, you will need to create an account in order to save your work. When your template opens, you will notice that the interface is split in two - the source code on the left and the view of your document on the right.
The process of writing a resume can be divided into three steps, and each step requires different assistance: content. guidelines for writing a resume. spell and grammar check. LinkedIn profile import. typesetting. fine-tuned typography. layout adjustments (font size, margins, colors, etc.) high-quality PDF output.
In this live session, I will demonstrate to you step-by-step how to create a stunning resume using the popular online LaTeX editor, Overleaf. Whether you're ...