- PRO Courses Guides New Tech Help Pro Expert Videos About wikiHow Pro Upgrade Sign In
- EDIT Edit this Article
- EXPLORE Tech Help Pro About Us Random Article Quizzes Request a New Article Community Dashboard This Or That Game Popular Categories Arts and Entertainment Artwork Books Movies Computers and Electronics Computers Phone Skills Technology Hacks Health Men's Health Mental Health Women's Health Relationships Dating Love Relationship Issues Hobbies and Crafts Crafts Drawing Games Education & Communication Communication Skills Personal Development Studying Personal Care and Style Fashion Hair Care Personal Hygiene Youth Personal Care School Stuff Dating All Categories Arts and Entertainment Finance and Business Home and Garden Relationship Quizzes Cars & Other Vehicles Food and Entertaining Personal Care and Style Sports and Fitness Computers and Electronics Health Pets and Animals Travel Education & Communication Hobbies and Crafts Philosophy and Religion Work World Family Life Holidays and Traditions Relationships Youth
- Browse Articles
- Learn Something New
- Quizzes Hot
- This Or That Game
- Train Your Brain
- Explore More
- Support wikiHow
- About wikiHow
- Log in / Sign up
- Computers and Electronics
- Microsoft Office

How to Combine PowerPoints on Mac or Windows
Last Updated: June 20, 2022 Fact Checked
This article was co-authored by wikiHow staff writer, Darlene Antonelli, MA . Darlene Antonelli is a Technology Writer and Editor for wikiHow. Darlene has experience teaching college courses, writing technology-related articles, and working hands-on in the technology field. She earned an MA in Writing from Rowan University in 2012 and wrote her thesis on online communities and the personalities curated in such communities. This article has been fact-checked, ensuring the accuracy of any cited facts and confirming the authority of its sources. This article has been viewed 8,488 times. Learn more...
Do you want to use the slides from your other presentation in this one? The "Reuse Slides" function in Microsoft PowerPoint makes it easy to reuse slides from other presentations. It's also a helpful tool that will help you merge your presentations into one PowerPoint. If the "Reuse Slides" feature isn't available for your version of PowerPoint, you can also copy and paste slides, use the "Insert Object" menu, or drag and drop slides. This wikiHow article teaches you multiple ways you can combine PowerPoint presentations on your Windows or Mac computer.
Reusing Slides

- These imported slides will change to copy the theme and design of the other slides. If you don't want it to change, you can select Keep source formatting before you import them.

- If you want the slide(s) to maintain the original design theme and formatting, check the box next to Keep source formatting . [1] X Trustworthy Source Microsoft Support Technical support and product information from Microsoft. Go to source
- Once you've selected the slides from the original source, they will appear in the new PowerPoint immediately.

Copy and Paste

- Use this option if "Reuse slides" isn't available since this will allow you the same options.

- If you want to select more than one slide, press and hold Shift as you click multiple sides.

Insert Object

- Use this if there are animations with the slide that you want to preserve. You won't be able to fine-tune the slide like you would if you used "Reuse Slide," but it will have all the animations and slide transitions from the previous slideshow.

- If you don't see the "New Slide" option, make sure the Home tab is selected.

- Stretch the image to fill the entire slide to prevent it from changing sizes randomly.
Expert Q&A
You might also like.

- ↑ https://support.microsoft.com/en-us/office/reuse-import-slides-from-another-presentation-c67671cd-386b-45dd-a1b4-1e656458bb86#OfficeVersion=Windows
- ↑ https://support.microsoft.com/en-us/office/copy-and-paste-your-slides-1fe39ace-4df6-4346-b724-30a6e2c0aeab#OfficeVersion=Windows
About This Article

1. Open the presentation that you want to add slides to. 2. Click where you want to add your slide. 3. Click the Home tab. 4. Click the arrow next to "New Slide" and select Reuse Slides . 5. Click Open a PowerPoint File and double-click the file you want to use. 6. Click a slide to add to your PowerPoint. 7. Save your presentation. Did this summary help you? Yes No
- Send fan mail to authors
Is this article up to date?

Featured Articles

Trending Articles

Watch Articles

- Terms of Use
- Privacy Policy
- Do Not Sell or Share My Info
- Not Selling Info
Keep up with tech in just 5 minutes a week!
Critical PowerPoint Shortcuts – Claim Your FREE Training Module and Get Your Time Back!
How to present two PowerPoint Presentations (side-by-side)
- PowerPoint Tutorials
- Shortcuts & Hacks
- February 1, 2024
Yes, you can run two PowerPoint presentations at the same time from your computer. This dogged me for years until I realized how easy this was to setup in PowerPoint.
As you begin to do deals overseas, work with international clients and investors, you will eventually be asked to run two different translations of your PowerPoint presentation, at the same time on the same monitor. When I was working in China, I was asked to do this all the time. That is, showing both an English and Chinese version of our deal, at the same time as you can see below.

To be clear, PowerPoint presentations by default, run as full screen slides. That is, after starting your slide show, your slides take up the entirety of your screen, monitor, or overhead projector.
The trick to running two PowerPoint presentations at the same time is to change the default behavior of how PowerPoint runs your presentations in slide show mode. That is, you need to change them to run as individual windows that you can resize and rearrange. In this way, you can present two or more presentations at the same time, on the same screen.
Presenting two or more presentations at the same time is useful when you need to:
- Present the same presentation in two different languages (or for two different audiences)
- Compare two different presentations side-by-side in Slide Show mode
- Run a presentation on half of your screen, while you add speaker notes in the other half
NOTE: When running two presentations at the same time on your computer, each presentation needs to be advanced individually. On top of that, some of the presentation tools like the pen and highlighter do not work when running multiple presentations at the same time. See below for further details.
Table of Contents
[watch] running two presentations at the same time.
You are currently viewing a placeholder content from Youtube . To access the actual content, click the button below. Please note that doing so will share data with third-party providers.
NOTE: To access all my best PowerPoint training courses geared for analysts and associates for just $37/month (which you can cancel at anytime), grab your PowerPoint Pro Membership here .
Setting up two presentations to run side-by-side
Setting up two presentations to run like this is easy in PowerPoint. Just remember to change the settings back before you send your presentation to your boss or client.
Once you change how PowerPoint runs in Slide Show mode, it remains that way until you change it back to its default.
If you send your client a deck that runs differently than they expect, I guarantee they will send it back to you and tell you that PowerPoint is broken. This has happened to be a couple of times over the years, so that is a friendly reminder for you.
1. Open the Set Up Slide Show dialog box

To open the Set Up Slide Show dialog box, simply:
- Click the Slide Show tab
- Select the Set Up Slide Show command
You can also shortcut the process by holding the Shift key on your keyboard and clicking the Reading Pane icon at the bottom of your PowerPoint screen.
NOTE: Once you have your two or more presentations setup to run as individual windows, you can use the Windows snap shortcuts to quickly arrange the windows on your screen. To learn how to use these Windows shortcuts and more, read my guide here .
2. Select Browsed by an individual (window)
The goal of this step is to get your presentations to run in a resizable window as pictured below. This allows you to then run and resize as many presentations as you want on the same monitor.

To present multiple presentations at the same time like this, you need to change the default behavior from Presented by a speaker (full screen) to Browsed by an individual (window) .

Once you’ve made the selection, click OK to return to the Normal View in PowerPoint.
3. Snap your two slide shows into place on your computer
In the image below, I’m using the Windows snap feature options at the top of my screen. To open these, simply click and drag your window to the top of your screen to display them.

After you have changed both of your PowerPoint presentations to run in individual windows, snap the two presentations into place, in the order you want them to display in. The easiest way to do this is to use the Windows snap features at the top of your screen. In this case, I’m using the side-by-side view.
As you do this, make sure you put the presentations in the order you want them to present in. In this case, I’ve put the English version of my presentation on the left, and the Chinese version on the right.
NOTE: You can alternatively start your slide shows first, and then snap them. Once your presentations are set to run as individual windows, is doesn’t matter which order you do this in.
4. Start your two slide shows individually

Once your two presentations are set up the way you want them, all you need to do is start your presentations. The easiest way to do that is to hit F5 on your keyboard. To see alternative ways to start your presentations (including shortcuts), see my guide here .
Below is an example of two 16×9 presentations running side-by-side in slide show mode. My computer monitor is not large enough to show each Slide Show well in the 16:9 format, but you get the idea of how this works.
NOTE: There is no easy way to flip between the 4:3 and 16:9 slide sizes without messing up your presentation. To see why, see my slide size guide here .

NOTE: You can still use the PowerPoint laser pointer shortcut when running two presentations side-by-side. The laser pointer works, but only if you use its shortcut.
Advancing side-by-side slide shows
Now that you are running two or more presentations on the same monitor, your next question is going to be “Can I advance both presentations at the same time?”
Unfortunately, each slide show must be advanced on its own. There is no way to advance both PowerPoint presentations with the single click of your mouse. Instead, you need to click into each presentation individually and advance it.
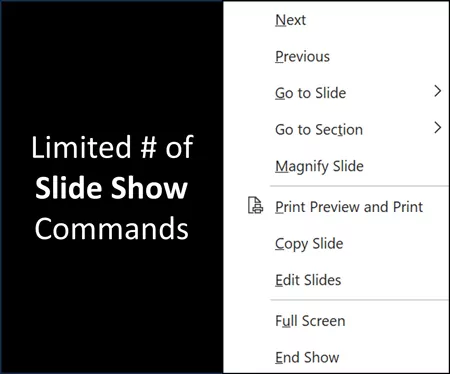
NOTE: The number of Slide Show commands is limited when running two presentations at the same time. For example, you cannot draw on your PowerPoint slides , and can only use a limited number of commands in the right-click menu.
You are all set for doing international deals now! The next time you are pitching a client and your boss asked you to get two translations of your presentation running at the same time, you will know how to set it up using the Set Up Slide Show dialog box.
Just remember that when running presentations in an individual windows like this, there are a limited number of slide show commands you can use, and you need to advanced each presentation separately.
If you enjoyed this article and want to learn more about our other PowerPoint resources and training courses, visit us here .
🔒 Unlock the PowerPoint Shortcuts Trusted by Industry Leaders KKR, American Express, HSBC, and More!
Join over 114,880 professionals from diverse fields including consulting, investment banking, advertising, marketing, sales, and business development who have supercharged their PowerPoint game with our proven methods.
✅ Customize compelling presentations effortlessly.
✅ Master time-saving techniques for faster deck creation.
✅ Boost your career prospects with top-notch PowerPoint skills.
Get FREE access to the Critical PowerPoint Shortcuts module of our premium training course by entering your name and email below.
DISCLAIMER: PC Users Only!
We respect your privacy and will keep your info safe and confidential.
Related Articles
- Bar chart trick: Right aligning categories (PPT, Word, and Excel)
- PowerPoint settings: program level vs. presentation level
- What is a linked Excel chart in PowerPoint?
- Set Up Slide Show: Customize how your PPT presentations run
- What is the Popup Toolbar in PowerPoint?
About The Author

Popular Tutorials
- How to Strikethrough Text (l̶i̶k̶e̶ ̶t̶h̶i̶s̶) in Word, Excel & PowerPoint
- How to Make Animated Fireworks in PowerPoint (Step-by-Step)
- Strikethrough Shortcut (l̶i̶k̶e̶ ̶t̶h̶i̶s̶) for Word, Excel & PowerPoint
- How to Create a Flash Card Memory Game in PowerPoint (Like Jeopardy)
- Keyboard Shortcuts Not Working: Solved
PowerPoint Tutorial Categories
- Strategies & Opinions
- Presentation Design
- Pictures, Icons, Videos, Etc.
- New Features
- Miscellaneous
- Charts & Data Viz
We help busy professionals save hours and gain peace of mind, with corporate workshops, self-paced courses and tutorials for PowerPoint and Word.
Work With Us
- Corporate Training
- Presentation & Template Design
- Courses & Downloads
- PowerPoint Articles
- Word Articles
- Productivity Resources
Find a Tutorial
- Free Training
- For Businesses
We help busy office workers save hours and gain peace of mind, with tips, training and tutorials for Microsoft PowerPoint and Word.
Master Critical PowerPoint Shortcuts – Secure Your FREE Training Module and Save Valuable Time!
⌛ Master time-saving expert techniques.
🔥 Create powerful presentations.
🚀 Propel your career to new heights.
We value your privacy – we keep your info safe.
Discover PowerPoint Hacks Loved by Industry Giants - KKR, AmEx, HSBC!
Over 114,880 professionals in finance, marketing and sales have revolutionized their PPT skills with our proven methods.
Gain FREE access to a full module of our premium PowerPoint training program – Get started today!
We hate spam too and promise to keep your information safe.
You are currently viewing a placeholder content from Facebook . To access the actual content, click the button below. Please note that doing so will share data with third-party providers.
- Slidesgo School
- PowerPoint Tutorials
How to Combine Multiple PowerPoints into One

PowerPoint is one of the most widespread and widely used Microsoft tools in the world, allowing you to make high quality presentations in a simple, fast and super visual way. Maybe that's why presentations have triumphed in the world of business and education!
Whether you're a professional or a student, you surely must have had to make more than one presentation throughout your career. That's a piece of cake when you have Slidesgo and its templates! In this post we want to lend you a hand and help you become a true master of this program: today you will learn how to combine different PowerPoint presentations .
How to merge PowerPoint presentations
If you want to join two or more different presentations in the same file, you want to add some extra slides or you need to merge the collaborative work of different teams, all you have to do is follow these steps:
- Open the first presentation. For this example we are going to use the template Minimalist Grayscale Pitch Deck .
- Go to the Start menu > New Slide. Click on the drop-down, not on the button. A menu will open with different options, select "Reuse slides".
- A menu will open on the right with recommended presentations. To add yours, click on Browse. We are going to add slides from the presentation Investment Business Plan .
- Go to the place in the presentation where you want the new content to appear.
- Choose which slides you want to add and add them one by one by clicking Insert Slide. You can also add the whole presentation by clicking on Insert All.
Pro tip : We recommend that you keep the "Use source formatting" checkbox checked. This feature makes the presentation you are adding keep its original style instead of adapting to the layout of the new one.
Simple, isn't it? There is also another method, just as quick and easy, using the ancient technique known as "copy and paste". It consists of the following:
- Open the presentation where you want the new slides to appear.
- Open the other presentation and choose the slides you want to add. You can select more than one by pressing Control and clicking on them or you can select all of them by pressing Control + E. For this example we are going to add three slides from the Business Plan with Elegant Backgrounds template.
- Right click and press copy or press Control + C.
- Now go to the first presentation, choose the location and right click > Paste or press Control + V. Remember to select "Keep source formatting", this will keep the slides from losing their layout.
Now that you know how to put together your favorite presentations and slides, take a look at our website and download the ones that best suit your needs. You can choose resources from different designs and put them together to create the perfect presentation.
Do you find this article useful?
Related tutorials.

How to print PowerPoint notes
Crafting an impactful PowerPoint slideshow and delivering a captivating presentation are distinct skills. The first focuses on designing appealing visuals to convey a clear message, while the second involves employing effective presentation techniques to ensure the audience grasps the idea. The content of this article will help you with the latter part of this process, guiding future presenters on how to print PowerPoint with speaker notes to enhance your presentations success and effectiveness.

Discover Our Online Presentation Software for Free
We have great news for you today! If you’ve been a Slidesgo fan for years (or months, or weeks, or days, or mere hours, we welcome everyone!), you’ll probably know for now that our templates are available mostly in two formats: for use in Google Slides and PowerPoint.Google Slides is a free tool, since you only need a Google account in order to use it. PowerPoint, on the other hand, is part of the Microsoft Office suite, so it’s not a free program, but that didn’t stop it from being one of the most popular options in the world!What if we...

Webinar: Presentation Audit
With more than 15,000 templates released on Slidesgo and a user base composed of millions of people, we estimate that the total number of presentations created adds up to… um, a lot! Our team of professional designers work very hard to provide you with editable slides so that the only thing you need to do is, well, customize the elements to your liking. Starting from any given template, the results may vary a lot depending on the person who edited the contents.Have you ever wondered “Is my presentation good enough?” and wished that an expert on presentations looked at your template...

How to Change Slides Orientation in Google Slides
A change of perspective is always good! Do you want your public to look at your slides in a new way? Changing slides orientation will do the work. In this tutorial you’re going to learn how to go from horizontal slides, to vertical ones (and vice versa!).
- PowerPoint Themes
- Latest PowerPoint Templates
- Best PowerPoint Templates
- Free PowerPoint Templates
- Simple PowerPoint Templates
- PowerPoint Backgrounds
- Project Charter
- Project Timeline
- Project Team
- Project Status
- Market Analysis
- Marketing Funnel
- Market Segmentation
- Target Customer
- Marketing Mix
- Digital Marketing Strategy
- Resource Planning
- Recruitment
- Employee Onboarding
- Company Profile
- Mission Vision
- Meet The Team
- Problem & Solution
- Business Model
- Business Case
- Business Strategy
- Business Review
- Leadership Team
- Balance Sheet
- Income Statement
- Cash Flow Statement
- Executive Summary
- 30 60 90 Day Plan
- SWOT Analysis
- Flow Charts
- Gantt Charts
- Text Tables
- Infographics
- Google Slides Templates
- Presentation Services
- Ask Us To Make Slides
- Data Visualization Services
- Business Presentation Tips
- PowerPoint Tutorials
- Google Slides Tutorials
- Presentation Resources
How To Merge Two PowerPoint Presentations? Detailed Guide On How To Combine PowerPoints
Save your time and hassle by merging multiple PowerPoint presentations to reuse your already created presentations and optimize your workflow. This blog will guide you through the best methods to combine multiple slides into a single presentation.

If you work in sales, customer service, or as an independent consultant, you may need to utilize the same templates in many of your presentations. Of course, you don’t want to keep making the same slides for different presentations. That’s why you should consider learning how to combine PowerPoints slides.
That’s where merging slides in PowerPoint comes in handy when creating presentations from previously generated slideshows. In your current presentation, you can reuse slides from prior presentations to modify content, strengthen concepts, debunk ideas, or reference facts.
It’s all quite simple. Allow us to demonstrate how to combine multiple powerpoints into one.
How To Merge PowerPoints?

Consider the following five approaches and their associated stages to know how to combine powerpoints:
- Copy and Paste slides
- Reuse PowerPoint Slides
- Use Insert Object to Merge PowerPoint Files
- Drag and Drop PowerPoint Slides
- Merge with Compare Function
1. Copy and Paste Slides
The easiest option to combine multiple slides is the copy-and-paste option. Follow the below steps to learn how to merge two PowerPoint presentations:
- Open both the slides that you want to combine.
- Right-click on a slide and select “copy.” You can also copy it by using the Ctrl+C command.
- Now, open the slide on which you want to combine this slide.
- Choose a location in between your slides where you want to add the slide. You can do this from the left-side navigation pane.
- Right-click and choose “Paste”. Or you can use the “Ctrl+V” command. You can select “Use Destination Theme” or “Keep Source Formatting” to meet your needs.
- Repeat this step for multiple slides.
2. Reuse PowerPoint Slides
Let’s learn how to combine powerpoints using the Reuse option. Reusing slides is the simplest technique for incorporating slides from one presentation into another. This strategy allows you to manage what slides you add and where you place them. The reuse slides approach appears in this example. Follow the below steps to understand how to merge powerpoints:
- Open PowerPoint, then open the document to which you wish to add slides.
- Select where you wish to add a slide or slides. Then, click between two existing slides.
- In the ‘Main Menu,’ click the ‘Insert’ tab.
- Then, on the left side of the menu, click the ‘New Slide’ option.
- Then choose ‘Reuse Slides.’
- Click the ‘Browse’ button to access the ‘Reuse Slides’ dialog box. If you click the option next to ‘Keep source formatting,’ the newly added slides will keep their original formatting. When you uncheck the box, their formatting will match the main presentation.
- Insert your slide here. Browse the presentations, choose the one from which you wish to add the slides, and then click ‘Open.’
- You will see the thumbnails of the available slides. Browse and pick the ones you want to include in your main document. You can import all slides from the external presentation by clicking ‘Insert All Slides.’
- When choosing the slides to include, click the ‘Apply Theme to All Slides’ option to replace the theme of the primary presentation with that of the secondary presentation.
This strategy is perfect if you want to merge ppt slides. Use it for adding a slide or two to your PowerPoint presentation. It is also the best approach for including bits and pieces from other presentations in your primary presentation. Although you can use this approach to insert all slides from an external presentation, using the ‘Insert Object’ option is preferable.
3. how to combine powerpoints using Insert Object Methods?
The insert object method is best if you wish to insert all slides from an external presentation while keeping the animations and transitions between them.
Remember that after you include the slides in your new presentation, they will no longer be connected to the original file. As a result, any modifications you make to the original file will not affect the slides you include in your primary presentation.
Now that we’ve addressed that let’s examine how to merge powerpoints using the insert object technique. Follow the below steps to learn how to combine multiple powerpoints into one:
- Open MS PowerPoint and the main presentation.
- Go to the slide where you want to add another slide
- In the Main Menu, choose the ‘Insert’ tab.
- In the “Text” group, Select the ‘Object’ option.
- The ‘Insert Object’ dialog box will appear. Choose the ‘Create from file’ option there.
- Click “Browse” and select the slide you want to add.
- Following that, you will only view the first slide of the imported presentation. The remaining slides are below, though you can’t see them now.
- To prevent changes in the size of the slides after the presentation is played, stretch the added object to suit the size of the slide of your main presentation. After inserting the complete item into your main presentation, you can alter and tweak it to ensure its good performance.
4. Drag And Drop PowerPoint Slides
Let’s understand how to combine powerpoints using the drag & drop method. A drag-and-drop approach is one of the simplest methods of integrating two presentations. This feature is useful if you have two different presentations that you want to combine with PowerPoint or are working on a collective project. Follow the below steps to learn how to combine two powerpoints into one:
- Open both presentations on your PC or Mac, and minimize the PowerPoint software so that you can view both simultaneously.
- Long-press the slide you want to relocate and drag it to its new location with your mouse. You should do this for each slide; luckily, you can select all of them by clicking on the first slide, holding down the ‘Shift’ key, and then clicking on the final slide.
- The slide’s position will be highlighted with a red line. Your final presentation will be updated to match the design of the receiving document. Of course, you can always change the document’s overall look by clicking the ‘Design’ button at the top of your presentation.
5. how to combine powerpoints with compare function
This compare function combines your multiple slides with uniform formatting. Follow the below steps to learn how to merge PowerPoint presentations:
- Open the presentation in which you want to add another slide.
- Select the “Review” Tab from the Top Menu.
- Click on the “Compare” function.
- Browse the presentation you want to combine and select “Merge.” It will combine all the slides from both presentations.
It’s great to learn how to combine powerpoints into one slide to increase the usability of slides and save time in creating new slides from scratch. The techniques described in this blog will assist you in taking your PowerPoint abilities to the next level. In minutes, you can combine and merge PowerPoint presentations like an expert.
Does the formatting change if I combine ppt slides?
The formatting isn’t usually affected. However, you can choose to keep formatting or not while merging.
What are some tips for effectively merging slides?
Organize your slides beforehand, ensure consistent formatting and styling across all slides, remove duplicate content, and thoroughly review the merged presentation to ensure accuracy and coherence.
Is there a limit to the number of presentations I can merge?
Usually, there is no limit to the number of presentations to merge.
Table Of Content
Related presentations.

Customer Journey Executive Summary

Project Planning Presentation

Customer Journey Roadmap PowerPoint Template
Related blogs.

10 Bad PowerPoint Slides Examples to Avoid

10 Best Animated PowerPoint Templates

10 Best Business PowerPoint Templates for Presentations

10 Best Free PowerPoint Templates
Tags and categories, privacy overview.
Necessary cookies are absolutely essential for the website to function properly. This category only includes cookies that ensures basic functionalities and security features of the website. These cookies do not store any personal information
Any cookies that may not be particularly necessary for the website to function and is used specifically to collect user personal data via ads, other embedded contents are termed as non-necessary cookies. It is mandatory to procure user consent prior to running these cookies on your website.

- PowerPoint Tips
- Office Tips
- Privacy Policy
- Submit Guest Post
How to Merge Two or Multiple PowerPoint Presentations
If there are 2 or even more related PowerPoint presentations, and you want to merge them into one to make the presentation more informative, there’s a simple method to insert the slides from different files.
1. Open PowerPoint and create a new blank presentation.

2. Click Home > New Slide > Reuse Slides…

3. Hit Browse button on the Reuse Slides pane and choose Browse File… in the drop-down menu.
4. Find the PPT presentation you want on the computer and Open it.

5. Check the option of Keep source formatting on the bottom of Reuse Slides .
6. Right-click any of the slides and choose Insert All Slides in the menu. Then all the slides from the selected file will be inserted to the presentation.

7. Now you can click Browse > Browse File… to insert the slides from another presentation in the same way.

8. Similarly, you can insert the slides from more PowerPoint presentations to merge them into one. You just need to save the file after finishing all the settings.
Leave a Reply Cancel reply
Your email address will not be published. Required fields are marked *
Save my name, email, and website in this browser for the next time I comment.
Copyright © 2020 My Microsoft Office Tips All Rights Reserved


3 Ways to Combine Multiple PowerPoint Presentation Files
So you made two different PowerPoint presentations and are stuck with merging them together? Don’t worry. You want to match their themes or keep them original? Covered. You want to drop/keep transitions? Cool.PowerPoint got it all covered for you. However you want to merge slides, you can do it all in PowerPoint itself. This article will take you through different methods and options that will let you combine multiple PowerPoint Presentation files the way you please.

Table of Contents
Method 1: Reuse Slides
When to use:
- If you do not want to keep the transitions and animations of the inserted presentation after merging it into the main presentation.
- If you want to merge only a few slides of inserted presentation and not the whole presentation.
How to use:
1.Open the main presentation in which you want to insert another presentation.
2.Decide the two slides between which you want to insert the new slides and click between them.
3. A red line will appear.

4.Click on the ‘ Insert ’ menu.
5.Open the drop-down menu by clicking on ‘ New Slide ’.
6.At the bottom of the menu, click on ‘ Reuse Slides ’.

7.On the right-hand side, the Reuse Slides tab will appear.
8.If you want to keep the theme of the inserted presentation, check the ‘ Keep source formatting ’ checkbox at the bottom of the tab. Else, if you want it to take the theme of the main presentation, uncheck the box.
9.Now, browse the file you want to insert and click on OK.
10.You can now see all the slides of the presentation to be inserted.

11.If you want a few particular slides from this presentation to appear in the main presentation, simply click on the thumbnail . Else, right-click on any thumbnail and click on ‘ Insert all slides ’.

12.Adding a slide while having ‘ Keep source formatting ’ checked you will get something like this.

And unchecking ‘Keep source formatting’ will give you.

13.If you want the whole presentation with the theme of the inserted presentation, right-click on any thumbnail in the ‘ Reuse Slides ’ tab and click on ‘ Apply theme to all slides ’ and you will then get:

14.If you want to insert the new slides at different positions in the main presentation, then before clicking on any particular slide to be inserted in the ‘Reuse Slides’ tab, just click on that main slide thumbnail (on the left-hand side of the window), below which you want your inserted slide. You can do this for every inserted slide to get this:

Method 2: Insert Object
- If you want to keep the transitions and animations of the inserted presentation after merging it into the main presentation.
- If you want to merge the whole presentation into the main presentation.
2. Add a blank slide at the position you want your inserted slide to be. You can do this by clicking on ‘ New Slide ’ in the insert menu and then clicking on ‘ Blank ’.

3.Click on ‘ Object ’ in the insert menu.

4.Select ‘ Create from file ’ radio button and browse the presentation you want to be inserted and click on OK.
5.You will see the first slide of the inserted presentation in the center of the blank slide you had inserted.

6. Resize the inserted slide to fit the main slide completely by dragging the corners of the inserted slide.
7.Click on the Object.
8.Go to the Animations menu and click on ‘ Add Animation ’.

9.Click on ‘ OLE action verbs ’ at the bottom of the drop-down menu.
11.In the dialog box, select ‘ Show ’ and click on OK.

13.Go to the ‘ Animations ’ menu and click on ‘ Animation Pane ’.
14.On the right-hand side, a tab will open. You can see the inserted object in the tab.
15.Click on the downward pointer beside the object name and a list will open.

16.Select ‘ Start With Previous ’.
17.Now, s elect the object in the tab and click on the downward pointer again.
18.Select ‘ Effect Options ’. A dialog box will open.
19.In the ‘After Animation’ drop-down list, click on ‘ Hide After Animation ’.

20.Now insert some object like a text box or an image on the main slide containing the inserted presentation object.

21.Right-click on it and select ‘ Send to Back ’.

22. You now have your presentations merged.
Method 3: Copy-Paste
If you want to keep animations of the inserted presentation and want to keep/change the theme and transitions.
1.Open the presentation you want to insert and select the slides that you want to insert into the main presentation.
2.Press ‘ Ctrl+C ’ to copy them.
3.Open the main presentation.
4.Right-click in the left pane wherever you want to insert the slides.

5.Here you get two paste options:
1.USE DESTINATION THEME:
Selecting this will cause the inserted slides to adopt the theme and transitions of the main presentation while keeping the animations of inserted slides intact.
2.KEEP SOURCE FORMATTING:
Selecting this will keep the theme, transitions, and animations of inserted file itself.
6. Select the option you want and you are done.
There you go! You can now merge your presentations with any possible combinations.
Recommended:
- Fix Windows could not Find a Driver for your Network Adapter
- Repair Master Boot Record (MBR) in Windows 10
- Fix This Copy of Windows Is Not Genuine Error
- How to Change Gmail Password in 5 minutes
I hope the above steps were helpful and now you can easily Combine Multiple PowerPoint Presentation Files, but if you still have any questions regarding this tutorial then feel free to ask them in the comment section.
About The Author

Aditya Farrad

How to Add Pronouns to Email Signature

How to Type pi π symbol on Windows, iOS and Android

How to Import and Convert JSON to Excel

Fix Spill Range is Too Big #SPILL Error in Excel

Where are Pictures Stored on Android?

Can Android Users See When iPhone Users Read Their Texts?
Leave a comment cancel reply.
Your email address will not be published. Required fields are marked *
- PowerPoint Notes
Advance Two PowerPoint Presentations With a Single Click
Originally, this started with a discussion in an internal group exploring solutions that would allow one click on a remote to advance two presentations at the same time. Why would anyone want two presentations to move ahead at the same time?
There are many reasons why presenters may want to move to the next slide in two decks at the same time:
- Language: If you are presenting to a multilingual audience, you may want to present the same content in two languages.
- Design: Much like spanning your desktop machine on two displays, you may have design reasons to provide symmetrical displays on two opposite ends. While the designs may be similar, they could still be flipped, continuous, or even entirely different.
- Accessibility: You may have to design slides differently if your audience comprises of people with opposing disabilities.
Whatever your reasons may be, you would need to proceed to the next slide on both presentations simultaneously.

- DSan PerfectCue
This is the industry standard and has two USB cable connections for two separate computers, and single remote to advance both. This system has a 150-feet range, but does need both computers close together. It is not economical, at approximately $600, but can be rented for $50 a day from virtually any AV company, including hotel and conference centers’ in-house AV departments.
There are three variants available:
- DSan PerfectCue Mini
- DSan PerfectCue Micro

Interlink Navigator
The Interlink Navigator is my personal favorite. The USB dongles can be synced to a remote easily. And, you can sync one remote to multiple receivers. The remote is $75 and comes with one receiver. You can try to order a second receiver from Interlink, or just purchase a second remote system and use that receiver. This system is best if under 20 feet from the computers.

Related Posts

Filed Under: Tricks Tagged as: Delivery , Hardware , PowerPoint , Troy Chollar
No Comments
Microsoft and the Office logo are trademarks or registered trademarks of Microsoft Corporation in the United States and/or other countries.
Home | PowerPoint | Photoshop | PowerPoint Templates | PowerPoint Tutorials | Blog | Notes | Ezine | Media Kit | Feedback | Site Map | About Us | Contact Us Link to Us | Privacy | Testimonials PowerPoint Backgrounds | Christian PowerPoint Backgrounds | Business PowerPoint Presentation Templates
Plagiarism will be detected by Copyscape
© 2000-2024, Geetesh Bajaj - All rights reserved.

Work together on PowerPoint presentations
When you save your presentation to OneDrive or SharePoint in Microsoft 365 , you can work on it concurrently with your colleagues.
Share your file with others
To invite other people to access your PowerPoint file and collaborate, take these steps:

Use the drop-down list to indicate whether a recipient can edit the file or only can view the file. Optionally add a note.
To proceed, select Send .
Note: The Share dialog box offers an alternative option: Use the Copy link button and share the link. Anyone with the link can access the document with default permissions.
Collaboration
As others join you in working in your shared document, you can see evidence of their presence and activity.

To enable automatic display of full names (i.e., for Accessibility purposes) go to File > Options > Advanced > Display > Show presence flags for selected items

When you’re done working, simply save your file. If there are no conflicts in the revisions, they will be automatically merged.
Reviewing changes and resolving conflicts
When you close/exit your shared PowerPoint presentation file, you can review the recent changes and resolve any difference across the team’s edits.
Review all changes
Upon saving your file, all non-conflicting changes are automatically merged into your presentation. You can see these in the My Changes view.
Choose either My Changes or Changes by Others .

When you are done resolving conflicts, select Done .
More detail about conflicting changes

Communicate in the shared file via Comments, Tasks, and Chat
In addition to seeing each other’s slide revisions in real time, PowerPoint enables various team interactions within the presentation file.
Comments. To create, view, or respond to comments, use the Comments icon. You can reply to, resolve, or mark comments as complete. To learn more, see Add comments .
Tasks. A Task is a special kind of Comment that can be assigned and tracked to closure. To learn more, see add Tasks . Chat. (Microsoft 365 only) You can instantly chat with other people who are working in a presentation stored on OneDrive for work or school or SharePoint in Microsoft 365.
On the toolbar, at the right end, click the icon (picture or initials) of a collaborator who is currently working in the file.

Use the chat window to interact with everyone who is currently in the file.
Note: If another person subsequently opens the file to edit it, they can also join the chat. However, they will see only the new messages from that time forward, not the chat history.
Notifications upon reopening a changed file

See others’ recent revisions

Select the thumbnail to open the full-size slide.

Note: Recently revised slides are highlighted, but all revisions may not be indicated on the slide. Non-indicated revision types include notes pane changes, deletion of shapes, comment additions, and animation changes.
Access prior versions of a presentation
While you are working on files stored via OneDrive and OneDrive for work or school, Office preserves prior versions of them. For a specific file, you can view the list of prior versions and optionally restore a prior version.
View the prior-versions list
With the file open, take these steps:
Select the file name in the title bar of the app window.
Select Version History.

Open a prior version
In the Version History pane, select a previous version.
Select Open version .
View the read-only copy now displayed in a separate window.
More information about revision highlighting
Several factors can affect the extent to which revision highlighting occurs.
Revision highlighting works on shared documents that are stored in OneDrive and SharePoint.
Changes are not highlighted if the file is encrypted or password protected.
Changes are not highlighted if the file is in .odp format or the older PowerPoint .ppt or .pps format.
Changes are highlighted only when the person making the change is using PowerPoint for the web, or PowerPoint for Microsoft 365. (More specifically, at least version 1707 of Current Channel or version 1803 of Semi-Annual Enterprise Channel). Here is a link to Find your Office version .
Changes are not highlighted if revision data has been turned off for the document in the Trust Center Privacy Options . Privacy options NOT turned on If the privacy options are not turned on, the presentation will store the user's name and the time of the most recent edits to an object. If needed, you can remove that information via Document Inspector. Learn how in this article: Remove hidden data and personal information by inspecting documents, presentations, or workbooks . Privacy options ARE turned on If the privacy options are turned on, the revision highlighting gets turned off. Thus, there is no storage of person-related data (usernames and their recent access timing.)
Where the data is stored
In order to make revision highlighting possible, data about the read/unread status of individual slides is stored separately by PowerPoint. Where that data is stored depends on which version and channel of PowerPoint is in use.
Note: We are in the process of shifting towards storing that data in an online Microsoft service designed for saving user settings.
This table lists versions of PowerPoint and where each one stores the read/unread status data specific to each person who opens the file. Use this link to Find your Office version .
Do you miss Slide Libraries?
If you’d like to see Slide Libraries in PowerPoint, please send us your feedback. See How do I give feedback on Microsoft 365 . Your input will help us prioritize which features to include in future updates.
Share your presentation with others and collaborate on it at the same time

Note: If you'd rather not upload your presentation to your OneDrive or SharePoint, you can share it via an email attachment by selecting Send a Copy instead.
Enter the email address of the person you'd like to share the presentation with. If you already have the person's contact info stored, you can just enter the name. The control at the top lets you determine whether your invitees can edit the file or only can view the file.
Click Share . An email will be sent to your invitees.
See where others are working in your shared presentation
Open the presentation and start working in it.
If someone else is viewing or working in the presentation, their thumbnail picture appears in the top-right corner of the ribbon. PowerPoint alerts you when people enter or leave your presentation.

You'll also see the name of anyone viewing or editing the presentation in the Share pane. There's an indicator—on the thumbnail of the slide and in the actual slide—that shows where someone is working in the presentation. Hover over or select that indicator to find out who is editing.

(For accessibility, PowerPoint also allows you to turn on automatic display of the editor's name. Turn it on by selecting PowerPoint > Preferences > View > Show presence flags for selected items .)

When you’re done working, save your file.
If your updates and other authors’ updates don't conflict, they'll be merged automatically, and you don’t need to do anything else.
Notifications when you open a changed file
After other people make changes to a shared presentation file, PowerPoint for Microsoft 365 for Mac notifies you when you re-open the file. A small banner tells you who has made changes to your presentation while you were away.

Tracking changes: Revisions by others are highlighted
PowerPoint for Microsoft 365 for Mac automatically keeps track of changes made in online documents.

When you re-open a changed presentation (or are in a file being actively edited by someone else), changed slides are highlighted in turquoise in the thumbnail pane. A tooltip says, "Slide has unread changes."

Select a thumbnail to look at the full-size slide. You'll see the changed portion of the slide outlined in turquoise. An accompanying notation tells you who made the change, and when. By looking at the revised slide, you clear away the turquoise highlighting and the "slide has unread changes" notation on that slide.
(There are some cases where a revised slide is highlighted, but the kind of change that has been made isn't outlined on the individual slide. Examples of such changes include: Changes in the Notes pane, deletion of a shape, addition of a comment, and animation changes.)

What determines whether changes are highlighted:
This feature works on shared documents stored in OneDrive and SharePoint.
Changes are highlighted only when the person who makes the change is using PowerPoint for the web, or PowerPoint for Microsoft 365 for Mac—at least version 16.11. Find your Office version
Changes aren't highlighted if the file is encrypted or password-protected.
Changes aren't highlighted if the file is in .odp format or the older PowerPoint .ppt or .pps format.
Communicate by using Comments

You can add a new comment or reply to or resolve existing comments.
( Microsoft 365 only ) Tag a colleague in a comment by using the @-sign followed by the person's name. That person receives an email message with a link to your comment. Clicking the link brings them into the document and into the conversation.

See previous versions of the file
Office preserves prior versions of your SharePoint, OneDrive, and OneDrive for work or school files while you’re working on them.
To open the list of the prior versions of a file, select the file name in the title bar of the app window, then select Browse Version History .
Version History is for viewing, not editing. You can see any prior version of a file.
To open a prior version:
In the Version History pane on the right, select Open Version in one of the version-history items.
A read-only copy of that version is opened in a separate PowerPoint window.
You can copy content from a prior version. You can also Save A Copy of a prior version so that you can edit it separately from the file you're currently working on.
Share a presentation with others

Add a message to your colleagues if you like.
Click Send .
When multiple people work in a file at the same time, indicators show you where they are:
Towards the top right corner of the window you'll see a badge - with their profile picture or initials - for each person who currently has the file open. Select that badge to see where in the slide deck they currently are.
On the thumbnail pane you'll see a label appear at the top right corner of the slide thumbnail with the name of the person currently on that slide.
See revisions made by other people
When you open a presentation that someone else has changed, PowerPoint tells you in two ways:
A While You Were Away message appears on the right side of the window.
In the slide thumbnail pane on the left, slides that have been revised are highlighted with a turquoise background.
When you open that slide, you'll also see a turquoise outline around the revised slide element. By looking at the revised slide, you clear away the turquoise highlighting and the "slide has unread changes" notation on that slide.
Confer by using Comments or Chat

Tag a colleague in a comment by using the @-sign followed by the person's name. That person receives an email message with a link to your comment. Clicking the link brings them into the document and into the conversation.

Use File > Info > Version History to open the list of the prior versions of a file.
Version History is for viewing, not editing. You can see any prior version of a file. You can copy content from a prior version. You can also Save A Copy of a prior version so that you can edit it separately from the file you're currently working on.
Rename a presentation file
You can rename a file in PowerPoint for the web while you're co-authoring with others.

Type a new name for the file. Or use the arrow keys to position the insertion point within the title, and then type your changes to the file name.
Press Enter when you're done.
In a moment, the name change syncs with other instances of the file that are currently open.

Need more help?
Want more options.
Explore subscription benefits, browse training courses, learn how to secure your device, and more.

Microsoft 365 subscription benefits

Microsoft 365 training

Microsoft security

Accessibility center
Communities help you ask and answer questions, give feedback, and hear from experts with rich knowledge.

Ask the Microsoft Community

Microsoft Tech Community

Windows Insiders
Microsoft 365 Insiders
Was this information helpful?
Thank you for your feedback.
How to Link Multiple Slides in PowerPoint Presentations
Last updated on December 26th, 2023
From time to time, we may need to do a big presentation, which may need to get together different presentations at some point. By mixing presentations with PowerPoint, you will be able to get together a lot of information without getting everything mis-formatted. In this article, we will present how to link multiple presentations in one .
First of all we need to have a couple of presentations done, put them all in one directory.
Now go to Insert > Object > Create from file. Go to browse and look out for any of the other presentations you already have.

Enable the “Link” checkbox and “Display as Icon” box. Then click “Ok” button.
Now, you will have a PowerPoint Icon in your presentation. When you click this Icon the new presentation will start, but if you want it to do automatically you just need to add an animation which starts with the previous one.

This way PowerPoint will open the new presentation automatically when you click on the object link with the PowerPoint icon.
We will send you our curated collections to your email weekly. No spam, promise!
How to Merge Two PowerPoint Presentations into One with Separate Backgrounds

PowerPoint presentations are effective tools for a number of business applications, such as new employee orientations, interoffice training seminars and potential client marketing meetings. You can incorporate slides from a second show into a first by using the Reuse Slides feature, and they will appear as one unified presentation. If you want to merge two presentations and retain their individual themes, you have a couple of options.
Advertisement
Copy and Paste
Video of the Day
You can copy slides from one presentation and paste them into the other presentation without changing the backgrounds. Open both presentations and select the one from which you want to copy slides. Press the "Ctrl" key and click on each slide you want to copy in the Slides pane. Right-click any slide and choose "Copy." Click the blank area on the Slides pane of the second presentation. Right-click and choose "Keep Source Formatting" under Paste Options to paste the slides with their original backgrounds.
Reuse Slides Pane
There are two ways to merge presentations while keeping separate backgrounds when you use the Reuse Slides features, but you must first access the Reuse Slides pane. Open the presentation into which you want to insert slides from another show. On the Home tab, click the "New Slide" down arrow in the Slides group and choose "Reuse Slides." The Reuse Slides pane opens with links to recently used presentations and a list of other options.
Accessing a File
Once you have the Reuse Slides pane accessible, you can begin merging presentations. Click on the name of a presentation in the Recent list, if applicable. Otherwise, click the "Open a PowerPoint File" link or click the "Browse" button and choose "Browse File." Navigate to the second slide show from which you want to obtain some or all of the slides. Click on the file name and click "Open" to open thumbnails of all of the slides in the Reuse Slides pane.
Retain Background Formatting
Press the "Ctrl" key and click on each slide you want to copy in the Reuse Slides pane. If you want to merge all of the slides, select the "Keep Source Formatting" check box at the bottom of the pane. Right-click any slide and choose "Insert All Slides." Alternatively, click on the slides you want to insert. Press the "Ctrl" key and click on each slide you inserted in the Slides pane. Right-click any slide in the Reuse Slides pane and choose "Apply Theme to Selected Slides." The slides revert to their original backgrounds.
- Microsoft Office Support: Reuse (Import) Slides from Another Presentation
- Indezine: Reuse Slides in PowerPoint 2010
Report an Issue
Screenshot loading...
How-To Geek
How to merge shapes in powerpoint.
Create your own unique object by merging two shapes in PowerPoint.
Quick Links
Merging shapes in powerpoint.
PowerPoint features a large library of shapes used for things like creating flowcharts . That’s not all, though—PowerPoint also lets you combine and merge these shapes to create a unique object. Here’s how.
To merge shapes in PowerPoint, you’ll first need to insert the shapes you wish to merge. To do so, head over to the “Insert” tab and select “Shapes” found in the “Illustrations” group.
On the drop-down menu that appears, browse through the large library of shapes and select the one you want to use. We’ll use the oval shape in this example.
Next, draw your shape. You can do so by clicking and dragging your cursor.
Repeat the steps above to insert your next shape. Once ready, make sure the shapes are overlapping.
To merge the shapes, you’ll need first to select both of the shapes that you want to merge. To do this, hold the Ctrl key while clicking each shape in turn.
Once you select the shapes, you’ll notice a new tab appear—the “Shape Format” tab. Go ahead and select that tab.
Over in the “Insert Shapes” group, click the “Merge Shapes” button.
From the drop-down menu that appears, select your desired merge type. You can also hover over each option to get a live preview.
That’s it. Your shapes will now be merged.
IMAGES
VIDEO
COMMENTS
Click the "OK" button. Next, you'll be greeted with a list of the slides from the presentation you're linking to. Select the slide that you'd like to go to and click "OK." You'll now notice the file path of the second presentation appears under the "Hyperlink To" box. Once you're ready, select the "OK" button.
Click the "Browse" button to locate the PowerPoint presentation file that you want to merge into your open file. Locate your second PowerPoint file and then click the "Open" button to insert it. A list of slides from your second presentation will appear in the "Reuse Slides" menu on the right. First, you'll need to decide on the formatting for ...
To use Compare and Combine, open the presentation that you want to merge slides into. Then, find the Review tab on PowerPoint's ribbon and open it up. In the Compare group, find and click on the Compare button. Go to Review > Compare to begin the process of merging two PPT slide decks together.
1. Open the presentation that you want to add slides to. 2. Click where you want to add your slide. 3. Click the Home tab. 4. Click the arrow next to "New Slide" and select Reuse Slides. 5. Click Open a PowerPoint File and double-click the file you want to use. 6. Click a slide to add to your PowerPoint. 7. Save your presentation.
Learn how to merge multiple PowerPoint presentations into one presentation. Sometime you might get asked to put a number of PowerPoint Presentation into one...
1. Open the Set Up Slide Show dialog box. To open the Set Up Slide Show dialog box, simply: Click the Slide Show tab. Select the Set Up Slide Show command. You can also shortcut the process by holding the Shift key on your keyboard and clicking the Reading Pane icon at the bottom of your PowerPoint screen.
Open the other presentation and choose the slides you want to add. You can select more than one by pressing Control and clicking on them or you can select all of them by pressing Control + E. For this example we are going to add three slides from the Business Plan with Elegant Backgrounds template. Right click and press copy or press Control + C.
Follow the below steps to learn how to combine multiple powerpoints into one: Open MS PowerPoint and the main presentation. In the "Text" group, Select the 'Object' option. The 'Insert Object' dialog box will appear. Choose the 'Create from file' option there. Click "Browse" and select the slide you want to add.
1. Open PowerPoint and create a new blank presentation. 2. Click Home > New Slide > Reuse Slides…. 3. Hit Browse button on the Reuse Slides pane and choose Browse File… in the drop-down menu. 4. Find the PPT presentation you want on the computer and Open it. 5.
How to use: 1.Open the main presentation in which you want to insert another presentation. 2.Decide the two slides between which you want to insert the new slides and click between them. 3. A red line will appear. 4.Click on the ' Insert ' menu. 5.Open the drop-down menu by clicking on ' New Slide '.
In this tutorial I have explained how to merge two separate PowerPoint presentation into one. Combing two PowerPoint presentation is easy and can be done jus...
Find beautiful and engaging PowerPoint templates with Envato Elements: https://elements.envato.com/presentation-templates/compatible-with-powerpoint?utm_ca...
Select either "Insert Slide" or "Insert All Slides" to merge your presentation slides. 2. Compare. The compare function in PowerPoint merges all the slides of two presentations together with one uniform formatting. Here are the steps to merge your presentations completely: Open your main presentation.
Linking to Another Slide in the Same Presentation. Open your presentation and navigate to the slide that will contain the hyperlink. Once there, highlight the text, object, shape, or image to which you want to attach the link. Next, head over to the "Insert" tab and click the "Link" button. In the Insert Hyperlink window that opens ...
There are many reasons why presenters may want to move to the next slide in two decks at the same time: Language: If you are presenting to a multilingual audience, you may want to present the same content in two languages. Design: Much like spanning your desktop machine on two displays, you may have design reasons to provide symmetrical displays on two opposite ends.
In this video learn to merge two PowerPoint presentations.Either you can add only selected slides or add entire slides from one PPT into another PPT.Here im ...
Deliver your presentation on two monitors. On the Slide Show tab, in the Set Up group, click Set Up Slide Show. In the Set Up Show dialog box, choose the options that you want, and then click OK. If you choose Automatic, PowerPoint will display speaker notes on the laptop monitor, if available. Otherwise, PowerPoint will display speaker notes ...
Chat. (Microsoft 365 only) You can instantly chat with other people who are working in a presentation stored on OneDrive for work or school or SharePoint in Microsoft 365. On the toolbar, at the right end, click the icon (picture or initials) of a collaborator who is currently working in the file. On the menu that appears, select Join Group Chat .
First of all we need to have a couple of presentations done, put them all in one directory. Now go to Insert > Object > Create from file. Go to browse and look out for any of the other presentations you already have. Enable the "Link" checkbox and "Display as Icon" box. Then click "Ok" button. Now, you will have a PowerPoint Icon in ...
This is a video tutorial on how you can combine powerpoint slides into one. ~~~~~🡺 I hope I resolved your issue ...
Open both presentations and select the one from which you want to copy slides. Press the "Ctrl" key and click on each slide you want to copy in the Slides pane. Right-click any slide and choose "Copy." Click the blank area on the Slides pane of the second presentation. Right-click and choose "Keep Source Formatting" under Paste Options to paste ...
In this video, I have explained how we can combine different PowerPoint presentations into a single presentation in a very easy way. In this video, I have explained how we can combine different ...
You can do so by clicking and dragging your cursor. Repeat the steps above to insert your next shape. Once ready, make sure the shapes are overlapping. To merge the shapes, you'll need first to select both of the shapes that you want to merge. To do this, hold the Ctrl key while clicking each shape in turn. Once you select the shapes, you ...