Critical PowerPoint Shortcuts – Claim Your FREE Training Module and Get Your Time Back!

How to Make a PowerPoint Presentation (Step-by-Step)
- PowerPoint Tutorials
- Presentation Design
- January 22, 2024
In this beginner’s guide, you will learn step-by-step how to make a PowerPoint presentation from scratch.
While PowerPoint is designed to be intuitive and accessible, it can be overwhelming if you’ve never gotten any training on it before. As you progress through this guide, you’ll will learn how to move from blank slides to PowerPoint slides that look like these.

Table of Contents
Additionally, as you create your presentation, you’ll also learn tricks for working more efficiently in PowerPoint, including how to:
- Change the slide order
- Reset your layout
- Change the slide dimensions
- Use PowerPoint Designer
- Format text
- Format objects
- Play a presentation (slide show)
With this knowledge under your belt, you’ll be ready to start creating PowerPoint presentations. Moreover, you’ll have taken your skills from beginner to proficient in no time at all. I will also include links to more advanced PowerPoint topics.
Ready to start learning how to make a PowerPoint presentation?
Take your PPT skills to the next level
Start with a blank presentation.
Note: Before you open PowerPoint and start creating your presentation, make sure you’ve collected your thoughts. If you’re going to make your slides compelling, you need to spend some time brainstorming.
For help with this, see our article with tips for nailing your business presentation here .
The first thing you’ll need to do is to open PowerPoint. When you do, you are shown the Start Menu , with the Home tab open.
This is where you can choose either a blank theme (1) or a pre-built theme (2). You can also choose to open an existing presentation (3).
For now, go ahead and click on the Blank Presentation (1) thumbnail.

Doing so launches a brand new and blank presentation for you to work with. Before you start adding content to your presentation, let’s first familiarize ourselves with the PowerPoint interface.
The PowerPoint interface

Here is how the program is laid out:
- The Application Header
- The Ribbon (including the Ribbon tabs)
- The Quick Access Toolbar (either above or below the Ribbon)
- The Slides Pane (slide thumbnails)
The Slide Area
The notes pane.
- The Status Bar (including the View Buttons)
Each one of these areas has options for viewing certain parts of the PowerPoint environment and formatting your presentation.
Below are the important things to know about certain elements of the PowerPoint interface.
The PowerPoint Ribbon

The Ribbon is contextual. That means that it will adapt to what you’re doing in the program.
For example, the Font, Paragraph and Drawing options are greyed out until you select something that has text in it, as in the example below (A).

Furthermore, if you start manipulating certain objects, the Ribbon will display additional tabs, as seen above (B), with more commands and features to help you work with those objects. The following objects have their own additional tabs in the Ribbon which are hidden until you select them:
- Online Pictures
- Screenshots
- Screen Recording
The Slides Pane

This is where you can preview and rearrange all the slides in your presentation.
Right-clicking on a slide in the pane gives you additional options on the slide level that you won’t find on the Ribbon, such as Duplicate Slide , Delete Slide , and Hide Slide .

In addition, you can add sections to your presentation by right-clicking anywhere in this Pane and selecting Add Section . Sections are extremely helpful in large presentations, as they allow you to organize your slides into chunks that you can then rearrange, print or display differently from other slides.

The Slide Area (A) is where you will build out your slides. Anything within the bounds of this area will be visible when you present or print your presentation.
Anything outside of this area (B) will be hidden from view. This means that you can place things here, such as instructions for each slide, without worrying about them being shown to your audience.

The Notes Pane is the space beneath the Slide Area where you can type in the speaker notes for each slide. It’s designed as a fast way to add and edit your slides’ talking points.
To expand your knowledge and learn more about adding, printing, and exporting your PowerPoint speaker notes, read our guide here .
Your speaker notes are visible when you print your slides using the Notes Pages option and when you use the Presenter View . To expand your knowledge and learn the ins and outs of using the Presenter View , read our guide here .

You can resize the Notes Pane by clicking on its edge and dragging it up or down (A). You can also minimize or reopen it by clicking on the Notes button in the Status Bar (B).
Note: Not all text formatting displays in the Notes Pane, even though it will show up when printing your speaker notes. To learn more about printing PowerPoint with notes, read our guide here .
Now that you have a basic grasp of the PowerPoint interface at your disposal, it’s time to make your presentation.
Adding Content to Your PowerPoint Presentation
Notice that in the Slide Area , there are two rectangles with dotted outlines. These are called Placeholders and they’re set on the template in the Slide Master View .
To expand your knowledge and learn how to create a PowerPoint template of your own (which is no small task), read our guide here .

As the prompt text suggests, you can click into each placeholder and start typing text. These types of placeholder prompts are customizable too. That means that if you are using a company template, it might say something different, but the functionality is the same.

Note: For the purposes of this example, I will create a presentation based on the content in the Starbucks 2018 Global Social Impact Report, which is available to the public on their website.
If you type in more text than there is room for, PowerPoint will automatically reduce its font size. You can stop this behavior by clicking on the Autofit Options icon to the left of the placeholder and selecting Stop Fitting Text to this Placeholder .
Next, you can make formatting adjustments to your text by selecting the commands in the Font area and the Paragraph area of the Home tab of the Ribbon.

The Reset Command: If you make any changes to your title and decide you want to go back to how it was originally, you can use the Reset button up in the Home tab .

Insert More Slides into Your Presentation
Now that you have your title slide filled in, it’s time to add more slides. To do that, simply go up to the Home tab and click on New Slide . This inserts a new slide in your presentation right after the one you were on.

You can alternatively hit Ctrl+M on your keyboard to insert a new blank slide in PowerPoint. To learn more about this shortcut, see my guide on using Ctrl+M in PowerPoint .
Instead of clicking the New Slide command, you can also open the New Slide dropdown to see all the slide layouts in your PowerPoint template. Depending on who created your template, your layouts in this dropdown can be radically different.

If you insert a layout and later want to change it to a different layout, you can use the Layout dropdown instead of the New Slide dropdown.
After inserting a few different slide layouts, your presentation might look like the following picture. Don’t worry that it looks blank, next we will start adding content to your presentation.

If you want to follow along exactly with me, your five slides should be as follows:
- Title Slide
- Title and Content
- Section Header
- Two Content
- Picture with Caption
Adding Content to Your Slides
Now let’s go into each slide and start adding our content. You’ll notice some new types of placeholders.

On slide 2 we have a Content Placeholder , which allows you to add any kind of content. That includes:
- A SmartArt graphic,
- A 3D object,
- A picture from the web,
- Or an icon.
To insert text, simply type it in or hit Ctrl+C to Copy and Ctrl+V to Paste from elsewhere. To insert any of the other objects, click on the appropriate icon and follow the steps to insert it.
For my example, I’ll simply type in some text as you can see in the picture below.

Slides 3 and 4 only have text placeholders, so I’ll go ahead and add in my text into each one.

On slide 5 we have a Picture Placeholder . That means that the only elements that can go into it are:
- A picture from the web

To insert a picture into the picture placeholder, simply:
- Click on the Picture icon
- Find a picture on your computer and select it
- Click on Insert
Alternatively, if you already have a picture open somewhere else, you can select the placeholder and paste in (shortcut: Ctrl+V ) the picture. You can also drag the picture in from a file explorer window.

If you do not like the background of the picture you inserted onto your slide, you can remove the background here in PowerPoint. To see how to do this, read my guide here .
Placeholders aren’t the only way to add content to your slides. At any point, you can use the Insert tab to add elements to your slides.
You can use either the Title Only or the Blank slide layout to create slides for content that’s different. For example, a three-layout content slide, or a single picture divider slide, as shown below.

In the first example above, I’ve inserted 6 text boxes, 3 icons, and 3 circles to create this layout. In the second example, I’ve inserted a full-sized picture and then 2 shapes and 2 text boxes.
The Reset Command: Because these slides are built with shapes and text boxes (and not placeholders), hitting the Reset button up in the Home tab won’t do anything.
That is a good thing if you don’t want your layouts to adjust. However, it does mean that it falls on you to make sure everything is aligned and positioned correctly.
For more on how to add and manipulate the different objects in PowerPoint, check out our step-by-step articles here:
- Using graphics in PowerPoint
- Inserting icons onto slides
- Adding pictures to your PowerPoint
- How to embed a video in PowerPoint
- How to add music to your presentation
Using Designer to generate more layouts ideas
If you have Office 365, your version of PowerPoint comes with a new feature called Designer (or Design Ideas). This is a feature that generates slide layout ideas for you. The coolest thing about this feature is that it uses the content you already have.
To use Designer , simply navigate to the Design tab in your Ribbon, and click on Design Ideas .

NOTE: If the PowerPoint Designer is not working for you (it is grey out), see my troubleshooting guide for Designer .
Change the Overall Design (optional)
When you make a PowerPoint presentation, you’ll want to think about the overall design. Now that you have some content in your presentation, you can use the Design tab to change the look and feel of your slides.
For additional help thinking through the design of your presentation, read my guide here .
A. Picking your PowerPoint slide size
If you have PowerPoint 2013 or later, when you create a blank document in PowerPoint, you automatically start with a widescreen layout with a 16:9 ratio. These dimensions are suitable for most presentations as they match the screens of most computers and projectors.
However, you do have the option to change the dimensions.
For example, your presentation might not be presented, but instead converted into a PDF or printed and distributed. In that case, you can easily switch to the standard dimensions with a 4:3 ratio by selecting from the dropdown (A).
You can also choose a custom slide size or change the slide orientation from landscape to portrait in the Custom Slide Size dialog box (B).

To learn all about the different PowerPoint slide sizes, and some of the issues you will face when changing the slide size of a non-blank presentation, read my guide here .
B. Selecting a PowerPoint theme
The next thing you can do is change the theme of your presentation to a pre-built one. For a detailed explanation of what a PowerPoint theme is, and how to best use it, read my article here .
In the beginning of this tutorial, we started with a blank presentation, which uses the default Office theme as you can see in the picture below.

That gives you the most flexibility because it has a blank background and quite simple layouts that work for most presentations. However, it also means that it’s your responsibility to enhance the design.
If you’re comfortable with this, you can stay with the default theme or create your own custom theme ( read my guide here ). But if you would rather not have to think about design, then you can choose a pre-designed theme.
Microsoft provides 46 other pre-built themes, which include slide layouts, color variants and palettes, and fonts. Each one varies quite significantly, so make sure you look through them carefully.
To select a different theme, go to the Design tab in the Ribbon, and click on the dropdown arrow in the Themes section .

For this tutorial, let’s select the Frame theme and then choose the third Variant in the theme. Doing so changes the layout, colors, and fonts of your presentation.

Note: The theme dropdown area is also where you can import or save custom themes. To see my favorite places to find professional PowerPoint templates and themes (and recommendations for why I like them), read my guide here .
C. How to change a slide background in PowerPoint
The next thing to decide is how you want your background to look for the entire presentation. In the Variants area, you can see four background options.

For this example, we want our presentation to have a dark background, so let’s select Style 3. When you do so, you’ll notice that:
- The background color automatically changes across all slides
- The color of the text on most of the slides automatically changes to white so that it’s visible on the dark background
- The colors of the objects on slides #6 and #7 also adjust, in a way we may not want (we’ll likely have to make some manual adjustments to these slides)

Note: If you want to change the slide background for just that one slide, don’t left-click the style. Instead, right-click it and select Apply to Selected Slides .
After you change the background for your entire presentation, you can easily adjust the background for an individual slide.

Inside the Format Background pane, you can see you have the following options:
- Gradient fill
- Picture or texture fill
- Pattern fill
- Hide background
You can explore these options to find the PowerPoint background that best fits your presentation.
D. How to change your color palette in PowerPoint
Another thing you may want to adjust in your presentation, is the color scheme. In the picture below you can see the Theme Colors we are currently using for this presentation.

Each PowerPoint theme comes with its own color palette. By default, the Office theme includes the Office color palette. This affects the colors you are presented with when you format any element within your presentation (text, shapes, SmartArt, etc.).

The good news is that the colors here are easy to change. To switch color palettes, simply:
- Go to the Design tab in the Ribbon
- In the Variants area, click on the dropdown arrow and select Colors
- Select the color palette (or theme colors) you want
You can choose among the pre-built color palettes from Office, or you can customize them to create your own.
As you build your presentation, make sure you use the colors from your theme to format objects. That way, changing the color palette adjusts all the colors in your presentation automatically.
E. How to change your fonts in PowerPoint
Just as we changed the color palette, you can do the same for the fonts.

Each PowerPoint theme comes with its own font combination. By default, the Office theme includes the Office font pairing. This affects the fonts that are automatically assigned to all text in your presentation.

The good news is that the font pairings are easy to change. To switch your Theme Fonts, simply:
- Go to the Design tab in the Ribbon
- Click on the dropdown arrow in the Variants area
- Select Fonts
- Select the font pairing you want
You can choose among the pre-built fonts from Office, or you can customize them to create your own.
If you are working with PowerPoint presentations on both Mac and PC computers, make sure you choose a safe PowerPoint font. To see a list of the safest PowerPoint fonts, read our guide here .
If you receive a PowerPoint presentation and the wrong fonts were used, you can use the Replace Fonts dialog box to change the fonts across your entire presentation. For details, read our guide here .
Adding Animations & Transitions (optional)
The final step to make a PowerPoint presentation compelling, is to consider using animations and transitions. These are by no means necessary to a good presentation, but they may be helpful in your situation.
A. Adding PowerPoint animations
PowerPoint has an incredibly robust animations engine designed to power your creativity. That being said, it’s also easy to get started with basic animations.
Animations are movements that you can apply to individual objects on your slide.

To add a PowerPoint animation to an element of your slide, simply:
- Select the element
- Go to the Animations tab in the Ribbon
- Click on the dropdown arrow to view your options
- Select the animation you want
You can add animations to multiple objects at one time by selecting them all first and then applying the animation.
B. How to preview a PowerPoint animation

There are three ways to preview a PowerPoint animation:
- Click on the Preview button in the Animations tab
- Click on the little star next to the slide
- Play the slide in Slide Show Mode
To learn other ways to run your slide show, see our guide on presenting a PowerPoint slide show with shortcuts .
To adjust the settings of your animations, explore the options in the Effect Options , Advanced Animation and the Timing areas of the Animation tab .

Note: To see how to make objects appear and disappear in your slides by clicking a button, read our guide here .
C. How to manage your animations in PowerPoint

The best way to manage lots of animations on your slide is with the Animation Pane . To open it, simply:
- Navigate to the Animations tab
- Select the Animation Pane
Inside the Animation Pane, you’ll see all of the different animations that have been applied to objects on your slide, with their numbers marked as pictured above.
Note: To see examples of PowerPoint animations that can use in PowerPoint, see our list of PowerPoint animation tutorials here .
D. How to add transitions to your PowerPoint presentation
PowerPoint has an incredibly robust transition engine so that you can dictate how your slides change from one to the other. It is also extremely easy to add transitions to your slides.
In PowerPoint, transitions are the movements (or effects) you see as you move between two slides.

To add a transition to a PowerPoint slide, simply:
- Select the slide
- Go to the Transitions tab in the Ribbon
- In the Transitions to This Slide area, click on the dropdown arrow to view your options
- Select the transition you want
To adjust the settings of the transition, explore the options in the Timing area of the Transitions tab.
You can also add the same transition to multiple slides. To do that, select them in the Slides Pane and apply the transition.
E. How to preview a transition in PowerPoint

There are three ways to preview your PowerPoint transitions (just like your animations):
- Click on the Preview button in the Transitions tab
- Click on the little star beneath the slide number in the thumbnail view
Note: In 2016, PowerPoint added a cool new transition, called Morph. It operates a bit differently from other transitions. For a detailed tutorial on how to use the cool Morph transition, see our step-by-step article here .
Save Your PowerPoint Presentation
After you’ve built your presentation and made all the adjustments to your slides, you’ll want to save your presentation. YOu can do this several different ways.

To save a PowerPoint presentation using your Ribbon, simply:
- Navigate to the File tab
- Select Save As on the left
- Choose where you want to save your presentation
- Name your presentation and/or adjust your file type settings
- Click Save
You can alternatively use the Ctrl+S keyboard shortcut to save your presentation. I recommend using this shortcut frequently as you build your presentation to make sure you don’t lose any of your work.

This is the standard way to save a presentation. However, there may be a situation where you want to save your presentation as a different file type.
To learn how to save your presentation as a PDF, see our guide on converting PowerPoint to a PDF .
How to save your PowerPoint presentation as a template
Once you’ve created a presentation that you like, you may want to turn it into a template. The easiest – but not technically correct – way, is to simply create a copy of your current presentation and then change the content.
But be careful! A PowerPoint template is a special type of document and it has its own parameters and behaviors.
If you’re interested in learning about how to create your own PowerPoint template from scratch, see our guide on how to create a PowerPoint template .
Printing Your PowerPoint Presentation
After finishing your PowerPoint presentation, you may want to print it out on paper. Printing your slides is relatively easy.

To open the Print dialog box, you can either:
- Hit Ctrl+P on your keyboard
- Or go to the Ribbon and click on File and then Print

Inside the Print dialog box, you can choose from the various printing settings:
- Printer: Select a printer to use (or print to PDF or OneNote)
- Slides: Choose which slides you want to print
- Layout: Determine how many slides you want per page (this is where you can print the notes, outline, and handouts)
- Collated or uncollated (learn what collated printing means here )
- Color: Choose to print in color, grayscale or black & white
There are many more options for printing your PowerPoint presentations. Here are links to more in-depth articles:
- How to print multiple slides per page
- How to print your speaker notes in PowerPoint
- How to save PowerPoint as a picture presentation
So that’s how to create a PowerPoint presentation if you are brand new to it. We’ve also included a ton of links to helpful resources to boost your PowerPoint skills further.
When you are creating your presentation, it is critical to first focus on the content (what you are trying to say) before getting lost inserting and playing with elements. The clearer you are on what you want to present, the easier it will be to build it out in PowerPoint.
If you enjoyed this article, you can learn more about our PowerPoint training courses and other presentation resources by visiting us here .
🔒 Unlock the PowerPoint Shortcuts Trusted by Industry Leaders KKR, American Express, HSBC, and More!
Join over 114,880 professionals from diverse fields including consulting, investment banking, advertising, marketing, sales, and business development who have supercharged their PowerPoint game with our proven methods.
✅ Customize compelling presentations effortlessly.
✅ Master time-saving techniques for faster deck creation.
✅ Boost your career prospects with top-notch PowerPoint skills.
Get FREE access to the Critical PowerPoint Shortcuts module of our premium training course by entering your name and email below.
DISCLAIMER: PC Users Only!
We respect your privacy and will keep your info safe and confidential.
About The Author

Popular Tutorials
- How to Strikethrough Text (l̶i̶k̶e̶ ̶t̶h̶i̶s̶) in Word, Excel & PowerPoint
- How to Make Animated Fireworks in PowerPoint (Step-by-Step)
- Strikethrough Shortcut (l̶i̶k̶e̶ ̶t̶h̶i̶s̶) for Word, Excel & PowerPoint
- How to Create a Flash Card Memory Game in PowerPoint (Like Jeopardy)
- Keyboard Shortcuts Not Working: Solved
PowerPoint Tutorial Categories
- Strategies & Opinions
- Shortcuts & Hacks
- Pictures, Icons, Videos, Etc.
- New Features
- Miscellaneous
- Charts & Data Viz
We help busy professionals save hours and gain peace of mind, with corporate workshops, self-paced courses and tutorials for PowerPoint and Word.
Work With Us
- Corporate Training
- Presentation & Template Design
- Courses & Downloads
- PowerPoint Articles
- Word Articles
- Productivity Resources
Find a Tutorial
- Free Training
- For Businesses
We help busy office workers save hours and gain peace of mind, with tips, training and tutorials for Microsoft PowerPoint and Word.
Master Critical PowerPoint Shortcuts – Secure Your FREE Training Module and Save Valuable Time!
⌛ Master time-saving expert techniques.
🔥 Create powerful presentations.
🚀 Propel your career to new heights.
We value your privacy – we keep your info safe.
Discover PowerPoint Hacks Loved by Industry Giants - KKR, AmEx, HSBC!
Over 114,880 professionals in finance, marketing and sales have revolutionized their PPT skills with our proven methods.
Gain FREE access to a full module of our premium PowerPoint training program – Get started today!
We hate spam too and promise to keep your information safe.
You are currently viewing a placeholder content from Facebook . To access the actual content, click the button below. Please note that doing so will share data with third-party providers.
What are the steps to create a PowerPoint presentation?
By: Author Shrot Katewa

Knowing how to create a PowerPoint presentation is without doubt one of the most basic and important skills that businesses today expect their employees to have. We have frequently seen people struggle and literally spend days, even weeks in creating a PowerPoint presentation and they still don’t get it right! This can be a daunting task or a cakewalk depending on who you ask. In case you are one of those people who fear PowerPoint presentations – don’t worry, we’ve got you covered!
But first, just in case you are wondering, what is a PowerPoint presentation? A PowerPoint presentation is a tool that allows us to share information about a certain topic in an effective manner. As opposed to other forms of sharing information, PowerPoint presentation allows us to make the information specific to our audience and often present it in an engaging manner. It has a wide range of uses. However, the beauty of PowerPoint is that it is very easy to use for beginners and packs some awesome features even for experts! PowerPoint presentation file can be used as a standalone file or as a reference in the background while delivering your presentation . The term is derived from Microsoft PowerPoint who created the PowerPoint software. While there are other tools that also allow us to create and deliver a presentation, PowerPoint, today, has become synonymous with any form of presentation.
Let’s dive right into the steps for creating a PowerPoint presentation –
Step 1 – preparing to create your PowerPoint presentation
Preparing for creating your presentation is one of the KEY STEPS that can set your presentation apart. A good PowerPoint presentation is engaging & easy to follow, aesthetically beautiful, has a clear objective, and actionable next steps (wherever possible).

Thus, there are a few things that you should keep in mind even before you begin creating a PowerPoint presentation. You should step back for a moment and ask yourself –
- Who is my target audience?
- How much time do I have with my target audience?
- Will I be sharing this deck over email or do I plan to present it in person?
- What is the audience size who you would be delivering the presentation?
Answers to the above questions can give you direction for a few key things while creating a presentation. For example, if you are planning to present to a large audience, you may want to ensure that you don’t cram too much of the information on the slides as it may be difficult for people to read and it will act as a distraction.
Another example on how the above questions can help would be on the number of slides. If you know that you have about 30 minutes for delivering the presentation, you may want to keep about 10 minutes for answering questions from the audience. Thus, you would only be left with about 15-20 minutes to for the actual presentation. Such an assessment allows you to identify how many slides should you consider for your presentation based on a rough estimate on the amount of time each slide would take.
Step 2 – create your PowerPoint presentation structure
Once you’ve completed step 1, you will now have to start thinking about what is the objective of the PowerPoint presentation that you intend to create. What content would you like to include in order to achieve the objective. Mostly importantly, how you would want to structure the content of your presentation.
The best presentations are those which represent the most complex piece of information in the easiest and the simplest manner possible such that your audience spends the least amount of time understanding it!
-Shrot Katewa
When it comes to structuring your presentation – there is no right or wrong. It’s about what works best for you and what would be the easiest and the most simplest way you can represent the most complex piece of information such that your audience spend the least amount of time understanding it.
Every presentation is different and each presentation follows its own structure. But, what’s really important is the information flow. We recommend our customers to start with a high level view of your presentation objective – an abstract idea or a problem statement. As you proceed in your presentation, substantiate your idea and go deeper explaining more about your objective or the key idea. You can close with specific takeaways or call to actions that you want your audience to focus on.
Let’s look at an example. Let’s say you were the founder of Uber. Now, if you were creating a PowerPoint pitch deck for Uber, a great place to start the presentation would be with a “Problem” that Uber is trying to solve
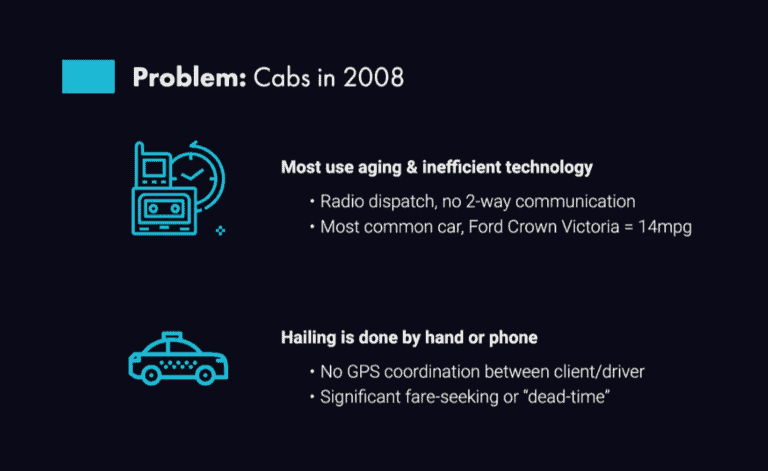
Stating the problem upfront gives a sense of the direction in which the rest of the presentation would flow. In the above example, the problem statement indicates that you would be talking about cabs or transportation or topics related to the problem in the rest of your presentation (it would be really odd if otherwise).
In a well structured pitch deck, your next steps will elaborate on the market size – how big a problem it is, solution – how does Uber solve that problem, demo – how does the app work, revenue model – how the company plans to earn money, funding related details – funds to be raised and how it will be utilised.
Step 3 – collating content to create your PowerPoint presentation
This is relatively the easy part of your PowerPoint presentation. Once you have a fair idea about the content structure, it is a lot easier for you to put the content on those slides. Most of us know what our organisation does. However, some of us often struggle with the right type of information for some slide.

One of the tricks that we’ve seen work very well with our customers who are unable to put content on the slide is to look at the topic of the slide and think about what your response would be if a 12 year old child asked you about the topic of your slide! How would you respond? Speak the response out loud. You may also want to record your own response. Then, make a note of the points that you mentioned and include content on those points on the specific slide.
Lastly, make sure to look at what your competitors are talking about. You will surely find a few relevant points for your presentation as well.
Step 4 – designing your PowerPoint presentation
Designing your PowerPoint presentation, in itself, is very difficult to cover in just one post. We will soon be carrying a series on designing your PowerPoint presentation. However, sharing below some of the basic things that all of us should keep in mind –
Choosing the right fonts for your PowerPoint presentation is important. If you are making a professional presentation, avoiding casual fonts is highly recommended. Small decisions like choosing the right fonts can make a big impact to your presentation. There’s a whole science behind how caligraphy impacts individual behaviour. Steve Jobs was one of the pioneers and early adopters of the concept of personalised calligraphy right through his early Macintosh days ( Source )
Small decisions like choosing the right fonts can make a BIG IMPACT to your PowerPoint presentation
You may ask what fonts are right to use for your PowerPoint presentation. San Serif fonts such as Arial or Calibri would both be great fonts to use for your PowerPoint presentation. Some of our other favourites are Montserrat and Helvetica. These work great for most professional presentations.
Another thing to keep in mind would be to use not more than 2 fonts in your presentation. Ensure that there is consistency in the use of fonts. For instance, all your headings should be of the same font family and font size. We recommend avoiding any special effects on the fonts especially for professional PowerPoint presentations, but that’s really a personal choice. Also, do note that the size of the font is not too small as this can make your presentation difficult to read, especially for a larger audience.
Colour scheme
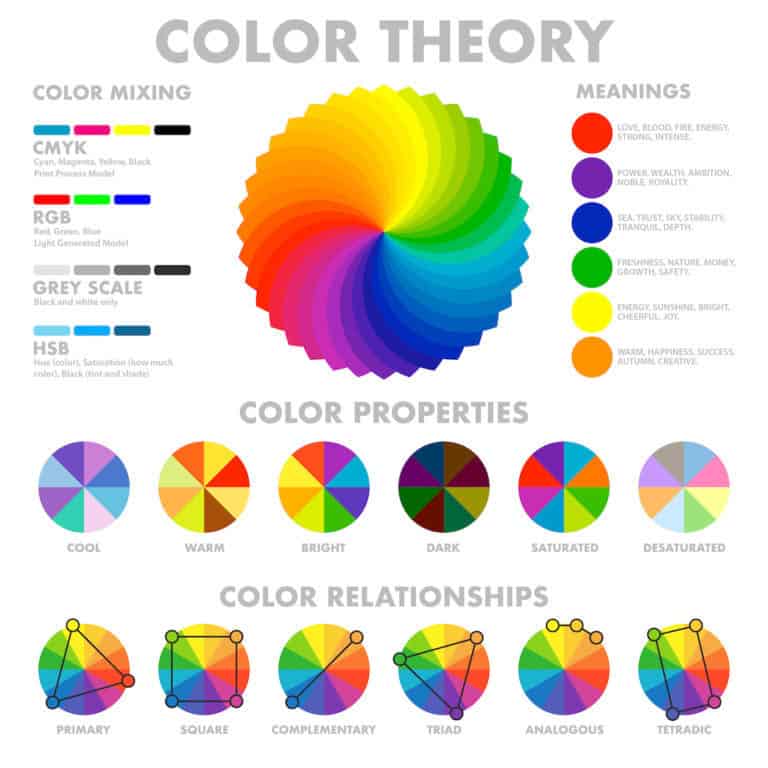
In some cases, the use of your colour pallette may be restricted to the brand guidelines of your organisation. That may actually make it easier for you to choose the colours for your PowerPoint presentation as your choice is restricted. Regardless, a critical point that you may want to keep in mind while designing the slides would be to use contrasting colours for your fonts and the background. That means using colours on the opposite end of the colour wheel. This will ensure good readability of the content. Avoid using flashy colours and more than 4-5 colours throughout the presentation. This maintains consistency of your PowerPoint presentation. If you need to use additional colours, using monochromatic colour scheme would be better than using multiple colours
Images & Graphics
Graphics and images break the monotony of your PowerPoint presentation content. However, using images & graphics is great for your presentation if used appropriately and sparingly. When using images, ensure that it relates to your content. Make sure that you have the legal rights and license for using the images. It is easy to fall in the trap of using copyrighted images from Google. Copyright infringement can damage the reputation of your organisation. We wrote an extensive post on how to avoid using copyrighted images and use images from Google and other sources for free. (Read more about it – https://www.owlscape.in/can-i-use-google-images-for-my-presentation/ )
Similarly, use graphics only when needed. A general rule of thumb for using graphics would be when you have bullet point based content on your slides. In such scenarios, graphics will enhance the overall look and feel of your slides.
Number of Slides
Our attention span is very limited. Thus, having too many slides on your presentation is something that should be avoided. There is no fixed rule on how many slides should one have on a presentation although Guy Kawasaki’s “10/20/30 rule” ( source ) may be an exception. However, an easy way to calculate the number of slides that you should have on your presentation is to identify the total amount of time you have for delivering the presentation. Divide that by the approximate time that you may spend on each slide. The resulting number could act as a reference to the number of slides you should be looking at.
We hope that this blog was useful for you and that it helps you to create better presentations in the future. What did you think about it? Please share your thoughts in the comments below. Let us know if you have any questions or if you would like to cover some specific topics that will help you upgrade your presentation skills.
7 Steps to Create a Presentation in PowerPoint (+ Templates)
Learn essential steps and tips to move beyond data slides. Discover why PowerPoint falls flat and unveil next-gen tools for impactful presentations.

Hadar Peretz
6 minute read

Short answer
7 steps to create a presentation in PowerPoint
Begin with a surprise or bold statement.
Provide necessary background information.
Frame your presentation as a story.
Keep the text concise and meaningful.
Use visuals to complement the text.
Incorporate interactive design.
Conclude with actionable insights.
Effective data and visual presentation requires specific knowledge
Displaying complex data and project visuals via multimedia elements demands substantial knowledge.
It's not merely about presenting data but doing so in a manner that's intuitive and engaging for the audience.
Utilizing graphs, charts, videos, and interactive animations effectively necessitates a good grasp of design principles, storytelling, and data visualization.
Moreover, familiarity with the technology and platforms for creating and sharing these multimedia presentations is crucial.
This blend of design acumen, technological expertise, and succinct communication is key to ensuring the data and project visuals are comprehended well by the audience.
5 benefits of mastering PowerPoint presentations
PowerPoint presentations come with a variety of benefits that make them a popular choice for both professional and educational settings. Here are some of the advantages:
Visual Engagement: Utilize visuals to keep audiences engaged and convey ideas effectively.
Organization: Structured slides ensure a clear, linear flow of content.
Customization: Modify designs to suit different topics or branding needs.
Compatibility and Reusability: Easily share across platforms, and update or reuse presentations.
Supports Multimedia: PowerPoint supports the integration of videos, hyperlinks, and other multimedia elements.
How to make a presentation in PowerPoint? (7 steps)
Creating a compelling presentation in PowerPoint is a blend of artistry and storytelling, combined with a clear understanding of the material at hand.
Let’s break down this process into seven detailed steps to craft a presentation that not only captivates your audience but leaves a lasting impact.
1. Start with a surprising statement, a bold promise, or a mystery
Kicking off with something unexpected grabs your audience's attention right from the outset.
It might be a shocking fact related to your topic, a bold promise of what they'll learn, or a mystery that piques their curiosity.
For instance, if your presentation is about time management , you might start with a surprising statistic about the average amount of time people waste on trivial tasks.
learn how to avoid these presentation starters : overloading facts, over-explaining initially, generic content, relying solely on PowerPoint norms, revealing key benefits early, and focusing on self over audience engagement.
Aim for curiosity-sparking, audience-tailored narratives.
2. Provide context with a bit of background information
Before diving deep, give your audience a clear understanding of the topic at hand. Offer a brief background to set the stage.
Going with the time management example, you could provide some insights into how modern distractions have made managing time more challenging.
3. Structure your presentation within a story framework
Stories are a powerful medium to convey messages. Structuring your presentation as a story keeps your audience engaged.
Introduce a protagonist, which could be an individual, a group, or even your audience, facing a problem that your presentation will help solve.
For instance, narrate a day in the life of a person struggling to manage time and how the techniques you’re about to share turn things around.
4 steps to structuring your presentation within a story framework:
Introduce Setting and Characters: Kickstart by presenting the backdrop and the entities involved, making them relevant to your audience.
Highlight a Conflict or Challenge: Unveil a significant problem or hurdle that the audience can relate to, setting the stage for your solutions.
Propose the Resolution: Unfold your solutions to the earlier stated problem, walking your audience through each resolving step.
Recap and Look Ahead: Conclude by recapping the narrative and offering actionable steps or insights for the audience to ponder upon or implement.
4. Make every word count, and use as few as possible
Conciseness is key. Make sure each word on your slide adds value to your presentation. This approach keeps your slides uncluttered and easy to follow.
For instance, instead of writing a long sentence about the importance of prioritizing tasks, use a brief statement like “Prioritize to Monetize.”
5. Use visuals only to support your presentation text
Utilizing visuals judiciously within your presentation is crucial. Visuals should complement your narrative, not overshadow it.
Explore the steps to make a presentation creative , apply these methods, and see your skills enhance, leading to captivating presentations.
The essence is to employ images, graphs, and charts to enhance understanding or convey a message more efficiently.
For instance, a simple pie chart can swiftly illustrate how much time is saved by effective prioritization.
By adhering to this guideline, you ensure that your audience remains focused on the key messages being delivered, with visuals serving as a supportive tool rather than a distraction.
6. Use interactive design to make your audience active participants
Engage your audience with interactive elements. Incorporating clickable links, embedded videos, or live polls can make your presentation more interactive and engaging.
For instance, a live poll could be used to understand the audience’s prior knowledge about time management.

7. End by telling your audience what they can do with what they’ve learned
Your conclusion should empower your audience to apply the learnings in their lives. Recap the key points and provide actionable steps they can take post-presentation.
For instance, share a list of time-management tools or a 30-day challenge to improve productivity.
By following these seven steps, you’re on the path to mastering the art of creating impactful PowerPoint presentations.
Each step is geared towards making your content more engaging, understandable, and memorable, ensuring that your message not only resonates with your audience but prompts action long after your presentation concludes.
Browse basic examples about how to end a presentation and discover what should be on the last slide of the presentation.
8 pro tips for crafting effective PowerPoint presentations
Crafting an effective PowerPoint presentation demands a blend of clear objectives, engaging narrative, visual creativity, and audience-centric communication.
Here are key tips to guide you in this endeavor:
Know Your Audience: Tailor your message to match audience expectations.
Clear Objective: Define the primary goal of your presentation.
Engaging Storyline: Employ a compelling narrative to convey your message.
Simplicity is Key: Keep content concise and language simple.
Visual Aids: Use visuals like images and charts to support text.
Practice and Prepare: Familiarize yourself with your content and anticipate questions.
Interactive Elements: Incorporate polls or Q&A to engage the audience.
C all to Action: End with a clear call to action guiding the audience on the next steps.
Why it's time to move to the next-gen presentation tools
Making a memorable presentation requires more than just PowerPoint slides. In fact, making a PowerPoint presentation interesting is impossible .
In today's digital era, engaging your audience demands innovative tools and a narrative approach.
Let’s explore a game-changing tool for impactful presentations.
Embrace interactivity
Interactive presentations foster real-time engagement, turning monologues into dialogues.
Tools like Storydoc offer a fresh, engaging approach to sharing your message.
With the right tools, creating lasting impressions is a breeze. It’s time to change the narrative and make your presentations both informative and inspiring.
Here’s our CEO, Itai Amoza, discussing the key elements that make a presentation engaging:

Best tool for making an effective presentation
Traditionally, PowerPoint or Google Slides were the go-to platforms for crafting presentations, offering simplicity.
However, to truly engage modern audiences, stepping up your game is essential. This is where next-gen AI-driven tools like Storydoc come into play.
Unlike static slides, Storydoc enables the creation of interactive, immersive content experiences. It’s not merely about showcasing data, but weaving a compelling narrative that resonates with your audience.
Creative presentation templates
Ever faced the daunting blank slide with a blinking cursor urging creativity? It's like having a stage awaiting your script.
Overcoming this initial challenge can be hefty, but there's a savior - creative presentation templates.
These templates act like a structured canvas, guiding your narrative while leaving room for your unique flair.
Grab a template and witness the simplicity it brings to narrating your distinct tale.
I am a Marketing Specialist at Storydoc, I research, analyze and write on our core topics of business presentations, sales, and fundraising. I love talking to clients about their successes and failures so I can get a rounded understanding of their world.

Found this post useful?
Subscribe to our monthly newsletter.
Get notified as more awesome content goes live.
(No spam, no ads, opt-out whenever)
You've just joined an elite group of people that make the top performing 1% of sales and marketing collateral.
Create your best presentation to date
Try Storydoc interactive presentation maker for 14 days free (keep any presentation you make forever!)
How to Create a PowerPoint Presentation

Introduction: How to Create a PowerPoint Presentation

Step 1: Launch the PowerPoint Program
Step 2: choosing a design.
The next thing you want to do is decide what design you want for the presentation. To do this, go to the 'Design' tab at the top of the page. Scroll through all the options and decide which one looks best for the presentation you want. To get a preview of what the design will look like before applying it to the presentation, hover over the design you want to preview. This design will be automatically continued throughout the rest of your presentation. Once you have more than one slide, you can add a different design for just one slide. To do this, select the slide you want to change the design on by clicking on it. It will pop-up as the big slide in the screen. Then you can right-click the design you want for this slide and select 'Apply to Selected Slide'. It will appear on that slide, but will not change the design of the other slides.
Step 3: Create Title Page
Step 4: add more slides, step 5: add charts, pictures, graphs, etc., step 6: add transitions, step 7: changing the order, step 8: play the presentation, recommendations.

Water Contest

Outdoor Life Contest

Woodworking Contest

5 steps to effective Powerpoint Presentations
by Olivia Mitchell | 5 comments

Stepcase Lifehack just published a blogpost on tips for more effective PowerPoint presentations . I was surprised to see some outdated and unhelpful advice. Here are my five steps to create an effective PowerPoint presentation. I’ve written about many of these steps before, so I’ve provided links to more detailed posts if you’d like more information.
1. Plan your presentation on paper first.
Keep away from the computer. Garr Reynolds from PresentationZen calls this going analog.
Instead focus on your audience and what you want them to take away from the presentation. What do you want them to do? How do you want them to think differently? What do you want them to remember? This will become your Key Message. See this post for more guidance A Simple and Concrete Key Message .
Then structure the flow of your presentation around what your audience will want to know – see Answer your audience’s questions .
The Lifehack post recommends writing a script. I don’t recommend this. Here’s why:
- Unless you’re a skilled dialogue-writer you’ll find it difficult to write your script in conversational language. And conversational language is what works best in a presentation.
- Once you’ve written a script, you may find it hard to keep from reading it. Reading to your audience is an effective way to put them to sleep.
- You may think that you can memorise it – what that means is that you’ll end up “reading” from the script in your head. You’ll still sound artificial and stilted. And you’ll be focusing on remembering what comes next rather than focusing on getting your ideas across to your audience.
Presenting is about communicating ideas – not exact words and sentences. So instead of a script create a set of notes for yourself. Your notes don’t say what you want to say – they remind you of what you want to say. For more guidance on creating notes, see this post The lost art of notes . Then you can focus on connecting with your audience.
Once you’ve created the structure and flow of your presentation, you can start creating slides. There are many different creative ways of creating slides. In this post, I’ll take you through a quick and easy way to use when you’re short of time.
2. Put one statement on each slide
Take each main point of your presentation and express it as a short and succinct statement. Put each statement on one slide.
That’s the only text you put on the slide. The Lifehack post says ‘No paragraphs’! I go further and say ‘No bullets’! Here’s why:
- Bullets are the speaker’s notes in disguise. Take them off the screen and put them in your hand or on the table/lectern in front of you.
- Having bullets on your slide and talking at the same time harms the ability of your audience to take in your message. See The problem with traditional bullet-point slides and New scientific evidence for banning bullets from your PowerPoint slides .
- Bullet-points are outdated. See 5 ways bullet-point slides damage your brand .
If you run out of time, these simple one-statement slides will work fine . If you’ve got time, go onto the next step.
3. Add a relevant visual to each slide
Now look at how you can add a visual element to each slide which helps back-up the point of the slide. There are four main types of visual:
- An image or photograph which directly represents or is a metaphor for what you’re talking about.
- A diagram which helps your audience understand the concept you’re describing.
- A graph which shows the meaning of your data.
- A flowchart that demonstrates the process you’re explaining.
For more description of each of these see this post on The application of visual thinking to presentations .
I agree with the Lifehack post that irrelevant, distracting images and cliched clipart shouldn’t be used. Watch out also for cliched images – the Slide:ology blog has lots of examples of these.
4. Pay attention to design
The Lifehacker post says:
Avoid the temptation to dress up your pages with cheesy effects and focus instead on simple design basics.
I agree. The key design principles are:
- Use a simple background – decorative templates add clutter.
- Use a sans serif font such as arial or helvetica.
- Use text which contrasts well with the background.
- If you’re using photos have them fill the whole screen and put your text on top of them. If necessary use a semi-transparent rectangle – a mask – behind the text to ensure that it is readable.
These two posts expand on these points:
- Powerpoint slide design – the basics
- PowerPoint slide design – adding elegance
The Lifehacker post says avoid dark backgrounds if you can to help with readability. This used to be true with older dimmer datashow projectors, but now with brighter projectors it’s not an issue unless you’re in a very light room like a conservatory or direct sunlight is hitting the screen.
5. Dance with your slides
You know not to read from your slides. But don’t go the other extreme of ignoring your slides like a wallflower at a dance. Dance with them. They are your partner in the presentation – sometimes you lead, sometimes the slide will lead. For more ideas on how to do this see my post Are you missing out on half the power of your PowerPoint slides?
Plan your Presentation with the SpeakerMap™ Template
Use a proven formula that will have you look confident and credible.
Success! Check your email for a link to download the SpeakerMap. And if you have a presentation coming up, do make use of the interactive email tips we'll send you.
Heads up: I will also send you valuable tips to help you improve your presentations and let you know about ways you can work with me. You can unsubscribe at any time.

Great post Olivia and some really useful links to individual articles. I agree that it’s important to challenge many of the old myths that are still circulating!

This article on Power Presentation is quite resourceful for me. I say well done.

Wow! This is truly very helpful for me and challenging. Looking forward to implementatingcthis new knowledge
Thanks Olivia

yeah thanks Olivia.

I followed these steps and my presentation was successful. Thank you for sharing them
Got an important presentation coming up?
Got an important presentation coming up and: You have so much content that you can't figure out what to leave out? Don't know where to begin your design process? Worried that your material won't be of value? Feeling overwhelmed and can't get started? Can't figure out your theme? Concerned you won't be engaging? Time is running out?
Recent posts
- Why striving to be authentic can be a trap
- The first time is never the best
- The Need to be Knowledgeable
- Would you wear clothes that clash?
- An unconventional approach to overcoming the fear of public speaking
Connect With Me

Recommended Books
Click here to see my favorite presentation books.
I earn a small commission when you buy a book from this page. Thank you!
- Audience (22)
- Content (62)
- Delivery (31)
- Nervousness (30)
- Powerpoint (37)
- Presentation blogs (2)
- Presentation books (4)
- Presentation critiques (9)
- Presentation myths (6)
- Presentation philosophy (5)
- Presentation research (11)
- Presentation skills (23)
- Presenting with Twitter (10)
- Visual thinking (3)
Want to create your most engaging presentation ever?
Plan your presentation with the SpeakerMap™ - a proven system that will have you feeling confident and credible.
Success! You'll soon receive an email from us with a link to step 1 of the SpeakerMap system.
Heads up: I'll also send you useful tips to improve your presentations. If you no longer need them, you can unsubscribe at any time.
Free Course
How to tame your fear of public speaking.
In this video-training series (plus workbook with transcripts) you’ll learn:
- The three things you must know BEFORE you begin to tackle your fear of public speaking
- Why the positive-negative thought classification doesn’t work for fear of public speaking
- The two powerful self-talk tweaks that can make an immediate difference.
You have Successfully Subscribed!
I ask for your email address to deliver the course to you and so that I can keep on supporting and encouraging you with tips, ideas and inspiration. I will also let you know when my group program is open for enrolment. I will keep your email safe and you can unsubscribe at any time.
Discover more from Speaking about Presenting
Subscribe now to keep reading and get access to the full archive.
Type your email…
Continue reading
- PRO Courses Guides New Tech Help Pro Expert Videos About wikiHow Pro Upgrade Sign In
- EDIT Edit this Article
- EXPLORE Tech Help Pro About Us Random Article Quizzes Request a New Article Community Dashboard This Or That Game Happiness Hub Popular Categories Arts and Entertainment Artwork Books Movies Computers and Electronics Computers Phone Skills Technology Hacks Health Men's Health Mental Health Women's Health Relationships Dating Love Relationship Issues Hobbies and Crafts Crafts Drawing Games Education & Communication Communication Skills Personal Development Studying Personal Care and Style Fashion Hair Care Personal Hygiene Youth Personal Care School Stuff Dating All Categories Arts and Entertainment Finance and Business Home and Garden Relationship Quizzes Cars & Other Vehicles Food and Entertaining Personal Care and Style Sports and Fitness Computers and Electronics Health Pets and Animals Travel Education & Communication Hobbies and Crafts Philosophy and Religion Work World Family Life Holidays and Traditions Relationships Youth
- Browse Articles
- Learn Something New
- Quizzes Hot
- Happiness Hub
- This Or That Game
- Train Your Brain
- Explore More
- Support wikiHow
- About wikiHow
- Log in / Sign up
- Computers and Electronics
- Presentation Software
- PowerPoint Presentations
Simple Steps to Make a PowerPoint Presentation
Last Updated: July 23, 2024 Fact Checked
Creating a New PowerPoint
Creating the title slide, adding a new slide, adding content to slides, adding transitions, testing and saving your presentation.
This article was co-authored by wikiHow staff writer, Darlene Antonelli, MA . Darlene Antonelli is a Technology Writer and Editor for wikiHow. Darlene has experience teaching college courses, writing technology-related articles, and working hands-on in the technology field. She earned an MA in Writing from Rowan University in 2012 and wrote her thesis on online communities and the personalities curated in such communities. This article has been fact-checked, ensuring the accuracy of any cited facts and confirming the authority of its sources. This article has been viewed 4,336,532 times. Learn more...
Do you want to have your data in a slide show? If you have Microsoft 365, you can use PowerPoint! PowerPoint is a program that's part of the Microsoft Office suite (which you have to pay for) and is available for both Windows and Mac computers. This wikiHow teaches you how to create your own Microsoft PowerPoint presentation on a computer.
How to Make a PowerPoint Presentation
- Open the PowerPoint app, select a template and theme, then like “Create.”
- Click the text box to add your title and subtitle to create your title slide.
- Click the “Insert” tab, then “New Slide” to add another slide.
- Choose the type of slide you want to add, then add text and pictures.
- Rearrange slides by dragging them up or down in the preview box.
Things You Should Know
- Templates make it easy to create vibrant presentations no matter your skill level.
- When adding photos, you can adjust their sizes by clicking and dragging in or out from their corners.
- You can add animated transitions between slides or to individual elements like bullet points and blocks of text.

- If you don't have a Microsoft Office 365 subscription, you can use the website instead of the desktop app. Go to https://powerpoint.office.com/ to use the website version.
- You can also use the mobile app to make presentations, though it's easier to do this on a computer, which has a larger screen, a mouse, and a keyboard.

- If you don't want to use a template, just click the Blank option in the upper-left side of the page and skip to the next part.

- Skip this step if your selected template has no themes available.

- If you're creating a PowerPoint presentation for which an elaborate title slide has been requested, ignore this step.

- You can change the font and size of text used from the Home tab that's in the orange ribbon at the top of the window.

- You can also just leave this box blank if you like.

- You can also click and drag in or out one of a text box's corners to shrink or enlarge the text box.

- On a Mac, you'll click the Home tab instead. [1] X Research source

- Clicking the white slide-shaped box above this option will result in a new text slide being inserted.

- Title Slide
- Title and Content
- Section Header
- Two Content
- Content with Caption
- Picture with Caption

- Naturally, the title slide should be the first slide in your presentation, meaning that it should be the top slide in the left-hand column.

- Skip this step and the next two steps if your selected slide uses a template that doesn't have text boxes in it.

- Text boxes in PowerPoint will automatically format the bulk of your text for you (e.g., adding bullet points) based on the context of the content itself.
- You can add notes that the Presentation will not include (but you'll still be able to see them on your screen) by clicking Notes at the bottom of the slide.

- You can change the font of the selected text by clicking the current font's name and then clicking your preferred font.
- If you want to change the size of the text, click the numbered drop-down box and then click a larger or smaller number based on whether you want to enlarge or shrink the text.
- You can also change the color, bolding, italicization, underlining, and so on from here.

- Photos in particular can be enlarged or shrunk by clicking and dragging out or in one of their corners.

- Remember to keep slides uncluttered and relatively free of distractions. It's best to keep the amount of text per slide to around 33 words or less. [2] X Research source

- Slide content will animate in the order in which you assign transitions. For example, if you animate a photo on the slide and then animate the title, the photo will appear before the title.
- Make your slideshow progress automatically by setting the speed of every transition to align with your speech as well as setting each slide to Advance . [3] X Trustworthy Source Microsoft Support Technical support and product information from Microsoft. Go to source

- If you need to exit the presentation, press Esc .

- Windows - Click File , click Save , double-click This PC , select a save location, enter a name for your presentation, and click Save .
- Mac - Click File , click Save As... , enter the presentation's name in the "Save As" field, select a save location by clicking the "Where" box and clicking a folder, and click Save .
Community Q&A
- If you save your PowerPoint presentation in .pps format instead of the default .ppt format, double-clicking your PowerPoint presentation file will prompt the presentation to open directly into the slideshow view. Thanks Helpful 6 Not Helpful 0
- If you don't have Microsoft Office, you can still use Apple's Keynote program or Google Slides to create a PowerPoint presentation. Thanks Helpful 0 Not Helpful 0

- Your PowerPoint presentation (or some features in it) may not open in significantly older versions of PowerPoint. Thanks Helpful 1 Not Helpful 2
- Great PowerPoint presentations avoid placing too much text on one slide. Thanks Helpful 0 Not Helpful 0
You Might Also Like

- ↑ https://onedrive.live.com/view.aspx?resid=DBDCE00C929AA5D8!252&ithint=file%2cpptx&app=PowerPoint&authkey=!AH4O9NxcbehqzIg
- ↑ https://www.virtualsalt.com/powerpoint.htm
- ↑ https://support.microsoft.com/en-us/office/set-the-timing-and-speed-of-a-transition-c3c3c66f-4cca-4821-b8b9-7de0f3f6ead1#:~:text=To%20make%20the%20slide%20advance,effect%20on%20the%20slide%20finishes .
About This Article

- Send fan mail to authors
Reader Success Stories
Artis Holland
Sep 22, 2016
Is this article up to date?

Oct 18, 2016
Jul 23, 2016
Margery Niyi
Sep 25, 2017
Jul 21, 2016

Featured Articles

Trending Articles

Watch Articles

- Terms of Use
- Privacy Policy
- Do Not Sell or Share My Info
- Not Selling Info
wikiHow Tech Help Pro:
Level up your tech skills and stay ahead of the curve
How to Start PowerPoint: A Step-by-Step Guide for Beginners
Starting PowerPoint is as easy as opening the program and selecting a template or a blank presentation. Once you’ve got the program open, you’ll be greeted with various options to create your perfect presentation, whether it’s for a business meeting, a school project, or just for fun. Just be sure you have PowerPoint installed on your computer or you have access to it online through Microsoft 365.
After you’ve opened PowerPoint and selected your template, you’ll be able to add text, images, videos, and other elements to your slides to make your presentation unique and engaging.
Introduction
PowerPoint is a versatile tool used by millions to create engaging and dynamic presentations. Whether you’re a student, a professional, or someone who just wants to make a fun slideshow for friends and family, knowing how to start PowerPoint is a must-have skill in today’s digital world. This program has been around for decades, evolving with technology to offer a wide range of features that can make any presentation go from bland to brilliant.
But why is it so important to know how to start PowerPoint? Well, think about it. Presentations are a key part of communication in various settings. They can make or break a business pitch, help or hinder a teacher’s lesson, and add a lot of fun to personal projects. PowerPoint is relevant to just about anyone who needs to convey information in a visual and organized way. So let’s dive in and get started on mastering the basics of opening and using PowerPoint.
Step by Step Tutorial: Starting PowerPoint
Before we begin, make sure you have PowerPoint installed on your computer. If you do, fantastic! If not, you can download it from the Microsoft website or access it online through Microsoft 365. Ready? Let’s go!
Step 1: Open PowerPoint
Launch PowerPoint by clicking on the program icon on your computer.
Once you’ve found the PowerPoint icon, either on your desktop, start menu, or taskbar, give it a click, and the program will open. You may see a loading screen briefly before the main window appears.
Step 2: Choose a Template
Select a template or a blank presentation to start creating your slides.
PowerPoint offers a variety of templates to fit every need and occasion. Whether you want something simple and professional or colorful and creative, there’s a template for you. If you prefer to start from scratch, you can choose a blank presentation.
Step 3: Customize Your Slides
Add text, images, videos, and other elements to your slides.
Once you’ve picked your template or opened a blank slide, it’s time to make it your own. You can add title text, bullet points, images, and even videos. PowerPoint has a range of tools for customizing each slide to fit your content perfectly.
| Benefit | Explanation |
|---|---|
| Easy to Use | PowerPoint is user-friendly, making it accessible for beginners and experts alike. |
| Customizable | With a wide range of templates and design tools, PowerPoint allows for high levels of customization. |
| Multimedia Integration | PowerPoint supports various media types, letting you create rich, engaging presentations. |
| Drawback | Explanation |
|---|---|
| Can Be Overwhelming | The vast array of features can be daunting for new users to navigate. |
| Template Limitations | While there are many templates, finding the perfect one can sometimes be challenging. |
| Potential for Technical Issues | Like any software, PowerPoint can experience glitches or crashes, which may cause inconvenience. |
Additional Information
When starting PowerPoint, it’s essential to keep your audience in mind. Who will be viewing your presentation? What is the main message you want to convey? Answering these questions can help you choose the right template and design elements. Don’t be afraid to experiment with different fonts, colors, and layouts to find what works best for your content.
Remember, a well-organized and visually appealing presentation can significantly impact your audience’s engagement and retention of information. Also, consider using PowerPoint’s various features like transitions and animations sparingly – while they can add a dynamic touch, overuse can be distracting. And always save your work regularly!
- Open PowerPoint by clicking on the program icon.
- Select a template or a blank presentation.
- Customize your slides by adding text, images, videos, and other elements.
Frequently Asked Questions
Do i need a microsoft account to use powerpoint.
Yes, to download and use PowerPoint, you’ll need a Microsoft account.
Can I access PowerPoint online?
Absolutely, PowerPoint is available online through Microsoft 365, which allows you to work on presentations from any browser.
Is PowerPoint free?
PowerPoint is not free, but it is included in the Microsoft Office Suite, which is available for purchase. However, you can use the online version with a Microsoft 365 subscription.
Can I collaborate with others on a PowerPoint presentation?
Yes, PowerPoint supports collaboration, allowing multiple users to work on the same presentation simultaneously.
Can I convert a PowerPoint presentation to a video?
Indeed, PowerPoint has a feature that lets you save your presentation as a video file.
Starting PowerPoint is just the beginning of creating compelling and memorable presentations. Whether you use a template or start from a blank canvas, the key to a great PowerPoint presentation is creativity, clarity, and audience engagement. Remember, practice makes perfect!
So go ahead and play around with all the tools and features PowerPoint offers. The more you use it, the more proficient you’ll become. And if you ever get stuck, there’s a vast community of PowerPoint users and an array of online resources to help you out. Now that you know how to start PowerPoint, where will your presentations take you?

Matthew Burleigh has been writing tech tutorials since 2008. His writing has appeared on dozens of different websites and been read over 50 million times.
After receiving his Bachelor’s and Master’s degrees in Computer Science he spent several years working in IT management for small businesses. However, he now works full time writing content online and creating websites.
His main writing topics include iPhones, Microsoft Office, Google Apps, Android, and Photoshop, but he has also written about many other tech topics as well.
Read his full bio here.
Share this:
Join our free newsletter.
Featured guides and deals
You may opt out at any time. Read our Privacy Policy
Related posts:
- Can I Convert My Powerpoint to Google Slides?
- How to Save Powerpoint as PDF with Notes
- How to Make a Powerpoint Slide Vertical in Powerpoint 2013
- How to Set Time for Slides in Powerpoint
- How to Insert Slides from Another Presentation in Powerpoint 2010
- How to Check Word Count on Powerpoint 2010
- How to Unhide a Slide in Powerpoint 2013
- How to Loop a Slideshow on Powerpoint 2013
- How to Change Hyperlink Color in Powerpoint 2010 (An Easy 5 Step Guide)
- How to Change the Font on All Slides in Google Slides
- How to Convert a PowerPoint to Word and Edit with Ease
- How to Insert Check Mark in Powerpoint for Office 365
- How to Change Line Spacing in Powerpoint for Every Slide at Once
- How to Download a Google Slides Presentation as a Powerpoint File
- Can I Create a Timeline in Powerpoint?
- How to Delete Multiple Slides in Google Slides
- How to Add Page Numbers in Powerpoint 2010
- How to Show Speaker Notes in Google Slides
- How to End Powerpoint on Last Slide in Powerpoint 2010
- How to Hide a Slide in Powerpoint 2010
How to Create a Simple PowerPoint Presentation
These steps let you add titles, text, designs, and images
Christina Morillo / Pexels
- Homework Tips
- Learning Styles & Skills
- Study Methods
- Time Management
- Private School
- College Admissions
- College Life
- Graduate School
- Business School
- Distance Learning
- M.Ed., Education Administration, University of Georgia
- B.A., History, Armstrong State University
You can make your next classroom or office presentation stand out by creating slides in PowerPoint, a simple process anyone can learn with a little practice.
Getting Started
Microsoft Corporation
When you first open PowerPoint, you'll see a blank “slide” with space for a title and a subtitle in different boxes. You can use this page to begin creating your presentation right away. Add a title and subtitle in the boxes if you want, but you can also delete the boxes and insert a photo, graph, or another object onto the slide.
Creating Slides
Here is an example of a title in the “title” box, but instead of a subtitle, there's a photo in the subtitle box.
To create a slide like this, click inside the “Title” box and type a title. The “subtitle” box is a container for inserting text, but if you don't want a subtitle there, you can remove this box by clicking on one edge to highlight it and then hitting “delete.” To insert a picture into this space, go to "Insert" on the menu bar and select "Picture." Choose a photo from your saved photo files in locations such as "My Pictures" or a flash drive .
The picture you select will be inserted onto the slide, but it may be so big that it covers the entire slide. You can select the picture and make it smaller by moving your cursor to the edge of the photo and dragging the corners inward.
Now that you have a title slide, you can create additional presentation pages. Go to the menu bar at the top of the page and select "Insert" and "New Slide." You’ll see a new blank slide that looks a little different. The makers of PowerPoint have tried to make this easy and have guessed that you’d like to have a title and some text on your second page. That's why you see “Click to add title” and “Click to add text.”
You can type a title and text in these boxes, or you can delete them and add any type of text, photo, or object that you like by using the "Insert" command.
Bullets or Paragraph Text
A title and text have been inserted in the boxes on this slide template. The page is set up to insert text in bullet format. You can use bullets, or you can delete the bullets and type a paragraph .
If you choose to stay with the bullet format, type your text and hit "return" to make the next bullet appear.
Adding a Design
Once you have created your first couple of slides, you might want to add a design to your presentation. Type the text for your next slide, then go to "Format" on the menu bar and select "Slide Background." Your design choices will show up on the right side of the page. Click on the different designs to see how your slide will look in each format. The design you select will be applied to all your slides automatically. You can experiment with the designs and change them at any time.
Watch Your Slide Show
You can preview your slideshow at any time. To see your new creation under way, go to "View" on the menu bar and select "Slide Show." Your presentation will appear. To move from one slide to another, use the arrow keys on your computer keyboard.
To go back to design mode, hit the “Escape” key. Now that you have some experience with PowerPoint, you're ready to experiment with some of the other features of the program.
- How to Copy Code From a Website
- C# Programming Tutorial - Programming Advanced Winforms in C#
- How to Create a Watermark in Microsoft Publisher
- Creating a Table of Contents
- How to Add Photos to a Google Website
- How to Make a People Bingo Card
- Setting Margins, Columns, and Guides in Adobe InDesign CC
- How to Create Your Own Fonts Using Inkscape and IcoMoon
- How to Copy and Paste From Word to WordPress
- How to Create a Greeting Card in Microsoft Publisher
- How to Inspect Web Page Elements
- How to Upload a Photo to Your Website
- Using Links to Create Vertical Navigation Menus
- Using Evernote With Scrivener
- How to Create an HTML Email Signature
- How to Type Spanish Accents, Characters, and Punctuation in Windows
.css-1qrtm5m{display:block;margin-bottom:8px;text-transform:uppercase;font-size:14px;line-height:1.5714285714285714;-webkit-letter-spacing:-0.35px;-moz-letter-spacing:-0.35px;-ms-letter-spacing:-0.35px;letter-spacing:-0.35px;font-weight:300;color:#606F7B;}@media (min-width:600px){.css-1qrtm5m{font-size:16px;line-height:1.625;-webkit-letter-spacing:-0.5px;-moz-letter-spacing:-0.5px;-ms-letter-spacing:-0.5px;letter-spacing:-0.5px;}} Best Practices 5 essential preparation steps for a successful presentation
by Tom Rielly • June 15, 2020

Keeping your presentation visuals minimalistic, simple, and clear is just one important step to remember when designing a hit presentation. Leaving nothing to chance, great presenters prove quite methodical as they prepare. Here’s a checklist for everything you need to keep in mind before your next presentation:
1. Choose the right software for your needs

The easiest way to select the right presentation software for you is to simply find the one that is native to your device. For example, if you have a Mac, use Apple Keynote, if you work on Windows, use PowerPoint. Google Slides is recommended if you’re working with someone, as it makes collaboration very easy. Another software option is Prezi: a specialty tool called Prezi that creates a presentation using motion, zoom, and panning across one giant visual space.
2. Organize your files
As you develop your script and visuals, you will need to start assembling all the assets for your slides. Create a unique folder on your computer to hold these items. Keep the folder organized by media type (presentation drafts, photos, videos, scripts) and back them up frequently to the Cloud or external disk. Label each file with a specific descriptive name, e.g. “Susan Johnson singing magpie 2020”, as opposed to “IMG_4043.jpg”, which can make it confusing to find your assets. The more organized you are up front, the easier preparing for your presentation will be.
3. Prepare your presentation materials
Make sure your presentation materials (script, graphics, actual slides) are saved in at least two safe spots (for example, your computer and an external USB drive) and are backed-up frequently. If you are using an online presentation software, such as Google Slides, be sure to also download a copy of your presentation in case the internet connection is unreliable. Having all the individual assets on hand in addition to your presentation slides can be helpful if you experience tech issues before presenting, or if you need to make any last minute changes. Make sure to label your final presentation with the title and your name so it’s easy to find.
4. Practice, practice, practice!
Remember, practice makes perfect. People often run out of time making their presentations and have no time to practice. Most TED speakers practice at least ten times. Neuroscientist Jill-Bolte Taylor gave one of the most successful Talks in TED history with nearly 27 million views. How did she do it? She practiced her Talk over 40 times! By rehearsing multiple times you will naturally memorize your Talk, which means you won’t need note cards when you give your final presentation.
5. Do a final test run
Before presenting, make sure the equipment you need is working properly. It’s generally good practice to rehearse standing on the exact stage with the exact lighting using the exact computer that you will be using in your final presentation.
Here’s a quick checklist of what to look for when testing your equipment:
- If you're not using your own computer, the one provided might be slower and have trouble playing media. If you have videos or other media, make sure they play correctly
- Test the projector to make sure it’s HD
- Make sure images are clear
- Test the sound of any clips you use, as this is what goes wrong most frequently
- If you’re using a mic, test the volume
Don’t let technical issues or other blunders overshadow your presentation. By following these guidelines, and with a little preparation, you can engineer out the problems BEFORE they happen.
Ready to learn more about how to make your presentation even better? Get TED Masterclass and develop your ideas into TED-style talks
© 2024 TED Conferences, LLC. All rights reserved. Please note that the TED Talks Usage policy does not apply to this content and is not subject to our creative commons license.
Unsupported browser
This site was designed for modern browsers and tested with Internet Explorer version 10 and later.
It may not look or work correctly on your browser.
- Communication
How Do You Prepare a Good Presentation in 2024 in 12+ Practical Steps? (+ Expert Tips)
There's nothing more nerve-wracking than having a big presentation coming up and feeling unprepared. Public speaking can be difficult. Not feeling ready makes it even more of a trial. Learn the essential steps for presentation preparation.

If you want to calm those nerves and wow your audience, then it's a good idea to understand the basics of creating attention-getting presentations.
In this guide, I'll share 12+ presentation preparation tips that'll walk you through how to prepare for a presentation from start to finish. So, you can feel confident when preparing to give a presentation .
Find Premium Presentation Slides on Envato Elements
One way to save time in the presentation preparation phase is to use a premium template to design your slides. This will help you feel secure about how your presentation looks, even if design skills aren't your core strength.
.png "describe the steps involved in creating a power point presentation")
A great place to find templates when preparing to give a presentation is Envato Elements. This marketplace has a great offer you can grab today. Download as many premium PowerPoint presentation templates as you want, all for one low price.

This offer includes other items you can use to make your presentations stand out, like stock photos, graphics, icons, and more.

The great thing about using premium design elements for your presentations is that they're well supported by the creators, are compatible with major software and apps, and are kept up to date .
Get More PowerPoint Presentation Templates on GraphicRiver
Envato Elements is an excellent resource if you've got plenty of presentations to do. But if you need a single presentation template for one-off use, try GraphicRiver.
.png "describe the steps involved in creating a power point presentation")
GraphicRiver is a great option if you prefer to pay as you go, and choose a single PowerPoint presentation template each time you need to create a new presentation.
How to Prepare a Good Presentation Step by Step in 2024 (+ Expert Quotes)
Now, let's look at some of the key steps in preparing a presentation, covering everything from topic selection to delivery, so you understand how to develop a presentation :
1. Choose the Right Topic

One of the most important presentation preparation tips is to pick the right topic for your presentation . You've got a few choices that'll give you a head start on wowing your audience. For example, you can:
- Choose a topic you're passionate about. This will make it easy to give an animated and appealing presentation.
- Pick your topic based on your knowledge and skills, so that you can wow your audience with the information you include.
- Do a data-driven presentation based on the latest statistics on a topic of interest, plus your expert opinion or conclusions.
- Select a presentation topic that relates to your business goals, such as reporting on key performance indicators (KPIs) or revenue .
Stephanie Schwab , Marketing Expert, Coach and Consultant, advises:
"Finding the right topic is all about knowing your audience. What's keeping them up at night? What do they really need to hear from you, right now, that will help them in their lives, or their businesses? If you're not sure what they need, ask them - survey them through email, ask your community on social media, talk to your customers directly. Meet your audience where they are and they will come to you again and again."
2. Know Your Audience
Related to that, another important step in presentation preparation is to know your audience . Your presentation plan will be completely different depending on whether audience members are novices or experts in your topic. Understanding who you're presenting to helps you select appropriate data and anecdotes to convey your topic.
Jared Karol , Speaker, Coach and Group Facilitator, says it's extremely important to think of your audience when preparing your presentation:
"If you can trust that your content and presentation flow is solid, you can give more attention to how your audience is thinking and feeling during and after the presentation. Involve the audience as much as possible. Invite them to be part of the presentation––whether rhetorically by using "we" and/or "you" language––and literally by utilizing chat and poll features, or, depending on the size of the group, allowing verbal interaction. Remember that you are creating an experience, not just delivering content."
If you're presenting to the C-suite, you'll want to keep your presentation short and focused to avoid wasting their time . Learn more executive presentation preparation tips in the following article:

3. Brainstorm
The next tip in our series of presentation steps is to brainstorm. This can be something you do on your own or with others. Either way, note down initial ideas and inspiration for your presentation. Use tools like mind mapping to connect related concepts.
By the end of this process, you'll have a clearer idea of the intended focus of your presentation and can move onto the next stage of your presentation plan.
4. Do Your Research

If you're thinking about how to prepare a great presentation, one of the key elements that separates good business presentations from the rest is research.
Tara Furiani , CEO & Host, Not the HR Lady, says:
"On our show, Not the HR Lady, we are huge proponents of ‘facts’ and call on our audience to fact check us. Presentations must be rooted in more than the theories of the presenter, to be credible. This can take on a lot of different looks. For me, I use and reference a lot of movies, music and pop culture to humorously drive serious points home (like racism, misogyny, bigotry, etc…) and that means finding just the right clip that illustrates your point. Not all ‘research’ has to be academic in nature, but all presentations should call upon someone other than one’s own opinions, for maximum impact and action."
Once you know your topic, you can search for supporting information such as:
- recent news or features
- the latest statistics (taken from reliable sources like .gov and .edu industry reports, and Google Dataset Search )
- relevant quotations
Once you've got that information, you're ready for the next step in presentation preparation.
5. Plan Your Presentation
Now it's time to put your presentation plan together. This is where you bring together ideas from your brainstorm and information from your research and organize them into a rough outline.
A good way to do this is with headings for different parts of your presentation and bullet points with facts, quotes, and stats. By the end of this process, you'll have a pretty good idea of the content of your slides. That's a crucial part of presentation preparation.
6. Draft/Write Your Presentation
Of course, creating a presentation isn't just about the slides. Use the outline you've created to draft the spoken part of your presentation. It's good to start with an overview of what your presentation will cover. Get it right, and this will whet your audience's appetite and make them pay attention.
Plan your introduction to draw your audience in . Using a story, or an unusual fact or stat can help with this. Christina Strickland , Vice President of Crackerjack Marketing, says:
"Presentation introductions are a chance to capture your audience’s attention right away. This is a good time to set the tone for the presentation and the meeting in general. Before you head in, know in your own mind the objectives for yourself and for your audience. When you introduce the presentation, begin by laying out the objectives for the audience and then a quick overview of the format and flow. This will help participants know what to expect and the right time to ask questions."
Plan your conclusion, too. It's helpful to know where you're headed so you can steer your presentation the right way.
Use storytelling throughout to keep your audience's attention. Don't be concerned if the final spoken presentation is a little different from your prepared outline. The outline is a guide, but you'll know what you need to include or exclude as you start to polish the actual presentation.

That's part of the reason you don't always need to create your slides at the outline stage of presentation planning. Instead, update that initial outline based on what your ACTUAL presentation will be. Then it's time for slide preparation (PPT templates, as you'll see, will be a big asset for the next stage).
7. Design Your Presentation Slides

Wondering how to prepare your presentation with minimum hassle? Use a premium presentation template from Envato Elements to get a harmonious design. This means you can focus on your content, rather than worrying about needing graphic design skills . Remember, you can download unlimited PowerPoint presentation templates from Envato Elements, all for one low price.
There are also attractive PowerPoint presentation templates on GraphicRiver , for those preferring a single-use template. So, there's lots of choice.
Here are some other useful presentation preparation tips:
- Don't overdo the font choice . A single heading font and a single body font will be fine for most presentations.
- Choose your fonts carefully . Some fonts look attractive on your computer but are hard to read.
- Pay attention to font size . You'll need to make sure that even someone who's at the back of the room can read your slides.
- Avoid walls of text . They make slides hard to read and is pretty off-putting. A wall of text is a sure way to lose your audience.
- Make one key point per slide . Have a few supporting bullet points.
- Use charts, graphics, images, and quotes . They can help make your points and keep your audience's attention.
For more presentation creation tips, check out our in-depth PowerPoint tutorial: How to Use PowerPoint (Ultimate Tutorial Guide) .
8. Expect Questions
Once your main presentation is ready, there's one more way to make your presentation great. That's to prepare for questions. As part of your presentation planning, you should:
- Think about what people might ask about your presentation content and be ready with answers.
- Consider how to deliver your presentation to lead people to ask certain questions that you're prepared for.
- Prepare an answer for when you've got no answer so that you're not left floundering.
Christina Strickland says:
"Unexpected questions are bound to happen. Don’t feel like you are required to answer every question that comes up. It’s always good to have a few different responses prepared for different types of questions. Remember, it’s ok to say “That’s a really good question but it’s not really in my area of expertise.”"
9. Practice the Presentation

When you're happy with your slides and have prepared for questions, it's time for some presentation practice. This is where you do a complete run-through of your presentation, with both your presentation script and the slides.
As you practice, pay attention to anything that doesn't flow, or is hard to say . Edit both your script and your presentation slides to remove these items. You don't want to be stumbling over your words on the day.
Some people prefer to practice alone but consider using a few friends or trusted colleagues as a test audience. It's a good way to make sure your material is clear and easy to understand.
Keep practicing till you feel you know your material inside out. This will help you deliver a polished presentation when it's time. If you're presenting online, Jared Karol suggests:
"The biggest thing to focus on when delivering presentations virtually is the idea of presence over performance. Try to recreate as closely as possible the vibe and feel you would create if you were all in the room together. Yes, prepare and rehearse. Yes, make sure the technology is good to go. And, remember that how you deliver the information is just as important as what information you're delivering. Wherever possible, try to personalize and humanize your presentation. Try to make your audience feel something not just remember something."
To learn more about presenting in public, read our public speaking guide:
.jpg)
10. Prepare the Room
When thinking about how to practice for a presentation, there's one element some people overlook: the presentation space . If it's possible, check it out well before it's time for you to present.
One thing to pay attention to is the presentation equipment. Whether you're using a laptop and screen, a projector and screen, or some other piece of technology, get familiar with the presentation technology so you can ensure it'll work as expected.
And if you're able to book rehearsal time, take advantage of it. If you do, there won't be any surprises on the day.
Here are a few additional tips for giving an online presentation.
11. Adjust Slide Design For Virtual Displays

If you're doing a virtual presentation, one of the most important tips for presentation preparation is to adjust the design of your slides. People will tune in from different size screens. So, make sure you don't have any text too near the top, bottom or sides of the slide, or some people won't be able to see it. Stephanie Schwab says:
"I like to give instructions to the audience on how to get the best view of the presentation; I use Zoom most of the time, so I'll do a quick explanation of how to switch from gallery view to speaker view, and how to slide the screensharing portion bigger or smaller. That way I can have a little bit more confidence that the audience will take in the presentation in the way I want them to see it, and not get distracted by gallery view."
12. Look After Background and Lighting
We've all been on Zoom calls where the speaker is backlit, or where there's something distracting in the background. Avoid both of these so your audience can focus on your presentation. Experiment with the room you're presenting in to find the best lighting or get a ring light or two to ensure your face is always visible. And consider using a virtual background to keep distractions to a minimum.
Tara Furiani says:
"The differences between presentations online and those that are in-person, are largely dependent on the skill of the facilitator. For example, one who’s engaging, tech savvy and can command a room… should find the presentations in-person or online, pretty much the same. When I present in a live setting, I use far less imagery than I would for an online session, because the focus would be on me. Virtually, I tend to add a touch more visual content, since my face alone should only be looked at for so long. By anyone."
13. Use Interactive Features
When preparing your presentation plan for an online presentation, try interactive features in your delivery platform to keep the audience engaged. Since you won't be able to use - or see body language - here are some tactics to try:
- Include polls.
- Ask questions people can respond to in the chat section.
- Encourage the use of emoji reactions to get the audience involved.
These features are a big advantage of presenting online, says Tara Furiani:
"One shift, I think, that we will miss about online presentations (when in-person becomes the ‘norm’ again) is the ability to know, in the moment, if you are affecting change with people and resonating. Reactions, re-quotes, comments, and questions are delivered to us, while we are presenting, instantaneously… training survey be damned, this is real-time feedback. We’re going to miss that; I just know it. In real life, save for applause, there aren’t ‘reactions’ to click that appear over the speakers’ head… maybe there should be?"
Presentation Preparation: Online vs In-Person
More conferences and events are being held online, and that's likely to continue. That means going one step further to understand how to develop a presentation to give a virtual audience a great experience. Stephanie Schwab comments:
"A lot of people think that giving an online presentation means you have to show slides the whole time - and I think just the opposite. I might have some slides to backup some of my points, but I'm usually pretty fluid between sharing my screen with a slide and then turning off sharing, so that the online audience can focus on me."
Do you wonder "what is a good presentation for online audiences?" Here are some differences in presentation preparation between online and in-person presentations.
- You can't read the room . When presenting in-person, you can tell if people are engaged because they may lean forward, make eye contact or respond in some way. On a video call, you may not be able to see them properly, and they'll likely be muted to avoid background noise. To make up for this, pause regularly and ask for comments or feedback.
- You can't rely on body language . An in-person presenter can use physicality for emphasis. That's not possible in the boundaries of a small screen.
- Visual cues are essential . In-person you can gesture or point at a key part of your slides. That's harder on a small screen. So, design your slides with visual cues like arrows and circles to direct your audience to what's most important on any slide.
- Working technology is more important for virtual presentations. It's essential to ensure your mic and camera are working properly so you look professional. In contrast, you always have the option of going tech-free in an in-person presentation.
- You handle questions differently . In-person, it's pretty easy to see when someone has a question, especially in a small room. Online, that's much harder, so have someone on hand to keep track of who's raised a hand or typed a question into the chat box.
- Camera position is crucial. In-person, you may not have a camera. Even if you do, you can walk around the room to make eye contact with different people. That's not possible online, so make sure you're looking directly into the camera. That will allow you to make virtual eye contact with every participant.
Learn More About How to Prepare Your Presentation
Now you know how to prepare a good presentation, but don't stop there. Find even more useful presentation preparation tips in the following guides and tutorials:

Find More Presentation Templates
Are you still looking for the right presentation template? Find great templates for any type of presentation in the following roundups:

Start Your Presentation Preparation
Now, it's your turn to prepare a presentation. You've learned some key presentation steps, including the importance of developing a presentation plan as well as the importance of presentation practice. You're ready to get started.
Don't forget. You can find attractive PowerPoint presentation templates on Envato Elements. And, for one-off use, you can also choose from the presentation templates on GraphicRiver. Check out the best PowerPoint templates available today.
Editorial Note: This post has been updated with contributions from Sharon Hurley Hall . Sharon is a freelance instructor for Envato Tuts+.

Creating an effective Power Point presentation: 5 steps for clear and functional presentations
When we want to create presentations either to share with colleagues, to send to friends or to help us during a presentation, we often turn to Microsoft Power Point to help us communicate our message clearly. Just as often, however, we sometimes see awkward presentations that do not encourage learning and participation and neither do they hold people’s attention. Usually we strive to decorate and enrich our slides so much that they become overstated: instead, in order to be truly useful, they must be clear and simple. Here are 5 useful practical tips for creating an effective Power Point presentation.
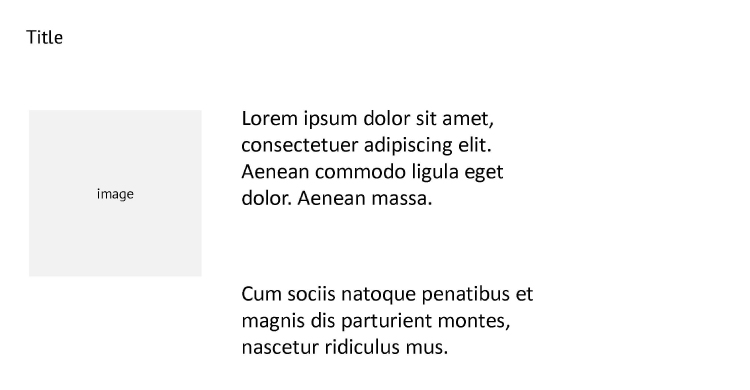
Michela Scocco
May also be of interest
Performance management, the telecom experience: how to positively communicate evaluation and development plans, news and events, the learning path method in blended training design, the learningpath method: chronicles of a posterlab.

Basic tasks for creating a PowerPoint presentation
PowerPoint presentations work like slide shows. To convey a message or a story, you break it down into slides. Think of each slide as a blank canvas for the pictures and words that help you tell your story.
Choose a theme
When you open PowerPoint, you’ll see some built-in themes and templates . A theme is a slide design that contains matching colors, fonts, and special effects like shadows, reflections, and more.
On the File tab of the Ribbon, select New , and then choose a theme.
PowerPoint shows you a preview of the theme, with four color variations to choose from on the right side.
Click Create , or pick a color variation and then click Create .

Read more: Use or create themes in PowerPoint
Insert a new slide
On the Home tab, click the bottom half of New Slide , and pick a slide layout.

Read more: Add, rearrange, and delete slides .
Save your presentation
On the File tab, choose Save .
Pick or browse to a folder.
In the File name box, type a name for your presentation, and then choose Save .
Note: If you frequently save files to a certain folder, you can ‘pin’ the path so that it is always available (as shown below).

Tip: Save your work as you go. Press Ctrl+S often or save the file to OneDrive and let AutoSave take care of it for you.
Read more: Save your presentation file
Select a text placeholder, and begin typing.

Format your text
Select the text.
Under Drawing Tools , choose Format .

Do one of the following:
To change the color of your text, choose Text Fill , and then choose a color.
To change the outline color of your text, choose Text Outline , and then choose a color.
To apply a shadow, reflection, glow, bevel, 3-D rotation, a transform, choose Text Effects , and then choose the effect you want.
Change the fonts
Change the color of text on a slide
Add bullets or numbers to text
Format text as superscript or subscript
Add pictures
On the Insert tab, select Pictures , then do one of the following:
To insert a picture that is saved on your local drive or an internal server, choose This Device , browse for the picture, and then choose Insert .
(For Microsoft 365 subscribers) To insert a picture from our library, choose Stock Images , browse for a picture, select it and choose Insert .
To insert a picture from the web, choose Online Pictures , and use the search box to find a picture. Choose a picture, and then click Insert .

You can add shapes to illustrate your slide.
On the Insert tab, select Shapes , and then select a shape from the menu that appears.
In the slide area, click and drag to draw the shape.
Select the Format or Shape Format tab on the ribbon. Open the Shape Styles gallery to quickly add a color and style (including shading) to the selected shape.

Add speaker notes
Slides are best when you don’t cram in too much information. You can put helpful facts and notes in the speaker notes, and refer to them as you present.

Click inside the Notes pane below the slide, and begin typing your notes.

Add speaker notes to your slides
Print slides with or without speaker notes
Give your presentation
On the Slide Show tab, do one of the following:
To start the presentation at the first slide, in the Start Slide Show group, click From Beginning .

If you’re not at the first slide and want to start from where you are, click From Current Slide .
If you need to present to people who are not where you are, click Present Online to set up a presentation on the web, and then choose one of the following options:
Broadcast your PowerPoint presentation online to a remote audience
View your speaker notes as you deliver your slide show.
Get out of Slide Show view
To get out of Slide Show view at any time, on the keyboard, press Esc .
You can quickly apply a theme when you're starting a new presentation:
On the File tab, click New .
Select a theme.

Read more: Apply a design theme to your presentation
In the slide thumbnail pane on the left, select the slide that you want your new slide to follow.
On the Home tab, select the lower half of New Slide .
From the menu, select the layout that you want for your new slide.
Your new slide is inserted, and you can click inside a placeholder to begin adding content.
Learn more about slide layouts
Read more: Add, rearrange, and delete slides
PowerPoint for the web automatically saves your work to your OneDrive, in the cloud.
To change the name of the automatically saved file:
In the title bar, click the file name.
In the File Name box, enter the name you want to apply to the file.
If you want to change the cloud storage location, at the right end of the Location box, click the arrow symbol, then navigate to the folder you want, then select Move here .
On the Home tab, use the Font options:

Select from other formatting options such as Bold , Italic , Underline , Strikethrough , Subscript , and Superscript .
On the Insert tab, select Pictures .
From the menu, select where you want to insert the picture from:

Browse to the image you want, select it, then select Insert .
After the image is inserted on the slide, you can select it and drag to reposition it, and you can select and drag a corner handle to resize the image.
On the slide canvas, click and drag to draw the shape.
Select the Shape tab on the ribbon. Open the Shape Styles gallery to quickly add a color and style (including shading) to the selected shape.

A horizontal Notes pane appears at the bottom of the window, below the slide.
Click in the pane, then enter text.

On the Slide Show tab, select Play From Beginning .

To navigate through the slides, simply click the mouse or press the spacebar.
Tip: You can also use the forward and back arrow keys on your keyboard to navigate through the slide show.
Read more: Present your slide show
Stop a slide show
To get out of Slide Show view at any time, on the keyboard, press Esc.
The full-screen slide show will close, and you will be returned to the editing view of the file.
Tips for creating an effective presentation
Consider the following tips to keep your audience interested.
Minimize the number of slides
To maintain a clear message and to keep your audience attentive and interested, keep the number of slides in your presentation to a minimum.
Choose an audience-friendly font size
The audience must be able to read your slides from a distance. Generally speaking, a font size smaller than 30 might be too difficult for the audience to see.
Keep your slide text simple
You want your audience to listen to you present your information, instead of reading the screen. Use bullets or short sentences, and try to keep each item to one line.
Some projectors crop slides at the edges, so that long sentences might be cropped.
Use visuals to help express your message
Pictures, charts, graphs, and SmartArt graphics provide visual cues for your audience to remember. Add meaningful art to complement the text and messaging on your slides.
As with text, however, avoid including too many visual aids on your slide.
Make labels for charts and graphs understandable
Use only enough text to make label elements in a chart or graph comprehensible.
Apply subtle, consistent slide backgrounds
Choose an appealing, consistent template or theme that is not too eye-catching. You don't want the background or design to detract from your message.
However, you also want to provide a contrast between the background color and text color. The built-in themes in PowerPoint set the contrast between a light background with dark colored text or dark background with light colored text.
For more information about how to use themes, see Apply a theme to add color and style to your presentation .
Check the spelling and grammar
To earn and maintain the respect of your audience, always check the spelling and grammar in your presentation .
Top of Page

Need more help?
Want more options.
Explore subscription benefits, browse training courses, learn how to secure your device, and more.

Microsoft 365 subscription benefits

Microsoft 365 training

Microsoft security

Accessibility center
Communities help you ask and answer questions, give feedback, and hear from experts with rich knowledge.

Ask the Microsoft Community

Microsoft Tech Community

Windows Insiders
Microsoft 365 Insiders
Was this information helpful?
Thank you for your feedback.
- Your organization A tailored solution to unlock your organization’s full potential
- Your tools Tools for achieving excellence in your work
- Your content Unlimited content available directly in Office
- Your IT Future proof software to leverage your IT infrastructure
- PowerPoint Perfect presentations at a fraction of the time
- Excel Workbooks and models with rigorous error checking
- Word Document formatting made simple
- Outlook Outstanding collaboration coming to you soon...
- Charts Beautiful PowerPoint charts at a click
- Guides and tutorials
- Book a demo
4 steps to great presentations
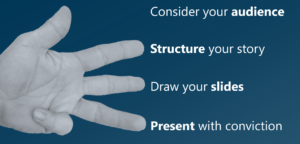
We all want to get the most yield from our efforts. So, we often rush into our work tasks. When crafting slides to support your story it pays to ‘slow down to speed up’.
Follow these 4 steps to make great presentations.
1) consider your audience and their vantage point.
Are you giving a talk where you are the main star? Or are you just presenting (yet another) monthly status update? Does your audience know the subject well? Have they had the chance to read your materials up front? How much time do you have? What is the set-up? Face-to-face? Teleconference? Videoconference? Classic presenter-to-audience?
Your visuals should be crafted accordingly and should differ depending on how you answer the above questions.
2) Structure the story you want to tell
Sketch up a rough structure of your story before you start making slides. Our secret trick is to write up the Executive Summary first – when done right, each statement in the summary will represent a separate slide. Emphasize one point per slide.
Check that you have a clear beginning, middle, and end. Be sure to end with a persuasive call to action.
3) Draw your slides accordingly
With a strong structure in place, it is time to make slides. One slide for each of the main statements in your summary. As you go, draft the content of each slide to ensure that it supports the headline. A few tips:
- Keep it simple – your concepts and frameworks should be instantly understandable and should be easy to communicate. Avoid animations.
- A picture is worth a thousand words. One strong image is much better than even the most eloquent formulations.
- Be stingy with your words and allow yourself to elaborate in voice over – if your audience starts reading, they stop listening to you. That is bad.
- A chart is better than a table when presenting numbers. Always. Most people grasp development in numbers better when presented as a chart.
4) Present with conviction
How you should present differs greatly depending on the set-up. Relaying a message via a conference call is different than doing it in person. But there are some universal principles. Start with briefly laying out the structure of the whole story. Then walk through each slide, start with the headline, then explain the content thoroughly, and finally conclude.
Clear the slide completely by asking for questions before advancing in your presentation.
That is it. Follow these 4 steps and you’re well on the way to make great presentations.
- Privacy policy
Why Ampler?
- Your organization
- Your content
Get Started
This website uses cookies in order to improve the user experience. When you continue to use this site, you accept the use of cookies. Read more about our cookie policy here .
IMAGES
VIDEO
COMMENTS
To do that, simply go up to the Home tab and click on New Slide. This inserts a new slide in your presentation right after the one you were on. You can alternatively hit Ctrl+M on your keyboard to insert a new blank slide in PowerPoint. To learn more about this shortcut, see my guide on using Ctrl+M in PowerPoint.
Step 1 - preparing to create your PowerPoint presentation. Preparing for creating your presentation is one of the KEY STEPS that can set your presentation apart. A good PowerPoint presentation is engaging & easy to follow, aesthetically beautiful, has a clear objective, and actionable next steps (wherever possible).
Under Drawing Tools, choose Format. Do one of the following: To change the color of your text, choose Text Fill, and then choose a color. To change the outline color of your text, choose Text Outline, and then choose a color. To apply a shadow, reflection, glow, bevel, 3-D rotation, a transform, choose Text Effects, and then choose the effect ...
On the Home tab, click New Slide. To choose a different slide layout, click the arrow next to New Slide and then click the slide layout you want. On the Transitions tab, click the transition you want. To see more transitions, expand the Transition gallery . On the Transitions tab, click Apply To All. Now you've set up a presentation with a ...
Create a presentation. Open PowerPoint. In the left pane, select New. Select an option: To create a presentation from scratch, select Blank Presentation. To use a prepared design, select one of the templates. To see tips for using PowerPoint, select Take a Tour, and then select Create, . Add a slide.
7 steps to create a presentation in PowerPoint. Begin with a surprise or bold statement. Provide necessary background information. Frame your presentation as a story. Keep the text concise and meaningful. Use visuals to complement the text. Incorporate interactive design. Conclude with actionable insights.
Step 3: Create Title Page. Click the first box that says 'Click to add title' and add the title of your presentation. Click the bottom box to add your name, or any other subtitle that you choose. Once you have your text in the boxes, you can change their font, size, color, etc. with the toolbar options at the top.
First, open the presentation file you saved to your computer. Once the presentation file is open, select "Slide Show" from the top toolbar. You can start the presentation from the beginning or at the current slide. Select "From the beginning," and the display fills the entire computer screen.
There are many different creative ways of creating slides. In this post, I'll take you through a quick and easy way to use when you're short of time. 2. Put one statement on each slide. Take each main point of your presentation and express it as a short and succinct statement. Put each statement on one slide.
Open the PowerPoint app, select a template and theme, then like "Create.". Click the text box to add your title and subtitle to create your title slide. Click the "Insert" tab, then "New Slide" to add another slide. Choose the type of slide you want to add, then add text and pictures. Rearrange slides by dragging them up or down in ...
Step 2: Choose a Template. Select a template or a blank presentation to start creating your slides. PowerPoint offers a variety of templates to fit every need and occasion. Whether you want something simple and professional or colorful and creative, there's a template for you. If you prefer to start from scratch, you can choose a blank ...
Go to the menu bar at the top of the page and select "Insert" and "New Slide." You'll see a new blank slide that looks a little different. The makers of PowerPoint have tried to make this easy and have guessed that you'd like to have a title and some text on your second page. That's why you see "Click to add title" and "Click to add ...
Get started with TED Masterclass. When preparing for your presentation, there are 5 steps to keep in mind when preparing for your presentation. These include: choosing the right software for your needs, organizing your files, preparing your presentation materials, practice, and make sure to do a final test run.
To change your PowerPoint theme, navigate to the Design tab on PowerPoint's ribbon. Click the drop-down arrow. Choose one of the thumbnails to change your PowerPoint theme to the best one for your presentation. Change theme designs in PowerPoint. Using themes and adding your content goes hand-in-hand.
1. Choose the Right Topic. One of the first presentation steps is picking the right presentation topic. One of the most important presentation preparation tips is to pick the right topic for your presentation. You've got a few choices that'll give you a head start on wowing your audience.
This step by step guide for creating a PowerPoint presentation is an actual recreation of narrations by a few of my blind students who described the process to me after we had worked for several weeks on creating presentations. Once desired slide is located with the arrow keys, press F6 until screenreader announces "To select an object, press ...
After reading this text kindly do a Powerpoint project on given below question. Ques. Create 5 slides presentation on Delhi Metro using Text, Pictures, Animation and transition effects. Note: For above question kindly refer given below notes step by step and PPT in the form attachment.
Click "Blank Presentation" on the opening screen and edit it to your liking. You can also create a new PowerPoint by clicking "File" to switch to "Backstage View" and then "New" which gives you the option to choose a blank presentation, choose a template or search templates. On the "Home" tab, click the "New Slide ...
Study with Quizlet and memorize flashcards containing terms like Sequence the steps to create a section outline slide in a presentation in PowerPoint Office 365., What are two ways to reuse slides across presentations in PowerPoint Office 365?, Sequence the steps to create and customize a master slide that can be reused as a template in PowerPoint Office 365. and more.
Here are 5 useful practical tips for creating an effective Power Point presentation. Prepare a general outline and keep to a pattern. We can give a function to every part of the slide: for example, we always put the title and subtitle in the top left hand corner and we use this pattern in every slide.
Under Drawing Tools, choose Format. Do one of the following: To change the color of your text, choose Text Fill, and then choose a color. To change the outline color of your text, choose Text Outline, and then choose a color. To apply a shadow, reflection, glow, bevel, 3-D rotation, a transform, choose Text Effects, and then choose the effect ...
2) Structure the story you want to tell. Sketch up a rough structure of your story before you start making slides. Our secret trick is to write up the Executive Summary first - when done right, each statement in the summary will represent a separate slide. Emphasize one point per slide. Check that you have a clear beginning, middle, and end.