- Use Presenter View Video
- Add speaker notes Video
- Practice and time your presentation Video
- Record a presentation Video
- Print a presentation Video


Use Presenter View

PowerPoint Presenter View shows you the current slide, the next slide, and your speaker notes, to help you focus while presenting and connect with your audience.
Select the Slide Show tab.
Select the Use Presenter View checkbox.

Select which monitor to display Presenter View on.

In Presenter View , you can:
See your current slide, next slide, and speaker notes.
Select the arrows next to the slide number to go between slides.
Select the pause button or reset button to pause or reset the slide timer in the upper left.
See the current time to help you pace your presentation.
Select the font icons to make the speaker notes larger or smaller.
Select the annotations pen icon to draw on the screen in real time, or select a laser pointer.
Select the thumbnail icon to see all the slides in your presentation and quickly jump to another slide.
Select the magnifying glass icon to zoom in on a particular part of a slide.
The screen icon let's you make the screen temporarily black to focus the attention on you.
Select END SLIDESHOW when you're done presenting.
Start the presentation and see your notes in Presenter view

Need more help?
Want more options.
Explore subscription benefits, browse training courses, learn how to secure your device, and more.

Microsoft 365 subscription benefits

Microsoft 365 training

Microsoft security

Accessibility center
Communities help you ask and answer questions, give feedback, and hear from experts with rich knowledge.

Ask the Microsoft Community

Microsoft Tech Community

Windows Insiders
Microsoft 365 Insiders
Was this information helpful?
Thank you for your feedback.
- Slidesgo School
- PowerPoint Tutorials
How to Use the Presentation Modes and the Screen Recording Features in PowerPoint

After designing all the slides for your presentation, the next and last step is presenting in front of your audience. In this new Slidesgo School tutorial, you’ll see how the presenter view works and how you can record your presentation .
Presentation Modes
Presentation modes — set up slide show, presentation modes — record slide show.
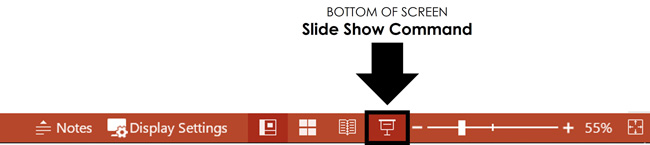
- There are different presentation modes in PowerPoint, besides the one you can find at the bottom of the screen.
- To access the presentation modes, go to the Slide Show tab.
- The first two options allow you to start the presentation from the beginning or from the currently selected slide.

- If you choose Present Online, an URL will be generated, which you can then share with your potential online viewers. After clicking this button, a new window will open, displaying info about the Microsoft Office online presentation service and a checkbox to enable remote download for your online audience. To enjoy this service, you need an Office 365 account. When you’re ready, click Connect to generate the URL.
- If you choose Custom Slide Show, you can select which slides to display in your presentation. First, create a new custom slide show and select the slides that you want to display. Then, click Add, enter the name of the presentation and click OK. This new custom presentation will appear on the list. Select it and click Show to begin the presentation.
- In the Set Up group you’ll find options to set up the presentation, hide slides, rehearse your presentation and even record it.
- Click Set Up Slide Show to adjust several settings regarding your presentation. You’ll find more information in the next section of this tutorial .
- If you click Hide Slide, the selected slide won’t show up during your presentation. Hidden slides will appear faded out on the list and their numbers will be crossed out.
- If you click Record Slide Show, you’ll be able to record your presentation from the beginning or from the current slide. We’ll go into detail in the last section of this tutorial.
- There are several checkboxes regarding whether to play narrations, use timings and show media controls.

- In the Monitors group you can choose which screen to display your presentation.
- The last group, Captions & Subtitles, is only available in Office 365. You’ll find options to enable subtitles, which will be generated out of your speech (so you’ll need to have a mic). There are settings to change the language and the position of the subtitles.
- Open your presentation in PowerPoint.
- Go to the Slide Show tab.
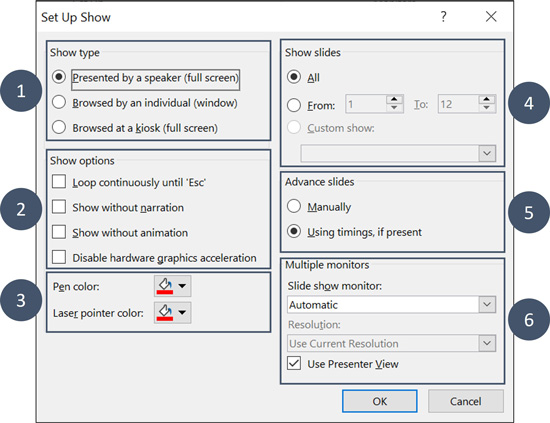
- In the Set Up group, click Set Up Slide Show. A new window will open, where you’ll find several options.
- In the top-left corner, under “Show type”, you can choose whether the presentation will be in fullscreen with speaker notes, windowed, or in fullscreen without speaker notes or the menu bar.

- Under “Show options” you can choose whether to show the presentation without narration or animations, or disable the hardware graphics acceleration (for better performance). You can also set the pen and laser pointer color.

- Under “Show slides”, you can choose which slides to show in your presentation. You can select all of them, a specific range or a custom slideshow.
- There are other settings to determine how to advance slides (manually or using timings), what the resolution will be and whether to use the presenter view.
- Click Record Slide Show. From the drop-down menu, select From the Current Slide or From the Beginning.
- A new window will open, along with the presentation in fullscreen mode. At the top-left you’ll find a button to start recording.
Do you find this article useful?
Related tutorials.

How to Use the Presenter View in Google Slides
Google Slides, like PowerPoint, has different presentation modes that can come in handy when you’re presenting and you want your slideshow to look smooth. Whether you’re looking for slides only, speaker notes or the Q&A feature, in this new Google Slides tutorial, you’ll learn about these and their respective settings. Ready? Then let’s explore the presenter view!

How to Download Google Slides Templates
When preparing a presentation, many people start panicking because they realize how much time it will take to edit each and every slide. Creating them from scratch, filling them in, looking for pictures, moving the elements...How stressful! But there is a solution that saves you a lot of time. We're sure that you've browsed the internet for templates, or basically, pre-established designs and elements, that can be downloaded for free and can be edited to your liking. Are we right? Then, we have some good news for you!

Discover our collection of printable templates
With the advance of technology, printing has become something that is no longer a necessity. Smartphones have made the paper format less and less frequent, but there are still certain cases in which having physical resources is much more convenient. Whether it's for taking notes, handing out assignments, making worksheets or handing out business cards or invitations, it's necessary to print your customized designs.From now on, in every Slidesgo printable presentation that you download, you will find the instructions for printing on the third slide. Depending on the style, colors or format of each presentation, we will tell you if you can...

How to Add Superscript and Subscript in Google Slides
Let’s take the most famous formula: E=mc^2, Einstein’s relativity equation. It wouldn’t be the same if it was E=mc2, right? Okay, yes, some people write it like that because it’s very famous and it won’t be misunderstood. But technically… It can! This is where the sophistication of superscript or subscript enters the room! Do you know how to write them in equations, copyright brands or even footnotes in your presentations? Let’s figure out how.

Powerpoint Assist
Tips for Powerpoint by Regina Griffin
How To Get Into Presentation Mode In PowerPoint
Are you looking to take your PowerPoint presentations to the next level?
Presentation Mode in PowerPoint is a powerful tool that can help you create engaging and professional presentations.
We will discuss why you should use Presentation Mode, how to enter it, its key features, and how to navigate through your slides.
Explore the ins and outs of Presentation Mode in PowerPoint, brought to you by teacher Regina Griffin from Oregon, US. Enhance your presentation skills!
Key Takeaways:
- Presentation mode in PowerPoint allows for a more engaging and organized presentation, resulting in a better experience for both the presenter and the audience.
- To enter presentation mode, simply click on the “Slide Show” tab and select “From Beginning” or “From Current Slide”.
- Presentation mode offers features such as a full-screen display, laser pointer/pen tool, and presenter view with notes and slide previews, making it easier to navigate through slides and deliver a professional presentation.
What Is Presentation Mode in PowerPoint?
Presentation Mode in PowerPoint refers to a feature that allows presenters to display their slides in a full-screen view, enhancing the visual impact of their presentation.
This mode is particularly useful during formal presentations, as it eliminates distractions and ensures that the audience’s focus remains on the content being discussed. In Presentation Mode , presenters can navigate through their slides smoothly, interact with their content, and make annotations in real time. One notable advantage of this mode is the Presenter view , where speakers can see upcoming slides, and speaker notes, and even manage time effectively without disrupting the flow of the presentation.
Why Use Presentation Mode in PowerPoint?
Using Presentation Mode in PowerPoint offers numerous advantages, such as creating a more engaging and professional presentation experience for both the presenter and the audience.
When in Presentation Mode, your PowerPoint transforms into a seamless slide show that eliminates distractions and focuses solely on your content. This feature optimizes the screen view for your audience, ensuring they stay engrossed in your message.
Presentation Mode allows the presenter to navigate slides effortlessly, maintaining a smooth flow of information that keeps the audience’s attention intact. The ability to preview slides on a separate monitor while presenting ensures that the speaker remains in control of the presentation pace and content delivery.
Allows for a more engaging and professional presentation
One of the key reasons to use Presentation Mode in PowerPoint is that it allows presenters to deliver a more engaging and professional presentation by providing advanced control over their slides, including features like a laser pointer .
With Presentation Mode, presenters can seamlessly navigate through their slides, controlling the flow of information and keeping the audience’s attention focused. The ability to access advanced controls such as animations, transitions, and speaker notes enhances the overall delivery quality.
The built-in laser pointer feature enables presenters to highlight specific points on the slides, emphasizing crucial information and guiding the audience’s focus. This interactive element adds a dynamic touch to the presentation, making it more engaging and memorable.
Helps the presenter stay on track and organized
Presentation Mode in PowerPoint aids presenters in maintaining focus, organization, and efficiency throughout their presentation by offering tools like Presenter View, where notes and slide previews can be accessed.
This feature is particularly useful as it allows presenters to keep an eye on upcoming slides while also referring to their speaking notes discreetly, enhancing the flow of the presentation. The ability to adjust display settings such as screen mirroring or extending desktops simplifies the setup process, ensuring that the presentation runs smoothly. The note-taking capabilities within Presentation Mode enable presenters to jot down important points or reminders directly within the application, eliminating the need for external notes and promoting a more organized approach to presenting.
Provides a better experience for the audience
Engaging Presentation Mode in PowerPoint not only benefits the presenter but also enhances the audience’s experience by ensuring a seamless and visually appealing display of the content.
When toggling to Presentation Mode, the display settings undergo a transformation that optimizes the presentation for viewer interaction. The ability to seamlessly swap displays allows the presenter to effortlessly navigate through slides, ensuring a smooth transition between different sections of the presentation. This elegant integration of features not only captivates the audience but also enables a more fluid and engaging delivery of the content. The visual appeal of the slides is enhanced, making it easier for viewers to follow along and grasp the key points being presented.
How to Enter Presentation Mode in PowerPoint?
To enter Presentation Mode in PowerPoint, follow these simple steps: open your presentation, click on the ‘Slide Show’ tab in the menu bar, and select ‘From Beginning’ or ‘From Current Slide’ to start your presentation.
If you want to ensure a seamless transition into Presentation Mode, it’s essential to set the right display options. First, check your display settings by going to the ‘Slide Show’ tab and clicking on ‘Set Up Slide Show.’ Here, you can choose whether to present your slides on the primary monitor, a secondary monitor, or in a window. Make sure to select the appropriate display mode based on your setup to guarantee a professional and effective presentation.
Step 1: Open your PowerPoint presentation
The first step to enter Presentation Mode in PowerPoint is to ensure that your presentation file is open and ready for display.
To do so, open PowerPoint and locate the file containing your presentation. Click on the file to open it. Review that the slides are arranged in the correct order and that any speaker notes or animations are set up as desired. Check the slide sorter view to confirm the flow of your presentation. Ensure that the current slide is the one you want to begin with when Presentation Mode is activated. This initial setup is crucial for a seamless transition into your presentation.
Step 2: Click on the ‘Slide Show’ tab in the top menu bar
Once your presentation is open, navigate to the ‘Slide Show’ tab located in the top menu bar of PowerPoint to access presentation controls and features like zooming into specific slides.
Once you’re on the ‘Slide Show’ tab, you’ll find a variety of essential controls that aid in delivering a seamless presentation experience. Here, you can click on ‘From Beginning’ to start the slide show from the very first slide. You can choose ‘From Current Slide’ to begin from the slide you’re currently on.
You’ll notice the ‘Slide Show’ tab offers options to toggle various functionalities like accessing presenter view or setting up custom slide shows. This tab is a hub of useful tools that elevate your presentation delivery.
Step 3: Select ‘From Beginning’ or ‘From Current Slide’ to start the presentation
After accessing the ‘Slide Show’ tab, choose between the ‘From Beginning’ or ‘From Current Slide’ options to initiate your presentation in Presentation Mode, ensuring the desired display settings and presenter view are selected.
When you opt for ‘From Beginning,’ your presentation will start from the very first slide, whereas selecting ‘From Current Slide’ allows you to start your presentation from the slide you are currently on. This choice depends on whether you want to begin at the start of the presentation or jump in at a specific point.
It is crucial to carefully review and adjust the display settings to ensure that your content appears as intended on the screen during the presentation. Make sure to enable the presenter view option for a more dynamic and organized delivery of your content, offering you control over what the audience sees and what you see on your screen.
What Are the Features of Presentation Mode in PowerPoint?
The features of Presentation Mode in PowerPoint are designed to enhance the presenter’s experience and engage the audience, offering functionalities such as Presenter view with notes, laser pointer integration, and slide previews.
Presenter view with notes allows speakers to refer to their talking points discreetly, ensuring a seamless delivery. The incorporated laser pointer feature permits highlighting key areas on slides, directing the audience’s focus effectively. Slide previews provide a comprehensive overview of the presentation flow, aiding in smoother transitions between topics. The option to hide or reveal slides as needed enhances the element of surprise and control during the presentation, captivating the audience’s attention. These combined features transform the presenter’s performance into a dynamic and engaging experience for all participants.
Full-screen display of slides
Presentation Mode in PowerPoint offers a full-screen display of slides, ensuring that the audience can focus solely on the content being presented.
This feature eliminates distractions and directs attention to the key points of the presentation. By seamlessly transitioning between slides, the flow of information is maintained, keeping the audience engaged throughout the talk. The full-screen view enhances the visibility of multimedia elements, such as images and videos, making them more impactful.
Ability to use a laser pointer or pen tool
Presentation Mode enables presenters to use a laser pointer or a pen tool to highlight key points on slides, enhancing the clarity and impact of their presentation.
The laser pointer, a staple in traditional presentations, offers a precise way to direct attention to specific details, aiding in engaging the audience. On the other hand, the pen tool, usually found in digital platforms like smartphone apps or presentation software, allows for more creativity and flexibility in drawing emphasis without the need for physical devices like remote controls. This versatility caters to different presenter preferences and presentation styles, ensuring a dynamic and interactive delivery of content.
Presenter view with notes and slide previews
Presenter view in PowerPoint provides presenters with a comprehensive overview of their slides, including notes and slide previews, facilitating better organization and seamless delivery.
When utilizing the Presenter view, presenters gain the advantage of accessing notes discretely without them being displayed to the audience, allowing for a more professional and polished delivery. In addition, having a live preview of the upcoming slides enables the presenter to seamlessly transition between points, enhancing the flow of the presentation. Through system preferences or the displays app, customization options such as adjusting the layout to suit individual preferences or toggling between speaker notes and slide previews can be easily configured, providing a tailored experience for each presenter.
Option to hide the presentation controls
One convenient feature of Presentation Mode is the ability to hide presentation controls , providing a cleaner and more immersive viewing experience for both the presenter and the audience.
By opting to hide presentation controls, presenters can focus on delivering their content without any distractions or overlays obstructing their view. This is especially beneficial when engaging in live demonstrations, showcasing visual content, or utilizing mirror displays for a seamless and professional presentation.
In scenarios where presenters are utilizing a two-monitor setup for advanced display configurations, such as showing notes on one screen while presenting on the other, hiding presentation controls on the main display ensures that only the essential content is visible to the audience, maintaining a neat and streamlined appearance.
How to Navigate Through Slides in Presentation Mode?
Navigating through slides in Presentation Mode can be done efficiently using keyboard shortcuts, mouse controls, or specific commands within PowerPoint.
One handy method to quickly move to the next slide during a presentation is by pressing the Spacebar or Enter key on your keyboard. Conversely, to go back to the previous slide, you can use the Backspace key. You can effortlessly jump to a specific slide by entering the slide number followed by pressing the Enter key. For a more visual approach, you can click on the slide thumbnails on the left sidebar or use the scroll wheel to navigate through the slides.
Use the arrow keys on your keyboard
Utilize the arrow keys on your keyboard to seamlessly advance through slides in Presentation Mode, ensuring a smooth and controlled flow of your presentation.
With the simple and intuitive collaboration of the arrow keys, you can effortlessly navigate through your slides, enabling precision in delivering your content. The arrow keys allow you to move forward or backward with ease, keeping the focus on your message during the presentation. This feature is especially useful in Presenter View, where you can see upcoming slides and speaker notes, maintaining a seamless delivery. When you record a slide show, the arrow keys help you pace your narration perfectly, ensuring synchronization between your speech and slide transitions.
Click on the arrows in the bottom left corner of the screen
For a more interactive navigation experience, users can click on the directional arrows located in the bottom left corner of the screen to progress through their presentation while having access to speaker notes and animations.
Users can enhance their presentation experience by utilizing the fullscreen mode . By entering fullscreen, viewers can keep the focus solely on the presentation content, removing any distractions from the surrounding interface elements. This feature is particularly useful when showcasing detailed slides or when presenting to a larger audience, allowing for a more immersive and engaging delivery.
Use the scroll wheel on your mouse
Another seamless way to navigate through slides in Presentation Mode is by utilizing the scroll wheel on your mouse, providing smooth and intuitive control over slide transitions and content progression.
The scroll wheel allows users to effortlessly advance slides without the need to click buttons or use keyboard shortcuts, enhancing the overall presentation experience.
With its responsive nature, the scroll wheel ensures quick and precise movements, enabling presenters to fluidly transition between slides with the utmost ease.
This feature is particularly handy when presenting slides with high resolution , allowing for a seamless display of detailed content in a visually appealing manner.
How to Exit Presentation Mode in PowerPoint?
Exiting Presentation Mode in PowerPoint is a simple process that involves pressing the ‘Esc’ key on your keyboard, clicking on the ‘End Show’ button, or selecting ‘End Show’ from the drop-down menu to return to the normal viewing mode.
To exit Fullscreen mode in PowerPoint, you can simply press the ‘Esc’ key, the keyboard shortcut that is universally used to escape full-screen views across various applications. This action will promptly take you out of the immersive mode and back to the regular interface.
Another convenient way to exit the Presentation Mode is by navigating to the bottom left corner of the screen and clicking on the ‘End Show’ button. This button serves as a quick exit route from the full-screen display, offering an immediate transition back to the standard PowerPoint screen.
Step 1: Press the Esc key on your keyboard
The first step to exit Presentation Mode is to press the ‘Esc’ key on your keyboard, which will promptly exit the full-screen display and return you to the standard PowerPoint interface.
Exiting Presentation Mode using the ‘Esc’ key is a simple maneuver that can swiftly transition you back to your familiar workspace. Once you press the ‘Esc’ key, the fullscreen effect will dissolve, and any Speaker Notes you might have been glancing over will no longer dominate your screen, ensuring a seamless flow as you exit the presentation. This action provides an effortless way to shift the focus back to the general view of your PowerPoint, facilitating a smooth continuation of your usual workflow.
Step 2: Click on the ‘End Show’ button on the top left corner of the screen
To exit Presentation Mode, users can also click on the ‘End Show’ button located in the top left corner of the screen, providing a direct and visible method to conclude the presentation.
Once you are ready to end your presentation and exit the immersive Presentation Mode, simply direct your attention to the top left corner of the screen where the ‘End Show’ button awaits your command. By clicking on this button, you seamlessly transition back to the regular view, enabling you to navigate your presentation’s content, check additional details, or record the slide show for future reference. This function provides an effortless way to not only conclude your speech but also to review or amend content from the current slide onward, ensuring a smooth transition and accessibility for your audience.
Step 3: Select ‘End Show’ from the drop-down menu
For a more detailed exit process, users can select ‘ End Show ‘ from the drop-down menu within PowerPoint, ensuring a controlled and comprehensive conclusion to their presentation.
Once ‘End Show’ is chosen, users can seamlessly transition back to PowerPoint’s standard interface, bidding farewell to the presenter view. Exiting this mode allows presenters to access additional options to end their presentation smoothly and efficiently.
Upon choosing ‘End Show’, users can review their content, make final adjustments, and conclude their presentation with confidence, maintaining professionalism throughout the process. This method ensures a polished and professional exit from Presentation Mode, leaving a lasting impression on the audience.
Frequently Asked Questions
How do i enter presentation mode in powerpoint to enter presentation mode in powerpoint, click on the slideshow tab in the top menu and then select “from beginning” or “from current slide” depending on where you want to start your presentation., can i customize the way i enter presentation mode in powerpoint yes, you can customize the way you enter presentation mode by going to the slideshow tab and selecting “set up slide show.” from there, you can choose options such as looping, presenter view, and more., is there a shortcut to enter presentation mode in powerpoint yes, you can press the f5 key on your keyboard to enter presentation mode in powerpoint. you can also press shift+f5 to start from the current slide., can i use a different display for presentation mode in powerpoint yes, you can use a different display for presentation mode by going to the slideshow tab and selecting “set up slide show.” from there, you can choose to present on a secondary monitor or projector., how do i exit presentation mode in powerpoint to exit presentation mode in powerpoint, press the escape key on your keyboard or right-click and select “end show.” you can also press the b key to go back to the previous slide., can i add speaker notes while in presentation mode in powerpoint yes, you can add speaker notes while in presentation mode by clicking on the notes section at the bottom of the screen. this will allow you to add notes that only you can see while presenting., similar posts, how to divide a rectangle into equal parts in powerpoint.
Looking to enhance your PowerPoint presentations with visually appealing elements like divided rectangles? In this tutorial, we will explore the reasons why dividing a rectangle in PowerPoint can be beneficial, such as creating visual aids, designing infographics, and making charts and graphs. We will then walk you through the step-by-step process of dividing a rectangle,…
How To Enable Editing In PowerPoint
Are you looking to unlock the full potential of PowerPoint but not sure how to enable editing? In this tutorial by Regina Griffin, a teacher from Oregon, US, we will explore Powerpoint. We cover understanding what PowerPoint is and why it is useful, accessing and downloading it on various devices, enabling editing, troubleshooting tips, and…
How To Paste Text In PowerPoint Without Changing Format
Have you ever experienced the frustration of pasting text into PowerPoint, only to have its format completely change? In this tutorial by Regina Griffin, a teacher from Oregon, US, we will explore the default paste options in PowerPoint and how they affect the format of your text. Learn the different ways to paste text in…
How To Outline In PowerPoint
Are you looking to take your PowerPoint presentations to the next level? Outlining is a crucial step that can help you organize your thoughts, improve the flow of your presentation, and save time in creating slides. In this article, we will explore why outlining is important in PowerPoint, how to create an outline using different…
How To Group Slides In Powerpoint
Are you looking to take your PowerPoint presentations to the next level? Grouping slides can help you organize your content, make editing easier, and improve navigation for your audience. In this tutorial by Regina Griffin, a teacher from Oregon, US, you will learn why and how to group slides in PowerPoint. From selecting slides to…
How To Put Duration In Powerpoint
Do you want to create engaging and impactful PowerPoint presentations that keep your audience hooked? Setting the right duration for your slides is crucial. We will discuss the importance of duration in PowerPoint presentations, how to add duration to slides using features like “Rehearse Timings” and slide transitions, and tips for setting the right duration…
Home Blog PowerPoint Tutorials How to Work with Presenter View in PowerPoint
How to Work with Presenter View in PowerPoint

Not all presenters have excellent memory recall or the ability to speak flawlessly to the audience without any cues. However, many of them are good at hiding it by using Presenter View in PowerPoint. It is a presentation mode that enables the presenter to hide speaker notes and presentation controls from the audience while leveraging the various handy features offered by PowerPoint.
How to Use Presenter View in PowerPoint
To start using Presenter View, ensure it’s enabled before you begin your slideshow. If you are new to this feature, we recommend using this option to familiarize yourself with the various navigation options for this presentation mode. This might also be helpful if the PowerPoint templates you are accustomed to using might have animations that you might want to preview in this mode to understand when to give the next visual cue.
How to Enable Presenter View in PowerPoint
To enable PowerPoint presenter view, go to the SlideShow tab and make sure the Use Presenter View option is enabled. This will ensure that you can access Presenter View when you switch your slides to SlideShow mode.

Adjust Display Settings
You can swap between the presenter view and slideshow mode or duplicate the slideshow to exit the Presenter View from the Display Settings menu from the top toolbar.

Navigate Slides in Presenter View
Like any standard PowerPoint presentation in SlideShow mode, you can navigate between slides by using the arrow keys or with a presentation remote. Presenter View also provides slide navigation buttons to move the slides back and forth.

View Taskbar in Presenter View
The Show Taskbar option at the top enables viewing the taskbar. This can be helpful if you require using the taskbar, such as to view your battery charge, see the time, enable or disable another app from the taskbar menu, etc.

Reset or Pause the Timer
Once you start your presentation in Presenter View, a timer starts showing how much time you have spent in slideshow mode. This is an excellent way to understand how much time you have consumed for your session and to keep an eye out for good timekeeping. You can also hit Pause or reset the timer anytime.

Change the Size of the Speaker Notes
How to view notes in PowerPoint while presenting? If you have any speaker notes added to your slides, they will appear in Presenter View on your screen. You can increase or reduce the size of the text via the two options at the bottom of the speaker notes pane.

Using Annotation Tools in Presenter View
PowerPoint annotation tools can be accessed from the bottom toolbar in Presenter View. The Pen and Laser Pointer Tools button gives you access to the pen, ink colors, laser pointer, and eraser and also allows you to show or hide the mouse pointer via Arrow Options .

View All Slides in Presenter View
If you need to go back and forth to find a relevant slide for an ongoing discussion or query during your presentation, you can view all slides in Presenter View via the See all slides option.

Zoom Slides using Presenter View
PowerPoint’s Zoom feature lets presenters quickly pick a portion of the slide to zoom into. Presenter View allows you to leverage this feature by instantly selecting a portion of the slide to enlarge it after selecting Zoom into the slide option. To exit the Zoom mode or hit the Esc key.

Black or Unblack SlideShow
Sometimes, you might want to turn the screen blank for a while, such as during a mid-presentation break. The Black or Unblack SlideShow option blanks the slides for your audience while continuing to show you all navigation options via Presenter View.

Toggle Subtitles in Presenter View
One of the most revolutionary features introduced by Microsoft for PowerPoint over the past decade has been Live captions. This feature enables subtitles by converting speech to text as you present. You can toggle Live subtitles on or off while in presenter view to help your audience read what you speak.

Toggle Camera in Presenter View
Like subtitles, you can also toggle the camera on or off in Presenter View.

End Slideshow in Presenter View
There are different ways to end or exit a SlideShow from Presenter View. You can hit the Esc key or click End Slide Show . Similarly, you can click the three dots at the bottom and select End Show .

More Slideshow Options
Other than the various visibility prominent menus available to navigate, annotate, and present your slides, you can also find a few additional options via More slideshow options , which are accessible via the three dots at the bottom toolbar. These include adjusting the position of the subtitles, turning your screen white or black, ending the slideshow, etc.

How to Use Presenter View on a Single Screen
While Presenter View can be enabled to work with dual monitors, you can also use Presenter View on a single monitor with remote meeting apps like Zoom. A simple method for switching to Presenter View on a single monitor is to click the three dots ( More slideshow options ) at the bottom in SlideShow mode and select Show Presenter View .

You can also switch to Presenter View on a single monitor anytime using the ALT+F5 hotkey.

The presenter can easily manage a PPT in presentation mode, with the utility to view speaker notes, annotate or zoom slides, toggle subtitles or camera on or off, and keep your audience engaged via better slideshow management. However, if you’re new to this presentation mode, a bit of practice might help you avoid confusion when presenting before an audience in Presenter View for the first few times.

Like this article? Please share
PowerPoint Tools, Presentation Skills Filed under PowerPoint Tutorials
Related Articles

Filed under PowerPoint Tutorials • April 9th, 2024
How to Remove Notes from PowerPoint
Make alternative versions of your presentation files by learning how to remove notes from PowerPoint. Step-by-step guide with screeshots.

Filed under PowerPoint Tutorials • April 2nd, 2024
How to Round Corners in PowerPoint
Learn how to add rounded corners to shapes and images in PowerPoint. Elevate your presentations with sleek designs. Expert tips and step-by-step guides.

Filed under PowerPoint Tutorials • March 26th, 2024
How to Translate in PowerPoint
Unlock the experience of PowerPoint translation! Learn methods, tools, and expert tips for smooth Spanish conversions. Make your presentations global.
Leave a Reply
Contribute to the Microsoft 365 and Office forum! Click here to learn more 💡
April 9, 2024
Contribute to the Microsoft 365 and Office forum!
Click here to learn more 💡
- Search the community and support articles
- Microsoft 365 and Office
- Search Community member
Ask a new question
Navigating to previously presented slide (not previous slide)
In presentation mode, I can jump from slide 10 to slide 20 by typing 20+Enter. It works great.
However, when I press P or Backspace then, I go to slide 19.
Is there a shortcut which allows me to jump to the previously presented slide (10) rather than previous slide (19)?
Report abuse
- Volunteer Moderator
You could put an action button on the target slide(s) and give it an action of "Last Slide Viewed" You can either click it or maybe try TAB then ENTER to go back.
This. But be aware that "Last Slide Viewed" doesn't work like a reasonable person would expect it to (ie, like the back button in your browser).
It takes "Last Slide Viewed" very literally. You don't want to add several of these thinking you can step backwards through a chain of viewed slides. Instead, you'll end up going back and forth between the same two slides; the one you're on now and the last viewed slide. Then the one you were on becomes the last viewed slide, so a last viewed button will take you back to it. Back and forth. Forever.
1 person found this reply helpful
Was this reply helpful? Yes No
Sorry this didn't help.
Great! Thanks for your feedback.
How satisfied are you with this reply?
Thanks for your feedback, it helps us improve the site.
Thanks for your feedback.
Replies (2)
Question info.
- For business
- Norsk Bokmål
- Ελληνικά
- Русский
- עברית
- العربية
- ไทย
- 한국어
- 中文(简体)
- 中文(繁體)
- 日本語
Critical PowerPoint Shortcuts – Claim Your FREE Training Module and Get Your Time Back!
How to Present a PowerPoint Slideshow (w/ Shortcuts)
- PowerPoint Tutorials
- Shortcuts & Hacks
- May 11, 2019
There are a variety of ways to start a PowerPoint presention, depending on:
- Where you start your presentation (from beginning or from current)
- Which PowerPoint view you prefer to present in (Slide Show view or Presenter view)
- How comfortable you are with keyboard shortcuts
Why would Microsoft include so many ways to present a presentation? My guess is that everyone learns PowerPoint differently, and has personal presentation styles. The more options you have, the easier your life will be as there will always be a way to start your presentation the way you want to (or jump back into it when you need to).
See all the options below and find the method that works best for you and let the slide show begin !
NOTE: If you are running two presentations side-by-side, each presentation needs to be started as it’s own slide show. To see how to set up two PowerPoint presentations to run side-by-side like this before you start your slide show, read my guide here .
Table of Contents
Start slide show from beginning.

To start a slideshow from the beginning of your presentation using the ribbon, simply.
- Navigate to the Slide Show tab
- Select From Beginning
Selecting From Beginning starts your presentation from the very first non-hidden slide in your presentation, regardless of which slide you are currently inside of your deck.

You can also start your slide from the beginning of your presentation by hitting the Slideshow From Beginning keyboard shortcut, F5 .
Regardless of which method you use, this is the classic way to start your presentation in full screen from your first title slide (regardless of where you are in your slide deck).
Let the slide show begin!
NOTE: To expand your knowledge and learn how to use PowerPoint’s FREE and HIDDEN built-in laser pointer to point things out during your presentation, read my guide here .
Take your PPT skills to the next level
Start slide show from current.

To begin your slide show from the slide you are currently on using the ribbon, simply
- Navigate to the Slide Show tab
- Select From Current Slide
Selecting From Current Slide starts your slide show from whatever slide you are currently on, even if the slide is hidden.

You can also start your slide from the current slide you are on by hitting the Shift+F5 keyboard shortcut.
Because it’s often easiest to catch errors when building your slides in this full screen mode, I highly recommend learning the Shift+F5 shortcut and using it frequently as you build your slides to spot them for errors.
If you don’t want to bother learning the From Current Slide shortcut, you can also start your slideshow by clicking the Slide Show icon at the bottom of your screen.
This is a fantastic way to spot check your slides as you are building them. On top of that, it’s a fast and uncomplicated way to re-start your presentation from where you left off after demoing something on screen.
Start a mini-slide show in PowerPoint
You can also use the following hidden PowerPoint shortcut to run a mini slide show over the top of your current deck.

To run a mini slide show, simply:
- Hold down the Alt key on your keyboard
- With your mouse, click the Slide Show icon
Doing so starts a small slide show of your presentation that you can see below, from the current slide you are on.

Presenter View
The Presenter View is an alternate way to run your presentation in PowerPoint. In this view, your slides are projected on screen, and the details of your presentation are displayed on your computer as pictured below.

The presenter view includes your next (non-hidden) slides that is coming up, your current slide projected on screen, how long you’ve been talking and your speaker notes.

To launch the Presenter View from the beginning of your presentation using your Ribbon, simply:
- Navigate to the Slide Show tab
- Hold down the Alt key on your keyboard
- Click From Beginning
Holding down the Alt key and clicking From Beginning , the Presenter View will launch from the very first (non-hidden) slide in your presentation.

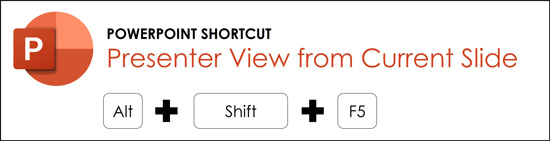
You can also launch the presenter view from the beginning of your presentation at any time by clicking Alt + F5 on your keyboard.
Start Presenter View in PowerPoint From Current Slide

Did you know that you can access different views in PowerPoint by adding keys as you click commands in the PowerPoint ribbon?
To start the Presenter view from your current slide using your Ribbon, simply:
- Hold down the Alt key on your keyboard
- Click From Current Slide
Holding the Alt key and clicking From Current Slide launches the Presenter View from your current slide. So, this is another way you can quickly practice your presentation, see your speaker notes and see what’s coming up next.
You can also launch the Presenter View from the beginning of your presentation at any time by hitting Alt+F5 on your keyboard.
Showing and Hiding Presenter View
Regardless of which view you start your PowerPoint slide show; you can switch between the two different slide show views without exiting presentation.

To switch between the two slideshow views (while giving your presentation), simply:
- Right-click your slide in whichever presentation view you are currently in
- Select either Show Presenter View or Hide Presenter View
When would you use a feature like this during a presentation? One example is if you want to view your notes without leaving the slide show mode.
NOTE: The letter r for both Show Presenter View and Hide Presenter View is underlined. This means that it is a keyboard shortcut. So, if you want to quickly flip between these two presentation views, you can simply right-click your slide and hit the letter r on your keyboard. Doing so automatically switches the view you are in.
Controlling how your presentation runs
Another way to control how your presentation runs (including the default laser pointer and pen color), is the Set Up Slide Show dialog box.

To open the Set Up Slide Show dialog box, simply:
- Select the Set Up Slide Show command
Doing so, opens all your PowerPoint slide show settings and options as pictured below.
Inside the slide show settings dialog box, you can select:
- How your presentation runs (full screen, window or in kiosk mode).
- Your default pen and laser pointer color options ( see our laser pointer article here ).
- Which slide you want start from, or which slides you want to show. You can also setup a custom show here.
- How your slides progress (manually or using slide timings).
- Which of your computer monitors (or screens) your slide show runs on.
The Set Up Slide Show dialog box is also the secret to running multiple presentations at the same time in PowerPoint. To expand your knowledge and learn how to set this up, read our guide here .
Setup Slide Show SECRET Shortcut

To use the SECRET shortcut to open the Set Up Slide Show dialog box, simply:
- Hold down the Shift key on your keyboard
- With your mouse, click the Reading View icon at the bottom of your screen
This is useful when you need to quickly cycle through lots of PowerPoint presentations and change how those presentations run. Instead of wasting time clicking through the Ribbon, simply hold the Shift key and click the Reading View icon. This is also a friendly conversation starter with a fellow PowerPoint enthusiast at Happy Hour.
NOTE: The color of your Reading View icon might be different than in the picture above, as it is dependent on the Office Theme you selected for PowerPoint.
How to exit a PowerPoint presentation early?

Regardless of how you start your full screen presentation, you can end your presentation at any time by hitting the Esc key on your keyboard.
Hitting Esc immediately takes you out of the PowerPoint presentation mode and back to the normal editing view of your slides, on whatever slide you were last presenting.
Here is how you can use a combination of all the different keyboard shortcuts to spot check and practice your presentation in full screen before you finalize your presentation.
- Hit F5 on your keyboard to start your presentation in full screen from the very first slide in your presentation. You can then use your arrow keys to advance, spot checking your slides for errors.
- When you find an error, simply hit Esc key to return to the normal PowerPoint editing view to fix your slide.
- When you are done, hit Shift + F5 to return the full screen presentation mode from the slide you just updated. You can then continue spot checking your presentation (without having to start over from the beginning).
In this way you can quickly work your way through your slides and practice your presentation, fixing and adjusting your content as you go.
Understanding how to run your presentations is CRITICAL to the success of your presentation. Not only in presenting them live, but also in knowing how to spot check your slides as you build them.
I personally find it easiest to spot check your slides and quickly fix errors by running your presentation in slide show mode (or full screen). The last place you want to discover an error is during your presentation.
Using the commands and shortcuts above, you can quickly start, exit and step back into your slide show. Once you have these commands and features down, you will also look like a whiz during your presentations.
If you enjoyed the depth of this article, you will love our other PowerPoint training courses and free resources. To learn more, visit us here .
🔒 Unlock the PowerPoint Shortcuts Trusted by Industry Leaders KKR, American Express, HSBC, and More!
Join over 114,880 professionals from diverse fields including consulting, investment banking, advertising, marketing, sales, and business development who have supercharged their PowerPoint game with our proven methods.
✅ Customize compelling presentations effortlessly.
✅ Master time-saving techniques for faster deck creation.
✅ Boost your career prospects with top-notch PowerPoint skills.
Get FREE access to the Critical PowerPoint Shortcuts module of our premium training course by entering your name and email below.
DISCLAIMER: PC Users Only!
We respect your privacy and will keep your info safe and confidential.
Related Articles
About the author.

Popular Tutorials
- How to Strikethrough Text (l̶i̶k̶e̶ ̶t̶h̶i̶s̶) in Word, Excel & PowerPoint
- How to Make Animated Fireworks in PowerPoint (Step-by-Step)
- Strikethrough Shortcut (l̶i̶k̶e̶ ̶t̶h̶i̶s̶) for Word, Excel & PowerPoint
- How to Create a Flash Card Memory Game in PowerPoint (Like Jeopardy)
- Keyboard Shortcuts Not Working: Solved
PowerPoint Tutorial Categories
- Strategies & Opinions
- Presentation Design
- Pictures, Icons, Videos, Etc.
- New Features
- Miscellaneous
- Charts & Data Viz
We help busy professionals save hours and gain peace of mind, with corporate workshops, self-paced courses and tutorials for PowerPoint and Word.
Work With Us
- Corporate Training
- Presentation & Template Design
- Courses & Downloads
- PowerPoint Articles
- Word Articles
- Productivity Resources
Find a Tutorial
- Free Training
- For Businesses
We help busy office workers save hours and gain peace of mind, with tips, training and tutorials for Microsoft PowerPoint and Word.
Master Critical PowerPoint Shortcuts – Secure Your FREE Training Module and Save Valuable Time!
⌛ Master time-saving expert techniques.
🔥 Create powerful presentations.
🚀 Propel your career to new heights.
We value your privacy – we keep your info safe.
Discover PowerPoint Hacks Loved by Industry Giants - KKR, AmEx, HSBC!
Over 114,880 professionals in finance, marketing and sales have revolutionized their PPT skills with our proven methods.
Gain FREE access to a full module of our premium PowerPoint training program – Get started today!
We hate spam too and promise to keep your information safe.
You are currently viewing a placeholder content from Facebook . To access the actual content, click the button below. Please note that doing so will share data with third-party providers.
How to Go Into Presentation Mode in PowerPoint

Presenting your idea, content or report to an audience can be a daunting task. However, with the right preparation, practice and knowledge of PowerPoint, you can deliver a captivating presentation with ease. One of the most important aspects of presenting with PowerPoint is to know how to go into presentation mode. In this article, we will show you step-by-step how to access presentation mode and how to use it effectively.
Table of Contents
Preparing your PowerPoint Presentation for Presentation Mode
Before you can present your PowerPoint presentation, it is important to prepare your slides for presentation mode. Here are some important tips to follow:
- Make sure your presentation has a clear structure with a logical flow of ideas
- Use eye-catching and relevant visuals to support your points
- Practice your presentation and time yourself to ensure it is within the allotted time frame
- Make sure all hyperlinks and multimedia elements are working properly
- Ensure your text is legible and easily readable by audience members in the back of the room
Another important aspect to consider when preparing your PowerPoint presentation for presentation mode is to engage your audience. You can do this by asking questions, encouraging participation, and using humor where appropriate. Additionally, it is important to be confident and enthusiastic when presenting, as this will help to keep your audience engaged and interested in your presentation.
Understanding the Different Views in PowerPoint
PowerPoint offers different views to help you create and edit your presentation. These include the Normal view, Slide Sorter view, and the Slide Show view. When in Normal view, you can edit and create your presentation, while in the Slide Sorter view, you can rearrange and organize your slides. The Slide Show view is where you can present your PowerPoint presentation.
In addition to these three main views, PowerPoint also offers a Notes Page view and a Reading view. The Notes Page view allows you to add speaker notes to your slides, which can be helpful during a presentation. The Reading view is designed for reviewing your presentation, and it displays your slides in a full-screen format without any editing tools.
Another useful feature in PowerPoint is the ability to switch between views seamlessly. For example, you can switch from Normal view to Slide Sorter view to get an overview of your presentation, and then switch back to Normal view to make edits. This flexibility allows you to work more efficiently and effectively when creating your PowerPoint presentation.
How to Access Presentation Mode in PowerPoint
To access presentation mode in PowerPoint, simply click on the Slide Show tab and then click on the From Beginning or From Current Slide buttons, depending on where you want to start your presentation from. Alternatively, you can press F5 on your keyboard to start presentation mode.
It is important to note that before entering presentation mode, you should ensure that your presentation is fully prepared and that all necessary edits have been made. You can also preview your presentation in presentation mode by clicking on the Preview button, which will allow you to see how your slides will appear to your audience.
Navigation Tips for Effective Presentations
During your presentation, you may need to navigate between slides to emphasize your points or answer questions. Use the following navigation tips to effectively control your presentation:
- Use the arrow keys on your keyboard to move forward and backward between slides
- Press the Esc key to end your presentation
- Use the spacebar or Enter key to move to the next slide
- Press the B key to darken the screen
- Press the W key to white out the screen
Another useful navigation tip is to use the mouse to click on the slide you want to go to. This can be helpful if you need to quickly jump to a specific slide during your presentation.
It’s also important to practice your navigation before your presentation to ensure that you are comfortable with the controls. This can help you avoid any technical difficulties or awkward pauses during your presentation.
Using Presenter View to Enhance Your Presentation
If you have a second monitor or projector, you can enable Presenter View in PowerPoint to help you deliver a professional and engaging presentation. With Presenter View, you can see your slides, notes, and the next slide in your sequence, while the audience only sees the presentation. To enable Presenter View, go to the Slide Show tab and click on the Use Presenter View option.
Presenter View also allows you to zoom in and out of slides, highlight important points, and draw on your slides in real-time. This can be especially useful when presenting complex data or diagrams. Additionally, you can use Presenter View to keep track of time and stay on schedule by setting up a timer that will display on your screen. Overall, Presenter View is a powerful tool that can help you deliver a more polished and professional presentation.
Customizing Your Slide Show Settings
Customizing your slide show settings can greatly enhance the delivery of your presentation. Here are some ways to customize your slide show settings:
- Set up automatic timings for your slides to progress without manual intervention
- Choose to show or hide your pointer during the presentation
- Change the animation settings of your slides to make your points more engaging
Another way to customize your slide show settings is to add background music or sound effects to your presentation. This can help set the tone and create a more immersive experience for your audience. You can also adjust the resolution and aspect ratio of your slides to ensure they display properly on different devices and screens. Experimenting with different customization options can help you create a more polished and professional presentation.
Keyboard Shortcuts to Control Your Presentation
Keyboard shortcuts can be a real time-saver when presenting with PowerPoint. Here are some of the most useful keyboard shortcuts to control your presentation:
- Press B to make the screen go black
- Press W to make the screen white
- Press Ctrl+P to go to the previous slide
- Press Ctrl+N to go to the next slide
- Press Ctrl+S to stop the slide show
It’s important to note that not all keyboard shortcuts work on all versions of PowerPoint or on all operating systems. Be sure to check the keyboard shortcut options for your specific version of PowerPoint and operating system before your presentation to ensure that the shortcuts you plan to use will work.
Troubleshooting Common Issues with Presentation Mode
In some instances, you may encounter common issues when presenting in PowerPoint. Here are some of the most common issues with presentation mode in PowerPoint:
- Presentation is in a different resolution than the monitor
- Multimedia elements not playing or displaying properly
- Slides appearing blurry or pixelated
- Presenter view not displaying properly or at all
If you encounter any of these issues, there are a few troubleshooting steps you can take. First, try adjusting the resolution of your presentation to match the resolution of the monitor you are presenting on. If multimedia elements are not playing or displaying properly, make sure they are properly embedded in your presentation and that you have the necessary software or plugins installed. If your slides appear blurry or pixelated, try adjusting the image quality settings in PowerPoint. Finally, if presenter view is not displaying properly or at all, make sure your computer is properly connected to the display and that you have selected the correct display settings in PowerPoint.
Tips for Delivering a Captivating Presentation
Aside from knowing how to go into presentation mode and utilizing the various features of PowerPoint, there are other tips to help make your presentation captivate and engage the audience:
- Use stories or personal anecdotes to humanize and add interest to your presentation
- Maintain eye contact with your audience
- Use humor where appropriate
- Speak clearly and confidently
- Use body language effectively to emphasize your points
Another important tip for delivering a captivating presentation is to tailor your content to your audience. Consider their interests, knowledge level, and what they hope to gain from your presentation. By doing so, you can ensure that your presentation is relevant and valuable to your audience, which will help keep them engaged and interested throughout.
Recording and Sharing Your PowerPoint Presentation
If you want to share your presentation with a wider audience or review your presentation for performance improvement, you can record your presentation in PowerPoint. Simply go to the Slide Show tab and click on the Record Slide Show option. Once you have recorded your presentation, you can save it and share it with your audience.
By following the steps and tips outlined in this article, you will be well-equipped to go into presentation mode in PowerPoint and deliver an engaging, informative, and memorable presentation.
Another way to share your PowerPoint presentation is by uploading it to a cloud-based storage service, such as Google Drive or Dropbox. This allows you to easily share the presentation with others, without having to send large files via email. You can also control who has access to the presentation and make changes to it in real-time.
It’s important to keep in mind that when sharing your presentation, you should consider the file size and compatibility with different devices and software. To ensure that your presentation looks the same on different devices, you can save it as a PDF or use PowerPoint’s compatibility checker to identify any issues before sharing it.
By humans, for humans - Best rated articles:
Excel report templates: build better reports faster, top 9 power bi dashboard examples, excel waterfall charts: how to create one that doesn't suck, beyond ai - discover our handpicked bi resources.
Explore Zebra BI's expert-selected resources combining technology and insight for practical, in-depth BI strategies.

We’ve been experimenting with AI-generated content, and sometimes it gets carried away. Give us a feedback and help us learn and improve! 🤍
Note: This is an experimental AI-generated article. Your help is welcome. Share your feedback with us and help us improve.

Stack Exchange Network
Stack Exchange network consists of 183 Q&A communities including Stack Overflow , the largest, most trusted online community for developers to learn, share their knowledge, and build their careers.
Q&A for work
Connect and share knowledge within a single location that is structured and easy to search.
Go to a specific slide in powerpoint when creating the slides
This might be very simple to achieve, but I don't know how to see it through. When I create presentations using MS powerpoint, I have to go from slide to slide (say from Slide 3 to slide 45). So far I have reached the required slide using the slide sorter.
For a similar requirement, MS Word has the option of Go to page which can be called using Ctrl+G keyboard shortcut.
Is there a similar shortcut to go to a particular slide while editing slides in MS powerpoint?
From the answer below and from the internet search I understand that in Edit mode one cannot go to a particular slide (as one would go to a page in Word).
I wrote the following macro to implement this functionality.
Is there a better/efficient way to implement this?
- microsoft-office
- microsoft-powerpoint
- microsoft-powerpoint-2010
- I think Benson Yeung's method below is enough.(if you haven't seen it..) – Chan Kim Aug 27, 2020 at 2:22
7 Answers 7
Is there a shortcut to go to a particular slide in the presentation.
Presentation mode:
Slide number + Enter , or
Right-click a slide, select "Go to Slide" on the shortcut menu, and then select a slide from the list by title or slide number .
- There is no function to navigate quickly to a specific slide.
- Thanks for your answer. I updated the question with macro – Prasanna Feb 2, 2017 at 7:24
I just came across the same issue. For example to go to slide 60, my solution is to enter the presentation mode and go back to editing mode immediately afterwards: <F5> 60 <Enter> <Esc> . A few more keystrokes but fast enough and working well for me.
F5: presentation mode
60: the desired slide number
Enter: go to slide
Esc: back to edit mode, on the shown slide
@Prasanna, thank you for your code, which didn't work for me but got me started.
This version works for me. I wish I knew how to assign a keyboard command (hotkey) to it.
- Works well for me, thanks! – FlorianH Mar 17, 2021 at 8:59
Cant believe PowerPoint does not have this shortcut.. If you use autohotkey this is an excellent workaround (if not then you should reconsider! :-) ). Activated using CTRL+G (for go)
- Select the text you want to use as link to a certain slide
- go to insert -> links-> action
- select hyperlink to -> select slide
this link now works when editing powerpoint and during the presentation itself
That,s the way to go about it: To go to a particular slide in the same presentation select a word in the slide to be hyperlinked. In the left selection bar "Link to": Select "place in this document". this will show you the slide numbers on the right. Select the one you want to go to. Works perfect!
I use the same 'link' technique on images, icons, whole shapes/text boxes etc. Usually a little 'Play' triangle button on the bottom right of the slide.
Then I add the same icon on the page I 'jump' to with a link that sends me back too. If you animate this icon so that it only appears at the end of all animations in that slide, the presenter can keep clicking the mouse button from the source slide 'play button' through these animations and then jump back without needing to move the mouse/cursor.
Helps when other people will use the deck....defence against ID-10-t errors! ;-)
You must log in to answer this question.
Not the answer you're looking for browse other questions tagged microsoft-office vba microsoft-powerpoint microsoft-powerpoint-2010 ..
- The Overflow Blog
- Want to be a great software engineer? Don’t be a jerk.
- Climbing the GenAI decision tree sponsored post
- Featured on Meta
- New Focus Styles & Updated Styling for Button Groups
- Upcoming initiatives on Stack Overflow and across the Stack Exchange network
- Google Cloud will be Sponsoring Super User SE
Hot Network Questions
- Colorbar to illustrate the change of a specific parameter
- NSF grant proposal not reviewed despite being received
- Why does a 1:1 transformer preserve voltage?
- Can you use existing in home coax cables to connect a Leaf antenna to TV?
- People who frequently travel in planes are called…?
- What happens when an automatic transmission completely fails?
- What size wire in conduit before feeding 20A nm circuit?
- First mention of Einstein in Science Fiction?
- How precise are future Solar eclipse timing, path and dates, what could change timing/path?
- What do I do if my players are acting in a way that is meta-gaming and are refusing to accept my decision?
- Is it possible to do a vc-relax calculation using GPAW?
- Is Toeplitz operator on the Bergman space bounded iff its symbol is bounded?
- Non-EU citizen travelling to Germany for internship. Do I require a work permit (Bundesagentur fur Arbeit)?
- Why does one airliner fly along the coast and the other doesn't?
- Almost sure probability in convergence, versus 0 probability in reality
- In how many ways can 10 economists attending a conference be arranged in 2 triple sharing and 2 double sharing rooms?
- Help fixing loose baseboard
- Are the subjective experience of the "inner witness of the Holy Spirit" and the subjective experience of an external world of equal epistemic value?
- Split String Function Implementation in Python
- Can anyone explain this sacrifice?
- What is a safe way to transport ebike battery on planes?
- When discharging a capacitor, why would a resistor make a difference if it is situated after ground?
- Feasibility of a bio-engineered, floating tree lifeform in the Venusian atmosphere?
- What is the purpose of this "add with carry" adc instruction (x86)?

- Get started with computers
- Learn Microsoft Office
- Apply for a job
- Improve my work skills
- Design nice-looking docs
- Getting Started
- Smartphones & Tablets
- Typing Tutorial
- Online Learning
- Basic Internet Skills
- Online Safety
- Social Media
- Zoom Basics
- Google Docs
- Google Sheets
- Career Planning
- Resume Writing
- Cover Letters
- Job Search and Networking
- Business Communication
- Entrepreneurship 101
- Careers without College
- Job Hunt for Today
- 3D Printing
- Freelancing 101
- Personal Finance
- Sharing Economy
- Decision-Making
- Graphic Design
- Photography
- Image Editing
- Learning WordPress
- Language Learning
- Critical Thinking
- For Educators
- Translations
- Staff Picks
- English expand_more expand_less
PowerPoint Tips - Jump to a Specific Slide
Powerpoint tips -, jump to a specific slide, powerpoint tips jump to a specific slide.

PowerPoint Tips: Jump to a Specific Slide
Lesson 5: jump to a specific slide.
/en/powerpoint-tips/open-a-file-in-slide-show-mode/content/
Jump to a specific slide
When you’re in the middle of a presentation, you don’t have to scroll through one slide at a time to return to an earlier slide. Instead, you can use three different shortcuts to jump to a specific slide while you’re in Slide Show mode.
The video below illustrates how you can use these shortcuts.
- To go to a specific slide number, press a number + Enter . For example, if you wanted to see slide 4, just press 4 , then Enter . (This shortcut is best for shorter presentations when it’s easier to memorize the number of each slide).
- Press Ctrl + S to display the title of every slide in your presentation. Click on your choice and select Go to .
- To display thumbnails of every slide, press the G key, then click the one you want.
It’s important to note that this last shortcut only works in PowerPoint 2013 and newer versions.
Now you don’t have to waste time going back one slide at a time! Stay tuned for our next lesson about spell check and thesaurus shortcuts.
/en/powerpoint-tips/spell-check-and-thesaurus-shortcuts/content/
PowerPoint Tip: Set Right-Mouse Click To Go Back
If you want to set the right button click of your mouse to go back during a slide show presentation instead of opening the menu, then here we show you how to configure it.
First, you will need to go to PowerPoint 2010 options . To do this, go to File -> Options . And then click Advanced tab.
Now, look for Slide Show section and then uncheck the Show menu on right mouse click option.

It is important to notice that this will work only if you have the slideshow configured to run in full screen mode, but not using the normal resizable window. This PowerPoint tip can be useful for example if you want to prevent the right click of your mouse to open the contextual menu during a presentation but also to configure a PowerPoint remote control which will use the right click to go back.
Leave a Comment Cancel reply
Your email address will not be published. Required fields are marked *
Save my name, email, and website in this browser for the next time I comment.
Sign up to our newsletter
We will send you our curated collections to your email weekly. No spam, promise!
How to Change PowerPoint to Portrait? A Step-by-Step Guide
Table of contents.
PowerPoint slides typically use a landscape orientation, where the width of the slide is wider than its height. This layout has become the norm for presentations because it matches the shape of many projectors and computer screens, ensuring that your content looks its best when displayed to your audience.
Landscape and Portrait Slide Sizes?
In PowerPoint, slides are typically set to Landscape orientation by default, coming in two sizes:
- Standard : 4:3 ratio (10×7.5 inches)
- Widescreen : 16:9 ratio (13.33×7.5 inches)
For Portrait slides, the default size is 10×5.626 inches.
Landscape orientation provides a wider space for your content, making it great for including visuals like images, charts, graphs, and tables. The text flows naturally from left to right, which is easier for viewers to read and understand.
On the other hand, Portrait orientation has a taller, narrower layout, with the height exceeding the width. While it’s not as common in presentations, Portrait orientation might be useful for specific situations where a different layout is needed.
How to Change PowerPoint to Portrait
On windows:.
Step 1 – Open your presentation: Launch Microsoft PowerPoint and open the presentation you want to modify.
Step 2 – Access the Design tab: Locate the ribbon at the top of the PowerPoint window. Click on the “Design” tab.
Step 3 – Find the Slide Size options: Within the “Design” tab, look for the “Customize” group on the right-hand side. Click the dropdown menu under the label “Slide Size.”
Step 4 – Choose “Custom Slide Size”: Several pre-defined sizes will appear. Instead of selecting one of those, choose the option at the very bottom: “Custom Slide Size.”
Step 5 – Set Orientation to Portrait: A new window titled “Slide Size” will pop up. Under the “Orientation” section, you’ll see two radio buttons: “Landscape” (which is the default) and “Portrait.” Click the radio button next to “Portrait” to switch the orientation.
Step 6 – Click “OK”: Once you’ve chosen “Portrait,” simply click the “OK” button at the bottom of the “Slide Size” window.
Step 7 – Choosing Between “Maximize” and “Ensure Fit”
After clicking “OK” in the previous step, PowerPoint might prompt you with a choice between two options:
- Maximize: This option enlarges your existing slide content to fill the entire portrait space. However, this may cause some elements to appear distorted or cut off.
- Ensure Fit: This option shrinks your slide content to fit proportionally within the portrait layout. This ensures everything stays visible but may leave extra blank space around the edges.
- Open your PowerPoint presentation.
- Go to the File menu and select Page Setup.
- In the “Page Setup” dialog box, under Orientation, choose Portrait. You can also adjust the width and height values here if needed.
Recommendations:
- For presentations intended to be shown on a screen: Choose “Maximize” to utilize the full portrait area. Text and images might need slight adjustments to avoid being cropped.
- For printing handouts or notes: Opt for “Ensure Fit” to guarantee all content remains visible on the printed page, even if there’s extra space.
Are you a Google Slides user? Check our guide on How To Make Google Slides Vertical here !
How to Make a Single Slide Portrait in PowerPoint?
While PowerPoint doesn’t directly support both orientations within a single file, you can achieve this by linking separate presentations. Here’s how:
Step 1: Open your landscape presentation.
Step 2: Navigate to the slide where you want to insert the link.
Step 3: Add a text box or select existing text to act as the link.
Step 4: Go to Insert > Action.
Step 5: Choose between “Mouse Click” (triggers when you click the text) or “Mouse Over” (triggers when you hover over the text).
Step 6: Select “Hyperlink to:” and choose “Other PowerPoint Presentation” from the dropdown.
Step 7: Locate and select your portrait presentation. Then in “Hyperlink to Slide”, select the slide you want to start from.
Step 8: Click “OK.”
Now, during your presentation, clicking (or hovering, if you chose Mouse Over) the designated text will seamlessly switch to your portrait presentation.
Remember these things while linking the presentation :
- Ensure both presentations are saved in the same folder to avoid broken links.
- Consider using a clear call to action on the linked text, like “Click here for details” or “View data in portrait mode.”
Benefits of Portrait Orientation
There are several reasons why you might need to change the orientation to portrait:
1. Enhanced Viewing Experience
- Vertical Content Suitability : Documents, articles, and social media feeds primarily consist of text, making portrait orientation more efficient in utilizing the screen’s height. This allows for better readability with fewer scrolls needed to view content.
- Focused Viewing : Portrait orientation gives a better view of vertical content like portraits or tall buildings, allowing you to focus on the details without distractions.
2. Considering Device Limits
- Comfortable Handheld Use : Holding a phone or tablet in portrait orientation is often more comfortable for long periods.
- Optimized Screen Space : On smaller screens, portrait orientation might be the only way to see everything without zooming or scrolling sideways.
3. Tailoring to Application Needs
- App-Specific Design : Certain applications are primarily designed for portrait orientation, and using them in landscape mode may result in functionality or display issues.
- Seamless Reading Experience : Many ebooks and webcomics are formatted for vertical scrolling, making portrait orientation preferable for a smooth and uninterrupted reading experience.
Tips for Creating Visually Appealing Portrait Slides
Choosing the Right Images:
- Pick clear, well-lit portraits without blurriness or pixelation.
- Make sure the images match the slide content, avoiding generic stock photos.
- Select portraits that convey emotions and resonate with the audience, considering facial expressions and mood.
- Aim for diversity by including various genders, ethnicities, ages, and backgrounds.
Composition and Design:
- Crop images strategically to highlight the subject’s face and remove distracting background elements.
- Position portraits carefully within the slide layout for balance.
- Use empty space effectively to avoid clutter and draw attention to the portrait.
- Coordinate the color scheme of the portrait with other slide elements.
Text and Content:
- Keep text brief on the portrait slide to avoid overshadowing the image.
- Choose a clear, readable font that matches the overall style.
- Place text thoughtfully to ensure important parts of the portrait are visible.
Additional Considerations:
- Use filters sparingly to enhance the mood without compromising image quality.
- Consider adding subtle overlays or textures for visual interest.
- Maintain a consistent visual style for a professional look.
Closing Thoughts
Changing PowerPoint to portrait orientation is a straightforward process that lets you customize your presentations to fit different purposes. Whether you’re making a vertical infographic or getting slides ready for a poster presentation, these steps will help you easily switch between landscape and portrait orientations in Microsoft PowerPoint.
Frequently Asked Questions
Why change slide orientation in powerpoint.
While landscape dominates presentations, switching to portrait in PowerPoint can be beneficial for showcasing tall content like portraits and infographics, creating handouts, adapting to specific screens, or adding visual variety. However, this format has limitations – you can’t mix orientations and content might require adjustments. Choose the orientation that best suits your content and presentation goals.
Can I mix Portrait and Landscape slides in one presentation?
While directly combining them isn’t possible, you can achieve a similar effect. Here’s how:
Create two separate presentations: One in landscape and another in portrait.
Link the presentations: Insert hyperlinks in your main presentation (landscape) to specific slides in the portrait presentation.
Does changing one slide’s orientation affect the whole presentation?
Yes. By default, all slides in a presentation share the same orientation (landscape or portrait). Changing one slide’s orientation will automatically adjust the entire presentation to match.
Can I revert my portrait PowerPoint back to landscape?
Yes, you can easily revert to landscape by adjusting the slide size settings.
Are there specific templates designed for portrait presentations?
Some templates are optimized for portrait mode, or you can customize existing ones.
Is there a quick way to switch between Landscape and Portrait in PowerPoint?
Unfortunately, there’s no single shortcut key to change the entire presentation’s orientation. However, you can access the orientation settings through the following methods:
- Go to the “Design” tab. In the “Customize” section, you’ll find the “Slide Size” option. Clicking the dropdown menu allows you to choose between Landscape and Portrait.
- Right-click on any slide. Select “Size and Layout” from the context menu. A window will appear where you can choose the desired orientation.
How to put PowerPoint in portrait mode for handouts?
In Print settings under “Handouts,” choose a portrait layout option like “2 Slides per Page (Portrait)” to display your slides in portrait on printed handouts.
What happens to my existing content if I change the orientation to portrait?
PowerPoint will attempt to scale your existing content to fit the new orientation. However, depending on the amount of content and its layout, adjustments might be necessary to ensure everything displays correctly.
Will my presentation work on all projectors if it’s in portrait orientation?
While most modern projectors can handle portrait presentations, some older models might have limitations. It’s recommended to test your presentation on the specific projector beforehand if unsure.
Save Time and Effortlessly Create Presentations with SlidesAI

Microsoft Power BI-blog
Power bi april 2024 feature summary.

Welcome to the April 2024 update! Here are a few, select highlights of the many we have for Power BI. There are new updates for line enhancements, supporting folders in workspace, dynamic subscriptions for Power BI and paginated reports.
There is more to explore, please continue to read on.
Fabric Conference Day 1 Keynote is now available!
Did you miss it, or want to hear it again? We are excited to release the FabCon Day 1 Keynote to the Microsoft Fabric YouTube Channel !
If you aren’t already, be sure to subscribe to the Microsoft Fabric Channel! Check out the amazing announcements & demos from Arun, Amir, Wangui, and other awesome presenters. The Day 3 keynotes will be released later this month, and more content will be released regularly moving forward.
Make sure you check out the blog post from Arun, that highlights the announcements from FabCon you can find that here: Announcements from the Microsoft Fabric Community Conference
Earn a free Microsoft Fabric certification exam!
We are thrilled to announce the general availability of Exam DP-600 , which leads to the Microsoft Certified: Fabric Analytics Engineer Associate certification.
Microsoft Fabric’s common analytics platform is built on the instantly familiar Power BI experience , making your transition to Fabric Analytics Engineer easier. With Fabric, you can build on your prior knowledge – whether that is Power BI, SQL, or Python – and master how to enrich data for analytics in the era of AI.
To help you learn quickly and get certified, we created the Fabric Career Hub. We have curated the best free on-demand and live training, exam crams, practice tests and more .
And because the best way to learn is live, we will have free live learning sessions led by the best Microsoft Fabric experts from Apr 16 to May 8, in English and Spanish. Register now at the Learn Together page.
Also, become eligible for a free certification exam by completing the Fabric AI Skills Challenge. But hurry, the challenge only runs from March 19 – April 19 and free certs are first-come, first-served! (limit one per participant, terms and conditions apply).

- Version number: v: 2.128.751.0
- Date published: 4/8/24
- New Visual – 100% Stacked Area Chart
- Line enhancements
- Enhance Q&A with Copilot-generated Linguistic Relationships
Storytelling in PowerPoint – Improved image mode in the Power BI add-in for PowerPoint
Storytelling in powerpoint – continuous slide show auto refresh, storytelling in powerpoint – auto populating the slide title.
- Introducing the Fabric metadata scanning sample app
- Dynamic Subscriptions for Power BI and paginated reports
Supporting Folders in workspace
New “clear barcode” action in the report footer, open power bi items in full screen mode.
- New Visuals in AppSourceKPI MatrixGrowth Rate Chart by DJEENI v1.4Aimplan Comment Visual
Financial Reporting Matrix by Profitbase
Horizon chart by powerviz, drill down scatter pro by zoomcharts, image gallery, horizontal bar chart, multi-pane card 1.1.
New Visual – 100% Stacked Area Chart
Introducing the new 100% Stacked Area Chart, now available in our core visuals gallery. These visuals display the relative percentage of multiple data series in stacked areas, where the total always equals 100%. It’s perfect for showing the proportion of individual series to the whole and how they change over time. Find it in the visual gallery, on-object dialog, or format pane, right next to the Stacked Area Chart. Give it a try and share your feedback with us!
Line enhancements
Take your line charts to the next level with our new line control features.
- Adjust line color transparency under Lines > Colors > Transparency.
- Control the color and transparency of each series by selecting them in the ‘Apply settings to’ dropdown.
- Use Monotone and the new Cardinal smooth type for full control of smooth lines.
- Choose from before, center, and after step lines to align your visual with your story.
Try out these new features and enhance your line charts.

Enhance Q&A with Copilot-generated Linguistic Relationships
Improving your linguistic schema is an important step in making sure that the Q&A visual can understand the wide range of questions people might ask about their data. This is why, back in September , we added a new section into the Q&A setup menu to help you add linguistic relationships to teach Q&A about words which qualify or relate your data.
But we also know that coming up with all the different words people might be using to refer to your data can take time and effort, and we’ve been working on ways to make that process easier for you! In November , we introduced a way for you to quickly generate new synonyms for the names of tables and columns in your model; this month, we’ve introduced the same functionality for linguistic relationships!
When you open a report with a Q&A visual, if you have Copilot enabled and you’ve already added synonyms, you’ll now see a banner prompting you to get relationships with Copilot as well.

Unlike with synonyms, Copilot-generated relationships will not be used to understand natural language inputs until you have approved them, so make sure you accept the ones which work for your model!
Allow Copilot to help interpret Q&A questions.
You can also now use Copilot to improve the Q&A engine’s term recognition when you ask questions! This new feature will trigger when you ask Q&A a question which uses words or phrases which Q&A doesn’t recognize, but which it detects might be referring to data entities like tables or columns. Then, Copilot will also check those unknown words or phrases to see if there is any reasonable match — and, if so, return the answer as a visual as though a suggested synonym had been applied.

This feature is not a replacement for synonyms! In fact, adding synonyms for the entities in your semantic model is even more important to create good matches, as they increase the surface area to check for similarities. It will widen the range of inputs Q&A will recognize, but like a multiplier, it will improve recognition for well-modeled data much better than it will for poorly modeled data.
This feature will be automatically enabled when you choose to get synonyms with Copilot, but you can also turn it on or off manually in the suggestion settings menu in the Synonyms tab in Q&A setup.

We’ve made saving Power BI content as an image simpler and more powerful.
First, we’ve added a new dropdown menu to the add-in’s footer. In that menu, you can choose whether you want to see live data or a snapshot. So now it is much easier to find where to switch between live data and a static image.
Second, for snapshots, you now have two options:
- Public snapshot: Anyone who can view the presentation can view the image.
- Snapshot: Only those who have permission to view the report in Power BI will be able to see the snapshot.
Third, we’ve disabled the default snapshot, so that the slide thumbnail doesn’t show the image by default (this also applies when you copy & paste the slide into an email for example), but only after the add-in is loaded and the required permissions have been checked.
And lastly, we honor this setting also when you open the presentation in PowerPoint for the web. You still cannot change a live view into a snapshot in PowerPoint for the web, but if you or someone else has changed the view to snapshot in the PowerPoint desktop app, this will be respected, and you will see the snapshot also in PowerPoint for the web.
PowerPoint allows you to continuously playback a presentation. This is especially useful when you want to present information in public displays without any human interaction.
If a presentation that is running continuously has slides that include the Power BI add-in, the data in the add-in might become outdated, since the add-in gets the data from Power BI when the slide is loaded, or when the user manually refreshes the data being presented.
With the new automatic refresh in slide show feature, you can set the add-in to automatically pull fresh data from Power BI while the presentation is in slide show mode, ensuring that the presentation will always show the most recent data.

Note that auto refresh only happens in slide show mode and not while you’re editing the presentation.
When you add the Power BI add-in to an empty slide that doesn’t have a title yet, the Power BI add-in is here to help. It offers you suggestions for the slide title based on the content of you add-in. The title can be the report name, the page/visual name, or both. Just select the desired option and hit Add title .
Introducing the Fabric metadata scanning sample app
We’re delighted to announce the availability of the new Fabric metadata scanning app. This sample application builds upon the metadata scanning capabilities of Fabric’s set of Admin REST APIs collectively known as the scanner APIs. This new app can be used as a reference for admins interested in utilizing the Scanner API to catalog and report on all the metadata of their organization’s Fabric items.
The Fabric metadata scanning sample app handles all the steps for calling the scanner API including authentication, parallelism, throttling, and incremental scanning. In addition, it provides a central configuration file which can be easily modified to suit the specific needs of the caller. Currently authentication is supported both by using a service principal and a delegated token.
The app is available as a Microsoft open-source project, and is open for suggestions and improvements here:
https://github.com/microsoft/Fabric-metadata-scanning/
Dynamic Subscriptions for Power BI and paginated reports
We’re pleased to announce that you can now send dynamic per recipient subscriptions to up to 1000 recipients instead of the earlier limit of 50 recipients from the data in the Power BI semantic model. For existing subscriptions, we will automatically send subscriptions up to 1000 recipients if your Power BI semantic model contains that many rows of data. You need to edit the subscription if you don’t want to automatically send subscriptions. Learn more about creating dynamic per recipient subscriptions for Power BI Reports and paginated reports .

This feature will be available in some regions as soon as today, however depending on the geography in which your Power BI tenant is located, it may take up to two weeks to appear.
The Power BI Mobile apps support folders in workspace. So, you can access items that are organized in folders inside of your workspace directly from the mobile app.

Workspace and folders are Fabric entities, which means that you can add items that are not necessarily Power BI items to a workspace. But the Power BI Mobile apps only support a subset of Power BI items. Therefore, only the Power BI item will be accessible when you are browsing the folder content from the app. If a folder contains only non-Power BI items, it will appear empty in the mobile app.
When a field in your model is marked as a barcode, you can use your mobile device camera to scan the barcodes of real objects to filter reports that are built on this model. This feature is extremely useful for retail, where you can scan the barcode on a piece of merchandise to get a report showing data about the item directly in your mobile app (for example, inventory information, product selling data, etc.).
To make it easier and more intuitive to use barcodes and based on feedback we’ve gotten from our users in stores, we’ve added a new button to the report footer that makes it a one-click action to clear any previously scanned barcode from the report’s filter.
Learn more about scanning barcode from the mobile app

We continue to simplify the experience of using the Power BI Mobile apps, always keeping in mind the frontline workers who need quick access to their content. In this monthly update we’ve made it possible to open Power BI items on full screen, so users can view their data at its max.
Opening an item on full screen is supported both for launch items and when using a universal link.
A launch item is a Power BI item (report, page, app, etc.) that the user has selected to automatically open when they open the app. Now, you can also tell the Power BI Mobile app to open this item in full screen mode.
To set a launch item to open in full screen mode, go to Settings > Launch item and enable the Open in full screen toggle.
Using an MDM tool that supports an AppConfig file, mobile device administrators can also configure a launch item to be opened in full screen mode for their users.
You can also add the query parameter? fullscreen =1 to a Power BI item’s link. When you use a link with this parameter on your mobile device, the mobile app will open the item in full screen mode.

Visualizations
New visuals in appsource kpi matrix growth rate chart by djeeni v1.4 aimplan comment visual.
Making financial statements with a proper layout has just become easier with the latest version of the Financial Reporting Matrix.
Users are now able to specify which rows should be classified as cost-rows, which will make it easier to get the conditional formatting of variances correctly:

Selecting a row, and ticking “is cost” will tag the row as cost. This can be used in conditional formatting to make sure that positive variances on expenses are a bad for the result, while a positive variance on an income row is good for the result.
The new version also includes more flexibility in measuring placement and column subtotals.
Measures can be placed either:
- Default (below column headers)
- Above column headers

If you have multiple fields showing on your column headers, you can now decide which of these fields you want a column subtotal for.
This is in addition to the already existing features of the Financial Reporting Matrix:
- Adding custom rows
- Applying company/customer specific themes
- Expand/collapse columns
- Conditionally hide columns
- + much more
Highlighted new features:
- New Format Pane design
- Measure placement – In rows
- Select Column Subtotals
- Row Options
Get the visual from AppSource and find more videos here !
A Horizon Chart is an advanced visual, for time-series data, revealing trends and anomalies. It displays stacked data layers, allowing users to compare multiple categories while maintaining data clarity. Horizon Charts are particularly useful to monitor and analyze complex data over time, making this a valuable visual for data analysis and decision-making.
Key Features:
- Horizon Styles: Choose Natural, Linear, or Step with adjustable scaling.
- Layer: Layer data by range or custom criteria. Display positive and negative values together or separately on top.
- Reference Line : Highlight patterns with X-axis lines and labels.
- Colors: Apply 30+ color palettes and use FX rules for dynamic coloring.
- Ranking: Filter Top/Bottom N values, with “Others”.
- Gridline: Add gridlines to the X and Y axis.
- Custom Tooltip: Add highest, lowest, mean, and median points without additional DAX.
- Themes: Save designs and share seamlessly with JSON files.
Other features included are ranking, annotation, grid view, show condition, and accessibility support.
Business Use Cases: Time-Series Data Comparison, Environmental Monitoring, Anomaly Detection
🔗 Try Horizon Chart for FREE from AppSource
📊 Check out all features of the visual: Demo file
📃 Step-by-step instructions: Documentation
💡 YouTube Video: Video Link
📍 Learn more about visuals: https://powerviz.ai/
✅ Follow Powerviz : https://lnkd.in/gN_9Sa6U

ZoomCharts has just launched the latest addition to their suite of user-friendly custom visuals – Drill Down Scatter PRO . It provides all the features you would expect from a great scatter chart visual, but what sets Scatter PRO apart is the ability to easily drill down . Simply click on a data point and see all the values underneath it.
This way, you can quickly find your answers while also gaining a full understanding of where they come from. Furthermore, the visual’s UI is designed to be smooth and user-friendly for PCs and touch devices , and with cross-chart filtering you can use Scatter PRO to build incredible reports for immersive data exploration.
Main features:
- Drill Down: Create a multi-level hierarchy and drill down with just a click.
- Dynamic formatting : Apply custom marker colors, shapes, or images to each data point directly from data.
- Trendlines: Show a linear or polynomial regression line on the chart.
- Thresholds: Display up to 4 line or area thresholds on each axis.
- Area Shading: Highlight up to 8 custom areas with rectangles or ellipses.
🌐 Learn more about Drill Down Scatter PRO
Documentation | ZoomCharts Website | Follow ZoomCharts on LinkedIn

The Image Gallery is the first visual to be certified by Microsoft that allows for the display of high-quality images and their exportation along with other report content. There is no need to upload images to the Cloud, a CDN, or use any datasets . Simply import your images directly into the visual and share them instantly with your colleagues.
This visual boasts several impressive capabilities:
- Microsoft certification ensures that the visual doesn’t interact with external services , ensuring that your images are securely stored and encrypted within the report, consistent with your report’s sensitivity settings.
- Automatically saves your selected image in preview mode , allowing your colleagues to view the exact image you have highlighted.
- Images can be uploaded or removed exclusively in Edit Mode. Users in View Mode can only view the images.
- The visual is compatible with Power BI’s export functionality to PDF and PowerPoint.

LINK: https://appsource.microsoft.com/en-us/product/power-bi-visuals/pbicraft1694192953706.imagegallery?tab=Overview
A space-saving horizontal bar chart designed with category labels placed inside the bars for clarity
This horizontal bar chart serves as an efficient filter to navigate through your data more effectively, optimizing space by placing the category labels within the bars themselves.
- Adjustable Bar Thickness and Spacing: Offers the flexibility to adjust the thickness of the bars and the spacing between them. This allows for optimal use of space and improves readability, especially when dealing with large datasets.
- Tooltip Details on Hover: Displays detailed information about each category when the user hovers over a bar. This feature provides additional context and insights without cluttering the visual.
- Data-Driven Category Labels: Automatically updates category labels based on the data source. This ensures that the chart remains accurate and up to date, reflecting any changes in the underlying data.
- Support for Hierarchical Data: Allows users to drill down into hierarchical categories within the chart. This functionality enables a more detailed data analysis without leaving the context of the initial visual.
- Export Options: Offers the ability to export the chart as an image or PDF, facilitating easy sharing and reporting outside of Power BI.

Link: https://appsource.microsoft.com/en-us/product/power-bi-visuals/pbicraft1694192953706.horizontalbarchart?tab=Overview
Introducing the “ Trends ” visual for Power BI – your gateway to leveraging Google Trends data for strategic business analysis. This innovative visual tool allows you to compare brand popularity, monitor market trends, and gain insights into consumer search behaviors directly within your Power BI environment.
With Trends visual, you can:
- Analyze the ebb and flow of brand interest over time to identify market opportunities and competitive threats.
- Compare the popularity of products to inform marketing strategies and product development decisions.
- Understand seasonal trends to optimize your marketing campaigns and inventory planning.
Securely integrated and easy to use, “Trends” transforms your Power BI reports into a dynamic analysis tool, offering a comprehensive view of the market landscape. Dive into data-driven decision-making with “Trends” and stay one step ahead in the competitive business environment.

New visual: Multi-pane Card can be used to group and show data in multiple collapsible panes in Power BI reports. It is an alternative to multi-row card visual, but it can combine columns into a few groups and put each group’s data in each pane. It is suitable to show data in detail with a reduced number of report pages.
Screenshot 1 (Show data in 3 groups: Area and Population, GDP and Foreign Exchange Reserves for countries)

Data can be sorted by a specified column and numbers can be converted to a human readable string. You can also set up how many rows that you want to show on the card. Using these features, it will be very easy to show “Top 10 best performing stores” or “Top 10 worst performing stores” for retail businesses.
Screenshot2 (Combined with drilldown choropleth map to show the top 10 richest countries by GDP per capita for each continent and subregion)

You can go to Microsoft AppSource( https://appsource.microsoft.com/en-us/product/power-bi-visuals/mylocsinc1648311649136.tcard )to download and try it.
To learn more on how to use it, please read tutorials ( https://www.mylocs.ca/tutorials.html#multi-pane-card ).
Introducing Copilot pane in Power BI Desktop
Earlier this year, we announced preview of Copilot for all customers with Premium/Fabric capacity in Power BI web . We’re thrilled to share that the same Copilot experience for report creation is now available for preview in Power BI Desktop. With our current preview, users can create reports faster and easier in the Power BI Desktop experience. You can now open the Copilot pane in report view and ask Copilot to:
- Create a report page – Copilot will create an entire report page for you by identifying the tables, fields, measures, and charts that would help you get started.
- Summarize a semantic model – Copilot will help you understand your Power BI semantic model by summarizing the data in your model.
- Suggest a topic – Copilot will suggest topics for your report pages.
Click here to learn more about how to get started.
That is all for this month! Please continue sending us your feedback and do not forget to vote for other features that you would like to see in Power BI! We hope that you enjoy the update! If you installed Power BI Desktop from the Microsoft Store, please leave us a review .
Also, don’t forget to vote on your favorite feature this month on our community website.
As always, keep voting on Ideas to help us determine what to build next. We are looking forward to hearing from you!
- paginated reports
- power bi desktop
- Visualization
IMAGES
VIDEO
COMMENTS
Select the Slide Show tab. Select the Use Presenter View checkbox. Select which monitor to display Presenter View on. Select From Beginning or press F5. In Presenter View, you can: See your current slide, next slide, and speaker notes. Select the arrows next to the slide number to go between slides. Select the pause button or reset button to ...
First, create a new custom slide show and select the slides that you want to display. Then, click Add, enter the name of the presentation and click OK. This new custom presentation will appear on the list. Select it and click Show to begin the presentation. Defining a custom slide show.
Presentation mode in PowerPoint allows for a more engaging and organized presentation, resulting in a better experience for both the presenter and the audience. To enter presentation mode, simply click on the "Slide Show" tab and select "From Beginning" or "From Current Slide".
Keep reading to find out more about using Presenter View in PowerPoint and the best features to try out.. Turn On PowerPoint Presenter View. In PowerPoint for macOS, simply click on Presenter View on the Slide Show tab to kick off the presentation in Presenter view. Turn on Presenter View by clicking on Presenter View on the Slide Show tab.. You'll see the Presenter View interface on one screen.
A simple method for switching to Presenter View on a single monitor is to click the three dots ( More slideshow options) at the bottom in SlideShow mode and select Show Presenter View. You can also switch to Presenter View on a single monitor anytime using the ALT+F5 hotkey. The presenter can easily manage a PPT in presentation mode, with the ...
Before you can access the presenter view of Microsoft PowerPoint, you need to follow these steps: Open Microsoft PowerPoint and select an existing presentation. Once the existing presentation opens, go to the Slide show Tab and navigate to the "Monitors" section. Check the box beside the "Use Presenter View." Select from the "Start Slide Show ...
In today's tech tip, we share some Microsoft PowerPoint presentation tips. Including how to get into presentation mode, how to annotate the screen while pres...
Report abuse. In reply to John SR Wilson's post on October 2, 2022. You could put an action button on the target slide (s) and give it an action of "Last Slide Viewed" You can either click it or maybe try TAB then ENTER to go back. This. But be aware that "Last Slide Viewed" doesn't work like a reasonable person would expect it to (ie, like the ...
With that let's go back to our ongoing training video on using Microsoft PowerPoint presenter mode. A couple keys that I really prefer is the black and white key. If I hit B in here we go, look what it just did. It blank the screen in black. If I hit the W key, it does the same thing it blanks the screen to white.
If this happens to you often, these are the PowerPoint shortcuts you need for a quick text alignment before starting your slide show: Use "Ctrl + J" to justify your text. Press "Ctrl+E" to center the text. Use "Ctrl+L" for left alignment. Press "Ctrl+R" to right-align your text.
Navigate to the Slide Show tab. Hold down the Alt key on your keyboard. Click From Beginning. Holding down the Alt key and clicking From Beginning, the Presenter View will launch from the very first (non-hidden) slide in your presentation.
To access presentation mode in PowerPoint, simply click on the Slide Show tab and then click on the From Beginning or From Current Slide buttons, depending on where you want to start your presentation from. Alternatively, you can press F5 on your keyboard to start presentation mode.
For example to go to slide 60, my solution is to enter the presentation mode and go back to editing mode immediately afterwards: <F5> 60 <Enter> <Esc>. A few more keystrokes but fast enough and working well for me. F5: presentation mode. 60: the desired slide number. Enter: go to slide. Esc: back to edit mode, on the shown slide
To go to a specific slide number, press a number + Enter. For example, if you wanted to see slide 4, just press 4, then Enter. (This shortcut is best for shorter presentations when it's easier to memorize the number of each slide). Press Ctrl + S to display the title of every slide in your presentation. Click on your choice and select Go to .
Learn how to use PowerPoint better, from setting up your slide designs to working with text, images, video, charts, multi-media, and more. Discover how to work with PowerPoint's core presentation tools to make great presentations quickly, while maximizing your presentation design workflow. If you only have a few minutes to spare, then be sure ...
If you want to set the right button click of your mouse to go back during a slide show presentation instead of opening the menu, then here we show you how to configure it.. First, you will need to go to PowerPoint 2010 options.To do this, go to File -> Options.And then click Advanced tab.. Now, look for Slide Show section and then uncheck the Show menu on right mouse click option.
How to Change PowerPoint to Portrait. On Windows: Step 1 - Open your presentation: Launch Microsoft PowerPoint and open the presentation you want to modify. Step 2 - Access the Design tab: Locate the ribbon at the top of the PowerPoint window. Click on the "Design" tab. Step 3 - Find the Slide Size options: Within the "Design" tab ...
To enable automatic refresh, go to the add-in footer, select Add-in options, choose Slide show settings, check Automatic refresh in slide show and set the desired frequency. Note that auto refresh only happens in slide show mode and not while you're editing the presentation. Storytelling in PowerPoint - Auto populating the slide title