Templates for college and university assignments
Include customizable templates in your college toolbox. stay focused on your studies and leave the assignment structuring to tried and true layout templates for all kinds of papers, reports, and more..


Keep your college toolbox stocked with easy-to-use templates
Work smarter with higher-ed helpers from our college tools collection. Presentations are on point from start to finish when you start your project using a designer-created template; you'll be sure to catch and keep your professor's attention. Staying on track semester after semester takes work, but that work gets a little easier when you take control of your scheduling, list making, and planning by using trackers and planners that bring you joy. Learning good habits in college will serve you well into your professional life after graduation, so don't reinvent the wheel—use what is known to work!
14 Best Steps on How to Make an Assignment on MS Word

Nowadays, it is very common for students to complete their assignments using Microsoft Word. Thus, they look up how to make an assignment on MS Word. Because of the numerous options provided by MS Word, it might be difficult for a beginner to handle. All you have to do is become familiar with MS Word’s options before moving on to the assignment.
Here in this blog, we will explain 14 best steps you need to follow in order to know how to make an assignment on MS word.
How to make an assignment on MS word
Table of Contents
Yes, we understand that completing an assignment is challenging for most students. Because some of them are worried about completing the task like write my paper , and even if they aren’t worried, they don’t know how to use Microsoft Word effectively, which can be disastrous for many. Similarly, we are publishing this blog to teach you how to make an assignment in Microsoft Word.
| . |
Yes, we understand that completing an assignment is challenging for most students. Because some of them are worried about completing the task, and even if they aren’t worried, they don’t know how to use Microsoft Word effectively, which can be disastrous for many. This blog is being published to teach you how to make an assignment in Microsoft Word.
1. Setting the layout of the page for your assignment
On the Toolbar, select the Page Layout tab. Likewise, Page Setup options will appear.
2. Set Margins
Set the margins as follows (Standard measure for the margin):
- Bottom: 2.5cm
- Left: 2.5cm (or 3.2cm)
- Right: 2.5cm (or 3.2cm)
3. Setting Orientation of the page
- Orientation: Portrait
4. Setting Size
- Set to A4 unless otherwise specified.
5. Setting styles
Go Back to the Home tab, You will find the Styles options in the right of the toolbar you will need to use these steps to set the headings and paragraph text for your work.
6. For Headings
Always use the first three headings (Heading 1,2 and 3)
- H1: Arial 14 pt bold
- H2: Arial 12 pt bold, italics
- H3: Arial 10.5-11 pt bold
And the text type should be Normal text
- Times New Roman 12 pt (or equivalent)
7. To set the headings styles for your work, you will have to
- Click the small Styles icon/button.
- Select/highlight the style to modify (e.g. ‘H1’), and then right-click >Modify. Likewise, the Modify Style dialog box will appear.
- Under Formatting, You can change the font style and size as per your need.
- Click OK.
8. Setting up your assignment as the one document
Also, your Work, including the title page and references ( not the Assignment Attachment form*), must be aggregated as a single word (.docx) report.
Therefore, it is simpler to make one record, embed your significant headings, and enter the content from that point. But, if you decide to make separate documents while setting up your task (for example, a different record for references), you will need to copy and paste the final contents into the one-word document and finalize the formatting there.
*The assignment attachment structure is either submitted electronically as a different document or attached to a submitted printed copy.
If you face any issues related to PowerPoint or find it difficult to complete your PowerPoint homework, use our PowerPoint PPT Homework Help by Experts .
9. Inserting section breaks, page breaks, and page numbers
The document has two sections
Section 1 Contains
- The title page
- Table of contents
Section 2 Contains
- The remainder of the assignment.
There are then page breaks within each section i.e
(e.g. between ‘Abstract’ and ‘Table of contents’; ‘Conclusion’ and ‘References’).
To insert the Section break (i.e. make two sections)
- Position your cursor at the end of the Table of contents. (Just have this as a heading; the actual table will be added at the end.)
- From the toolbar at the top of your document, open the Page Layout tab and select Breaks>Section Breaks>Next Page. Under Section break types, select ‘Next page’. This has now divided the assignment into two sections.
Now to insert the page breaks
- Place your cursor at the foot of the title (cover) page.
- Select the Page Layout tab>Breaks>Page Breaks>Page. This has now created a page break between the title page and Abstract.
- Place the cursor at the foot of the Abstract page and repeat to make the break between the Abstract and Table of contents.
- Place a page break between the Conclusion in the next section.
10. Now to add the page numbers
For section 1:.
- Place your cursor within the title page. Click on the Insert tab and then select Page Number in the Header & Footer set of options.
- Select Top of Page>Plain Number 3 (‘right’ alignment). Do not close the Header and Footer just yet.
- Check the box for Different First Page. (This will remove the page number from the title page.)
- In the Header & Footer group of options to the left of the toolbar, select Page Number>Format Page Numbers. Select i, ii, iii .. from the Number format
- Drop-down list. Under Page numbering, click the Start at the radio button (if not already activated) and select i. Click OK.
- Close the Header and Footer. [This will paginate slightly differently from the example, with Abstract on page ii. ]
For section 2:
- Go to the start of section 2 (i.e. beginning at the ‘Introduction’) and double click on the existing page number. This will open the Header settings options.
- In the Header & Footer options section on the toolbar, select Page Number>Format Page Numbers.
- Make sure the ‘Show number on the first page is selected (i.e. the box is ticked).
- Select 1, 2, 3 from the Number format drop-down list. Under Page numbering, Click on the Start at the radio button and set the start on page 1.
11. Inserting the Table of contents
- Move the cursor under the ‘Table of contents’ heading.
- Check the checkboxes for ‘Show page numbers’ and ‘Right align page numbers’.In the (last) Show levels box, set it to either just ‘1’ (i.e. list only the heading 1 level headings) or ‘2’ (to show both H1, and H2 headings).
- To update the table anytime, right-click on the table and it’s almost done.
12. The title page
Follow these steps as the model for your work:
- Assignment title: Arial 28 pt, italics, centered
- (Assignment number): Arial 18 pt, italics, centered
- Other details: Times New Roman 14 pt, left-justified; single tab spacing for items on the one line.
13. Word count
Show the word count properly for the body of your assignment, because it’s’ important.
- Place your cursor on the Introduction title, hold the Shift key down, and got to the end of the Conclusion.
- And then Tools>Word Count and record the number of words.
14. Spelling and Grammar Check
Always keep an eye on spelling and sentence structure and Before you get a printed copy of your task,
What you have to do is
- Run the word spell and sentence structure, and carefully look at your Work. (Tools>Spelling and Grammar.)
- Ensure the Dictionary Language is set to English (Australia, UK, Canada).
Get the Best Excel Assignment Help Now
6 Tips On How To Make an Assignment First Page Best
8 Best Steps On How to Write An Assignment Report
4 Tips on How to Write an Assignment Introduction
6 Tips on How to Make An Assignment For High School
To this end, now you know the 14 best steps on how to make an assignment on MS Word in detail. Many times students are worried about their assignments but we are here to assist you with all your problems. You can contact our experts anytime if you have an issue with MS Office assignment help.
As a result, Our computer science assignment help experts are available for you to provide help 24/7.
Related Posts

How to Hire someone to do my Statistics Homework for Me?
Students ask to do my statistics homework for me. Although there are many online tutors or statistics homework service providing websites available to help you…

How to Get Good Grades in Exams Tips by Experts
Here in this blog, Codeavail professional experts will help you to understand how to get good grades in Exams. Notice that not all the material…
9 Microsoft Word Tips to Edit Your College Assignment Faster

Your changes have been saved
Email is sent
Email has already been sent
Please verify your email address.
You’ve reached your account maximum for followed topics.
Assignments at the college and university levels are research-heavy, and you’re often expected to produce write-ups with a significant number of pages. Just when you think you’re done with producing the required word count, the next step is equally challenging and time-consuming: editing.
From keyboard shortcuts to simple, built-in features such as Find and Replace and the automatic table of contents, here are several tips you can use to edit and format your college assignment more efficiently in Microsoft Word.
1. Leave Paragraph Spacing as Your Last Step

Let’s first start on the right track. When you have a 3,000-word essay or report ahead, it’s tempting to set double-spacing when you only write a few sentences or a paragraph at most. It gives the comforting illusion that you have done more work than you actually have.
But to be more efficient at the final editing stage, it’s best to leave paragraph spacing as your last step. This way, you save time because you don’t have to scroll up and down much more than you need to while navigating through different sections and pages of your text.
2. Learn to Utilize Keyboard Shortcut Keys
Keyboard shortcuts make editing and formatting much faster compared to using a mouse. For example, when you use your mouse to select some words, you’ll probably miss a letter or two and have to re-highlight, or overshoot and include a period when you don’t need to.
In this case, you can select text accurately by using Ctrl + Shift , and the left and right arrow keys in Windows. There are many more Microsoft Word keyboard shortcuts that will enable you to get most editing done on the keyboard, without having to switch to your mouse or trackpad. Don’t underestimate the amount of time you save with this method!
3. Hide the Headers and Footers

When you’re reading through a continuous body of text, the blank headers and footers may feel disruptive. To have a smoother reading and editing experience, hide the headers and footers to join all the pages together.
Hover your cursor over the gray space between your current page and the next, then double-click. When you need to use the headers and footers in Microsoft Word again, unhide them by hovering your cursor over the page separator line and double-click.
4. Collapse the Headings and Subheadings

For long report-style assignments, you’ll likely split your content into headings and subheadings. As you move from one section to the next, or jump between sections to rewrite and edit, make it easier to scroll through your text by collapsing the headings.
Hover over the heading title, then click the triangle icon that appears next to it to hide the content. If you want to hide all headings at once, right-click on any heading, and select Expand/Collapse > Collapse All Headings .
5. Automatically Sort References by Alphabetical Order

The works cited list is an essential section in any higher education assignment and is usually sorted by alphabetical order. You’ve likely added references to the list as you cite them in your essay, but when it comes to sorting at the end, it’s unfeasible and time-consuming to sort them manually. You can simply sort them automatically in Microsoft Word.
Select all your references and go to the Home tab. Under the Paragraph section, click the Sort icon (A and Z, with a downward arrow). In the Sort by field, choose Paragraphs . In the Type field, select Text . Then, select Ascending and click OK . The list will now be sorted by alphabetical order.
However, you might notice a couple of outliers. For example, when some references start with symbols instead of a letter, they will all likely be pushed to the very top. These are the few ones you’ll then need to manually reinsert into your list correctly.
6. Use Find and Replace to Avoid Spelling Mistakes

Whether they’re textbooks or journal articles, every student has probably encountered authors with surnames that are a little tricky to spell. Typing the name over and over for each in-text citation is prone to human error. To avoid misspellings, you can use Find and Replace.
First, use a unique abbreviation as a placeholder when you write your assignment. I recommend including a number in this abbreviation. This is because if your abbreviation only consists of letters, there’s a chance that this short combination of letters may have appeared elsewhere, as a part of a word, in your essay.
Once you’re done with the body content, it’s time to replace the abbreviation with the actual surname. In the Home tab, click Replace in the Editing tab. In the Find what field, type your abbreviation. In the Replace with field, type the actual author's name. Then, click Replace All . All your abbreviations will now be replaced with the correct author surname.
7. Insert Your Picture Into an Invisible Table

If you haven’t quite got the hang of formatting pictures in Microsoft Word, here’s a simple alternative that helps guarantee your image won’t cause your text to break up at weird places: insert your picture into an invisible table.
Go to the part of the text where you want your picture to appear. Press Enter to go to a new paragraph. Head to the Insert tab, click Table , and select one box to create a 1x1 table. With the cursor inside your table, click Pictures > Insert Picture > This Device to upload your picture into the document.
You can resize your picture within the table. Once you’re satisfied, highlight the table, go to the Table Design tab, click Borders > No Border . The black table border will then disappear. Your picture now appears to be perfectly fitted between two paragraphs of text.
8. Have an Overview of Multiple Page at Once

When you’re almost done editing, it’s best to scroll through all the pages to make sure there are no odd blank pages, separate sections, or incorrect image displays. But if you have more than 20 pages worth of content, scrolling through that much content quickly is just dizzying.
Instead, go to the View tab. In the Zoom section, click Multiple Pages . This zooms out your Microsoft Word document , so you can view two or three pages at once. You can also click the Zoom slider at the bottom right to zoom out even more and view more pages at once.
9. Automatically Create a Table of Contents

One of the final assignment components is the table of contents. If you’ve been manually keying in each heading, typing a line of periods that end with the heading’s corresponding page number, and double-checking the said page number yourself, it’s time to let Microsoft Word handle the task.
First, make sure you have applied the correct style to your headings. You can check this by clicking on each heading and see which style is selected in the Home tab. Then, number the pages of your Microsoft Word document .
Finally, go to the blank page where you want to insert your Table of Contents. Head to the References tab, click on Table of Contents , and select one of the Automatic Tables . Microsoft Word instantly generates a table of contents for you.
Improve Your Editing Process in Microsoft Word
By applying the above tips, you can revise your assignment more quickly and effectively without burdening yourself with eye fatigue. Cut down on the excessive scrolling and other manual tasks that can be done automatically by Microsoft Word.
Plus, saving time on editing means you have even more time to proofread and review your essays thoroughly, enabling you to produce higher-quality essays and reports.
- Productivity
- Microsoft Word
- Text Editor
- What is Word? Article
- Create a document Article

Create a document

Select Blank document .
Or, if Word is already open, select File > New > Blank document .
To create a document using a template
Open Word. Or, if Word is already open, select File > New .
Double-click a template to open it.
Tip: Pin templates you like, so you always see them when you start Word. Select the template and then select the pin icon that appears next to the name of the template.
Search for a template
In the Search for online templates box, enter a search word like letter , resume , or invoice .
Or, select a category under the search box like Business , Personal , or Education .
Click a template to see a preview. Click the arrows on the side of the preview to see more templates.

Select Create .
For more templates, see Microsoft Word templates .
Create more with Microsoft templates
Download free, pre-built templates
Save documents online
Discover more Word training at LinkedIn Learning

Need more help?
Want more options.
Explore subscription benefits, browse training courses, learn how to secure your device, and more.

Microsoft 365 subscription benefits

Microsoft 365 training

Microsoft security

Accessibility center
Communities help you ask and answer questions, give feedback, and hear from experts with rich knowledge.

Ask the Microsoft Community

Microsoft Tech Community

Windows Insiders
Microsoft 365 Insiders
Was this information helpful?
Thank you for your feedback.

Want to create or adapt books like this? Learn more about how Pressbooks supports open publishing practices.
Word Practice 1

Here is a video demonstrating the skills in this practice. Please note it does not exactly match the instructions:
Complete the following Practice Activity and submit your completed project.
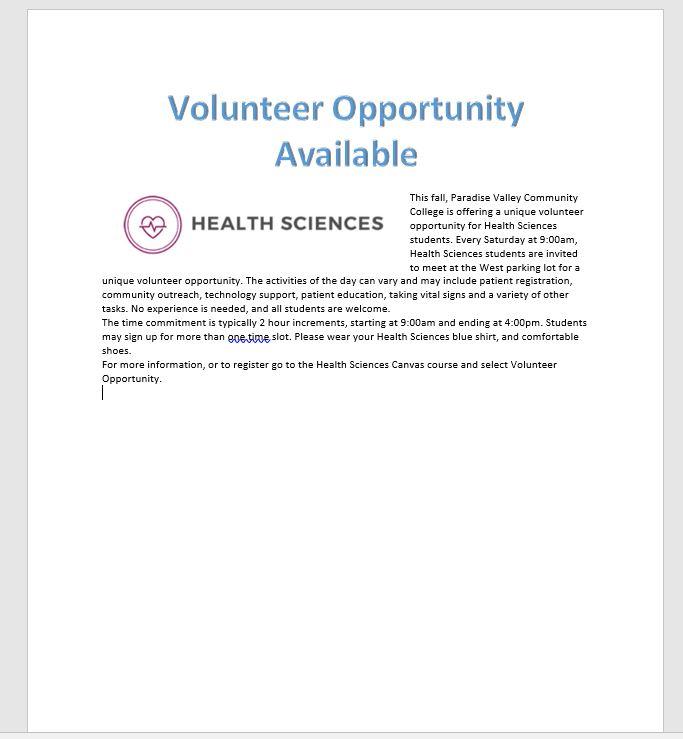
For our first assignment in Word, we will create a flyer to be printed or posted online. The flyer will advertise a volunteer opportunity for Health Sciences students at Paradise Valley Community College. Key skills in this practice are inserting text and pictures, textboxes, formatting text and footers.
- Start Word. Click Blank Document .
- Show formatting marks by navigating to the Home Tab, Paragraph Group, and selecting the Show/Hide icon. This is a Toggle Button . This means it has two modes, on and off. To turn it on, click it once, to turn it off, click it again.
- Show the ruler by navigating to the View tab, Show Group, and selecting the Ruler Check Box . A Check Box is a type of input control . A checkboxes value is only included in the submitted data if the checkbox is currently checked. In other words, when the box is checked, the value is included.
- Navigate to the File Tab to enter Backstage View. In backstage view, select File, then Save As. Click the Browse button. In the Save As dialog box , navigate to your file structure from the previous chapter, then open the Word folder. In the Name field, type Yourlastname_Yourfirstname_Word_Practice_1 as the file name, and then save.
- Type Volunteer Opportunity Available and press Enter twice.
- Type the following text: This fall, Paradise Valley Community College is offering a unique volunteer opportunity for Health Sciences students . Press spacebar.
- Navigate to the Insert Tab, Text group, and choose the Object arrow. Then choose text from file. In the Insert File dialog box, browse to the location where you saved the files from Canvas. Select the file Text_Word_Practice1. Click OK. The text will automatically update your document.
- Select all of the text in the document. On the Home Tab, Font Group, ensure the Font is Calibri and font size is 12.
- Select the title, Volunteer Opportunity Available, including the paragraph mark. On the Home Tab, Font Group, select the arrow next to Text Effects and Topography . In the third row, third column, a pply the Fill: Blue, Accent color 5; Outline: White, Background color 1; Hard Shadow: Blue, color 5 text effect.
- With the title still selected, change the font size to 36.
- On the Home Tab, Paragraph Group, choose Center to align the title centered on the page.
- On the Home Tab, Font Group, change the font color to Blue, Accent 1 for the title.
- With the title still selected, on the Home Tab, in the Font Group, choose the arrow next to the Text Effect and Typography icon. Apply a Shadow and under Inner, click Inside: Right text effect.
- Position the insertion point at the beginning of the paragraph that begins with This Fall.
- On the Insert tab, Illustrations group, choose Pictures . Navigate to your saved files from Canvas and choose the HSPicture_Word_Practice1 image.
- Be sure the picture is selected, and apply the Square text wrapping option.
- Using the sizing handle at the lower right hand corner of the picture, drag up and to the left until the bottom of the graphic is aligned at approximately 3.5 inches on the vertical ruler.
- Click Undo to return the picture to its original size. The Undo icon is located in the quick access toolbar in the upper left hand corner.
- On the Picture Tools, Format tab, in the size group, change the shape width to 4”.
- On the Quick Access Toolbar , click the Save icon. Then, compare your document to the image below.
- Ensure the picture is still selected. Display the Layout dialog box by selecting the Layout Options shortcut menu, then choose see more. In the Layout dialog box for the picture, make sure the Position tab is selected.
- Set the horizontal alignment to Left, relative to Margin.
- Set the vertical alignment to Top, relative to Line. Select OK to close the dialog box.
- With the picture selected, apply the Soft Edges 10 Point picture effect. This is on the Picture Tools Format Tab, Picture Styles group, under Picture Effects, Soft Edges.
- With the picture selected, on the Picture Tools, Format tab, in the Adjust Group choose the Artistic Effects arrow. Apply the Pastels Smooth artistic effect. Dese lect the picture .
- On the Design Tab, in the Page Background Group, select Page Borders. Add a page border selecting the:
- Shadow setting
- Triple Lines style
- Blue, Accent 1 color
- Whole document
- Position the insertion pointer at the blank paragraph below the title and press Enter six times.
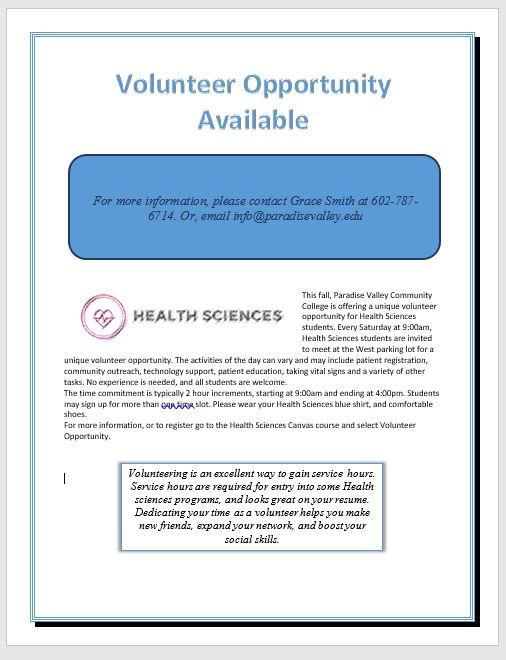
- On the Insert Tab, in the Illustrations group, choose Shapes . Insert a Rounded Corners Rectangle shape at the left margin at approximately 1.5 inches on the top ruler. Click once to insert a 1-inch by 1-inch Rounded Rectangle, or use the drag and drop feature.
- On the Drawing Tools, Format Tab in the Size group, Change the shape height to approximat ely 1.8 and the shape width to 6.4.
- Select the Rectangle shape and type the following text: For more information, please contact Grace Smith at 602-787-6714. Or, email [email protected]
- Italicize the text, change the font to Calibri and increase the font size to 16. Deselect the text.
- Select the same text as above and explore the mini-toolbar , by clicking the Font Color button arrow and under Theme Colors, click on Blue, Accent 5, Darker 50%.
- With the shape still selected, go to the Drawing Tools, Format Toolbar, the Shape Styles Group. Select the arrow next to Shape Outline and under Theme Colors, click on Blue, Accent 5, Darker 50%. Change the weight to 3pt.
Compare your document to the image below.

- Using the keyboard shortcut CTRL+END , navigate to the end of your document. If your keyboard does not have these keys, click to put your insertion point after the period on opportunity. Hit enter 3 times.
- Your insertion point should be approximately at the 8” mark on the side ruler. On the Insert tab, in the text group, click the arrow next to the textbox and draw a text box at approximately the 1”mark on the vertical ruler. Draw a text box by dragging down to create a text box that is approximately 1.5 inches high by 4.5 inches wide. Type the following in the text box: Volunteering is an excellent way to gain service hours. Service hours are required for entry into some Health sciences programs, and looks great on your resume. Dedicating your time as a volunteer helps you make new friends, expand your network, and boost your social skills.
- Select and Drag the textbox, by clicking and holding on the outer edge, until the horizontal green alignment guide displays above the first blank paragraph mark and the vertical green alignment guide displays in the center of the page. To be more precise:
- In the Layout dialog box on the Position Tab for the text box set the horizontal alignment to Centered, relative to Margin.
- Set the Vertical alignment by typing .25 in the Absolute position box and selecting Below Paragraph .
- On the Size tab, type 1.5 in the Absolute Height box and 4.5 in the Absolute Width box. Then, click OK.
- With the textbox still selected, on the Drawing Tools, Format Tab, in the Shape Styles group Apply the Colored Outline – Blue, Accent 1 shape style.
- Under Shape Effects , apply the Offset Center outer shadow shape effect to the text box.
- Select the text in the text box, change the font size to 13 italics, and center the text.
- Save the document. Compare your document to the image below.
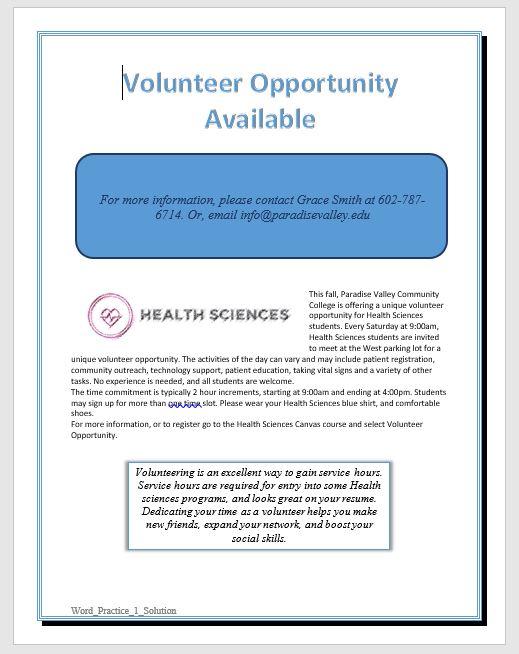
- On the Insert tab, in the Header & Footer Group, choose Edit Footer. On the Header & Footer Design Toolbar, in the Insert Group, choose Document Info. Use Document Info to insert the file name in the footer. Select the File Name Field . The File Name should display in the lower left hand footer of the document. Do not type it in, rather use the Document Info Field.
- In Backstage view, click on Show All Properties, and type the following:
- In the Tags box: trainee, flyer, internship
- In the Subject box: Your course name and section number
- In the Author box: Your first and last name
- Turn off formatting marks. As a reminder, formatting marks are on the Home Tab, Paragraph Group.
- Take a moment to compare your document to the image below and make any modification based on what you have learned.
- Using Find and Replace, (Home tab | Editing | Replace), change all instances of pvcc and Paradise Valley to spscc or South Puget Sound.
- Zoom in to view the document in a larger size. Zoom is located in the lower right hand corner of the Word window.
- Save again, and ensure you have your file saved in a safe location. Take note of that location because you will need to find your file to upload it for grading.
- Submit the file for grading per your instructor’s instructions.
A starting point for creating a new document in Microsoft Word
Characters that display on the screen but do not print, indicating where the Enter key, the Spacebar, and Tab key were pressed, also called non printing characters
A button that can be turned on and off by clicking it once to turn on, and clicking again to turn it off
A small box which can be clicked to indicate a check is turned on or off to indicate an on or off response
Allows the user specify the drive, directory, and name of a file to save their file
Decorative formats, such as shadowed or colors that make text stand out
Images or graphics that are stored locally on a computer or flash drive and can be uploaded to a document to add visual interest
The manner in which text displays around an object
Located above the Ribbon (top-left) and provides access to commonly used features and commands, such as Save and Undo/Redo, and is customizable
Picture formatting options that control the manner in which text wraps around a picture or other object
Formats applied to images that make pictures resemble sketches or paintings
A decorative border that appears outside the margins on each page and can be solid, dashed, or an artistic style
Lines, arrows, starts, banners, ovals, rectangles, and other basic shapes with which you can illustrate an idea, a process or a workflow
Appears whenever you right-click text in Word, Excel or PowerPoint and provides a quick-access version of the Font group on the Home tab, plus a few extra buttons from other groups
Allows you to apply preset colors and effects to quickly change the appearance of your shape
Allows you to change the outline color, weight (thickness), and style of a the outline surrounding a shape
One or more keys used to perform a menu function or other common functions
A moveable, resizable container for text or graphics
A green vertical or horizontal line that displays when you are moving or sizing an object to assist with proper placement
A grouping of coordinating effects that can be applied to a shape including shadows, glows, reflections, soft edges, bevels, and three-dimensional (3-D) rotations
Placeholders that store and display data, and can perform simple tasks like returning the page number or current date and time
Any word, phrase, or number string related to the file that may help you locate the file later
Intro to Microsoft Office Copyright © 2021 by Abby Rusu & Maricopa Millions is licensed under a Creative Commons Attribution 4.0 International License , except where otherwise noted.
Share This Book

22 Basic Microsoft Word practice exercises for beginners

Microsoft Word Exercises for Practice: – This article is very important for a basic computer course, for college and school students learning Microsoft Word online and offline. In this, you will get the best ideas on how to learn and practice Microsoft Word. And you can explore the capabilities of Microsoft Word as a business software in this post.
The best way to learn anything is by doing exercises and creating samples of existing materials from experts. It’s ok that you know about Bold, Italic, Page Layout, Insert Menu, View options, etc. but it’s great if you can use such options in creating anything in Microsoft Word.
I mean tools are the same, but the field, seed, and process are changed. So, Can you do that with the same tools? I know farmers do it daily.
So, let’s explore how to learn Microsoft Word. Microsoft Word Exercises ideas that I think every student around the world should practice.
Microsoft Word practice exercises for beginners:
1. create and design admission/enquiry forms etc..
To create this kind of form, you need to use shapes, text boxes, colors, formatting options, tables, and horizontal lines in MS Word. This is a very good exercise to practice because it will give you an idea of how to use such options practically on various official documents that we use in our daily official life.
These days many people do not create forms and charts usually they download them. That makes the forms boring. And often you see similar kinds of formats in forms. But as a student or teacher or small business owner if you learn to create such forms not only do you expand your thinking and creativity but you can also utilize this ability in business and job.
See a sample in the image below.

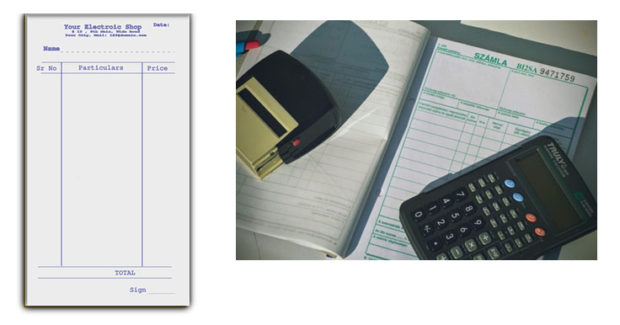
2. Create bills/leaflets/brochures. See the sample below.
Everyone has various designs of bills such as your refrigerator shopping bill, computer bill, electricity bills, and various other kinds of bills. So you can practice in Microsoft Word to create that type of bill format. It’s good for practice in which you will learn the Insert menu option, text adjustment between the table, page size, and text boxes.
3. Design E-book cover pages / Magazine front/ books front/back page using the cover page option in Insert Menu.
This practice is an advance. But try to find the books and magazine cover pages. And try to make it similar in MS Word. Imagine if you’re the designer, how you will design the same content or front page. You will learn while practicing this about the Cover Page option in MS Word or you can design without using that option. The benefit of learning this is about understanding the various practical uses of Microsoft Word in our daily lives.
4. Create Business Cards using Shapes, text, and colors.
People use Adobe Photoshop, Corel Draw, and websites to create business cards nowadays automatically and manually. You can also use that. But it’s about mastering MS Word options and skills. When you create and design anything in Microsoft Word. Your basic computer skills become strong. That helps you in the future when you start working on a Computer or MS Office or MS Word. Also, basic computer skills are very important before doing any degree course in IT. So, Design the business cards similarly you see in the below sample picture.
You Might Also Like

How to learn Microsoft Office Online at Home
5 Best CRM Software to build intact customer relationships
Streamline Your Business with Essential All-in-One Management Software

This is an advanced exercise, but if you do it and create cards then the options you’ve learned during your computer courses in MS Word remain forever in your brain.
Related: Importance of MS Word in Education
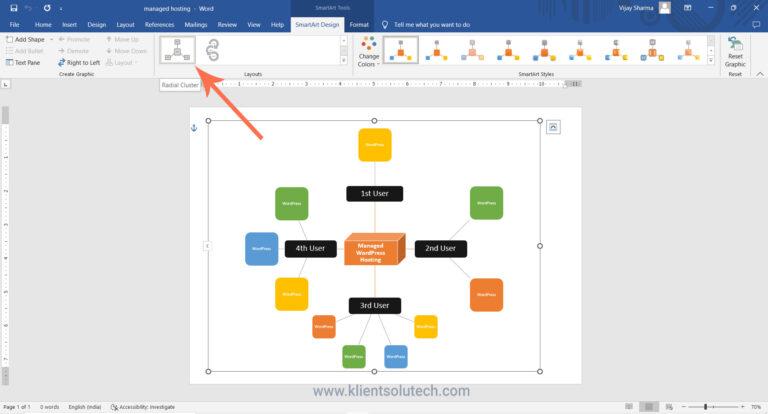
5. Use smart art and create organizational charts and showcase relations:
Smart Art is one of the favorite options in Microsoft Word. Smart art is used to draw diagrams that are used to showcase the content visually that will be easy to understand and manage. As you see below the smart art image Hierarchy Diagram is used to create an organizational chart or structure of the Telecom company.
This is the best method to understand and teach certain things to students, teachers, parents, and companies. You will see such organizational charts in the company’s office and government head offices.

Radial Cluster:
I have created this radial cluster diagram and organizational chart using Smart Art in Microsoft Word to showcase the difference between Managed WordPress Hosting and Shared Hosting” in one of the latest published posts. You can practice and create a similar chart to showcase the relation or useability differences.
Structural Chart:

I hope that you can see (if not zoom in the browser using (Ctrl+ + ) both WordPress hosting and shared hosting smart images that are created in Microsoft Word.
When you practice MS Word Option to create the above diagram or any other, you get many problems. Those problems were not there while you were learning MS Word. These are the problems such as font size adjustment, lines adjustment, etc. colors, shape adjustment, etc. when you use tools or Word applications to communicate your point of view.
So, when you solve these problems by yourself or with the help of your computer course instructor it will be great for your computer knowledge and MS Office skills. Because when you solve the problem you learn very important working lessons in MS Word. This is why you’re learning.
Related: Steps to create a simple business plan using templates in Word App
6. Make book content page or index page
This is another idea in which you need to create an index or content page of the book. In this process, you will learn about the first-line indent, hanging indent, and the perfect use of the ruler bar in Microsoft Word.
And also about a page number, and a hyperlink (if it is an eBook). You can discuss this article with your computer teachers, to allow us or provide us with similar things to practice on.

7. Try to create a similar Header and footer that you’re seeing in the Book
This is the most important option and thousands of students find it difficult to use the header and footer. It’s easier to learn header and footer one time but if you’re not practicing it in various ways or the things such as books header and footer, it’s tough for you to explain it to others.
That’s why I am suggesting you try using the different styles of header and footer. And you will get such an example from the books.

8. Insert the Image into the shape
This is a little easy. But you must know easier things more than difficult things. Because in interviews especially related to IT, people ask easier questions than difficult ones.
So, practicing even on small things is also beneficial. You don’t know when it will be helpful for you in the future.
So, insert an image into the shape. Take and draw a shape from the Illustration menu, place it on a page a little higher in size, and then double-click on the shape. Go to the shape fill option and click on the picture. As an example, you can see the following image.

Related: – Top 10 powerful uses of Microsoft Word.
9. Practice hyperlinking and creating links between Word document texts to D: /, Play songs from Microsoft Word text, and create links between internal and external files.
This is the most important option in Microsoft Word. Most of the processes on the internet contain links. The hyperlink is the starting point in which you learn how things are connected.
It’s also a great option for Web Designers or web designing teachers to teach “How website links work” by using the hyperlink as an example.
As you can see in the image below, I am displaying the connection between the play song text to the location of the song.
Now you need to select the text in which have written the play song and then insert a hyperlink (Ctrl+K) and in the hyperlink address, put the path of the song. After that press, the Ctrl button and click on the blue link, so now any song that you selected will start playing.

10. Design a Happy Birthday Message by using Word Art and print it.
I think it’s the easiest thing for you. You can use the Word Art option for this. You can create the best wishes message in MS Word. After that, you can print. And give it to the person. It’s about creating small things at home. This is also a good way to make kids interested in learning the computer.
Also good for students and kids to create fun things and print or give them as a gift to parents. So, they will enjoy your creativity.

11. Create a chart and show the product price comparison between years:
The chart option is very important in Microsoft Word and Excel. However, the use of the chart option and any other option in MS Word depends on the demand for a certain content type.
For example, you’re writing a book or making notes about something in which you have to write and explain the price comparison between 3-4 years. Then you can use the chart for visualizations to analyze the data.
In visual format or the chart, it’s easier for people to understand, what you mean. Also, it gets more views or focus than the content.

So, try to create the chart you’re seeing in the above image.
12. Get the newspaper and see the text-based advertisement and Design
Design and create text or image-based advertisements that you saw in the newspaper. Designing such an advertisement will be a very beneficial role for Microsoft Word students or people learning Advanced Microsoft Word skills. Advertisement designs contain high-quality images, text, and layouts. And these designs are created by experts. When students practice expert material and create similar or better than that.
I think that movement is great for learners and teachers. So, try to create as many as you like. It will make you master MS Word. And I think doing exercises after completing the class topic is the best way to learn MS Word.

13. Take a double-column book or newspaper and design or create a similar paragraph style in the Word document .
Not all often type or create content in a double column. I know computer teachers can teach you such options. But they will not be able to explain the deepest or professional uses of such options for certain reasons.
So, I will suggest that you use the column option and find the newspaper similarly as you see below and create or type the text as you’re seeing in the newspaper. And if you’re having a problem, ask your teachers. So, when your teachers teach you how to do that thing or this thing, it will be great for your knowledge.
14. Create a letterhead or identity card of any company or institution that you have and insert the Watermark with that company name in the document.

You can create an identity card, visiting card or birthday card in MS Word. As you’re seeing below this is an example of cards and letterheads. But you can find such things. And practice your MS Word knowledge in creating an identity card, and letterhead.
This will give you an idea of how to adjust the text in different shapes and areas. Also, this is a good exercise in which you learn after printing, what size you need to adjust on the page. And when you do that, you learn very precious things in MS Word.
In this video tutorial, you will get basic ideas to create a letterhead. You will get ideas to insert letterhead content in the header and footer, you will also learn how you can use watermarks in letterhead, and how to print and adjust content on the page. The video tutorial is in Hindi, but even if you’re not familiar with the Hindi language, you can still learn and watch it for practice ideas:
Step by Step Guide to create printable letterhead in Microsoft Word and Google Docs
15. Decorate a Word document with a page border, and content border, add patterns, and write beautiful text in it.
This is the easiest page layout option, in which you can learn about page borders in MS Word, text borders, color or shading on the page, and pattern.
These options are very beautiful when you’re creating eBooks, making notes, and doing anything that requires the following type of style. See the image below and try to create something similar to this one.

16. Insert Images and Practice on Format Menu and Image Options.
You can use image options and style to decorate, retouch, and adjustment of colors and brightness in MS Word. As you can see, I have created various styles and image effects. These are easy to create.
But to learn more advanced effects later in other professional software, you need to learn and practice such things during your basic computer course.

17. Insert a template or download the new template in Microsoft Word from the Internet and edit those templates with your content.
There are 100+ templates almost for anything in the Microsoft Word Template option. The top benefit of using the template is that if you don’t know how to create or design a certain thing then you can just download the template and replace the existing text with your text. And it’s done.
This is the most important option that you should learn because it’s tough when you don’t know how to design or create anything, so try to practice on 10+ templates and see what it will look like.

Related: Uses and features of Microsoft Word.
18. Practice Typography
Write 10 lines or 10 sentences and then change the font, style, color, and size of each sentence. make each one different from than previous and next..
Fonts are the face of the text. The following image displays various fonts and styles. Just create similarly. During the practice, you will learn which font will be better for the specific text. Just write 10 lines and differentiate each one.

19. Create a Tenant management form in Hindi or your native language.
We use computers or technology mainly for two reasons the one is Innovation and the second is problem-solving. There are various ways of solving problems using computers. Some problems are solved immediately or some take time. For example, you can create an accounts management software to manage business incoming, outgoings, cash flow, balance, and taxes.
Similarly, there are software and mobile apps to manage tenants. I have created this form for my office space owner. He wanted a simple solution that they could follow and manage easily. They are not that much familiar with apps and other digital methods. I told them about digital options. But they want something that can be taken care of easily and also send tenants’ details for police verification when needed.
So we created the following form and this is also an example of immediate problem-solving using a computer and Microsoft Word. Now after printing one copy of this, they can photocopy it as per the number of tenants they want to manage.

So as beginners, you can try to create a similar form by using the Table feature in Microsoft Word. For the best practice 1st create and decide on columns on rough physical paper and the details that you want. You can create a better form than this and I expect that from you.
And for Hindi or your native language, even if you do not have Hindi font or French or Spanish font on your computer or in Microsoft Word. You can use Google Translate for this, convert the word into Hindi or Spanish, and then copy and paste it into the form table column.
20. Practice to design a brochure for an event
When you try creating this brochure design in Microsoft Word, you’ll learn basic and advanced techniques. This includes using image effects, grouping shapes, adding colorful bullets, and creating textures. These skills are valuable, especially if you plan to work with Word or as a virtual assistant. But even as a Word beginner, practicing these exercises is essential for building your Word skills.

Here you can watch a free video tutorial to learn brochure design : Brochure Design Practice in Microsoft Word | Word Exercise for Beginners | Hindi Tutorial
21. Learn and Practice creating business card designs in Microsoft Word
Today, there are plenty of software options available for creating business cards, such as online tools, Adobe InDesign, Corel Draw, Photoshop, Canva, and more. However, making a printable business card may seem straightforward but does involve some technicalities and creative flair.
As a student, it’s beneficial to tackle challenging and intricate design tasks in Microsoft Word, like this business card project. This practice will help you strive for excellence and mastery of Word skills. Consider it your 21st exercise towards becoming a Word expert.
Here you can watch a complete and detailed video tutorial on this: How to Create Modern Business Card Design in MS Word | Step-by-Step Detailed Tutorial
22. Practice to create a professional-looking certificate design
Practicing certificate design and Microsoft Word is essential because it empowers you with valuable digital skills that are increasingly relevant in today’s technology-driven world. By honing your proficiency in Microsoft Word, you not only gain the ability to create professional certificates but also enhance your competence in document formatting, layout design, and image manipulation. These skills have broad applications across various personal and professional tasks, making you more adaptable and capable in a digital environment.
Furthermore, practicing certificate design offers you a practical avenue for skill development while producing tangible outcomes. It allows you to create certificates for courses, achievements, or even for your own business, helping you develop an eye for aesthetics, attention to detail, and the ability to produce polished documents. Overall, this practice not only enhances your digital competence but also provides you with a versatile skill set that can significantly benefit your personal and professional growth.
By creating and practicing below certificate design below, you will be able to explore various design options to create a professional-looking certificate. This is just a sample but along with this design, you can take it’s design to the next level.

If you want to learn how you can do it please follow this step tutorial: How to create a professional-looking certificate design in Word | Step-by-Step Tutorial in Hindi
I think if you practice Microsoft Word by working on these exercises then it will be enough to make you above average among all the students around the world doing basic computer courses or learning Microsoft Word.
Because after learning Microsoft Word, you have to work with professionals or in companies. And almost all official works are related directly and indirectly to the above exercises.
So, this is the best method to learn Microsoft Word by doing exercises. And this is about practical knowledge.
I hope these Microsoft Word Exercises ideas will be helpful for you. To learn more visit: Top 10 Basic and Advanced Microsoft Word skills
How useful was this post?
Click on a star to rate it!
Average rating / 5. Vote count:
No votes so far! Be the first to rate this post.
We are sorry that this post was not useful for you!
Let us improve this post!
Tell us how we can improve this post?
7 thoughts on “22 Basic Microsoft Word practice exercises for beginners”
good practical please send more practical in winword. Thanks
These are good Practical exercises. Please send list of practicals of MS Word in Vocational IT NSQF level-1 subject code-402 class IX
please send a book which covers exercises like this
Great content! Thanks for putting this out there!
This is very nice
I have recently joined a Private Computer classes at the age of 53. Can you guide me through WORD, EXCEL, POWERPOINT & INTERNET
Is it possible for you send step by step Assignments for all the above 4 courses, so that I can evaluate whether I am learning properly or not ?
Hi, That’s a very good concern as a student “whether I am learning properly or not” I think 80% students ignore this. I will contact you by email. Age is not a problem. I expect you have strong reason or specific task or goals to learn all these three + internet in this age. Yes, I can evaluate through giving you assignment and testing it.
Leave a Comment Cancel reply
Save my name, email, and website in this browser for the next time I comment.

4 Essential Types of Search Engine Optimization
Subject Explorer
School Subjects
Math & Science
Business & Technology
Electives & Health
Board & Administration
Teaching & Learning
Audio/Video Lectures
Books & Documents
Classifieds
Jobs & Resources
Discussions
Language & Literature
Practice Projects for Microsoft Word

Word 9 Table Practice Document
In this practice project for Word, students create a document with a title and table. The table has two columns that have different font alignment and incluces various fonts. …

Word 8 Formatting Text Practice Document
In this practice project for Word, students create a document using a different size and color font for the title than the rest of the paragraph. …

Word 7 Bullets Practice Document
In this practice project for Word, students create a document with two different types of bullets showing points and subpoints. …

Word 6 Letter Practice Document
In this practice project for Word, students create a letter. Included in the letter is a heading on the right, indented paragraphs, and the closing and signiture near the middle of the document. …

Word 5 Text And Outline Practice Document
In this practice project for Word, students create a document that contains several paragraphs of text and also includes an outline with key points and subpoints. …

Word 4 Modified Text Practice Document
In this practice project for Word, students create a document with the heading on the right, a boldfaced, centered title, and indented paragraphs. The document is double-spaced. …
Word 3 Basic Text Practice Document
In this practice project for Word, students create a document with the heading on the right, a boldfaced title that is centered, and several paragraphs that are indented. …

Word 22 Preset Headings Practice Document
In this practice project for Word, students create a document using the preset headings to create a title bar. The document has different alignment and font, blanks, and a short outline. …

Word 21 Formatting Options Practice Document
In this practice project for Word, students create a document that shows some different effects that can be used with the same font. …

Word 20 Numbered List Practice Document
In this practice project for Word, students create a document that includes a centered title followed by a numbered list. …

Word 2 Heading 2 Practice Document
In this practice project for Word, students create a document that has a centered title, a heading in the upper right corner, and indented paragraphs. …

Word 19 Advanced Table Practice Document
In this practice project for Word, students create a document with a table showing a school schedule. The blocks in the table are different sizes and will take individual work within the blocks to …

Word 18 Columns Practice Document
In this practice project for Word, students create a document with a header and two colomns. The columns include boldfaced and italic font and different alignment. …

Word 17 Columns Practice Document
In this practice project for Word, students create a document with two identical columns in landscape orientation. Included in each are indented lines and different alignment and font. …

Word 16 Lesson Notes Handout Practice Document
In this practice project for Word, students create a document like a student handout. This includes an outline with several levels, blanks for students to write on, and different font. …

Word 15 Lesson Notes Practice Document
In this practice project for Word, students create a document with a header and two outlines. Students are asked to use the automatic numbering and outlining features in Word. They must use different …

Word 14 Table Practice Document
In this practice project for Word, students create a scoresheet using a table. Students must use different sizes, colors and styles of font, including different alignment. …

Word 13 Outline Practice Document
In this practice project for Word, students create an outline using the automatic outline in Word, including many levels of subpoints. …

Word 12 Formatting Practice Document
In this practice project for Word, students create a document with a centered title in all capitals, the first letter of each word slightly larger than the rest. Throughout the document the font is …

Word 11 Formatting Practice Document
In this practice project for Word, students create a document similar to a test or quiz. They must include points and subpoints, blanks, boldfaced text, tabs, and spacing. …
Resource Type:
Pass it on:
Leave a Reply
How-To Geek
6 ways to improve your microsoft word formatting.

Your changes have been saved
Email is sent
Email has already been sent
Please verify your email address.
You’ve reached your account maximum for followed topics.
Mail Merge Is More Useful Than You Think: 4 Practical Uses
If your pc won't run windows 11, here are 5 great linux operating systems to try instead, the switch eshop is full of shovelware, here's how to avoid it., quick links, spacing after (instead of pressing enter twice), multilevel lists (instead of manual numbering), page breaks (instead of pressing enter repeatedly), automatic table of contents (instead of typing them manually), image captions (instead of adding text under images), use preset table formatting (instead of formatting them manually).
Being an academic proofreader and former legal document production specialist, it has become evident over the years that many people adopt habits when formatting their Microsoft Word documents that make them structurally insecure, less adaptable, and out of line with what Word is built to do.
In this guide, I'll offer alternatives to some habitual formatting processes, ultimately saving you time and making your document look the part.
Many of the screenshots below contain non-printing characters , such as º, •, and ¶. These are useful for seeing where you have pressed Enter, the Spacebar, or Tab, and also show you other pagination controls. You can turn these on and off by clicking the Show/Hide ("¶") icon in the Home tab on the ribbon.
It's tempting to press Enter twice after the end of a paragraph to create a white space between the sections of text, especially if only pressing it once makes it difficult to see where one paragraph ends and the next one begins.

However, pressing Enter twice can lead to issues down the line. For example, if you do this at the end of a page, the first line of the next page might not be aligned to the edge of the upper margin, meaning your text begins in different places on each page. Also, if you increase your document's font size, this double-space will become too large and look untidy.
Instead, use Microsoft Word's paragraph settings to force the program to create that space for you. Click the icon in the bottom-right corner of the Paragraph group in the Home tab to launch the Paragraph dialog box.

Then, in the Indents And Spacing tab, change the Spacing Before to "0 pt," and the Spacing After to the same size as the font you are using (in our case, size 12, so "12 pt"), before clicking "OK."

You will then see a space appear after the paragraph, even though you only pressed Enter once.

Instead of formatting each paragraph's settings individually, set them all to the same Style and then amend the Style's settings.
There may be occasions when you need to have a numbered list with several levels, such as when writing your academic paper, a work contract, or a set of terms and conditions. In this example, we have typed the numbers manually.

However, if you have to go back and add another section or level later on, you'll need to update all the numbers you typed manually that fall after that addition. In a lengthy document with lots of headings and numbers, this would take time and is sure to result in error.
Instead, you should use Word's built-in multilevel list creator . Place your cursor in the first paragraph you want to number, and click the Multilevel List icon in the Paragraph tab on the ribbon.
You can then click to select one of the preset multilevel list options displayed in the drop-down.
If you click one of the options with Headings included, the levels will work automatically with the Heading Styles you have chosen.

Otherwise, to change the level of one of your paragraphs, after assigning the paragraph to be included within that multilevel list by clicking on the paragraph and selecting the same option as earlier, click the Multilevel List icon again, hover over "Change List Level," and choose the appropriate option.

If the default multilevel list options do not align with what you need in your document, click "Define New Multilevel List" in the Multilevel List drop-down.
As with pressing Enter twice to create a gap between paragraphs, pressing Enter repeatedly to start a new page can lead to issues down the line if you add more content to earlier parts of your document or change the font size.
The best way to start a new page is to use Word's built-in Page Break . Place your cursor where you want the Page Break to go, and in the Layout tab, click Breaks > Page.

A Page Break simply continues your document onto the next page, continuing the formatting and conditions you set for the previous page. If you want to format different pages independently, click Breaks > Next Page in the Layout tab. This will create a more definitive Section Break instead.
Once again, this comes down to enabling automation within your Word document, which not only saves time at the point of implementation, but also prevents you from having to make significant amendments to your work later on.
Tables of contents are recommended for long, formal documents, as they enable the reader to navigate your work more easily without having to scroll or flick through the many pages to find what they're looking for. However, if you type the table of contents manually, adding or removing content later on would result in you having to go back and update your page numbers.
Before you add your automated table of contents, make sure all the titles in your document are assigned to a Heading Style. This is because Word creates the automatic table of contents by referencing the different Headings in your document.

Then, place your cursor where you want the table of contents to go in your document (ideally towards the start), and click " Table Of Contents " in the Referencing tab.

You can either choose from the available options, or click "Custom Table Of Contents" in the drop-down to customize your table of contents.

For example, you might want to (1) change how many Heading levels you want to display, (2) use a different tab leader, or (3) use hyperlinks instead of page numbers.

Whichever option you choose, you'll end up with an automatic table of contents, which you can update at any time by right-clicking anywhere on the table, selecting "Update Field," and clicking "Update Entire Table" or "Update Page Numbers."

Add a Page Break or Section Break after your table of contents—they should always be placed on their own page.
Having a line of text underneath your images adds context for the reader. However, if you type the caption using the Normal Style, there's no guarantee it will stay directly underneath your picture if it's at the end of a page (it might roll onto the next page). This is why you should use Word's caption tool instead. Another reason for using formatted captions is that you can create a table of captions—similar to a table of contents but just for the images in your document—which is useful if your images are diagrams in a formal document.
To add a caption, right-click the relevant image, and click "Insert Caption."

You can then add your caption, change the label, decide where to place the caption (below is always better), and adjust some other settings if necessary.

This caption will automatically be created using Word's Caption Style, meaning if you add more captions, they will number automatically (Figure 1, Figure 2, etc.)
It might be tempting to add differently colored rows and varied formatting to your tables, but this can lead to inconsistencies and also cause your Word document to slow considerably. Even though Excel is much better for creating tables, which you can copy and paste into Word, if you make a table directly within your Word document, use Word's preset table formatting styles.
Click anywhere in your table, and in the Table Design tab, click the "Table Styles" drop-down arrow.
Choose from the many options available, being sure to select a style that will suit all the types of tables you might use in the document.
Better still, you can right-click any of the designs in the Table Styles Gallery to make it the default table style. This means that any subsequent tables you add will be laid out in the same way.

Finally, I'd suggest you define how your table will behave when it splits over two or more pages , ensuring it remains easy to read and properly formatted.
As well as using the best formatting options in Microsoft Word, make sure you're avoiding some other common mistakes that can cause problems and slow your workflow.
- Microsoft Word
- Microsoft 365
Search our database of 10,000+ Microsoft Office templates.
28+ Best Free Assignment Cover Page Formats for MS Word
What is an assignment cover page, key elements for a comprehensive front page.
- Institution Details: Begin by prominently featuring the name of your school, college, or institute. This establishes credibility and provides context for your assignment.
- Personal Information: Include your own name to indicate authorship and ownership of the assignment. This adds a personal touch and facilitates easy identification.
- Assignment Title: Clearly state the title of your assignment, conveying its purpose and focus. A concise and informative title sets the tone for your work.
- Course Information: Specify the relevant course title or code to indicate the academic context in which your assignment was completed. This assists in proper categorization and organization.
- Instructor’s Name: Acknowledge the teacher or professor who will be evaluating your assignment by including their name. This demonstrates respect and professionalism.
- Due Date: Clearly indicate the deadline or due date for the assignment submission. This ensures timely assessment and helps you stay organized.
What are the basic tips?
- Font style : It is always in the best interest to use bold, simple, and clear text instead of using fancy text fonts and styles. This helps the reader understand things in a better way. Moreover, the usage of pictures behind texts must be avoided as it creates poor visibility for the reader when reading the text printed on it.
- Presentation: Presentation plays an important role in expressing what you need to convey to someone and how you need to communicate it. Presenting the title page in the most effective manner is essential as this leaves an impression on the teacher reading the assignment. It also acts as a decisive tool for the teacher whether or not he/ she interestingly goes through the whole document.
- Spell Check: Before handing over the assignment, one should take a brief review of all the spelling and also look for any grammatical errors.
- Avoid plagiarism: A student must always be honest in what he writes. He should avoid copying material or texts from anywhere.
- Personal detail: One should never forget to mention his/her name. The font size used for writing the name must be bigger so that it makes the name visible to the teacher.
Advantages of an Impressive Assignment Cover Page
- Showcasing Professionalism: By meticulously designing your cover page, you demonstrate a strong commitment to professionalism. This attention to detail reflects positively on your work ethic and sets you apart as a dedicated student.
- Creating a Positive Impression: A well-crafted front page sets the tone for your assignment, capturing the attention of your teacher or professor. It establishes a positive first impression, arousing their interest and encouraging them to delve further into your work.
- Enhancing Visual Appeal: A visually appealing cover page enhances the overall presentation of your assignment. With carefully chosen fonts, colors, and layouts, you create an engaging and aesthetically pleasing introduction that captivates the reader’s attention.
- Communicating Pertinent Information: It provides a concise summary of essential details, such as the assignment title, your name, and the due date. This ensures clarity and facilitates seamless identification and organization of your work.
- Reflecting a Professional Attitude: By dedicating time and effort to creating an impressive cover page, you exemplify a professional attitude towards your academic pursuits. This level of dedication and care leaves a lasting impression on your teacher or professor.
Download Free Cover Page Templates
#1 – best format.

#2 – Assignment Cover Page for Case Study

#3 – Best Design for Critical Review

#4 – For Any Kind of Educational Assignment

Video Tutorial
#5 – essay assignment.

#6 – Syllabus Assignment

#7 – Cover Page For University Assignments

#14 – Cover Page for Business Assignment

#16 – Academic

#17 – Generic Cover Page for any Assignment

#18 – Biology Assignment

#19 – For Chemistry Projects

#20 – Cover Page for Computer Projects

#21 – For Engineering-Related Assignments

#22 – For English Assignment

#23 – For Geography Projects

#24 – Mathematics

#25 – Physics

#26 – Cover Page for School Assignments

#27 – Best for Science Projects

#28 – For Social Study Assignment

Versatile Designs and Layouts for Every Purpose
- Assignment Types: Our templates are designed specifically for different types of assignments, such as case studies, critical reviews, essays, syllabi, and business projects. Each template is tailored to suit the requirements and objectives of its respective assignment type.
- Academic Disciplines: Our collection includes templates suitable for various academic disciplines like biology, chemistry, computer science, engineering, English, geography, mathematics, physics, and social studies. Each template aligns with the themes and aesthetics of its corresponding discipline.
- Purposes: Whether you are a student, educator, or professional, our templates serve multiple purposes. They can be used for university assignments, school projects, research papers, or any academic or professional endeavor that requires a polished cover page.
- Designs, Layouts, and Styles: Our templates offer a diverse range of designs, from minimalistic and clean to visually captivating and sophisticated. You can choose from different layouts that creatively arrange text, images, and graphics. Our templates cater to a variety of styles, ensuring there is something for everyone’s preferences.
User-Friendly Customization: Make It Your Own
- Easy Modifications: We believe in keeping things simple. With just a few clicks, you can effortlessly modify our templates to suit your specific requirements. Change colors, fonts, and layouts with ease, and watch your cover page transform before your eyes.
- Colors and Themes: Infuse it with the perfect color scheme and themes that truly represent your assignment. Our templates offer a wide range of options, so you can find the ideal palette and theme that resonate with your content.
- Font Selection: The right font can make all the difference. Choose from our diverse selection of fonts to enhance the visual appeal and readability. From elegant and professional to modern and bold, we have fonts to suit every style.
- Layout Flexibility: It should reflect your unique presentation style. With our templates, you have the freedom to experiment with different layouts, arranging titles, subtitles, images, and text blocks in a way that best suits your assignment.
Benefits of Using Professionally Designed Templates: Make an Impact with Ease
- Time and Effort Saving: Our professionally designed templates eliminate the need to start from scratch. With pre-designed layouts, styles, and graphics, you can save valuable time and effort in creating visually appealing front pages. Simply customize the template to suit your assignment’s requirements, and you’re ready to impress.
- Consistency and Professionalism: Using our templates ensures consistency in your assignment submissions. The standardized design elements and formatting guidelines help maintain a professional appearance throughout your work. Presenting your assignments with a polished title page enhances the overall quality and credibility of your content.
- Visual Appeal: A visually appealing title page grabs attention and sets the tone for your assignment. Our templates are thoughtfully crafted by design professionals, incorporating aesthetically pleasing elements, color schemes, and typography. By leveraging these designs, you can effortlessly create eye-catching cover pages that captivate your professors or readers.
- Positive Impression: First impressions matter, and a well-designed cover page leaves a positive impact on professors and readers alike. Showcasing your assignment in a professional and visually appealing manner demonstrates your dedication and attention to detail. It sets the stage for an engaging reading experience, encouraging your audience to delve deeper into your work.
- User-Friendly Customization: Our templates are designed to be easily customizable, allowing you to add your personal touch without technical expertise. You can modify text, colors, images, and other elements to align with your assignment’s theme and requirements. This flexibility ensures that your cover page reflects your unique style while maintaining a professional look.
Tips for Maximizing the Impact: Make Your Cover Page Stand Out
- Choose Colors Wisely: Select colors that complement your assignment’s theme and evoke the desired emotions. Vibrant colors can grab attention, while muted tones create a sense of elegance. Maintain consistency with your assignment’s overall design and avoid using too many colors that may distract from the main message.
- Opt for Legible Fonts: Use clear and readable fonts to enhance the accessibility and professionalism of your cover page. Avoid overly decorative or complex fonts that may hinder readability. Opt for fonts that align with your assignment’s tone and maintain consistency throughout the document.
- Incorporate Relevant Graphics: Graphics can enhance the visual appeal of your cover page and reinforce the assignment’s subject matter. Choose images or icons that are directly related to the topic or convey the assignment’s main concept. Ensure that the graphics are high-quality and appropriately sized to maintain clarity.
- Organize Information Effectively: Arrange the information in a logical and visually appealing manner. Use headings, subheadings, and bullet points to break down content and make it easier to read. Highlight key details such as the assignment title, your name, course information, and submission date.
- Maintain Simplicity: While it’s important to make it visually appealing, avoid cluttering it with excessive elements. Keep the design clean and uncluttered, allowing the key information to stand out. Remember, simplicity often has a greater impact than complexity.
- Preview and Proofread: Before finalizing, preview it to ensure that all elements are properly aligned and visually balanced. Proofread the content to eliminate any spelling or grammatical errors. A polished and error-free cover demonstrates your attention to detail and professionalism.
← Previous Article
Next Article →
You may also like

- Doctor Prescription Pad Formats
- Printable ID Cards
- Creative Resume Formats for Freshers
- Modern Resume Templates
- Best Cover Page Formats
- Printable Report Cards
- Business Proposal Templates
- 22 Raffle Ticket Templates
- Free Certificate Templates
- 5+ Free Food Diary Templates to Transform Your Eating Habits
- Make it Memorable: Free 4th of July Flyer Templates
- Say Goodbye with Style: Free Impactful Resignation Letter Templates
- Share Your Appreciation: Free Memorial Day Card Templates
- Crafted with Love: Free Mother’s Day Cards to Warm Mom’s Heart
- Stand Out from the Crowd: 6+ Free Fact Sheet Templates
- Make Your Mark: Free Printable Dog Name Tags for Every Tail-Wagger!
- 7+ Free Stunning Easter Templates for Joyful Celebrations
- 9+ Free Admit-One Ticket Templates: Flexible and Easy to Edit
- Get Cooking with Style: 8+ Free Customizable Recipe Card Templates
- 11+ Free Mortgage Flyer Templates to Elevate Your Marketing
- Enhance Your Events with 20+ Unique and Free Ticket Voucher Templates
- Certificates
- Cover Pages
- Educational
- Event Templates
- Invoices & Receipts
- Letterheads
- Office Related
- Personal Use
- 137+ Professional Reports – MS Word & Excel
- 70+ Printable & Editable ID Card Designs
- 59+ Proposal Formats
- 31+ Best Flyer Designs & Formats
- 100+ Cover Page Templates
- 22+ Free Letterhead Designs and Formats
- 24+ Free Resume Designs & for Freshers and Professionals
- 136+ Printable Certificate Templates
- 55+ Quotations & Invoices
- Create FREE PDF Calendar Online
Word & Excel Templates
Printable word and excel templates.

Assignment Cover Pages
Assignment cover page is the first page of an assignment. When you hold an assignment, the first page that you will see is the cover page. It is also called the title page. An assignment cover page includes the name of the institution, the title of the assignment, the name of the student, and the student’s ID. The assignment cover page helps identify what the assignment is about and which student submitted it.
Many students submit assignments to instructors, and instructors are usually teaching more than one subject. Therefore, without an assignment cover page, it would be difficult for the instructor to manage and sort out different assignments.
When there is an assignment cover page, instructors can easily sort out the assignments and grade them. Even the students submitting multiple assignments on the same day could end up submitting the wrong assignment if the assignments didn’t have a cover page.
Another important reason for having assignment cover pages is that this is part of training students to submit work professionally. An assignment cover page shows professionalism in submitting work. When students are trained for professional work, they are better equipped to succeed in their jobs. Thus, professors and instructors usually ask students to create cover pages for their assignments so that the students develop this habit early in their academic life.
The assignment cover page usually includes the name of the institution, title of the assignment, name of the student, student ID, and date of submission. In some cases, the title page may also mention the instructor’s name. Usually, the title page is not page-numbered.
Some courses might also require the students to format the assignment cover pages using popular referencing styles. For example, there is a particular format to make an assignment cover page using APA or MLA referencing styles.
In some cases, professors may also issue detailed instructions on how to format an assignment cover page. These instructions may include font style, font size, text color, page borders, and the information that must be stated on the cover page along with a particular order.
Cover pages are required in several situations:
- When submitting a project report
- When submitting a research proposal
- When submitting a dissertation
- When making a report that is longer than 2-3 pages
- When the assignment instructions require an assignment cover page
- When the professor is handling more than one subject assignments may be erroneously sorted
Assignment cover pages are very useful and can be created in MS Word or Adobe. MS Word software allows pictures and text to be used on the cover page. Students may also use headers and footers, page borders, and other features in MS Word to create a nice cover page. You can even use the popular heading styles given in MS Word.
If you do not have the time or energy to create a cover page, you may use cover pages available on our website. We offer editable cover page templates that you can easily download and customize. Browse through our specially designed assignment cover pages and save your time and effort.

Editable with MS Word

- Birthday Gift Card Templates
- Security Clearance Card Templates
- Parking Cards/Permits for Employees
- Company Meal Card Templates
- Conference Room Reservation Cards
- Employee Birthday Announcement Card Templates
- Happy Holiday Cards for Employees
- Good Luck Card Templates for Word
- Miscarriage Sympathy Cards
- Kids School ID Badge Templates
- Theater Ticket Templates for MS Word
- Service Dog ID Cards
- Service Dog ID Badge Templates
- Christmas Wish Cards in Editable Format
- Christmas Party Invitation Cards
This tool allows you to find the grammatical word type of almost any word.
- assignment can be used as a noun in the sense of "the act of assigning, or an assigned task" or "a position to which someone is assigned" or "a task given to students, homework or coursework" or "a transfer of something from one person to another, especially property, or a claim or right; the document that effects this transfer" or "an operation that assigns a value to a variable"
Related Searches
What type of word is ~term~ .
Unfortunately, with the current database that runs this site, I don't have data about which senses of ~term~ are used most commonly. I've got ideas about how to fix this but will need to find a source of "sense" frequencies. Hopefully there's enough info above to help you understand the part of speech of ~term~ , and guess at its most common usage.
For those interested in a little info about this site: it's a side project that I developed while working on Describing Words and Related Words . Both of those projects are based around words, but have much grander goals. I had an idea for a website that simply explains the word types of the words that you search for - just like a dictionary, but focussed on the part of speech of the words. And since I already had a lot of the infrastructure in place from the other two sites, I figured it wouldn't be too much more work to get this up and running.
The dictionary is based on the amazing Wiktionary project by wikimedia . I initially started with WordNet , but then realised that it was missing many types of words/lemma (determiners, pronouns, abbreviations, and many more). This caused me to investigate the 1913 edition of Websters Dictionary - which is now in the public domain. However, after a day's work wrangling it into a database I realised that there were far too many errors (especially with the part-of-speech tagging) for it to be viable for Word Type.
Finally, I went back to Wiktionary - which I already knew about, but had been avoiding because it's not properly structured for parsing. That's when I stumbled across the UBY project - an amazing project which needs more recognition. The researchers have parsed the whole of Wiktionary and other sources, and compiled everything into a single unified resource. I simply extracted the Wiktionary entries and threw them into this interface! So it took a little more work than expected, but I'm happy I kept at it after the first couple of blunders.
Special thanks to the contributors of the open-source code that was used in this project: the UBY project (mentioned above), @mongodb and express.js .
Currently, this is based on a version of wiktionary which is a few years old. I plan to update it to a newer version soon and that update should bring in a bunch of new word senses for many words (or more accurately, lemma).
Recent Queries

'Logical, beautiful, perfect' WordStar rises again: How you can type faster with this old tech

1994's WordStar 7 running on 2024's Mint Linux.
My first text processor was vi , but my first word processor was WordStar , which I started using in 1981 on an Osborne 1 . It changed my world. I'd always been a writer, but up until then, I used my prized IBM Selectric II typewriter. With WordStar, my writing speed went from 25 words per minute to 70, and I never looked back. I wasn't alone. Hugo Award-winning science fiction writer Robert Sawyer was a huge WordStar fan , and now he's revived the iconic word processor.
I don't think anyone saw this revival coming. In an unexpected twist of technological nostalgia, WordStar has been rediscovered and is making a surprising comeback on modern computers. Originally developed by MicroPro International, WordStar was the first commercially successful word-processing software for PCs . Before it appeared, word processors were dedicated programs on special-purpose office computers.
Also: 81% of workers using AI are more productive. Here's how to implement it
WordStar was quickly followed by XyWrite, EasyWriter, and a host of other programs. Most of them are now long forgotten. However, WordPerfect lives on largely in law offices, and a handful of writers have stayed loyal to WorStar.
If A&T and MicroPro had managed to port WordStar to Unix in the early 1980s, I expect I'd still be using it today. These days, I use LibreOffice and Google Docs , even though I still have the WordStar command set embedded in my fingers.
While most writers long ago switched to Microsoft Word , Sawyer, and at least one famous writer -- George R.R. Martin -- have stayed loyal to WordStar. So, why is that the case?
The answer is simple. Then, and now, WordStar was designed to make life easier for touch-typists. With WordStar, you don't need a mouse or function keys. All you need is the control button, and you're in business. All the major editing commands are easily accessible from the home key row. If you're a touch-typist, once you know WordStar, you can write faster than with any other word processor.
Also: You can upgrade your old PC to Windows 11 - even if Microsoft says it's 'incompatible'. Here's how
To quote Anne Rice , author of Interview with the Vampire: "WordStar was magnificent. I loved it. It was logical, beautiful, perfect. Compared to it, Microsoft Word is pure madness." I couldn't have said it better myself.
The WordStar program has long been available. Indeed, even when it was coining cash for MicroPro, it was infamous for being one of the most pirated programs on the planet. But the software's last vendor abandoned it 30 years ago.
So, simply bringing the WordStar program out of technology's trash was trivial. What Sawyer's done, which is why the program's getting so much attention again, is he took the trouble to make it easy to use again.
Sawyer wrote on his blog :
There was no proper archive of WordStar for DOS 7.0 available online, so I decided to create one. I've put weeks of work into this. Included are not only full installs of the program (as well as images of the installation disks) but also plug-and-play solutions for running WordStar for DOS 7.0 under Windows, and also complete full-text-searchable PDF versions of all seven manuals that came with WordStar — over a thousand pages of documentation. I've also included lots of my own explanations on how to use and customize WordStar, as well as many WordStar-related utility programs and numerous other goodies.
You can download the archive and check it out for yourself. It gives you everything you need to get up to speed with WordStar.
With a DOS emulator program -- Sawyer and I both recommend DOSBox -- you can run WordStar on Linux, Macs, and Windows PCs. I'm using it myself on my latest Linux Mint PC . To see if I still had the commands at my fingertips, I wrote this story in WordStar. I've still got the skills.
Also: This easy email trick will make your inbox clutter vanish - without complex rules
If the WordStar command set and its no-frills interface appeal to you, but you don't want to set up a DOS emulator and then install WordStar on it, there are alternatives. The JOE editor comes with the WordStar command set and the same nothing-but-words interface for Linux and Windows.
Now, I'm not pretending WordStar is for everyone. For example, while you can transform WordStar documents to the Word doc format, it can be tricky. But the software is more than just a blast-from-the-past nostalgia trip. Even in 2024, WordStar is still a useful word processor.
It's distraction-free. You can't insert images into it, you can forget about fancy formatting, and the interface is as simple as simple can be. When you want to write quickly without anything getting between you and your words, it's hard to beat.
The best Chromebooks you can buy, starting at $312
The best windows laptops of 2024: expert tested, the 2-in-1 laptop i recommend most is not a lenovo or dell (and it's cheaper than ever).
- College Football
- Football/Soccer
- Motorsports
- Pro Wrestling
- Baltimore Orioles
- Boston Red Sox
- New York Yankees
- Tampa Bay Rays
- Toronto Blue Jays
- Chicago White Sox
- Cleveland Guardians
- Detroit Tigers
- Kansas City Royals
- Minnesota Twins
- Houston Astros
- Los Angeles Angels
- Oakland Athletics
- Seattle Mariners
- Texas Rangers
- Atlanta Braves
- Miami Marlins
- New York Mets
- Philadelphia Phillies
- Washington Nationals
- Chicago Cubs
- Cincinnati Reds
- Milwaukee Brewers
- Pittsburgh Pirates
- St. Louis Cardinals
- Arizona Diamondbacks
- Colorado Rockies
- Los Angeles Dodgers
- San Diego Padres
- San Francisco Giants
Sports. Honestly. Since 2011
Red sox reinstate former trade acquisition, option to minors.
- August 8, 2024
Zach Goldman

After missing over two months due to injury, Boston Red Sox infielder Vaughn Grissom was reinstated from the 10-Day injured list on Thursday and optioned to Triple-A Worcester. Grissom had been on a rehab assignment with the Worcester Red Sox before being activated and sent back. The 23-year-old entered 2024 with a chance to be Boston’s starting second baseman. Injuries and struggles have held Grissom back from achieving that.
Red Sox Reinstate Vaughn Grissom And Send Him To Minor Leagues
Grissom was the biggest piece in a deal that sent former Red Sox starter Chris Sale to the Atlanta Braves in December. The infielder began the year on the injured list, though, with a left hamstring strain. He missed over 30 games before making his season debut. Grissom lasted just a month before straining his right hamstring on June 2. He struggled with Boston, batting just .148 with a .367 OPS in 23 contests.
Grissom continued to struggle during his rehab assignment, slashing .216/.310/.294 in 13 matchups. He began his professional career with the Braves and ranked as high as seventh in the organization’s system in 2022. Grissom dominated in the minors before making his MLB debut in August of 2022. He originally played well, batting .291 in 41 games. That somewhat spilled over into 2023, where Grissom hit for a .280 average, but he saw his OPS drop dramatically. The Florida native played just 64 games for Atlanta before being shipped to the Red Sox.
In Grissom’s absence from the big league roster, Emmanuel Valdez , David Hamilton , and Romy Gonzalez have split time at second base. The position has been Boston’s weakest in 2024. Red Sox batters, when playing second, have just a .551 OPS this season. That’s the worst mark on the team by far, with first base (.719) the closest. Boston made multiple moves at the deadline, but none addressed the middle infield position. Catcher Danny Jansen , who was acquired from the Toronto Blue Jays, was the only offensive player the Red Sox brought in.
Main Photo Credits: Eric Canha-USA TODAY Sports

Orioles Rookie Sensation Breaking Records After Rocky Debut
Baltimore Orioles top prospect Jackson Holliday may have had a quiet debut, but since returning to the big leagues he has been on a historic

Newly Acquired All-Star Has Struggled With Orioles – What’s Next
Gregory Soto, acquired by the Baltimore Orioles at the trade deadline, has had a rough start to his tenure. What should the Orioles do next?

The Cardinals Must Move On from Former MVP
While the St. Louis Cardinals have rebounded from a slow start this year, veteran first baseman Paul Goldschmidt has continued to have his worst offensive

Pirates Roster Moves and Rehab Assignments Portend More Roster Shuffling
On Thursday, the Pittsburgh Pirates announced three roster moves after announcing that two players would begin rehab assignments. Let’s look at the impact these moves
Send Us A Message
IMAGES
COMMENTS
Are you a student or a teacher struggling with creating assignments in MS Word? Look no further! In this video, we'll provide you with a comprehensive guide on how to create an assignment from ...
Stay focused on your studies and leave the assignment structuring to tried and true layout templates for all kinds of papers, reports, and more.
Learn how to set up your assignment formatting in Microsoft Word. Includes: margins, font style and size, line spacing, line indents, header, headings and referencing.
Create a new document. On the File tab, select New. Select Blank document, or double-click a template image or type the kind of document into the Search for online templates box and press Enter. Tip: For practice using Word features, try a learning guide like Welcome to Word or Insert your first table of contents. Add and format text.
If you are looking to create an assignment on MS Word. Then you need to read this blog about 14 Best Steps on how to make an assignment on ms word.
Struggling to edit your college assignments efficiently? Here are some useful Microsoft Word tips to accelerate your editing process and save time.
Always open this when doing work on assignments. The Navigation pane in Word lets you navigatethrough your document. You can also use the Navigation Panein Word to search your document. You can also use the Navigation Pane in Word to select and move text that has a "Heading" style applied.
Who this book is for. Microsoft Word Step by Step (Microsoft 365 and Office 2021) is designed for use as a learning and reference resource by people who want to use Word to create and edit documents, and who want to make use of the many features that help users achieve an attractive and professional result.
To create a document, open Word, select a blank document or template, and start typing. Discover professionally designed templates for Microsoft Word.
Complete the following Practice Activity and submit your completed project. For our first assignment in Word, we will create a flyer to be printed or posted online. The flyer will advertise a volunteer opportunity for Health Sciences students at Paradise Valley Community College. Key skills in this practice are inserting text and pictures, textboxes, formatting text and footers.
Microsoft Word practice exercises for beginners: 1. Create and Design Admission/Enquiry Forms etc. To create this kind of form, you need to use shapes, text boxes, colors, formatting options, tables, and horizontal lines in MS Word.
In this practice project for Word, students create a document using a different size and color font for the title than the rest of the paragraph. …
PRACTICAL- Type this paragraph &checks the spelling &grammer using spelling &grammar tool. Microsoft Word is a word processor developed by Microsoft. It was first released in 1983 under the name Multi-Tool Word for Xenix systems. MS Word is a popular word-processing program used primarily for creating documents such as letters ...
Even though Excel is much better for creating tables, which you can copy and paste into Word, if you make a table directly within your Word document, use Word's preset table formatting styles. Click anywhere in your table, and in the Table Design tab, click the "Table Styles" drop-down arrow.
Download professionally designed cover page templates for your assignments. Customize and create visually appealing title pages with our free MS Word templates.
In this video we will learn about how we can use ms word for university assignments and how to make assignments in ms word in perfect and easy way to get excellent marks. This video is very ...
Download and customize assignment cover page templates for MS Word and Excel. Choose from various designs and formats to suit your needs.
What type of word is ~term~? Unfortunately, with the current database that runs this site, I don't have data about which senses of ~term~ are used most commonly. I've got ideas about how to fix this but will need to find a source of "sense" frequencies. Hopefully there's enough info above to help you understand the part of speech of ~term~, and guess at its most common usage.
Take a typing test, practice typing lessons, learn to type faster.
Assignment Summary data can filter by a minimum of one checkbox to a maximum of 10 checkbox selection criteria in order to better track and manage assignments in various statuses. ... HR Pro, or Commander attempts to "Cancel" an 05-PCS EVENTS / 01-PCS Entries Absence Type/Reason when the related Assignment is blank. The Cancel action did ...
Will the Indianapolis Colts' Anthony Richardson Have a Steve McNair-Type of Career? Looking Back at McNair's Career. McNair played college football at Alcorn State, located in Lorman, Mississippi.
During roster expansions, each team can increase their active from 26 players to 28, so who might the Yankees bring up to the Bronx?
How to make Assignment on Microsoft Word easy way for Beginners | How to Format document in MS Word Energy Saver By Fouzia Altaf 2.43K subscribers Like 52K views 3 years ago #energysaver #howto # ...
'Logical, beautiful, perfect' WordStar rises again: How you can type faster with this old tech ... Before it appeared, word processors were dedicated programs on special-purpose office computers.
While the St. Louis Cardinals have rebounded from a slow start this year, veteran first baseman Paul Goldschmidt has continued to have his worst offensive season.Due to his struggles, age, and expiring contract, many feel the Cardinals must move on from the former MVP after the season.
Rising a wave of popularity, the Harris-Walz campaign is bypassing obvious attacks against Donald Trump's record and agenda in favor of needling the easily excitable former president.
Vice President Kamala Harris has selected Minnesota Gov. Tim Walz as her running mate, capping the Midwestern Democrat's short but swift ascent from a relative unknown to a leading driver of the ...
How To Use MS Word In Mobile For Assignment | How To Make Assignments on MS Word on Phone Digital World - Tech Tutorials 20.8K subscribers 19K 34K views 1 year ago MS Word Tutorials
After missing over two months due to injury, Boston Red Sox infielder Vaughn Grissom was reinstated from the 10-Day injured list on Thursday and optioned to Triple-A Worcester. Grissom had been on a rehab assignment with the Worcester Red Sox before being activated and sent back.