
How to Create a Resume in Microsoft Word (Step-by-Step Guide)
If this is your first time creating a resume in Microsoft Word, the process may seem overwhelming. Luckily, this article is here to help! In this step-by-step guide, we will cover how to create an effective resume from start to finish using Microsoft Word.
How Do I Make a Resume in Microsoft Word?
There are two primary methods for making a resume in Microsoft Word:
- From Scratch: This gives you the ultimate creative control. However, it also requires you to familiarize yourself with all of Microsoft Word’s tools and layout options. Building a resume from scratch can be more time-consuming but also more customizable.
- From a Template: Microsoft Word offers several pre-made resume templates. By using these, all the formatting and layout creation is handled for you. You simply have to fill in your own information.
To use a template, go to File > New and then select a template from the Resume and Cover Letter section.

How Should I Format My Resume in Microsoft Word?
The format you choose will depend on your experience level!
There are 3 basic resume formats to choose between:
- Reverse-Chronological: Details your most recent job and works backwards from there. This format focuses heavily on work experience.
- Functional: Focuses on skills and education rather than work experience. This is a good option for recent graduates or applicants with minimal work experience.
- Hybrid/Combination: Combines elements of both the Reverse-Chronological and the Functional. This is a good option for applicants with gaps in their employment history.
Choosing the best format for your needs is key. For more help on this subject, check out our guide on How to Choose the Correct Resume Format in 2021 !
Beautiful resume templates to land your dream job

Make a Resume in Microsoft Word in 7 Easy Steps
First, let’s make sure you can navigate the Microsoft Word ribbon!
The ribbon is the toolbar found at the top of the screen.
It should look something like this:

The main parts of the ribbon you should familiarize yourself with on the Home tab are Font , Paragraph , and Styles .
These are how you will edit the appearance of your text and headers.
You should also familiarize yourself with the Layout tab .
This tab is where you will adjust your margins and add columns!
Once you have taken your time to figure out where all of your tools are, it’s time to begin building your resume!
Important Note: These steps detail how to create a resume in Microsoft Word from scratch. By using one of the program’s pre-made templates, you can bypass many of these steps and simply fill in the pre-made format.
Step 1: Create Your Layout
Let’s begin by visiting the Layout tab .
Here, you can set your margin size and decide if you want to use columns.
Here is a breakdown of these two elements:
We recommend using 1-inch margins on all sides.
This will give you enough white space to keep your resume looking neat without sacrificing too much space.
It will also ensure your formatting looks good on printed versions of your resume.
Columns and Sidebars:
From the columns tab, you will find five options:

- The One , Two , and Three options are how you will create separate columns.
- The Left and Right options are how you will create sidebars! Sidebars are useful because they leave more room for the main text and sections.
From the Home tab , you can edit the following elements of your layout:
Alignment:
Choose between left, center, or right alignment.
We recommend using the left alignment.
Whichever you choose, it is a good idea to keep your alignment consistent across the board.
Line Spacing:
We recommend using 1.15 – 1.5 line spacing for the body text.
For section titles and headers, use 1.5 – 2.0 spacing to help them stand out from the rest of the text.
Use a simple and highly legible font. Try to use only 1-2 fonts throughout your resume.
We recommend the following seven fonts:
- Times New Roman
Step 2: Make Your Title Header
Your title header should contain the following information:
- Your Job Title
- Contact Information
- Professional Social Media Links
Use an H1 header to write your name at the very top.
Use the Normal style to write the rest of your information (see “How Do I Add Different Sections of the Resume on Microsoft Word” below for more information on header styles).
It should come out looking similar to this:
Copywriter Email: [email protected] Phone: (123) 456-7890 Website: Janesmith.com LinkedIn: linkedin.com/in/janesmith
Check out some of our free resume examples to see alternative ways of formatting your title header!
Step 3: Write an Objective or Summary
Following your title header will be your resume objective or summary.
This will be a short statement between 1-5 sentences detailing your desired job title, experience, and career goals.
You will want to write this statement in the Normal style .
However, you may want to use a slightly larger font than the rest of the text in other sections.
This will help your objective or summary statement to stand out.
Here is an example of how this might look with the title header example from before:
Resume Objective: I am a copywriter with over 5 years of experience. working with corporate clients. I am seeking the position of Head Copywriter at your company, bringing with me over 10 major corporate clients.

Step 4: Create Your Base Format
By creating a base format, you can save the document as a separate file to return to and fill in again and again.
This will help you to tailor your resume to fit specific jobs!
The idea of the base format is to provide outlined sections with the correct spacing and number of bullet points.
You are essentially creating a skeleton for your resume that you can edit and adjust over time.
By doing so, you ensure you have already allocated the proper amount of space on the resume for each section.
For example, this is what your base Work Experience section may look like:
Work Experience
Job Title 1 , Company Name Date – Date · Descriptive Sentence · Descriptive Sentence · Descriptive Sentence Job Title 2 , Company Name Date – Date · Descriptive Sentence · Descriptive Sentence · Descriptive Sentence Job Title 3 , Company Name Date – Date · Descriptive Sentence · Descriptive Sentence · Descriptive Sentence
As you gain more work experience, you can return to this base format and make changes as need be.
Because you have already outlined the section, you won’t have to worry about reformatting the entire resume to make a few simple changes.
Step 5: Determine Your Section Organization
Once you have built the base format of your resume, it’s time to determine if your sections are in the optimal location.
For instance, if you are creating a Reverse-Chronological style resume you will want your Work Experience section to come first.
Comparatively, if you are creating a Functional style resume you may want your Skills or Education section to come first.
The order and organization of your sections will impact the impression your resume makes on hiring managers.
Step 6: Fill in the Information
Now that you have created the base format of your resume and chosen the optimal organization, it’s time to fill in your information!
When filling in your information, be mindful of the following 3 factors:
- Be Concise: Always use simple sentences that clearly describe your strengths and accomplishments. Avoid complex sentences or overly complicated vocabulary and jargon.
- Use Bullet-Points: In each section, use bullet points to separate each thought or idea. This will make your resume more visually appealing and easier to read.
- Choose Compelling Language: Try to avoid repeating the same words or phrases over and over. Mix it up, use keywords, and find the best action verbs to make your resume sound even better!
Not sure how to make your language more compelling on your resume? Take a look at our list of 350+ Action Verbs to Make Your Resume More Effective in 2021 .

Step 7: Double-Check Your Sections
Once you have completed steps 1-6, look back over your resume and make sure you have included all of the key sections.
You should also take some time to consider what additional sections you could include.
Here are the key sections every resume should have:
- A title header with your name and contact information
- An objective or summary statement
- Work experience
As we have covered, the order of these sections will vary depending on the format you have chosen.
However, each of these sections should always be included in your resume.
There are also some additional sections to consider adding.
Here is a quick list of extra sections that can add some extra flair to your resume:
- Awards and achievements
- Certifications
- Unpaid experiences, such as volunteer work or internships
- Relevant hobbies
How Do I Add Different Sections to a Resume on Microsoft Word?
The way to create different sections on your resume comes in two parts:
- Use an H2 header to create the section titles (Work Experience, Education, Skills, etc.)
- Use the Normal style to create the body of text below the H2 header
Here is a breakdown of how to use the H1, H2, H3, and Normal styles within your resume:
Select the Styles window from the Home tab .
From here, you will have options to create headers.
Your heading options are as follows:
- Heading 1: Use this heading as your largest title. This is what you will use to write your name at the top of the page. Use a bolded font between 16 to 20 pt in size. Use 1.5 to 2.0 line spacing to help the title heading stand out.
- Heading 2: Use this heading to create your section titles. Use a bolded font size between 14 to 16 pt. in size. Make sure these headings are smaller than your title heading. Use 1.5 to 2.0 line spacing to help these headings stand out from the rest of the text.
- Heading 3: Use this heading to create your job titles. Your job titles should be only slightly bigger than the rest of the text. Use a bolded font between 12 to 14 pt. in size. Use between 1.15 to 1.5 line spacing.
- Normal: Use the Normal style to create the body text underneath the heading. Use a regular font between 11 – 12 pt. in size. Use between 1.15 to 1.5 line spacing.

What are the Pros and Cons of Using Microsoft Word to Craft Your Resume?
Microsoft Word is a handy tool to have, especially if your computer comes with the program pre-installed.
Here are 3 pros and 3 cons to using Microsoft Word to create your resume:
- Total Creative Control: When creating a resume on Microsoft Word directly from your computer, you have total control over the design and format.
- More ATS Friendly: Applicant Tracking Systems are designed to read .doc files, the file format used by Microsoft Word.
- Can be Edited by Recruiters: If you are using a recruitment agency, a Microsoft Word file can be easy to edit by recruiters before sending it off to employers.
- The Microsoft Word Learning Curve: If you are unfamiliar with Microsoft Word, there can be a pretty steep learning curve that can cause you frustration.
- Time Consuming: Building a resume from scratch can be highly beneficial, but also highly time-consuming. This can become problematic if you need to create a resume quickly.
- Temperamental Templates: Microsoft Word offers tons of free resume templates. On the surface, this is super useful. However, these templates can be tricky to use. One wrong move can mess up the formatting in a big way and be an even bigger headache to try and fix.
Why Should I Use an Online Resume Template or Resume Builder?
By using a resume template from an online provider, such as Easy Resume, you are more likely to find a template that fits your exact needs.
Plus, online resume templates and resume builders often have more design elements that are easier to use compared to Microsoft Word.
Are you interested in using our online templates or resume builder? Check out our beautifully designed resume templates to build your optimal resume!
Final Takeaways
Microsoft Word offers a lot of capabilities to help you build your ideal resume.
Here are five key takeaways for creating a resume on the program:
- Create a base skeleton for your resume that you can use again and again for different jobs.
- Use different heading styles to help your resume title and section titles to stand out.
- Use the column tool under the Layout tab to create sidebars. Sidebars are great for smaller sections, such as certifications or awards!
- Always use concise and compelling language.
- Consider using a template to build your resume faster.
At Easy Resume, we have designed our resume templates and online resume builder to fit your needs. No matter your level of experience or skill at making resumes, we have the tools to help.
Don’t forget to check out our expansive collection of FREE resume guides and examples while you’re here!
Browse more resume templates that fit your role

Ed is a co-founder of Easy Resume. His background in scaling teams at tech startups over the last decade has given him extensive experience and knowledge around how to hire top talent and build successful teams. He enjoys mentoring, coaching, and helping others reach their career goals. When he's not writing about career-related advice, he's playing with his dog, Lilo, or going on long hikes in upstate New York.
Get inspired with more resume examples
More advice that will accelerate your career path, 15+ key healthcare skills to list on your resume in 2022 (with examples).
Healthcare is a massive and important industry that contains all sorts of professionals. To land a job in healthcare, you must understand what relevant skills employers are searching for. In this guide, we will cover key healthcare skills to include on your resume and why doing so is so important.
15+ IT Skills to List on Your Resume in 2022 (With Examples)
IT is a massively growing industry with tons of potential for professional growth. It’s no wonder why so many applicants are flocking to these jobs! In this guide, we will cover what IT skills are and offer you examples of some of the top skills to include on your resume.
50+ Key Technical Skills to List on Your Resume in 2022 (With Examples)
Including technical skills on a resume is an absolute necessity. These types of skills show employers your quantifiable qualifications. In this guide, we will cover exactly what a technical skill is and some of the best examples to include on a resume.
20+ Key Computer Skills to List on Your Resume in 2022 (With Examples)
With the world becoming more digitally focused, having strong computer skills is more important than ever. In this guide, we will cover what computer skills are and which ones are best to include on your resume.
Read our how-to guides on making your resume perfect
How to write a resume header.
Your resume header is the very first thing an employer will see. Not only does it need to contain the correct information, but it needs to stand out as well! In this guide, we will teach you how to write the ideal header for your resume.
How to Write Your Resume in Reverse-Chronological Order
When setting out to write the perfect resume, choosing a format is an important decision. Reverse-chronological resumes are the standard format, so knowing how to craft one is key! This guide will teach you how to write the best reverse chronological resumes.
How to List Contact Information on Your Resume in 2022
Learn how to format contact information on your resume and what information to share with the hiring manager.
How to Write a Two-Page Resume (with Examples & Tips)
Don't know whether you should write a one-page or two-page resume? Find out when it is appropriate to write a two-page resume and learn how to write it correctly.
Professional resume templates to help land your next dream job.

Facebook • Twitter • Linkedin • Pinterest • Crunchbase
How-To Geek
How to create a professional résumé in microsoft word.
Pressing the send button when sending your résumé to a potential employer can be a nerve-racking experience.
Quick Links
What is a résumé, using a microsoft word résumé template, crafting a custom résumé in microsoft word, deciding what information to include, organizing that information.
Pressing the send button when sending your résumé to a potential employer can be a nerve-racking experience. We're here to show you how to create a résumé using Microsoft Word and provide a few tips on getting you through the résumé screening process so you can press that send button with confidence.
A résumé, often referred to as a CV (curriculum vitae), is a summary of a person's background and experience, including work experience, education, and even volunteer work, and its most common use is to send to potential employers when searching for a new career opportunity. In fact, though taking on a much different form than that of what you'd expect a résumé to look like today, Leonardo Da Vinci even did this himself, and he is often given credit as the first person to create a resume.
Of course, the résumé has undergone quite the transformation since Da Vinci's 1482 version, drastically so during the age of word processors and digital typesetting in the 1970's---40 years after résumés became an institution. Fast-forward to today and not only do you have your standard .doc or .pdf résumé, but you'll also see people uploading video résumés on YouTube and using social media platforms like LinkedIn to sell themselves to companies.
We should be thankful for these developments because now we can skip the quill and ink and jump straight into Microsoft Word.
Microsoft Word offers a bunch of résumé templates. Some are beautiful; some are not. We'll let you decide which style fits you best, but here's where you can find them.
Go ahead and open Word. As soon as you do, you'll be greeted with several different templates to choose from, ranging from a simple blank document, cover letters, résumés, or even seasonal event flyers. Click the "Resumes and Cover Letters" link under the search box to see only those types of templates.
Now, you'll see all the different resume styles Word has to offer. There are a lot of different styles and color schemes to choose one, so pick what feels right. If you scroll down the list a bit, you'll also see some plainer resume templates designed for different purposes---like an entry-level, chronological, or extended CV style.
Some of the templates are already built into Word; others are a quick, free download from Office.com (and you won't even have to leave Word to grab them). When you click to create a resume, Word will let you know the download size (if it needs to download the template). Click the "Create" button and a few seconds later, you'll be in your document and ready to edit.
That's all there is to it! But what if you didn't find a résumé you liked? Luckily, Word has a few formatting tools to help you craft the perfect résumé.
Before we start, it's important to know that each résumé should reflect a person's personal experience and education. Since everyone's experience is different, it's no surprise that their résumés will be too.
That being said, there are some general aesthetic guidelines for making a résumé that we highly recommend you follow for a professional-looking document .
Go ahead and open up a clean, blank document in Word.
The first thing we'll want to do is set our margins. Go to the "Layout" tab and click the "Margins" buttons.
The drop-down menu displays several different margin options from which to choose. If you can't find the one you're looking for, you can click "Custom Margins" at the bottom and enter your specifications. Let's go ahead and do that.
According to the experts, the best margin size is 1" for the top and bottom and 0.63" for the sides. This may seem like an oddly specific number, but the objective is to get as much (relevant) information about yourself as possible on a page without overwhelming the reader. With the above credentials, we leave enough white space on the page for the reader to not feel suffocated.
Click "OK" once you've entered the margin sizes you want.
Now that our margins are set, it's time to start inputting information.
The information you put mainly depends on what you're trying to accomplish and where you are in your professional career. If you have over two years of working experience, then detailing that information is much more valuable than which high school you graduated from or which clubs you were a part of in college. Like a cover letter, your résumé should uniquely cater to the recipient. Dress to impress.
So, which information should you put? We'll give you the overview, and you can decide which areas you should detail.
- Contact Information
- Professional Experience (It's also ok to include any volunteer work at the bottom of this section)
- Additional Skills
For all of these, tailor the information to the job. You don't need to fit irrelevant work experience in there unless not including it would create a gap in your work experience. But if you're applying for a job as an accountant, nobody cares that you delivered pizzas 12 years ago. And you do list out any additional skills, make sure they're relevant to the position for which you're applying. Your high school friend might be impressed by how high you can kick, but your future employer---not so much.
Another thing to remember is that you should always list out your experience in reverse chronological order. That is, list out your most recent experience first, and go back from there.
There're several ways to do this, but arguably the most effective way is by creating headings and then inserting a table for the content of each section. By doing so, you're not only able to move content around in groups instead of individually, which can be a headache in itself, but you're also able to give your résumé a unique touch by adding table designs. In the image below, for example, we've added a dashed border to the left side of the table to create a nice little visual element to tie the different experience elements together.
First things first, let's go ahead and find a heading that we like. In the "Styles" section of the "Home" tab, you'll find several default styles. If you can't find one you like, then Word has a feature that lets you create your own. First, click the "More" arrow on the right-hand side of the different built-in styles.
You'll see a menu with three different options. Go ahead and click "Create a Style."
The "Create New Style from Formatting" window will appear. The only thing you can do here is to name the style, so click "Modify."
Now you should see a window with many formatting options. For fonts, there's no best option. Just make sure you use something that's clean and readable. "Georgia" is a great example. A 14 pt font size is fine for headings, but make sure it's bold so that each section is easier to find for the reader.
The "Add to the Styles gallery" option will automatically be selected. It's good to leave this option selected so you'll have easy access to your heading for the other sections of your résumé. If you plan to use this heading again in future documents, you can go ahead and deselect "Only in this document," but since we only plan to use it for our résumé, we'll keep that option selected.
Click "OK."
Go ahead and type in your first heading and apply the new style to it. In this example, we'll use "Experience" first.
Now, let's use a table under our first heading so that we can keep all our content lined up correctly. Place your insertion point on the line under your new heading, switch to the "Insert" tab, and click the "Table" button.
You'll see a 10x8 grid on the drop-down menu. You can create the table size by moving your mouse over the grid and clicking when it's the size you want. For your résumé, you'll need one column and enough rows to contain the separate pieces of information you have to list. For example, if you have three prior jobs to list in the Experience section, you'll want a table that's 1x3.
And here's what it looks like after we've inserted the table into the document.
We'll remove the border lines later. First, go ahead and put in your information. You'll want the "Job Title, Company" text to be 1 or 2 pts larger than the rest of the text but be sure to keep it smaller than the heading of the section. If you want your job title to stand out, you can change the color or make it italic, but try to keep it simple.
Once that's ready, let's go ahead change the borders of our table. Select the table by placing your insertion point anywhere inside it. Switch to the "Design" tab in the "Table Tools" section of the Ribbon, and then click the "Borders" button.
If you want to keep it simple and remove all the lines of your table, select "No Border." In this example, we're going to give our table a little flavor, so we'll select "Borders and Shading."
Because we only want to customize the left border of our table, we will select "Custom" under the "Setting" section. This lets us use the "Preview" section to deselect the sides on which we don't want borders. Click the boxes surrounding the preview to turn off all the borders except for the left one.
In the "Style" list, you can select the border design, color, and width you want. Click "OK" when you're ready.
Now we should have an experience section on our résumé that's starting to shape up. A little playing with colors and maybe spacing the table rows a bit, and you should be ready to go.
Now, just repeat these steps for the rest of the sections and your professional résumé will be finished in no time!
Image Credit: fizkes /Shutterstock
- PRO Courses Guides New Tech Help Pro Expert Videos About wikiHow Pro Upgrade Sign In
- EDIT Edit this Article
- EXPLORE Tech Help Pro About Us Random Article Quizzes Request a New Article Community Dashboard This Or That Game Popular Categories Arts and Entertainment Artwork Books Movies Computers and Electronics Computers Phone Skills Technology Hacks Health Men's Health Mental Health Women's Health Relationships Dating Love Relationship Issues Hobbies and Crafts Crafts Drawing Games Education & Communication Communication Skills Personal Development Studying Personal Care and Style Fashion Hair Care Personal Hygiene Youth Personal Care School Stuff Dating All Categories Arts and Entertainment Finance and Business Home and Garden Relationship Quizzes Cars & Other Vehicles Food and Entertaining Personal Care and Style Sports and Fitness Computers and Electronics Health Pets and Animals Travel Education & Communication Hobbies and Crafts Philosophy and Religion Work World Family Life Holidays and Traditions Relationships Youth
- Browse Articles
- Learn Something New
- Quizzes Hot
- This Or That Game New
- Train Your Brain
- Explore More
- Support wikiHow
- About wikiHow
- Log in / Sign up
- Job Application Documents
- Resume Preparation
How to Create a Resume in Microsoft Word
Last Updated: September 25, 2023 Approved
This article was co-authored by Alyson Garrido, PCC . Alyson Garrido is an International Coach Federation accredited Professional Certified Coach (PCC), Facilitator, and Speaker. Using a strengths-based approach, she supports her clients with job search and career advancement. Alyson provides coaching for career direction, interview preparation, salary negotiation, and performance reviews as well as customized communication and leadership strategies. She is a Founding Partner of the Systemic Coach Academy of New Zealand. wikiHow marks an article as reader-approved once it receives enough positive feedback. In this case, several readers have written to tell us that this article was helpful to them, earning it our reader-approved status. This article has been viewed 1,631,518 times.
Resumes detail a person’s work experience, education, skills and achievements. A good resume that is clear, concise and easy to read is essential when looking for a job. Resumes should be word processed and should be neat and tidy. Microsoft Word offers you the option of creating your resume through templates, but you can also create your resume from scratch using Word's formatting features.
Sample Resumes

Creating a Resume from a Template (Word 2003, 2007, 2010, 2013)

- In Word 2007 you will have to click on “installed templates.”
- In Word 2010 it will be “sample templates.”
- In Word 2011 it will be “new from template.” [1] X Research source
- In Word 2013 the templates will be displayed when you click on “New.”

- In Word 2013, after clicking on “New” you will see a number of templates and a search bar which says “search for online templates.”
- After searching you will see a number of different resume templates to try out.

- Here you will be able to look through a number of templates for resumes and cover letters that you can download for free and edit in Word.
- You may have to sign in with your Microsoft online account to use these templates. [2] X Research source

- Be sure to look carefully at the detail of your resume and proofread it thoroughly.
- All of the versions of Word from 2003 to 2013 all come with some pre-installed templates for resumes.

- Click on the “Other Documents” tab, and then select “Resume Wizard.”
- Follow the wizard's instructions. The wizard will walk you through the resume creation process step-by-step
- If you do not see this option, it was not installed when you installed Word, and you will need to run the installation program again to install it.
Creating a Resume Without a Template

- Education and qualifications.
- Work and volunteer experience.
- Skills and qualities.
- It should also include your full contact details and state that references are available upon request.

- Most chronological resumes only cover the last 5 to 10 years of your employment history.
- You may wish to include positions earlier than this if they are appropriate to the job you're seeking.
- This is the format most American employers prefer to see resumes in.

- A combination resume might list your key skills at the top before providing a short account of your experiences.
- This type of resume can be helpful for those entering the job market with little work experience, or for those trying to change careers. [6] X Research source

- The CV is commonly used when applying for positions in Europe, and also when applying for positions at colleges and universities worldwide.
- CVs can be thought of as living documents that records all your work and achievements, which will generally grow and develop over time more than a resume. [7] X Trustworthy Source University of North Carolina Writing Center UNC's on-campus and online instructional service that provides assistance to students, faculty, and others during the writing process Go to source
Writing Your Resume

- If your resume extends beyond one page, ensure that your name is in a header on every page.
- Your email address should appropriate for a job application. Use your own name or initials if possible.
- Don’t use something jokey such as "sly-dude," "foxymama," or "smokinhot."

- For example, you might write that your objective is “To contribute to the design of new word processing software.”
- Alternatively it may state the position you hope to attain, such as “A position as in healthcare policy and research.”
- Objectives have become less common, and you may prefer to provide this information in your covering letter . [8] X Research source

- You can include a bullet point or two to provide a little further information on your specialism, if it is appropriate for the position you are applying for.
- If you achieved any honours or awards as part of your studying or training include these here.

- Use bullet points to make sure it is clear and easy to read or scan through for key words relating to the position you are applying.
- You can include volunteer positions if they relate to the job you're seeking or if you have little paid experience. [9] X Research source

- You can title this section as “Other Relevant Skills”, or just “Skills.”
- This could include proficiency in foreign languages, knowledge of particular computer software and programmes, and any other specific skills not previously mentioned. [10] X Research source
- Take care to avoid repeating yourself. You don’t need to say you have “excellent communication skills” more than once.

- Allow reasonable margins around the edges of the page. Word's default settings are usually sufficient for this.
- Left-align your section headings. You can use single-spacing after a heading and before the section content, and double-spacing before a heading.
- Get your resume down to one page if at all possible. You can try adjusting your line spacing in the Paragraph dialog box, but don’t lose your neat formatting trying to get it down to one page.
- Rethink your words and try to express yourself more concisely.
Expert Q&A

- Don't wait until you're looking for work to update your resume. Any time you have a promotion or significant accomplishment, add the new information to your resume. Thanks Helpful 5 Not Helpful 1
- Always tailor your resume to the type of position you're seeking. You may have to add, rearrange, or delete accomplishments or entire sections according to what the position requires. Thanks Helpful 6 Not Helpful 2

- The appearance and format of your resume is a reflection of your competence; be sure it represents you at your best. Thanks Helpful 5 Not Helpful 1
- Be sure that all the statements in your resume are both factually and grammatically correct and that all words are spelled correctly. Thanks Helpful 4 Not Helpful 1
You Might Also Like

- ↑ https://kb.iu.edu/d/agst
- ↑ https://templates.office.com/en-us/Resumes-and-Cover-Letters
- ↑ http://cla.umn.edu/student-services-advising/career-internship-services/job-search-resources/resume-guide/formatting-0
- ↑ http://writingcenter.unc.edu/handouts/curricula-vitae-cvs-versus-resumes/
- ↑ http://www.career.cornell.edu/story/resumes/parts.cfm
About This Article

1. Open Word and click File . 2. Click New . 3. Click a resume template. 4. Type your own data into each field. 5. Save your resume as a new file. Did this summary help you? Yes No
- Send fan mail to authors
Reader Success Stories
Jan 19, 2017
Did this article help you?

Asrar Ahamed
May 16, 2020
Amisha Khatri
Nov 23, 2016
Jan 9, 2017
Aug 12, 2017

Featured Articles

Trending Articles

Watch Articles

- Terms of Use
- Privacy Policy
- Do Not Sell or Share My Info
- Not Selling Info
Don’t miss out! Sign up for
wikiHow’s newsletter
How to Make a Word Resume in 2024 - 7 Easy Steps

At some point or another - meaning, before online resume builders made our lives easier - most of us have had to make a resume in Word.
Now, making a resume in Word can be tiresome. Not being entirely optimized for the task, it can give you a hard time formatting and styling your resume to your needs - and this is just one of its disadvantages.
That being said, the use of Word is unlikely to drop only because it’s impractical. This means that knowing how to make a resume in Word is still a good skill to have. And if you’re sitting and thinking: “well, this doesn’t make matters any easier” - we hear you.
That’s exactly why this article is here - to teach you how to make a resume in Word, in just a few easy steps.
- Should You Make a Resume in Word?
- How to Make a Resume in Word in 7 Easy Steps
- How to Format your Resume - 3 Pro Formatting Tips
But before we dive into the nitty-gritty details of how to make a resume in Word, let’s go through the downsides of using it to build your resume, and what other easier alternatives you might have in more detail.
Should You Make a Resume in Word?
Microsoft Word might once have been a top resume-building option, but that time is long gone. Although it has ready-made templates, Word in itself was never meant to be a resume builder - this reflects on the end product, which often looks old-fashioned and dull.
Not to mention that it offers very little space for creativity. Try to make a small change in the layout and see the format crumble in front of your eyes.
On the other hand, if you simply use the Word template without customizing it, yours might just become another resume in the crowd that won’t even pass the Applicant Tracking System (ATS) - the software most companies use to filter through countless resumes they receive daily.
Long story short, here are MS Word’s main cons as a resume builder:
Long story short, here are MS Word’s main cons as a resume builder:
- It can be clunky and outdated - chances are, any Word template you choose to use for your resume will look old-fashioned. Technology has changed what is expected of your resume, just as it has changed job-search over the last decade.
- It is not ATS-optimized - the software that most recruiters use not to waste time looking at the resumes? Well, most Word templates are not optimized for it. This means that you can be the fittest candidate for the job and not even get invited to an interview.
- It’s time-consuming - making changes to the layout of a Word resume template is a nightmare.
Everyone knows what happens when you move an image in Word:

It’s exactly for these reasons, as well as the added efficiency, originality, and time preservation, that online resume builders are the obvious choice for creating your resume.
Novorésumé’s online resume builder is fast, easy to use, and perfect if you want to land that interview. You can start building your resume immediately just by clicking on the link, or you can pick one of our free resume templates , according to your needs.
Step #1: Pick a Word Resume Template
The first step in making a resume in Word is accessing its free resume templates. How you access the templates may change depending on the Microsoft Word version you’re using, but what you ultimately need to do is the following:
Open Word.
Select one of the Resume templates Word suggests, or simply search for “resume” and you’ll find a bunch more.
Choose the resume template that best fits your qualifications and professional profile.
Click “Create.”
You’re good to go: the template should appear as a Word document ready to be filled with your personal information and all other relevant sections.
Step #2: Create a Resume Header
From this point on, things should be pretty easy to pick up.
Start filling up your resume from the top, which is where the resume header is located. Traditionally, the header should include the following information:
- First and last name
- Phone Number
- Location (Street Address, City, State)
You may notice the lack of optional information in this resume template, such as your professional job title , your LinkedIn URL , or social media links.
If you feel like that info will significantly improve your resume, look for a Word template that includes them, or manually add them to the template you’ve already chosen. We’ll go over some formatting techniques to improve your resume template later on in the article.
Step #3. Include a Resume Summary or Objective
Next, you need to describe your professional experience or professional goals (in case you lack the experience) through the resume summary or objective.
Write a resume summary or resume objective - depending on which one best fits your resume - and try to express yourself in a way that will keep the recruiter’s attention for more than the traditional 7 seconds .
Quick recap: a resume summary is a 2-3 sentence overview of your career and is used in 90% of the cases. A resume objective is more commonly used among those with little professional experience or those who are changing careers and describes your professional goals.
Step #4: Create a Compelling Work Experience Section
This is where things get serious.
The work experience section is the most important part of your resume for obvious reasons and usually plays a decisive part in the recruiters’ decisions. So just filling up the gaps in the experience section of the Word template won’t be enough. You should try to make this section as compelling as possible - following some of the tips provided below.
But first, the basics. As with any standard format, the experience section should include the following components:
- Job title and position
- Company name and location
- Dates of employment
- Achievements and responsibilities
Again, how the resume looks in Word will depend on the template that you have chosen.
Obviously, the template lets you add as many professional entries as you wish - but that doesn’t mean you should go overboard. List your experience in reverse-chronological order, meaning: start from the latest and move back in time, based on the amount of professional experience you possess.
There are, of course, a couple of pro tips that you should follow even as you use the Word templates to make your experience section more compelling.
Pro Tip #1 - List achievements over responsibilities
Notice the example above.
Instead of responsibilities, we have opted to list achievements. Listing achievements over responsibilities whenever possible is one of the best ways to stand out in the eyes of recruiters. That’s because responsibilities are similar for one type of job, while achievements show exactly what you can contribute to the position .
Pro Tip #2 - Tailor your resume to the job you are applying for.
Another good practice is tailoring your resume to the job you are applying for. This can help you go through the ATS and land your resume right on the recruiters’ tables.
If you want to know exactly what information to include in your resume, how and when to list achievements over responsibilities, and how to tailor your resume to your job, head over to our complete guide on how to write a resume .
Step #5: Add Your Educational Background
Things should get quite easy after you get your professional experience section out of the way.
The education section of your resume should include the following:
- University name and location
- Years attended
- Program name / Degree obtained
Optionally, you can include your GPA, Minor degrees, or any special award or academic achievement. Our advice is to include them only if you are a recent graduate or entry-level professional with not much else to include in your resume, or if your education history is truly outstanding.
Step #6: Make Sure to Include Your Skills
At this point, you can consider most of the work done!
Now that you have reached the skills section, things get even easier. Make a bullet or numbered list of your hard and soft skills and you’re good to go.
Hard skills are usually measured through experience levels - you can place your experience level (usually categorized into Beginner/Intermediate/Advanced or Expert ) into brackets, so you don’t take up too much space within the resume.
Pro Tip #3 - Tailor the skills and qualifications on your resume to the job
Take a look at the essential skills required on the job ad and see if you can incorporate them into your list of skills.
Step #7: Include Optional Resume Sections
Congrats - you can finally stretch your legs and even allow yourself a little pat on the back.
The additional sections are not mandatory in a resume, so if you’ve reached your resume space limit, you can just call it a day and save your resume.
They are, however, a great way to show off additional assets such as languages, hobbies and interests, and even volunteering experience on your resume !
- Remember to also determine your language knowledge levels. Those are Native , Fluent , Proficient , Intermediate , and Basic.
In the off chance that you still have some space left - considering resumes should be 1-2 pages at most and that Word templates are not as good at saving space as online resume builders - you can include the following optional sections:
- Certifications and Awards
- Publications
Follow the same practice as with the skills section, and you’re good to go!
How to Format Your Word Resume
With all the essentials covered, let’s go over some formatting tips such as fonts, line spacing, and headings so that your Word resume looks as uniform and clean-cut as possible.
Best Resume Fonts in Word
We cannot repeat this enough - the resume font you use, matters. It matters just as much as first appearances matter and we all know they do, a lot.
The font that you decide to use will impact your resume readability whether you like it or not, so you should use a font that will help you stand out, but not in a bad way. What’s a bad way? Comic Sans and other similarly-looking comic fonts.
The usual Times New Roman, point-12, formula, on the other hand, will just blend you with the crowd.
Instead, consider using one of the following recruiter-friendly fonts which will complement your resume both on-screen and in printed form, according to Business News Daily :
- Book Antiqua
- Trebuchet MS
Optimal Line Spacing for a Word Resume
The good thing about the Word resume template is that it usually has fonts and line spacing covered for you, yet it’s still good to know that the best line spacing for resumes is 1 or 1.15 between text and double lines after headings.
Feel free, however, to play around with line spacing when it comes to adjusting your resume layout.
Headings in a Word Resume
Again, Word templates do a good job of making the headings stand out. As a rule of thumb - and as is noticeable in the above examples - headings should be bigger than the rest of the text. So, if you’re using a 12 pt text, consider adjusting the headings between 14-16 pt.
You can also underline or bold each resume section heading, or even use a different font, but as we always advise: don’t go overboard and try to maintain the style of the Word resume template that you have chosen.
And by now, you should have a complete resume in Word that looks like this:

Key Takeaways
Well, here you have it - your nicely tailored resume in Word, ready to land you that job interview.
Although not the easiest task, we are convinced this article has given you all the necessary information on how to make a resume in Word and the confidence to do so easily.
Here’s what’s good to remember:
- Order your resume sections properly, usually in reverse-chronological order.
- Make sure that your section headings stand out from the rest of the text, by usually using a larger font size.
- Check if your chosen font, line spacing, and margins are aligned, readable, and professional-looking.
- Opt for an online resume builder such as the one Novorésumé provides for a more modern, time-saving, and HR-friendly resume.

To provide a safer experience, the best content and great communication, we use cookies. Learn how we use them for non-authenticated users.
Protect your data
This site uses cookies and related technologies for site operation, and analytics as described in our Privacy Policy . You may choose to consent to our use of these technologies, reject non-essential technologies, or further manage your preferences.
- Resume and Cover Letter
- Step-by-Step Guide on...
Step-by-Step Guide on Creating your Resume Using MS Word
9 min read · Updated on December 08, 2023

Microsoft Word is the best program to use when creating your resume. Here's how to do it so that your resume gets past the Applicant Tracking System - ATS and impresses hiring managers.
Microsoft Word comes with some very attractive templates that are ready to use and allow you to fill in the blanks. The bad thing is the templates offered by Word are not usually ATS-friendly. It is best to create your resume from scratch. You can do so without being an expert at using Word or knowing all of the formatting options the program offers.
A simple online search about creating a resume from scratch returns millions of results. Choosing the right set of instructions can be daunting. So, instead of going down that rabbit hole, follow this step-by-step guide on creating a resume using MS Word.
MS Word resume templates
It can seem like an easy answer to pick a template offered by Word. You open the program, click templates, and are presented with hundreds of options. However, considering that ATS can't properly parse information from resumes that have text boxes, columns, images, and charts, those templates are not going to serve you well .
Submitting a non-ATS-friendly resume is the best way to have your resume rejected for a job. When your resume is rejected by the ATS software, the human beings at the company don't even know you exist. It is one of the top reasons job seekers are ghosted by companies.
Format your overall document before you start typing
Believe it or not, an ATS will scan resumes for everything from keywords, experience, and education to margin width and font. There are some pre-typing formatting options you'll need to set to ensure that the ATS can read your document.
Set your margins so that they are no narrower than 0.5 inches all the way around. Alternatively, you can use 0.75 and one-inch margins if you prefer.
Choose the font you want to use . You can use more than one font in your resume to distinguish between headers and body text, but use no more than two separate fonts.
On the “Paragraph” formatting ribbon, set your line spacing to “Multiple” at 1.06 and enter “6 pt” in the “Before” box to ensure that your lines are squished together. You want to create some white space in your resume.
Setting the right formatting options ahead of time can save you some headaches when you're finished typing the text.
As you type out your resume information in your resume, use the “Font” and “Styles” formatting ribbons to customize things like font size, colors, headers, and section separators. Your resume should contain the following sections :
Other (e.g., Affiliations, Licenses, Certifications, Volunteerism)
Your contact section
Type your name on a line by itself. Typically, you want your name to be larger than the other text on the document. You can even put it in all caps or small caps to help it stand out. On the next line, type your city, state, zip code/postal code, phone, email, and any online portfolios you want hiring managers to know about.
It is no longer customary to include your full address. There have been instances of discrimination against job seekers based on their home addresses. It is critical, though, that you include your zip or postal code. Hiring managers can query the ATS for resumes within a radius of a zip code. If your zip code is missing, your resume doesn't get included.
If you use the “Intense Quote” style, your name and contact information will be set apart from the rest of the document with a border along the top and bottom of the text. Highlight your name to increase the size of the font and make it bold.
Title and summary section
As you write the title and summary of your resume, make sure that it is future-facing and targeted to the job to which you want to apply. Type the title on a line by itself and, like your name, put it in all caps, small caps, larger text, and bold text so that it stands out from the rest of the words on the page. It's also a good idea to center it on the line. You can also change the color.
Some rules to use when applying color to your resume:
Color draws attention to the important parts.
Use bright colors (e.g., blue and green) for headers and contact information.
Use complementary colors (e.g., lighter shades of blue and green) for subheadings, position titles, and degrees.
Avoid using red on your resume as red is associated with stopping. You don't want to give someone a queue to stop reading your document.
The summary paragraph should be three to five sentences in length with a focus on what you bring to the table in alignment with relevant keywords from the job description. Be specific, but be concise. Focus on how much experience you have, a few things that you're really good at, and include at least one achievement.
Your skills section
Your contact section, title, and professional summary won't have headers. The skills section is where you'll start including headers to separate content. Type the word “Skills” on a line by itself. Follow the same style for each of the other sections in your resume.
Then, on the next line list out your professionally relevant and job-specific skills. Keep the list to no more than 12 skills and be sure to use a strong mix of hard and soft skills .
Your professional experience section
This is where the bulk of your resume content should appear. In order to properly write your experience section, you should use the chronological resume format . This simply means that you start with your current or most recent job and work backward. There are some general rules of thumb to keep in mind when writing the experience section of your resume.
How to lay out the information for each job: Start with the name of the company and the timeframe you were employed there. It's best to use the MM/YYYY format for your jobs. After that, list your position title followed by three to five achievement bullets. Make sure that each bullet starts with a verb so that you have an action-based resume.
Stick to the last 10-15 years of experience: A great resume represents approximately 10 years of experience. It's okay to go back 15 years, but it's recommended that you avoid going further than that. You can certainly list older experiences under an “Early Career Experience” title, but the roles in that list won't contain bullets detailing your accomplishments.
Use stacking to list multiple roles at the same company: When you have progressed through more than one position within a single company, you'll list the company name first with the total amount of time you were employed there. In the next line, you'll list the last role you had with the company and the time you held that position followed by your achievement bullets. After those bullets, list the previous role you held with the company with the time you were in that role but don't list the company name again. Here's what that looks like:
ABC Company | 03/2007-Present
Senior Leader (05/2015-Present)
Experience that relates to the job to which you're applying.
Example(s) of projects or situations where you used this skill.
1 to 2 accomplishments or measurable results showing your expertise with this skill.
Associate Leader (03/2007-05/2015)
Your resume isn't meant to be a record of your professional life's events.
Talk about achievements that will intrigue a hiring manager to call you for an interview.
Anytime you can use numbers, it's best to do so.
Your education section
End your resume with an education section, which includes your education, professional development, and any credentials you may possess. List graduation dates only if you're still in school or graduated within the last year. You should also spell out acronyms (e.g., Master of Business Administration rather than MBA). You can put the acronyms in parentheses after the full spelling. This holds true for degrees and school names.
If you didn't graduate, you can still list your higher education on your resume. After you type out the degree you were pursuing and the name of the school, put verbiage that indicates the degree is unfinished. Here's an example:
Bachelor of Science in Business Management | ABC State School | Expected completion: MM/YYYY
When you didn't finish and know you're not going back, simply put the number of credit hours you completed in the place of the “Expected completion” text:
Bachelor of Science in Business Management | ABC State School | 98/120 Credit Hours Completed
Additional sections that may appear on your resume
Some jobs require you to be a member of a particular organization. You may have completed some career-related research or have articles published to which you want to call attention. Put a relevant header for any extra information that you want on your resume and type out the information.
Formatting headers
Now that you have the content written, it's time to make it look pretty. It's easy to update the text of each header title by enlarging the font and using bold. You can do more, though.
- Shading: Highlight the “Skills” header and click the down arrow next to the paint bucket icon on the “Paragraph” formatting bar. This will allow you to change the shading behind the header. Be sure to use something that complements any color you've already used and don't let the shading make it so you can't read the header text.
- Borders: With the word “Skills” still highlighted, click the down arrow next to the borders button on the “Paragraph” formatting bar (it's right next to the paint bucket icon). Choose to add a top or bottom border (or both) to your header. The choice is completely yours to use one or both borders.
Whatever formatting you decide to finish with on the “Skills” header needs to be repeated on all headers to ensure a level of consistency within your resume. The only header that wouldn't need formatting is the line you created if you decided to list “Early Career Experience.” You can simply bold that and leave it as simple text.
Now you have a beautifully formatted, from-scratch resume. In the end, all you needed to know how to do was bold text, change the font, and format shading and borders.
If you have questions, TopResume has a team of expert resume writers standing by.
Recommended reading:
- The Hidden Dangers of Using Microsoft Word Resume Templates
- What's an ATS-Friendly Resume? And How to Write One
- How to Write a Chronological Resume (Tips + Examples)
Related Articles:
Do Hiring Managers Actually Read Cover Letters?
How to Create a Resume With No Education
Why You Lose When You Lie on Your Resume: Learning From Mina Chang
See how your resume stacks up.
Career Advice Newsletter
Our experts gather the best career & resume tips weekly. Delivered weekly, always free.
Thanks! Career advice is on its way.
Share this article:
Let's stay in touch.
Subscribe today to get job tips and career advice that will come in handy.
Your information is secure. Please read our privacy policy for more information.
How to Create a Professional Resume Using Microsoft Word
Learn how to create a professional resume with only Microsoft Word in minutes. Then make sure you stand out from the crowd!
Microsoft Word offers templates and tools for creating resumes. Whether you are new to the workforce or an experienced professional, you have a variety of options.
Many companies use Application Tracking Software (ATS) which looks for keywords and specific color and design format in your resume. It can be rejected by ATS or a recruiter if the resume is not optimized and lacks standard design.
Sharing your work experience and skills is the first step in getting the attention of a recruiter. Let's understand how to create a professional resume in Microsoft Word.
Why Use a Resume Template?
Designing a resume from scratch and adding suitable content is a time-consuming process. Resume templates in Microsoft Word are created by professional designers and, therefore, in line with industry standards.
Using them can increase your chance of making a good first impression and meeting the required guidelines.
Choosing the Right Template
Now that you have learned the importance of using a template, let's see how to choose the right one. Microsoft provides an array of templates for diverse job profiles. Usually, designers or artists use templates with prominent visual elements.
These elements help in showcasing their portfolios, such as artwork, wireframe designs, or photographs. In contrast, technical or sales professionals prefer a design with a maximum of two colors and a simple layout.
Creating a Resume
Let's see how you can find the right template and create a resume.
- Open Microsoft Word and click New .
- Browse the list and click the Pin option to mark a few templates for future reference.
- After you have finalized a template, click Create .
- Remove sections that are not relevant. For example, if you are a graduate, the Experience section may not be relevant.
- Click Save .
Using the Resume Assitant by LinkedIn
When you create a resume in Microsoft Word, the Resume Assistant is displayed on the right panel. The assistant shows samples of popular LinkedIn profiles relevant to you.
If you face writer's block or need ideas to enhance your content, follow these steps to use the assistant.
- Enter your LinkedIn login credentials, role, and the preferred industry.
- Click Get Started . Examples of public profiles based on your preferences are displayed.
- Click the Read More option to view the details.
Polishing Your Resume
Incorrect grammar creates a poor impression on a recruiter. That's why editing and proofreading the resume is crucial. You can either use the in-built Spelling and Grammar Check feature in Microsoft Word or explore other grammar checkers .
You can also switch to Read Mode or Print Layout to review without distractions. This approach will help you spot errors.
Lastly, print your resume. Reading in paper format highlights spacing issues, missing periods, and incorrect formatting.
Alternative to Microsoft Word 365
Now that you have learned to create a resume in Microsoft Word, you can share it with recruiters or upload it to job portals. If you do not have access to Microsoft Word, alternate web-based software can help you get started.
You can also use external services to align your resume with the job description . These services will ensure that your resume is aligned with your role and meets industry standards.

Try Process AI free
How to make a resume in microsoft word.
Beginning your job hunt can seem like a daunting task. Crafting a perfect resume, however, doesn’t have to be. Microsoft Word provides plenty of tools and templates to help you make an impressive and professional resume. Just a few simple steps and you can have a stand-out resume.
To create a resume in Word, the first thing to do is pick the right template. Word has loads of pre-designed templates especially for resumes. These come with professionally designed layouts and formatting choices, so you can focus on your content and not stress about the design.
Once you have the template, you can customize it with your own info. This includes adding your contact info, work history, educational background, abilities, and other relevant details. All you need to do is replace the placeholder text with your own.
Word also offers visual elements to enhance your resume, such as headers, bullet points, and dividers. This makes the text easier to read and more visually appealing.
Furthermore, Word gives you plenty of formatting options to customize the look of your resume. You can adjust fonts, colors, and styles to fit your taste or meet industry standards.
In short, creating a resume in Microsoft Word is not difficult. It helps you showcase your talents effectively. Thanks to the templates and customization options, you can make a professional-looking resume that reflects your unique skills and experiences.
Setting up Microsoft Word for resume creation
Setting up Microsoft Word for creating a resume
To effectively set up Microsoft Word for resume creation, follow these 5 steps:
- Open Microsoft Word and click on the “File” tab.
- Select “New” to open the template options.
- Type “resume” in the search bar to access various resume templates.
- Choose a template that suits your needs and click on it to preview or open it.
- Customize the template by replacing the placeholder text with your own information.
In addition, make sure to save your resume document in a compatible format, such as .doc or .docx, to ensure easy sharing and compatibility with different devices.
If you encounter any issues or need further assistance, consult Microsoft Word’s official documentation or seek help from their support team.
True History: Microsoft Word has been a popular choice for resume creation due to its user-friendly interface and wide range of customizable templates. Users have found success in creating visually appealing and professional resumes using the software’s features.
If you don’t know how to open Microsoft Word, maybe you shouldn’t be making a resume in the first place.
Opening Microsoft Word
Open Microsoft Word and get ready to write your resume like a professional! Here’s a four-step guide to help you out:
- Start the app: Click the Start menu, type “Microsoft Word” in the search bar, and hit enter. Or find the Word icon on your desktop or taskbar and double-click it.
- Create a new document: Open Microsoft Word and click the “File” tab at the top left corner of the screen. Select “New” from the drop-down menu.
- Choose a template: When you open your blank document, you can either begin creating it from scratch or opt for one of the pre-designed resume templates. Look for the “Templates” option on the right side of the screen.
- Start writing: After picking a template or starting with a blank page, it’s time to unleash your creativity! Personalize the sections, fonts, colors, and content to make your resume stand out.
Don’t wait any longer – open Microsoft Word and get started! Make the most of its intuitive interface and features to craft an amazing resume that will grab the attention of recruiters. Your dream job could be just around the corner – so start writing now!
Selecting a resume template
Pick a template that matches your style and profession. A modern and clean one usually works. Creative fields need something more unique.
Look for sections that show your experience, education, skills and achievements. An organized layout is best.
Check that you can customize it with fonts, colors and sections. This helps adapt it to your needs.
Choose one with clear headings and enough white space. Avoid complicated designs and too many graphics.
Make sure it’s compatible with software like Microsoft Word.
Ask colleagues or professionals for feedback. Their advice can be useful.
Find a template that’s professional, shows off your skills and fits industry standards.
Take your time to explore different templates.
The right resume template will give you an edge over other candidates. So start searching today and take the plunge towards that dream job.
Customizing the resume template
Choose a professional font and formatting style; one that’s simple to read.
Personalize the sections of the template to display your abilities, education, and work history.
Match your personal brand or industry by customizing the color scheme and design elements.
Add or take away sections to make a comprehensive resume.
Little details can have huge effects. Observe the alignment, spacing, and consistency throughout the document. Showcase your strengths with your own touches while keeping it clean and official. This way, you can create an impressive resume which clearly states your qualifications.
Fun fact: 76% of recruiters prefer customized resumes over generic ones, as found in a survey by TopResume.
Adding personal information
Adding personal details in a resume
Starting with personal information for a resume, it is crucial to include relevant details in a professional manner. Begin with your full name and contact information , such as phone number and email address. Refrain from unnecessary introductory phrases and keep the response concise.
Next, mention your home address , making sure it is up-to-date. Including a professional summary or objective statement is also vital, providing a brief overview of your skills and career goals. Remember to use a Semantic NLP variation of the heading, focusing on the importance of personal details.
To make your resume stand out, consider including relevant social media profiles , such as LinkedIn or GitHub. However, only include accounts that showcase your professional achievements and align with the job you’re applying for.
Additionally, it is essential to include a professional headshot , providing a visual representation of yourself to potential employers. However, ensure it is a recent and high-quality photo, displaying a polished and presentable image.
In summary, adding personal information to a resume requires attention to detail and professionalism. Including relevant contact details, a professional summary/objective, social media profiles, and a suitable headshot can enhance your resume’s impact.
(Note: The above response has been generated using a combination of machine learning and human assistance. It may not be entirely accurate or represent the views of the authors.)
Make your contact information stand out like a desperate ex trying to win you back.
Contact information
Don’t miss out! Update your contact details today.
Have a dedicated email address for professional correspondence while keeping your privacy. Including a reliable phone number makes communication and accessibility swift. A physical address is essential for businesses to be located easily. Social media profiles give another way to interact. A website is ideal to show important info about you or your organization. Instant messaging platforms , like Skype or WhatsApp, provide real-time convos.
Additionally, add other contact methods for no interruptions and to meet preferences. Review and update contact info often to avoid missed messages and partnerships. Small adjustments can make a huge difference in your journey, so don’t miss out – update your contacts now!
Objective statement
Strategically add personal details into formal settings. It will help boost your professional profile and create connections. It adds a personalized touch that sets you apart from the crowd.
Share hobbies, volunteer work, or accomplishments . It shows you’re well-rounded and has qualities beyond what’s on your resume.
Personal info can be great conversation starters. It lets people connect with you and makes a memorable impression.
Choose info that’s relevant to the industry or position. Show how it contributes to your professional goals.
Be mindful of appropriateness and ensure it reflects positively. Avoid sensitive or controversial topics.
Use personalization in your professional life. Bring the best version of yourself by strategically using personal information. Don’t miss out on meaningful connections and opportunities.
Summary or profile section
John Smith saw a boost in interview requests when he added a concise yet informative summary section to his resume. This snapshot of his skills and qualifications showcased his expertise and potential value.
The profile section highlighted his education, experience, certifications, and achievements . It also included unique details like specialized training, industries he worked in, and niche skills. These distinct elements made John stand out to employers.
John’s well-crafted profile section captured potential employers’ attention and made them eager to learn more. It definitely had a significant impact on his career!
Highlighting skills and qualifications
Highlighting Your Skills and Qualifications:
To capture the attention of potential employers, it is crucial to effectively highlight your skills and qualifications in your resume.
– Showcase your expertise: Use bullet points to succinctly list your key skills and qualifications. Highlight specific achievements and experiences that demonstrate your abilities in a clear and concise manner.
– Tailor your resume: Customize your resume to align with the job requirements by emphasizing skills and qualifications that directly relate to the position. This will showcase your suitability for the role and increase your chances of getting noticed.
– Quantify your accomplishments: Whenever possible, use numbers and specific metrics to quantify your achievements. This will provide concrete evidence of your capabilities and make a lasting impression on recruiters.
By employing these strategies, you can effectively highlight your skills and qualifications in your resume, increasing your chances of securing the job opportunity you desire.
Remember, your resume acts as a powerful marketing tool that presents your abilities and experiences to potential employers. Make sure it accurately reflects your skills and qualifications in a compelling and professional manner. Don’t miss out on the opportunity to stand out from other applicants by showcasing your unique value. Create a resume that leaves a lasting impression and positions you as the ideal candidate for the job.
Listing relevant skills: Because anyone can say they’re a ‘team player,’ but are they really ready to be sabotaged by their coworkers for the sake of office entertainment?
Listing relevant skills
Honing your skills and qualifications is essential in the competitive job market today. Employers appreciate job-seekers with the right expertise to be successful in the role. Briefly and effectively listing relevant abilities can exhibit your capabilities and boost your chances of getting your dream job.
Figure out the key skills that match the job requirements. Alter your resume or CV to emphasize these skills prominently. Utilize bullet points for easy readability. For example:
- Communication: Outstanding verbal & written communication aptitudes, allowing clear & succinct connections with clients and team members.
- Problem-solving: Strong analytical thinking and innovative problem-solving abilities to identify and settle issues quickly.
- Leadership: Displayed leadership qualities, such as the ability to motivate teams, delegate tasks, and create a collaborative work environment.
Moreover, show examples of how you applied these skills in past positions or projects. This shows practical knowledge and emphasizes your efficiency. Prioritize pertinent skills based on the job description.
Also, consider adding special details that make you stand out from other prospects when listing your abilities. These might be special certifications or specific training you have undertaken, language fluency, or industry-specific knowledge attained through internships or volunteer work.
The practice of listing skills has been a major part of recruitment processes for a long time. Employers have relied on this method to evaluate applicants’ suitability for the jobs. In our modern digital age, this has become even more consequential as technology advances swiftly across several industries. Therefore, displaying one’s skills keeps playing a critical role in finding meaningful employment prospects.
Remember, listing relevant skills proficiently can strongly improve your chances of impressing employers and being distinct from the rest. By illustrating your knowledge concisely and clearly, you can prove that you are an invaluable asset to any organization. So take the time to strategically showcase your qualifications—you won’t regret it!
Showcasing accomplishments
Featuring skills and qualifications is a must for those trying to make a good impression on potential employers or clients. By displaying accomplishments, folks can show their abilities in a persuasive way. This helps them stand out from the competition and increases their shot at success in the professional sphere.
- Accomplishments provide proof of an individual’s aptitude and successes.
- Displaying accomplishments allows people to emphasize their strengths and know-how.
- Highlighting certain accomplishments can get employers’ or clients’ attention.
- Accomplishments demonstrate success and give others trust.
- By emphasizing accomplishments, individuals can make their value and worth known.
- Showing accomplishments shows one’s capacity to fulfill promises and meet professional expectations.
In addition to this, it’s important to focus on the unique details that make individuals stand out from the rest. These may include revolutionary projects, industry awards, or inventive solutions. By highlighting these one-of-a-kind achievements, individuals can further raise their professional status and improve their chances of getting desired opportunities.
A great example of the importance of displaying accomplishments is a graphic designer who wanted a job at a well-known design agency. Instead of just listing his qualifications and skills, he created an online portfolio with his best works and noteworthy projects. This approach let him present his abilities in a visually striking way while providing solid proof of his skill and imagination. As a result, the designer not only caught the eye of potential employers but also got multiple job offers, leading to a prosperous career in the field.
Education and work experience
In the professional world, your educational background and work experience are crucial aspects that employers consider for job applications. Demonstrating your qualifications and relevant experiences can greatly enhance your chances of securing a desired position. Here’s how to showcase your education and work experience effectively:
To present your education and work experience, you can utilize a table format to arrange the information in a clear and organized manner. A table provides a structured layout that makes it easy for employers to review your credentials. Consider the example below:
While the table accurately displays your educational and professional background, it’s important to include additional unique details that highlight your accomplishments and standout experiences. These details could include specialized training, projects, internships, or any exceptional achievements related to your field.
It is recommended to avoid using sequencing adverbs or ordinal adverbs to maintain a formal and informative tone. By using concise and direct language, you can effectively communicate your message without any unnecessary fluff.
Pro Tip: When listing your educational qualifications, start with the highest level of education achieved and work your way down. Conversely, when showcasing your work experience, begin with your most recent or current position and progress chronologically.
By following these guidelines, you can create an impressive resume using Microsoft Word that effectively presents your education and work experience. With a well-structured and informative layout, you can increase your chances of getting noticed by potential employers.
Education is important, but let’s be real, employers just want to know if you can microwave a frozen burrito without setting off the fire alarm.
Adding educational background
Having a degree or taking related courses reveals your commitment to personal development. Employers can see the subjects you’ve studied, the know-how you have and the theoretical base you possess. This information helps them decide whether you are a great fit for a certain role or industry.
Adding certifications or licenses that you own can improve your reputation and make you stand out from other applicants. These extra qualifications highlight your abilities in specialized areas and might give you an advantage over competitors who don’t have such credentials.
It’s important to note that educational background alone doesn’t ensure success in the workplace. Yet, it offers a strong foundation to build real-world skills and experiences. By combining theory with practice, individuals can create an in-demand set of abilities.
As per a survey by the National Association of Colleges and Employers (NACE), people with higher levels of education usually have higher earning potential and more career advancement opportunities than those with lower levels of education. This further emphasizes the significance of adding educational background when displaying one’s skills.
Including work experience details
When discussing work experience, it’s important to give a brief overview of each job. Focus on tasks and duties that show your skills. Present the info clearly and efficiently.
It’s also great to mention any unique accomplishments or projects . This shows not only your capabilities, but also your ability to exceed expectations.
Research from Forbes magazine shows those with work experience are more likely to get job offers. So, including relevant work experience in your education section is essential.
Remember to demonstrate professionalism and creativity with your work experience details. Use storytelling and show tangible results to grab employers’ attention. Showcase yourself as an asset in the workforce.
Formatting and organizing the resume
To ensure your resume stands out, it is essential to format and organize it properly. Here are some key points to consider:
- Start with a professional layout: Use a clean and simple design that is easy to read. Choose an appropriate font size and style, and maintain consistency throughout the document.
- Use clear headings: Divide your resume into sections with clear headings such as “Professional Experience,” “Education,” and “Skills.” This helps the reader navigate and find information quickly.
- Prioritize relevant information: Tailor your resume for each job application by highlighting the most relevant skills and experiences. Place these details prominently and consider using bullet points to make them stand out.
- Arrange information in reverse chronological order: Start with your most recent experience and work backward. This allows employers to see your most recent accomplishments first.
- Use consistent formatting: Maintain consistency in font styles, spacing, and bullet points. This creates a visually appealing and professional-looking resume.
- Proofread and edit: Avoid spelling and grammatical errors by thoroughly proofreading your resume. Consider seeking feedback from a trusted individual to catch any mistakes you might have missed.
Remember, a well-formatted and organized resume can make a strong first impression on potential employers, increasing your chances of securing an interview.
Start building your resume with Microsoft Word today and maximize your opportunities in the job market. Don’t miss out on the chance to showcase your skills and experience effectively.
Pick a font that won’t make HR squint like they’re trying to read invisible ink, but also won’t shout, ‘Hey, I’m a robot pretending to be a professional!’
Choosing fonts and formatting
Fonts and formatting are vital when it comes to resumes. They can make yours stand out from the competition or make it look cluttered and unappealing. Here’s what you need to do:
- Opt for a clean font like Arial, Calibri, or Times New Roman .
- Reject fancy or decorative fonts that can distract from the content.
- Font size should be between 10 and 12 points for the body text.
- Bold or italic formatting should be used sparingly to emphasize headings or achievements.
- Be consistent in formatting. All headings should be the same size and style.
- Utilize bullet points for better organization.
To take it to the next level, use white space to create a balanced layout. Also, try justified alignment for a polished look.
Remember that readability and professionalism have always been key. Back in the day, people used basic fonts and a simple format, but as technology advanced, they experimented with different styles. In the end, they reverted to clean fonts and well-structured formats for their resumes.
Arranging sections and headings
Start the resume off with a concise summary to grab the employer’s attention. Then, follow it up with sections in a logical order that best showcases the candidate’s qualifications.
Think formatting when writing the resume. Use a neat font and equal margins. List details under each section with bullet points instead of lengthy paragraphs.
Headings should accurately reflect the content. Get specific with titles, like “Relevant Work Experience” or “Internships.” This ties together related experiences and adds clarity.
Proofreading and finalizing the resume
Proofing and Perfecting Your Resume
Give your document the final polish
Proofreading and finalizing your resume is a crucial step in creating a professional and polished document that stands out to employers. To ensure your resume is error-free and effectively showcases your qualifications, follow these key points:
- Review for grammatical and spelling errors: Use the spell-check feature in Microsoft Word to catch any mistakes. Additionally, carefully read through your resume to catch any grammar or punctuation errors that may have been missed.
- Check formatting: Ensure consistent formatting throughout your resume, including font styles and sizes, bullet points, and spacing. A well-formatted resume is visually appealing and easy to read.
- Edit for clarity and conciseness: Cut out any unnecessary or redundant information, and focus on highlighting your most relevant skills and achievements. Employers appreciate resumes that are concise and to the point.
- Tailor your resume to the job: Customize your resume for each job application by highlighting skills and experiences that align with the specific role. This shows employers that you have taken the time to understand their needs.
- Get a fresh pair of eyes: Have someone else review your resume to provide feedback and spot any errors or areas for improvement that you may have missed. A second opinion can be invaluable in perfecting your resume.
- Double-check contact information: Ensure that your phone number, email address, and any other contact details are correct and up to date. This ensures that employers can easily reach out to you for any potential opportunities.
In addition to the above points, it is important to remember that the content and format of your resume should be tailored to your specific industry and the job you are applying for. By taking the time to carefully proofread and finalize your resume, you can increase your chances of landing that dream job.
True story: One job seeker diligently proofread and finalized her resume before sending it out to various employers. However, she accidentally misspelled her own name in the contact information section. Despite her impressive qualifications, this error gave employers a negative impression and hindered her job search. It serves as a reminder of the importance of thoroughly reviewing and perfecting your resume before submitting it.
Proofreading your resume is like playing detective, searching for errors and inconsistencies that would otherwise end up on your ‘Wanted’ poster.
Checking for errors and consistency
- Check your spelling and grammar. Typos and mistakes can make a bad impression on employers.
- Keep the font, size, and spacing consistent in your resume. Look out for aligning sections and bullet points for a neat look.
- Double-check facts like dates, job titles, and contact info. Also, be consistent with verb tenses and sentence structure.
Fun fact: A CareerBuilder study says that 58% of resumes have typos or grammar errors that could mean no interview.
Making necessary revisions
Review your resume content carefully. Look for any grammatical mistakes, spelling errors, or strange phrasing.
Notice the formatting and layout. Ensure it looks good and is easy to read with fonts, bullet points, and headings.
Evaluate the info on your resume. Highlight the essential details and place them in sections strategically.
Customize it to match the job you’re applying for. Showcase skills and experiences that the employer wants.
For uniqueness, include quantifiable achievements or metrics to illustrate your work’s impact. Emphasize keywords related to the job and industry.
Before finishing, get feedback from colleagues or professionals in your field. They may spot areas for improvement that you missed.
Saving and sharing the resume
Paragraph 1:.
When it comes to storing and exchanging your resume, Microsoft Word provides convenient options. Make your resume easily accessible by learning how to save and share it efficiently.
Paragraph 2:
- Saving your resume: Utilize the “Save As” feature in Microsoft Word to choose a specific location on your computer or cloud storage to save your resume. Ensure you use a descriptive file name to easily identify your resume.
- Sharing your resume: Microsoft Word allows you to share your resume through email or by uploading it to online job platforms. Use the “Email” or “Share” options to send your resume directly or save it in a compatible format for online applications.
Paragraph 3:
It is important to consider the format in which you save your resume to ensure compatibility. Additionally, make sure to set the appropriate permissions or access levels when sharing your resume to maintain privacy and protect your personal information.
Paragraph 4:
A friend once shared his resume on Microsoft Word using a secure cloud storage platform, allowing potential employers to easily access and review his qualifications. This method helped him land the job he desired.
Save your resume as a file because you never know when you might need to quickly delete all evidence of your professional existence.
Saving the resume as a file
- Choose a PDF file for your resume. It’s the best format for compatibility across devices and systems. Name it with your name and “resume”, like “John_Doe_Resume.pdf”.
- Create a folder for your job application documents.
- Check the file size so it won’t be too big for email attachments. Compress images and remove unnecessary elements to reduce size.
- Test compatibility on different devices and platforms. This will keep the formatting and info clear.
- Save your resume as a file to present yourself professionally.
- These steps help you impress potential employers.
Exporting the resume as a PDF
Ready to show off your stellar resume? Let’s export it as a PDF so that your formatting remains the same on any device or platform! Here’s your step-by-step guide:
- Choose suitable software: You’ll need something like Adobe Acrobat Pro, Microsoft Word, or an online converter.
- Open your resume file: Launch the software and open the file. Make all edits and formatting adjustments before continuing.
- Click “Save As” or “Export”: Find the option to save or export files in different formats.
- Select PDF format: In the save/export window, choose PDF. You may also have extra options to customize quality, compression, or password protection.
- Pick a destination folder: Specify where you want to save the exported PDF file.
- Click “Save” or “Export”: Click the appropriate button to export your resume as a PDF.
To make the PDF even more effective:
- Customize filename: Rename your exported PDF with something professional like “ Firstname_Lastname_Resume.pdf “.
- Review before submission: Check the PDF version to make sure everything looks correct.
Present yourself professionally with a well-crafted and accurately exported PDF resume, and maximize your opportunities!
Printing and sending the resume
Format your resume with standard fonts like Arial or Times New Roman . Ensure headings are clear. Proofread for any errors. Print on quality, white or cream-colored paper. Print multiple copies. Send electronically as a PDF file . Follow submission instructions. Customize your cover letter for each job application. Include relevant keywords from the job description to pass ATS . Double-check content and file before sending.

No credit card required
Your projects are processes, Take control of them today.
The Tech Edvocate
- Advertisement
- Home Page Five (No Sidebar)
- Home Page Four
- Home Page Three
- Home Page Two
- Icons [No Sidebar]
- Left Sidbear Page
- Lynch Educational Consulting
- My Speaking Page
- Newsletter Sign Up Confirmation
- Newsletter Unsubscription
- Page Example
- Privacy Policy
- Protected Content
- Request a Product Review
- Shortcodes Examples
- Terms and Conditions
- The Edvocate
- The Tech Edvocate Product Guide
- Write For Us
- Dr. Lynch’s Personal Website
- The Edvocate Podcast
- Assistive Technology
- Child Development Tech
- Early Childhood & K-12 EdTech
- EdTech Futures
- EdTech News
- EdTech Policy & Reform
- EdTech Startups & Businesses
- Higher Education EdTech
- Online Learning & eLearning
- Parent & Family Tech
- Personalized Learning
- Product Reviews
- Tech Edvocate Awards
- School Ratings
How to Switch iPhones
4 ways to write an informal letter, 5 ways to download microsoft word, how to become a criminologist: 14 steps, 3 ways to read allergy skin test results, how to rsvp: 8 steps, how to turn on data on android: 9 steps, how to use a de’longhi espresso machine, 12 ways to set boundaries in christian dating, how to use calipers: 11 steps, 4 ways to create a resume in microsoft word.
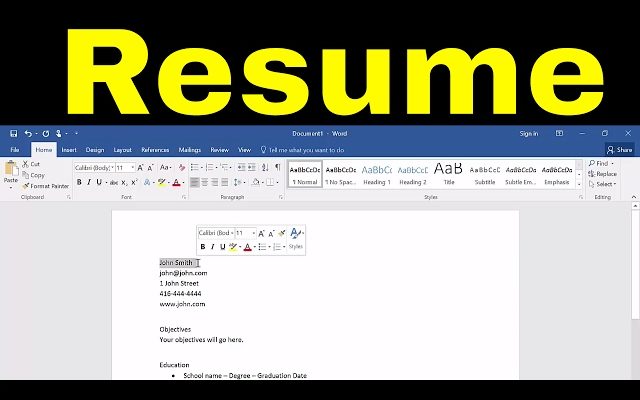
Creating a resume is a crucial step in showcasing your skills and experiences to potential employers. Microsoft Word offers various ways to create an impressive resume that stands out from the crowd. Here are four methods to design a resume in Microsoft Word:
1. Using Built-in Templates
Microsoft Word comes with a variety of built-in templates that can help you create a professional-looking resume with minimal effort. To use these templates:
a. Open Microsoft Word and click on “File” at the top-left corner.
b. Select “New” from the menu to open the templates gallery.
c. Type “Resume” in the search bar and press enter.
d. Browse through the available templates and choose one that suits your preferences.
e. Click on the selected template, and it will open in Word.
f. Update the placeholders with your personal information, work experience, and education.
2. Creating a Custom Template
If you prefer to create a custom resume template tailored to your needs, follow these steps:
a. Open Microsoft Word and click on “File” followed by “New Blank Document.”
b. Set your desired margins, font style, and size under the “Layout” menu.
c. Organize your resume into sections such as contact information, objective or summary, work experience, education, skills, awards or achievements, etc.
d. Add headings for each section using bold or italics for emphasis.
e. Fill in each section with relevant information.
f. Save your custom template so you can easily update it for future job applications.
3.Utilizing Online Templates
Another option is to use online templates specifically designed for MS Word resumes:
a. Search for websites offering free or premium resume templates compatible with Microsoft Word (for example: hloom.com, resumegenius.com).
b.Seek out a design that appeals to you and download the template file (.docx or .dotx).
c. Open the downloaded document in Microsoft Word and update the placeholders with your information.
4. Creating a Resume with MS Word Add-ons
Plug-ins or add-ons can enhance your resume-creation experience in Microsoft Word:
a. Launch Microsoft Word and click on “Insert” followed by “Get Add-ins” or “Store.”
b. Type “Resume” into the search bar and press enter.
c. Browse available add-ons, select a suitable one (for example: Pongo Resume Builder), and click “Add.”
d. Once installed, an icon should appear in your toolbar – click it to start creating your resume.
e. Follow the prompts and fill out all sections with your details.
Whichever method you choose, be sure to proofread your resume for any typos or inconsistencies before submitting it to potential employers. Crafting an organized and professional resume is essential in landing your dream job, so take advantage of these four ways to create one using Microsoft Word.
3 Ways to Set Up an Escrow ...
How to do a compression test: 15 ....

Matthew Lynch
Related articles more from author.
How to Use a Facial Scrub: 14 Steps

3 Easy Ways to Remove Dark Stains from Wood

12 Simple Ways to Identify Bed Bug Droppings

4 Ways to Open a Beer Bottle

3 Ways to Sex Tortoises

How to Grow Popcorn
Resume templates
Put your best qualities on display with professional, customizable resume and cv templates. no matter your line of work or length of professional history, you'll find resume and cv templates that'll help you get the gig..

Download free resume templates
Land your dream job with free, customizable resume templates. Showcase your potential to recruiters and stand out from other candidates with a professional template. Whether you're applying to corporate positions or creative roles, go with a sleek design or show your creativity with bold colors .
Resumes don't need to look boring—add flair to your professional experience with a creative resume template. There are plenty of resume designs to choose from, like simple resume templates and modern resume templates. Each resume template is fully customizable in Microsoft Word , so you can personalize each design element and add your own text. Using a template also makes it easier to customize your resume for each position you apply to.
Print out as many copies as you'd like or download the template for free to share digitally when applying online. These professional resume templates are perfect for any stage of life or career. Whether you're a high school student, actor, or seeking a career in nursing, you can find any format for any job type.
There are also a variety of free CV (Curriculum Vitae) templates to choose from. A CV is often longer than a resume and contains an in-depth look at your education and professional accomplishments. Like our resume templates, these CV templates are also customizable in Word.
Remember, your next job is only a template away! Once you've customized your resume, explore free cover letter templates to help you land the job.
Resume builder
Top Microsoft Office Skills for a Resume: How to List Them
Microsoft Office is a widely-used suite of productivity software that includes applications such as Word, Excel, PowerPoint, and Outlook. Proficiency in these tools is essential in many industries, making it crucial to highlight your Microsoft Office skills on your resume.
In this article, we will discuss the top Microsoft Office resume skills and provide tips on how to effectively list them on your resume to increase your chances of getting hired. Whether you’re a beginner or an expert, these tips will help you showcase your Microsoft Office skills and stand out to potential employers.

Table of Contents
Why Add Microsoft Office Skills to a Resume?
According to a recent survey conducted by Burning Glass Technologies , proficiency in Microsoft Office is one of the most in-demand job skills across a variety of industries. In fact, the survey found that proficiency in Microsoft Office was listed as a required skill in nearly 8 million job postings in the United States in 2020. By adding Microsoft Office Skills to your resume, you are showing potential employers that you have the necessary skills and knowledge to use these tools to streamline processes, increase productivity, and improve overall performance.
Additionally, Microsoft Office skills can be a differentiating factor between you and other candidates, making your resume stand out and showing your commitment to professional development.
Examples of Microsoft Office Skills
- Microsoft Word Skills
- Microsoft Excel Skills
- Microsoft Powerpoint Skills
- Microsoft Outlook Skills
- Microsoft Access Skills
- Microsoft Publisher Skills
- Microsoft Teams Skills
Here are some of the most common Office applications and relevant skills to include on your resume:
Microsoft Word:
- Formatting documents
- Tracking changes
- Creating bibliographies
- Creating graphs and charts
- Creating forms and templates
- Using master documents
- Inserting columns
- Setting up password protection
- Adding footers and headers
- Creating mail merge templates
Microsoft Excel:
- Creating and using pivot tables
- Applying conditional formatting
- Using advanced formulas and functions
- Working with macros
- Performing data simulation
- Making lists
- Using sparklines and slicers
Microsoft PowerPoint:
- Designing templates
- Creating charts and graphs
- Inserting media
- Creating animations
- Inserting hyperlinks
- Using the Accessibility Checker
Microsoft Outlook:
- Creating rules
- Archiving emails
- Organizing inboxes
- Making public folders
- Scheduling appointments and meetings
- Using Quick Steps
- Using Quick Parts
Microsoft Access:
- Creating and customizing databases
- Creating queries
- Importing and exporting data
- Producing reports
- Filtering data
- Converting reports to PDFs
Microsoft Publisher:
- Creating and formatting tables
- Manipulating graphics
- Using Design Checker
- Creating web pages
- Working with building blocks
- Designing business cards and promotional materials
Microsoft Teams:
- Setting up and conducting audio/video conferencing
- Using screen sharing
- Using the chat function
- Using Whiteboard
- Using Shifts.
Microsoft Office Skills Proficiency Levels
Microsoft Office skills proficiency levels can vary widely depending on the individual’s experience and training. Some individuals may have a basic understanding of Microsoft Office tools, while others may have advanced knowledge and expertise.
Proficiency levels are typically categorized into basic, intermediate, and advanced levels.
- Basic proficiency refers to the ability to perform basic tasks such as creating simple documents, spreadsheets, or presentations.
- Intermediate proficiency refers to the ability to use more complex features such as advanced formulas, data analysis , and design elements.
- Advanced proficiency refers to the ability to use the software to its fullest extent, including programming and automation.
It’s important to accurately assess your proficiency level and include it on your resume, as it can help potential employers understand your skillset and qualifications for the job.
How to List Microsoft Skills on a Resume
Listing your Microsoft skills on your resume is essential in showcasing your proficiency level and demonstrating your ability to work efficiently and effectively with various tools. Here are some tips on how to effectively list your Microsoft skills on your resume:
- Create a dedicated “Skills” section on your resume and list your Microsoft skills there.
- Customize your list of Microsoft skills to the specific job description, highlighting the skills that are most relevant to the job.
- Categorize your Microsoft skills by application, such as Microsoft Word, Excel, PowerPoint, Outlook, and Access.
- Use industry-recognized terminology and keywords to describe your proficiency level, such as “proficient,” “advanced,” or “expert.”
“Proficient in Microsoft Office suite, with advanced skills in Excel and PowerPoint. Experience in creating complex spreadsheets, including the use of pivot tables and advanced formulas to analyze data and make recommendations. Skilled in designing professional presentations, including the use of multimedia elements and animations to engage audiences. Expertise in using Word to create and edit professional documents, including the use of tracking changes, formatting, and mail merge templates.”
Quantify your skills where possible by including specific examples of how you have used your Microsoft skills to achieve success in past roles.
“Developed and maintained complex Excel spreadsheets to analyze sales data and make strategic recommendations, resulting in a 15% increase in revenue for the company. Designed and delivered professional PowerPoint presentations to executive management, resulting in approval for a new product launch. Managed a high-volume email inbox in Outlook, achieving a 98% response rate within 24 hours for customer inquiries. Utilized advanced Word features, such as formatting and mail merge templates, to create professional business documents that were praised by clients and colleagues.”
- If you have earned any Microsoft certifications, list them separately in a dedicated section to demonstrate your commitment to ongoing professional development.
Here’s an example of how to list Microsoft certifications on a resume to demonstrate ongoing professional development:
Certifications:
- Microsoft Office Specialist (MOS) Excel Expert
- Microsoft Office Specialist (MOS) PowerPoint
- Microsoft Certified Solutions Associate (MCSA): Office 365
Finally, be prepared to discuss your Microsoft skills during the interview process, as potential employers may ask about your proficiency level and how you have used these skills in previous roles.
Template for Listing Microsoft Office Skills on a Resume
Here’s a template for listing Microsoft Office skills on a resume:
Microsoft Office:
Microsoft Outlook: [proficiency level]
- Using Shifts
Note: Replace [proficiency level] with either “basic,” “intermediate,” or “advanced” depending on your level of proficiency in each application.
How Do I Say I Am Good at Microsoft Office?
To convey that you are good at Microsoft Office on your resume, use industry-recognized terminology to describe your proficiency level , such as “proficient,” “advanced,” or “expert.”
Quantify your skills by including specific examples of how you have used your Microsoft Office skills to achieve success in past roles, and highlight any relevant Microsoft Office certifications you have earned.
Finally, tailor your language to the job description, using the same terms and phrases to describe your Microsoft Office skills as the job posting. Be honest about your skill level and be prepared to discuss your Microsoft Office skills during the interview process.
How Can I Describe My Microsoft Office Skills in an Interview?
To describe your Microsoft Office skills in an interview, be prepared to discuss specific examples of how you have used Microsoft Office tools to achieve success in past roles.
Use industry-recognized terminology to describe your proficiency level, such as “proficient,” “advanced,” or “expert,” and provide examples of projects or tasks you have completed using specific applications, such as Excel or PowerPoint.
If you have earned any relevant Microsoft Office certifications, be sure to mention them and explain how they have helped you develop your skills. Finally, tailor your responses to the job description, emphasizing the Microsoft Office skills that are most relevant to the position.
How Can I Improve My Microsoft Office Skills?
To improve your Microsoft Office skills, there are several steps you can take:
- Take online courses or tutorials: There are many online resources available for learning Microsoft Office, including free and paid courses and tutorials.
- Practice using the software: The more you use Microsoft Office, the more comfortable and proficient you will become. Try to incorporate the software into your daily work tasks whenever possible.
- Experiment with new features: Microsoft Office is constantly evolving, and new features are added regularly. Take the time to experiment with new features and tools to learn how they can improve your productivity.
- Seek out help from colleagues or experts: If you’re struggling with a particular aspect of Microsoft Office, don’t be afraid to ask for help. Reach out to colleagues or consult with experts to get the guidance you need.
- Attend Microsoft Office training sessions: Many companies offer internal training sessions for employees to improve their Microsoft Office skills. Take advantage of these opportunities to learn from experts and get hands-on experience.
By following these steps, you can improve your Microsoft Office skills and become more confident and proficient in using the software.
Leave a Reply Cancel reply
Your email address will not be published. Required fields are marked *
Save my name, email, and website in this browser for the next time I comment.
- Format a resume with a template Video
- Format using tables Video
- Tools for better resumes Video

Format a resume with a template

Here’s how to download and use a template to create a sharp resume. We’ll show how you can cut and paste parts of your old resume and make the fonts and spacing look perfect.
Whether you’re online or offline go to FILE > New and search for “Resume.”
Preview and click the one you want to open.
You can start typing right away or cut and paste text into the document.
After pasting old text, it might look funny, or not formatted correctly. Select Ctrl to see Paste Options and choose one like Keep Text Only . Then the text use the font and formatting of the new resume.
Six steps to developing a great resume
Microsoft resume templates
Look up words in the thesaurus
Most people submit resumes online these days, but there are still reasons why you need a paper resume.
A big one is at the interview. You want to come in with copies of your resume so you can hand it to the person.
So they don’t have to scramble to find the copy of theirs or look for on their computer.
So I’m going to show you a couple of different ways of formatting a resume.
First of all it’s going to be with a template.
I’m going to open up Word 2013 here, and it opens to this new gallery view that shows off templates.
If you have an earlier version of Word, you just want to go to FILE and New and you’ll be able to search for resume or search for templates.
I’m going to type in “Resume”.
If I was offline I get about a dozen or so resumes, here online I can get the full power of Office.com .
I can get a couple hundred I can look for.
Some with categories, occupations… Let me just click on this thumbnail, I can see a little bigger thumbnail, and I can click through these arrows to find one I like.
You can also see customer ratings which is Ahh..You know that way you can see what’s populate what people like.
I’m going to use this one here called the Timeless design . Open that up. And it populates with my name.
Today I’m Daryl McFarland. And it gives you some instructions of how to use the template if you need that or you can just start typing away with your new objective here for your resume.
Now with resumes, most of the time people have older resume, they may cut and paste in, they want to format it so let’s look at that for a few moments here. I’m going to open up some text that I have here.
And just cut and paste this objective.
And you want to ahh.. make sure you know each resume has to have a different objective for each company.
Don’t want to be general. You want to be specific with your resume.
So, here I have the text that I want but, of course, it looks a little different. The font size is wrong.
There is a couple of different ways to change the formatting. You can look at styles. Some people use Format Painter .
But when you cut and paste, if you don’t touch any other keys, you get this little box here at the end, with a little clipboard that says Ctrl by it.
Ctrl is the shortcut. So let me click Ctrl . And it opens up Paste options. And it gives me several options I can use.
I can use this one called Keep Text Only . And look, it shrinks down my text. Perfect. So that’s good. Let’s do it one more time.
We’re going to grab some of these old skills I have and I’ll update them as I work this new resume. Again, little too big.
Now notice this last line I have some bold text in it.
I want to keep that bold text but if I chose the option -- Keep text only , it strips out all formatting.
So hyperlinks and everything is striped out so I don’t want to use that.
I want to go over here and Merge Formatting , and there, it keeps the bold and also makes the text look proper for this template.
Templates in general especially in resumes, templates have what we call control content.
If you look up here we have boxes for street address, telephone, email.
That just gives you some structure to the template, you can delete those if you want.
Also down here in the experience area we have this.
If you don’t want it, again you can just simply right-click and remove content control and it’ll strip that away.
A lot of times people just want to update a resume with a different look.
You can do that really quickly with the DESIGN tab. Let’s go over there.
So click DESIGN and I get all this formatting options here at the top and I can just mouse over and my resume changes, it previews.
Now some of these look good. Some of them really don’t look good.
But it’s a quick way to kind of get a different look for your resumes.
Because sometimes we just want a fresh start with a new resume. You can also do that with Themes over here on the far left.
Themes are a great way to control color, font size, spacing.
I use it a lot for PowerPoint and not as much in Word, but you can set a difference to your resume and just click the one that you want. So that’s working with templates.
In our next video, we’re going to use formatting, well, we’re going to format without a template.

Need more help?
Want more options.
Explore subscription benefits, browse training courses, learn how to secure your device, and more.

Microsoft 365 subscription benefits

Microsoft 365 training

Microsoft security

Accessibility center
Communities help you ask and answer questions, give feedback, and hear from experts with rich knowledge.

Ask the Microsoft Community

Microsoft Tech Community

Windows Insiders
Microsoft 365 Insiders
Was this information helpful?
Thank you for your feedback.

How to Create a Compelling Cover Letter in Microsoft Word
E very time you apply for a job, it's a good idea to include a cover letter. Deciding how to write each one is hard, but at least you don’t have to start from scratch with their design.
Microsoft Word offers templates and welcomes third-party designs to help you create compelling cover letters. Here’s how to use such options in Word and make the best first impression possible to potential employers.
Use Microsoft Word’s Cover Letter Templates
Formal letters don’t have to be bland. Go to File > More templates on Word, and type “cover letter” in the search box. You’ll find several stylish designs that add structure and color to your document.
What reflects you better, a subtle or sharp color scheme? If you’re considering a bold header for your professional details, learn how to design letterheads on Word , too. You can even add your portrait to your cover letter.
Microsoft Word’s built-in templates also include fields for you to fill in with your information and that of your potential employer. They guide you in these small ways, some even providing a sample for your letter’s main body. It’s a good idea to rephrase that, though, to fit each job application.
If you don’t like any of the options on Word’s desktop app, explore more Microsoft cover letter templates online and download your favorites from there.
Use Third-Party Templates in Microsoft Word
You can create cover letters for your dream job on platforms besides Microsoft. If you’d rather stick with it, you’ll even come across third-party templates specifically designed for you to download and customize on Word. Here are some examples.
1. ResumeLab
Explore over 50 cover letter templates, ranging from minimalist to eye-catching designs. Keep in mind that a few of them are meant to be created on ResumeLab. The rest you can bring onto Word by clicking their Download it free here link.
You’ll be redirected to websites like Good Resume and Resume Genius , which help you quickly download your documents. Then, all you have to do is open them in Microsoft Word.
You’ll also notice that some cover letters on ResumeLab are edited versions of Word’s built-in templates, but this just adds to your selection and gives you more ideas.
2. Template.net
This is a popular site for templates of all kinds, including cover letters. For some designs, you pay a small fee, but Template.net has an impressive range of free options, too. What’s more, the download process is very easy.
Just browse its collection, click on a design you like, and select the Word button under Download Free Template . In the next window, hit Free Download . If you’re not signed in already, you’ll be asked to as the final step.
Follow Best Practices for Cover Letters
Familiarize yourself with the dos and don’ts of writing a cover letter . Remember these guidelines when selecting and customizing a template or crafting a cover letter from scratch. They boil down to the following rules.
1. Research Potential Employers
Do your research before writing or designing your cover letter. Get to know each company and even the recruiter you’re addressing. It’s the same strategy as tailoring your resume for different job types .
2. Tailor Your Cover Letter
When showcasing your skills and interest in a position, use your research to tailor your letter so that it grabs the recruiter’s attention and impresses them. Be smart, enthusiastic, and concise with your words.
3. Use Your Blank Space Wisely
Aim to limit your cover letter to one page. Any more than that, and you risk losing the recruiter’s interest. Think about what you need to say, including important and relevant details not covered in your resume. Express these things as succinctly as possible.
4. Your Visuals Should Complement and Not Overwhelm the Letter
Add a bit of color and texture, going for a subtle effect. You could even use some small icons, as long as they’re tasteful and discreet. Whatever you choose, keep these visuals on the letter’s edges, and don’t let them dominate the text.
5. Master Word’s Features That Benefit Cover Letters
For example, you can create your cover letter more efficiently by setting the text’s boundaries from the get-go. To do this, go to Layout > Margins . From the same toolbar, you can adjust paragraph spacing and indentation.
Through Insert > Pictures , you can import an image of your signature and place it at the end of the letter. Your header and footer can be customized from here, too.
Even the Mailing toolbar might be of interest. It can help streamline the process of writing and sending letters, as well as keeping track of recipients.
Good Planning and Wording Make the Best Cover Letters
Between Microsoft and other providers, you have access to a wide selection of templates for simple but attractive cover letters that you can personalize on Word. The app itself is full of useful writing and editing tools.
With this leg up, designing a cover letter for every occasion is easier. Sound research and planning in terms of how to approach each application can help polish the letter even more.

Contribute to the Microsoft 365 and Office forum! Click HERE to learn more 💡
March 14, 2024
Contribute to the Microsoft 365 and Office forum!
Click HERE to learn more 💡
Top Contributors in Word: Stefan Blom - Charles Kenyon - Doug Robbins - MVP Office Apps & Services (Word) - Suzanne S. Barnhill - Bob Jones AKA: CyberTaz ✅
March 11, 2024
Top Contributors in Word:
Stefan Blom - Charles Kenyon - Doug Robbins - MVP Office Apps & Services (Word) - Suzanne S. Barnhill - Bob Jones AKA: CyberTaz ✅
- Search the community and support articles
- Microsoft 365 and Office
- Search Community member
Ask a new question
Resume created with Word not formatting correctly when I open
I had someone write a resume for me a couple of years ago and they sent me the finished document both as a docx and also a pdf. I've recently been trying to upload the docx into Word to make some minor updates to my resume but now it's not formatting correctly when I open it and for the life of me I can't figure out what the problem is or how to fix it!
Attaching two images (linked below - I couldn't get the photos to upload in the post) of a part of my resume to illustrate what I'm talking about - one is the original and the second is what happens now when I try to open it in Word. I blurred the text but you should still be able to get the effect.
https://www.canva.com/design/DAGAABy7Lr0/nk-hZiEhSSKzUm3sH7MKRw/view?utm_content=DAGAABy7Lr0&utm_campaign=designshare&utm_medium=link&utm_source=editor
- Subscribe to RSS feed
Report abuse
It would seem like the Key Skill section was set up with 3 newspaper style columns. It might be simpler to use a three column table.
If you send me a copy of the document, referencing this thread in the covering email message, I will investigate the issue.
2 people found this reply helpful
Was this reply helpful? Yes No
Sorry this didn't help.
Great! Thanks for your feedback.
How satisfied are you with this reply?
Thanks for your feedback, it helps us improve the site.
Thanks for your feedback.
Replies (2)
Question info.
- Norsk Bokmål
- Ελληνικά
- Русский
- עברית
- العربية
- ไทย
- 한국어
- 中文(简体)
- 中文(繁體)
- 日本語
IMAGES
VIDEO
COMMENTS
Step 3: Write an Objective or Summary. Following your title header will be your resume objective or summary. This will be a short statement between 1-5 sentences detailing your desired job title, experience, and career goals. You will want to write this statement in the Normal style.
First, click the "More" arrow on the right-hand side of the different built-in styles. You'll see a menu with three different options. Go ahead and click "Create a Style." The "Create New Style from Formatting" window will appear. The only thing you can do here is to name the style, so click "Modify."
1. Start with a header. This element can list your contact information, including your first and last name, email address and phone number. Depending on the template you select, this information is often bold and centered at the top of your resume. Simply add your information to the template by clicking each line and typing the required contact ...
Just pick the template you want, and our software will format everything for you. 1. Pick a template for your Word document resume. Creating a resume in Word starts with choosing the right template. Open Word and search for "resume" using the search bar in the top right-hand corner. This will bring up a range of resume templates for Word.
Whether you're online or offline go to FILE > New and search for "Resume.". Preview and click the one you want to open. You can start typing right away or cut and paste text into the document. After pasting old text, it might look funny, or not formatted correctly. Select Ctrl to see Paste Options and choose one like Keep Text Only.
Start by selecting "New" from the File menu. This displays the New Document task pane. You should then select "My Computer" from the Templates section on the left side of the task pane. Click on the "Other Documents" tab, and then select "Resume Wizard.".
If you need help creating a resume or cover letter, start with one of the dozens of professionally-designed resume and cover letter templates that are available in Word. Go to File > New. In the search box, type Resume or Cover Letter. Double-click the template you want to use. Replace the placeholder text with your own information.
Step #1: Pick a Word Resume Template. The first step in making a resume in Word is accessing its free resume templates. How you access the templates may change depending on the Microsoft Word version you're using, but what you ultimately need to do is the following: Open Word. Select one of the Resume templates Word suggests, or simply search ...
1 Open Microsoft Word. 2 Go to the search bar and type "resume.". Pick one of the pre-formatted resume templates that pop up. 3 Edit the filler text on the resume template with your professional information. 4 Save your document as a PDF and send it via email or submit it to an online job application form.
Add a Resume Objective/Summary. Double space from the last line in your resume header. Write "Objective" or "Summary" depending on which one you're using. As it's a section title, make it a little larger than the rest of the text (14-16 pt). Also, depending on the font you're using, make it bold.
Step 2: Choose a Word resume template. When you open Word, you'll find suggested resume templates. The first suggestions are just a few of the available options in Word. If you search for "Word resume templates," you'll find many more available to use.
In this step-by-step tutorial, learn how to create a professional and eye-catching resume in Microsoft Word. In this video, I show you how to make a resume i...
A simple online search about creating a resume from scratch returns millions of results. Choosing the right set of instructions can be daunting. So, instead of going down that rabbit hole, follow this step-by-step guide on creating a resume using MS Word. MS Word resume templates. It can seem like an easy answer to pick a template offered by Word.
If you need help creating a resume or cover letter, start with one of the dozens of professionally-designed resume and cover letter templates that are available in Word. Go to File > New. In the search box, type Resume or Cover Letter. Double-click the template you want to use. Replace the placeholder text with your own information.
On the job hunt? This video shows you how to use the resume templates and LinkedIn assistant available in Microsoft Word. Here are the steps outlined in the ...
Open Microsoft Word and click New . Under the search bar, click Resumes and Cover Letter. Alternatively, you can enter Resumes in the search bar. The templates are displayed. Browse the list and click the Pin option to mark a few templates for future reference. Click a template to preview it.
To effectively set up Microsoft Word for resume creation, follow these 5 steps: Open Microsoft Word and click on the "File" tab. Select "New" to open the template options. Type "resume" in the search bar to access various resume templates. Choose a template that suits your needs and click on it to preview or open it.
Add your personal info to the résumé. On the Home tab, select New Items > More Items > Choose Form. Set Look in to User Templates in File System. Locate and select the template you created earlier, then choose Open. Customize the template with content about yourself. Add recipients to the message, then select Send.
In this video, I show you how to create a resume in Microsoft Word. It is a simple tutorial, and I show you the process for creating a resume from scratch! T...
Here are four methods to design a resume in Microsoft Word: 1. Using Built-in Templates. Microsoft Word comes with a variety of built-in templates that can help you create a professional-looking resume with minimal effort. To use these templates: a. Open Microsoft Word and click on "File" at the top-left corner. b. Select "New" from the ...
Download free resume templates. Land your dream job with free, customizable resume templates. Showcase your potential to recruiters and stand out from other candidates with a professional template. Whether you're applying to corporate positions or creative roles, go with a sleek design or show your creativity with bold colors.
To create a resume using a Microsoft Word template, follow these steps: Choose your template in Word. To create your resume from scratch, click "File" in your Microsoft Word menu (you can also hit Alt+F on a PC or Command+F on a Mac). Click "More templates" to see a selection of resume layouts.
Watch this video for tips on How to Create a Resume in Microsoft Word in Five Minutes. We cover all the basics for Resume Writing including your contact info...
If you're used to working in Microsoft Word, for example, choose a template for that program instead of one designed for Google Docs. ... Templates that let you create resumes in word processing programs make it possible to use spell checkers and other editing tools to ensure your resume is free of problematic typos. Basic Text-Only Resume ...
Here are some of the most common Office applications and relevant skills to include on your resume: Microsoft Word: Formatting documents; Tracking changes; Creating bibliographies; Creating graphs and charts; Creating forms and templates; ... Expertise in using Word to create and edit professional documents, including the use of tracking ...
Whether you're online or offline go to FILE > New and search for "Resume.". Preview and click the one you want to open. You can start typing right away or cut and paste text into the document. After pasting old text, it might look funny, or not formatted correctly. Select Ctrl to see Paste Options and choose one like Keep Text Only.
Use Microsoft Word's Cover Letter Templates . Formal letters don't have to be bland. Go to File > More templates on Word, and type "cover letter" in the search box. You'll find several ...
I had someone write a resume for me a couple of years ago and they sent me the finished document both as a docx and also a pdf. I've recently been trying to upload the docx into Word to make some minor updates to my resume but now it's not formatting correctly when I open it and for the life of me I can't figure out what the problem is or how to fix it!