How to Use a Mac With PowerPoint: A Step-by-Step Guide
Using a Mac with PowerPoint is simple. First, make sure you have PowerPoint installed on your Mac. You can find it at the App Store or through a Microsoft 365 subscription. Open PowerPoint, and you’ll be greeted with a range of templates to start your presentation. From here, you can add text, images, and animations to create an engaging slideshow. Once done, you can present directly from your Mac or save your presentation to share with others.
After you’ve completed your PowerPoint presentation on your Mac, you’ll have a professional and compelling visual aid to support your speech or lecture. You can also share it with others or export it into different formats such as PDF, video, or even a web page.

Introduction
Are you ready to impress your audience with a stunning presentation? If you’re a Mac user, fear not – using PowerPoint on your macOS is as smooth as on any Windows PC. Let’s be honest, presentations are a part of life: whether you’re a student, a professional, or just someone with a story to tell, at some point, you’re going to need to put some slides together. PowerPoint for Mac has all the tools you need to create a presentation that’s both visually captivating and content-rich.
Why is this important? Well, PowerPoint presentations are a staple in the professional world. They’re used for everything from business pitches to academic lectures. Knowing how to create an effective PowerPoint presentation on your Mac could be the difference between persuading your audience or leaving them unimpressed. And who is this relevant to? Everyone! Whether you’re a newbie to presentations or a seasoned speaker looking to refine your skills, this guide will help you master PowerPoint on your Mac.
Step-by-Step Tutorial: Using PowerPoint on a Mac
Before jumping in, let’s clarify what you’ll achieve by following these steps. By the end, you’ll be able to create, edit, and present a PowerPoint slideshow on your Mac.
Step 1: Install PowerPoint
Install PowerPoint on your Mac from the App Store or through a Microsoft 365 subscription.
After installing PowerPoint, you’ll need to sign in with your Microsoft account to activate the software, then you’ll be ready to start creating your presentation.
Step 2: Open PowerPoint
Open PowerPoint and choose a template or open a blank presentation.
PowerPoint offers a variety of templates to suit different presentation styles. If you choose to start with a blank slate, you’ll have complete creative freedom.
Step 3: Add Content
Add slides and content such as text, images, and shapes to your presentation.
Remember to keep your slides simple and not clutter them with too much content. Visual aids should support your speech, not replace it.
Step 4: Customize Your Slides
Customize your slides’ design with themes, colors, and animations.
This step is where you can get creative with your presentation’s look and feel. Just be sure not to go overboard with animations – they should enhance your presentation, not distract from it.
Step 5: Present Your Slideshow
Present your slideshow directly from your Mac or save it to share with others.
You can start your presentation by clicking the ‘Slide Show’ tab and then ‘Play from Start’. Make sure you practice your presentation beforehand to ensure everything runs smoothly.
Additional Information
Now, let’s sprinkle in some extra tidbits that could elevate your PowerPoint game on a Mac. First off, did you know that PowerPoint for Mac supports real-time collaboration? Yup, you can work with your teammates on the same presentation at the same time, no matter where you are. And if you’re all about shortcuts, PowerPoint for Mac has plenty. For instance, pressing Command + Shift + N instantly creates a new slide.
Another neat feature is the Presenter View, which lets you see your notes, the upcoming slide, and a timer, all while the audience only sees the current slide. And for those who value accessibility, PowerPoint for Mac has tools to make presentations more accessible, including options for larger text and high contrast. Just remember, when using PowerPoint on a Mac, you have all the essentials at your fingertips to create presentations that are not just informational, but also memorable.
- Install PowerPoint on your Mac from the App Store or Microsoft 365.
- Open PowerPoint and select a template or start with a blank presentation.
- Add and customize your slides with text, images, and animations.
- Present directly from your Mac or save your presentation for later use.
Frequently Asked Questions
Can i use powerpoint on a mac.
Yes, PowerPoint is available for Mac users and can be downloaded from the App Store or included in a Microsoft 365 subscription.
Is PowerPoint for Mac different from Windows?
While there are some differences in design and available features, PowerPoint for Mac offers a comparable experience to the Windows version.
Can I collaborate with others using PowerPoint for Mac?
Absolutely! PowerPoint for Mac supports real-time collaboration, allowing multiple users to work on the same presentation simultaneously.
Can I open a PowerPoint presentation made on a Mac on a Windows PC?
Yes, presentations made in PowerPoint for Mac are compatible with PowerPoint for Windows, ensuring easy file sharing and collaboration.
Does PowerPoint for Mac support Presenter View?
Yes, Presenter View is available in PowerPoint for Mac, providing speakers with a private view of their notes and upcoming slides while presenting.
In conclusion, mastering the use of PowerPoint on a Mac can be a game-changer for anyone looking to create impactful and persuasive presentations. Whether you’re a student, educator, entrepreneur, or professional, the ability to present your ideas clearly and attractively is invaluable.
So, dive in, explore the features, and harness the power of PowerPoint on your Mac to captivate your audience. Remember, a well-crafted presentation can be the key to success. Happy presenting!

Matthew Burleigh has been writing tech tutorials since 2008. His writing has appeared on dozens of different websites and been read over 50 million times.
After receiving his Bachelor’s and Master’s degrees in Computer Science he spent several years working in IT management for small businesses. However, he now works full time writing content online and creating websites.
His main writing topics include iPhones, Microsoft Office, Google Apps, Android, and Photoshop, but he has also written about many other tech topics as well.
Read his full bio here.
Share this:
Join our free newsletter.
Featured guides and deals
You may opt out at any time. Read our Privacy Policy
Related posts:
- Can I Convert My Powerpoint to Google Slides?
- How to Save Powerpoint as PDF with Notes
- How to Drag Slides From One PowerPoint to Another: A Step-by-Step Guide
- How to Make a Powerpoint Slide Vertical in Powerpoint 2013
- How to Set Time for Slides in Powerpoint
- What Are Benefits of PowerPoint? A Comprehensive Guide
- How to Combine PowerPoint Presentations With Different Orientations
- How to Check Word Count on Powerpoint 2010
- How to Insert Slides from Another Presentation in Powerpoint 2010
- How to Change Hyperlink Color in Powerpoint 2010 (An Easy 5 Step Guide)
- How Is Microsoft PowerPoint Used in Business: A Comprehensive Guide
- How to Unhide a Slide in Powerpoint 2013
- How to Convert a PowerPoint to Word and Edit with Ease
- How to Loop a Slideshow on Powerpoint 2013
- How to: Effortlessly Create PowerPoint Looping Presentations
- How to Change the Font on All Slides in Google Slides
- How to Change Line Spacing in Powerpoint for Every Slide at Once
- How to Insert Check Mark in Powerpoint for Office 365
- How to Start PowerPoint: A Step-by-Step Guide for Beginners
- How to Email a PowerPoint Slideshow: A Step-by-Step Guide
How to Make a PowerPoint on Mac? (A Step-by-Step Guide)
If you’ve ever wanted to create a professional-level PowerPoint on your Mac, you’re in luck! In this step-by-step guide, we’ll walk you through the entire process from start to finish.
You’ll learn what Keynote is and how to open it on your Mac, how to create a PowerPoint, customize the slides, add text, images, and media, utilize themes and animations, and finally, save and share your PowerPoint.
By the end of this guide, you’ll be a PowerPoint pro on your Mac!
Table of Contents
Short Answer
Making a PowerPoint on a Mac is easy.
First, open up the Pages application on your Mac.
Then, select the File menu and choose New from Template.
From there, you can select a PowerPoint template and customize it to fit your needs.
When you are finished, you can save your presentation and share it with others.
What is Keynote?
Keynote is a presentation software program developed by Apple Inc.
and is available on all Mac computers.
It is a powerful program that allows users to easily create engaging and professional presentations.
Keynote provides users with a wide range of tools and features, including customizable slides, themes, animations, and more.
With Keynote, users can create stunning presentations in minutes.
It is a great tool for creating presentations for business, education, and personal projects.
Keynote is easy to use and is a great choice for anyone who wants to make a professional-looking PowerPoint on a Mac computer.
How to Open Keynote on Mac
Opening the Keynote app on a Mac computer is quite simple.
To open the app, you can either use the “Finder” app in your Applications folder, or you can use the “Spotlight Search” tool to quickly find the Keynote app.
If you choose to use the Finder, simply open the Finder app and navigate to the Applications folder.
From there, you will find the Keynote app.
You can then double-click on the Keynote icon to open the app.
Alternatively, you can use the Spotlight Search tool to quickly locate the Keynote app.
To do this, click on the magnifying glass icon in the top-right corner of your screen.
You can then type in “Keynote” in the search bar and hit the “Enter” key.
The Keynote app should appear in the search results.
You can then click on the Keynote icon to open the app.
Once the Keynote app is open, you can begin creating your PowerPoint presentation.
You can customize your slides by adding text, images, and other media.
You can further customize your slides by using various themes and animations.
Once you have created your presentation, you can save it as a .pptx file and share it with others.
With the Keynote app, you can easily create a professional-looking PowerPoint on a Mac computer.
Creating a PowerPoint on a Mac
Creating a PowerPoint presentation on a Mac computer is a straightforward process, whether youre creating a presentation for work or school.
The first step is to open the Keynote app on the computer.
Keynote is the presentation software for Mac computers, and it makes creating a presentation simple and easy.
Once you have opened the Keynote app, you can begin customizing your presentation.
You can add text, images, and other media to your slides, as well as utilize various themes and animations to make your presentation look professional and eye-catching.
You can also customize the layout of your slides, allowing you to add different elements and adjust their placement.
When your presentation is complete, you can save it as a .pptx file and share it with your colleagues, classmates, or anyone else who needs to view it.
You can also export your presentation as a PDF, a movie file, an HTML file, or a JPG file, depending on your needs.
With the Keynote app, creating a professional-looking PowerPoint on a Mac computer is easy and stress-free.
All you need to do is open the app, customize your slides, and then save your presentation in the desired format.
Whether youre creating a presentation for work or school, the Keynote app will help you get the job done quickly and efficiently.
Customizing the Slides
Customizing the slides is an important part of creating a stunning PowerPoint presentation on a Mac.
The Keynote app provides a variety of tools and features to help you design your slides.
You can easily add text, images, and other media to customize your slides.
To add text to your slides, simply select the text box and type in your desired text.
To add images, you can either drag and drop them into the slide or use the Insert Image button.
You can also insert shapes, charts, and other media to customize your slides.
Additionally, Keynote offers a range of themes and animations to help you further customize your presentation.
Themes allow you to quickly change the overall look and feel of your slides.
Animations can be used to add a touch of flair to your slides, such as transitions between slides and animated text.
To access the themes and animations, simply click on the Themes or Animations tabs in the upper right-hand corner of the app.
By taking advantage of the Keynote apps customization features, you can easily create a professional-looking PowerPoint on a Mac computer.
With just a few clicks, you can customize your slides and make them look stunning.
So, if youre looking to create an impressive presentation, the Keynote app is the perfect tool for the job.
Adding Text, Images, and Media
When it comes to creating a professional-looking PowerPoint on a Mac computer, adding text, images, and other media is key.
With the Keynote app, you can easily customize your slides by adding text, images, and other media elements.
To add text, select the text box icon from the top menu, and then type in the text you want to include in the text box.
You can also adjust the font type, font size, font color, and other text properties.
Once you have finished editing the text, click the Done button to save your changes.
To add images, click the Add Image icon from the top menu, and then select an image from your computer, or add an image from the web.
You can also adjust the size, position, and transparency of the image to make it look more professional.
Finally, you can add other media elements such as audio and video to your slides.
To do this, click the Add Audio or Add Video icon from the top menu, and then select the audio or video file you want to include.
You can also adjust the size, position, and playback settings of the media element to make it look more professional.
By using these methods, you can easily add text, images, and other media elements to your PowerPoint slides on a Mac computer.
Once you have added all the elements, you can save your presentation as a .pptx file and share it with others.
Utilizing Themes and Animations
Creating a PowerPoint presentation on a Mac computer is made easier with the help of the Keynote app.
Not only can you easily create a professional-looking presentation, but you can also customize your slides with various themes and animations.
With the help of themes and animations, you can create a presentation that is visually appealing and engaging.
When creating a presentation, you can choose from a wide variety of themes and animations.
You can choose from a variety of colors, fonts, and designs to give your presentation a unique look.
You can also choose from several animation styles to give your presentation a more dynamic feel.
For example, you can choose to have your slides transition in with a fade or a slide, or you can animate specific objects within your slides.
Themes and animations can also help to emphasize certain points in your presentation.
For instance, you can use animations to draw attention to a particular slide or element in your presentation.
Additionally, you can use themes to create a professional and consistent look throughout your presentation.
Creating a presentation with themes and animations is easy.
In the Keynote app, simply select the themes tab to access the available themes and animations.
From there, you can customize your slides with the desired theme and animations.
You can also preview your slides and animations before you save them.
Creating a professional-looking and engaging presentation on a Mac computer is easy with the help of the Keynote app.
With the help of themes and animations, you can create a presentation that is visually appealing and will help to emphasize certain points you want to make.
With a few clicks, you can quickly create a presentation that will be sure to impress.
Saving and Sharing Your PowerPoint
Once you have finished creating your PowerPoint presentation, you can save it as a .pptx file and share it with others.
To save your PowerPoint, click the File menu at the top of the Keynote window and then click Save.
You will be given the option to save your file to your Macs hard drive or to the cloud.
If you wish to share your presentation with others, you can do so by exporting it as a PDF file or by sharing it directly with other users.
To export your presentation to a PDF file, click the File menu and then select Export.
You will be given the option to export your PowerPoint as a PDF file.
If you would like to share your presentation directly with other users, you can do so by clicking the Share menu at the top of the Keynote window and selecting Share with Others.
Here, you can enter the email addresses of the people you would like to share your presentation with.
You can also set a password for your shared presentation if you wish.
Once you have saved and/or shared your presentation, you can open it up again at any time by double-clicking on the .pptx file.
This will open up the presentation in the Keynote app and you can make any changes that you wish.
With the Keynote app, creating a professional-looking PowerPoint on a Mac computer is easy and convenient.
The steps outlined above will help you create a great presentation and save/share it with others in no time.
Final Thoughts
Creating a professional-looking PowerPoint on a Mac computer doesn’t have to be difficult.
With the help of the Keynote app, you can easily create slides with text, images, and other media, and customize your slides with themes and animations.
Now that you know how to make a PowerPoint on Mac, you’re ready to create your own presentations and share them with others.
So get to it and start making your own PowerPoint today!
James Wilson
James Wilson has extensive knowledge in the information technology industry.His second love, besides dealing with computers, is smart home technology. He is continually updating information to better comprehend this problem and has a deep understanding of the apartment’s support system.
Recent Posts
Can You Create a Poll in Microsoft Outlook Email? Here's How!
Do you want to get feedback from your contacts quickly and efficiently? If so, then creating a poll in Microsoft Outlook email is the perfect solution! Polls are a great way to quickly collect data...
How To Fix Microsoft Outlook Cannot Connect To Server? (Here's The Solution)
Have you ever experienced the frustration of not being able to connect to your Microsoft Outlook server? It can be a major inconvenience when you need access to your emails, and it can be hard to...

What's new in PowerPoint 2021 for Mac
PowerPoint 2021 for Mac lets you create compelling content with the addition of features including co-authoring, Ink Replay, better support for SVG, and more rich media content from the Office Premium Creative Content collection.
If you're upgrading to PowerPoint 2021 for Mac from PowerPoint 2019 for Mac, you'll still have all the features you're used to—and you'll notice a few new ones as well!
Note: Some features listed below are not included in PowerPoint LTSC 2021 for Mac for commercial customers. Each of those features is noted if it does not apply to PowerPoint LTSC 2021 for Mac for commercial customers.
Co-authoring
You and your colleagues can open and work on the same PowerPoint presentation. This is called co-authoring. When you co-author, you can see each other's changes quickly — in a matter of seconds.
Note : Co-authoring is not available in PowerPoint LTSC 2021 for Mac.

Better collaboration with modern comments
Have control of when you send comments to your co-authors and be productive with a consistent commenting experience in your presentations and other Office apps.
Note : Modern comments is not available in PowerPoint LTSC 2021 for Mac.

Know who's in your presentation
See who else is working along with you and where they are in the presentation document.
Note : This feature is not available in PowerPoint LTSC 2021 for Mac.

Save your changes as they happen
Upload your files to OneDrive, OneDrive for Business, or SharePoint Online to make sure all your updates are saved automatically.
Replay your ink strokes
Now you can apply the new Replay or Rewind animation to ink and get the drawing effect directly in your presentations. You can adjust the timing of these animations to be faster or slower to match the experience you want.

See what’s new in stock media
We’re constantly adding more rich media content to the Office Premium Creative Content collection, a curated library of stock images, icons, and more that helps you express yourself.
Find what you're looking for
Use the search box to find text, commands, help, and more.
Tell me is a text field where you can enter words and phrases about what you want to do next, and quickly get to features you want to use or actions you want to perform.

Make an animated GIF from a slide show
Have you ever had an idea for an animated GIF but didn’t know where to get started?
You can now save a presentation as an animated GIF which can be shared via social or other digital channels.

Visual refresh
Work with a modernized Start experience and newly refreshed tabs in the ribbon.
Experience a clean, clear style with monoline iconography that communicates action and features with simple visuals.

Save as SVG for your pictures and graphics
We now support saving pictures, charts, and other graphics from your presentations as SVG (Scalable Vector Graphic).
Your saved images can be resized with no loss of image quality.

Try the Sketched style outline
You can give a casual, hand-drawn look to shapes in your presentations with the Sketched style outline.
Try out the Curved, Freehand, or Scribble options under Format Shape > Line > Sketched style .

Grow your Office skills

PowerPoint Training

PowerPoint Quick Start guide

Need more help?
Want more options.
Explore subscription benefits, browse training courses, learn how to secure your device, and more.

Microsoft 365 subscription benefits

Microsoft 365 training

Microsoft security

Accessibility center
Communities help you ask and answer questions, give feedback, and hear from experts with rich knowledge.

Ask the Microsoft Community

Microsoft Tech Community

Windows Insiders
Microsoft 365 Insiders
Was this information helpful?
Thank you for your feedback.
Best Apps To Stay Healthy With iPhone
How to quickly turn any image into a nice wallpaper on iphone, best terminal and ssh clients for iphone and ipad, best spring sale 2024 deals on tech accessories.
- Accessories
- Zip-rar tool
- Zip browser
How To Prepare A Professional PowerPoint Presentation On Mac
Microsoft PowerPoint has always been the go-to software for making professional presentations. Many rely on it for their Business presentations, designs of fliers, and pamphlets and for carrying out their daily tasks at work.
If you have a MacBook or your place of work uses an iMac, and you are in the dark on how you can make great PowerPoint presentations on it, look no further. This article guides you through the best route to seamlessly use your Mac to make amazing presentations and designs for work.
The software could be obtained with a purchase of the Microsoft Office suite on your computer and other applications like Excel, Word, etc. Once you have it set up on your computer, you will be able to operate it in the same manner you would operate it on a Windows computer.
How To Install Microsoft PowerPoint on Your Mac
Installing the application on your Mac is an easy process; all you need to do is:
- Open the Mac App Store application on your computer.
- Type in “PowerPoint” in the search bar and click search.
- The result from your search should show you the application, but if that isn’t the case, scroll through the results till you see Microsoft PowerPoint.
- Click “Get” and then begin installation by clicking “Install”.
- If the case warrants, sign in with your Apple ID to continue the installation and then click on “get” at the bottom.
- The application should start downloading. When it’s done, click “open” in the top-right corner.
- Finally, click “get started” to log in with your Microsoft ID, or you can opt for a one-month free trial .
Few Tips On How To Create Your Professional Presentation
Let’s break down the basics of the design process step by step:
Content Is Most Important
It is very paramount that you set out your content first and foremost before you begin any design. Setting out your content and topic helps give you a mental picture of what you want to achieve. This will, in turn, help in determining the type and appearance of your design.
Content writing is a hard part of creating a presentation for many people.
This is because it needs to be original, comprehensive, and unique. Stuffing your slides and presentations with poor content is the most common spoiler of presentations. That’s why it is always better to try PowerPoint presentation writing services for interesting and comprehensive information. Some professionals write content on the use for presentation, which can help you learn more about the topic.
Choose The Color Scheme You Will Base Your Design On
Colors matter in a presentation. The right color scheme would determine whether your work would look beautiful and professional or amateurish and unprofessional.
You could use Adobe Color CC to build your color scheme. It would make your work of building perfect color schemes easier, or you could copy from schemes others have already built.
How To Create Your Cover Slide
Your design is one step simpler after you successfully get your color scheme. The next move is to pick one from the colors in your scheme, place it in the background and get ready to start typing. It may seem too simple, but it’ll look great if you get it right.
Selecting Fonts
Choosing fonts is a daunting task for many people when creating slides. There is always the temptation to avoid basic-looking fonts in favour of fancy-looking ones. However, thinking too much about it often leads to selecting hideous font combinations. You could look for an online writing service if you have no clue. Try out something basic, stick within a font family, and as much as possible, make sure you select styles that are different from each other.
Try to avoid center alignment as much as you can. Sticking to the edge for your presentation to have better readability is always preferable.
It is also important to note that you don’t have to fill up every space on your layout. Leaving some spaces empty can go a long way in giving your presentation a clean look.
You can also take advantage of a secondary display with your Mac for easier organization when creating layouts for your presentation.
Inputting Content Into Your Slides
The secret about this is keeping it as simple as possible. You don’t have to input everything you want to say into your slides. It makes it hard to follow and simply too much.
Slides are meant to give a visual perspective to what you are saying. Stick to using only bullet points of your content on the slides.
Why is Content Originality Important?
Most times, the originality of your content is what makes your presentation different from others. If your presentation is borne out of content from within you, it would be easier for you to express yourself and convince your audience to be interested in your work.
When your presentation is professional or a business proposal , your audience will often want to buy into your ideas if they can see a synergy between you and the presentation you make. In situations where your presentation is to get a competitive opportunity, the only thing that could make your PowerPoint presentation stand out from others is its originality and how well you can express yourself.
If you read through all that has been said, you shouldn’t have a problem using PowerPoint on your Mac to make amazing presentations. People are always very visual. You could have good and wonderful points to say, but having a great PowerPoint presentation can be the cherry on top to perfect the delivery of your content to prospective audiences. Amazing PowerPoint presentations will keep your audiences on the edge of their seats when you speak.

Leave a Reply Cancel reply
Your email address will not be published. Required fields are marked *
Notify me of follow-up comments by email.
Notify me of new posts by email.
This site uses Akismet to reduce spam. Learn how your comment data is processed .
Sign Up for Our Newsletters
Related posts, best writing apps for mac in 2024, how to permanently erase data stored on an external drive on mac, how to recover unsaved excel file mac in five ways [full guide], 5 ways to recover overwritten files on mac.
Microsoft PowerPoint 4+
Create impactful presentations, microsoft corporation.
- 4.7 • 383.7K Ratings
- Offers In-App Purchases
Screenshots
Description.
This application requires a qualifying Microsoft 365 subscription. Microsoft 365 includes premium Word, Excel, and PowerPoint apps, 1 TB cloud storage in OneDrive, advanced security, and more, all in one convenient subscription. With Microsoft 365, you get features as soon as they are released ensuring you’re always working with the latest. Create, edit, collaborate, and share presentations using PowerPoint for Mac. Now it’s easier than ever to create, edit, and share presentations seamlessly across your devices and with others. Share your files and collaborate in real time within a document or edit Office docs attached to emails. Get smart assistance features as soon as they are released in Word, Excel, and PowerPoint so you’re always working with the latest. Whether you need to show off your school project, business plan, or family vacation photos, PowerPoint is your go-to app for presentations. Kickstart your creativity • Achieve more and enhance your documents with access to a growing catalog of premium templates for Word, Excel, and PowerPoint. • Advanced formatting and layout options produce beautifully pristine documents on any device including laptops, iPads, and iPhones. Present with confidence • Get your ideas across with beautiful design, rich animation, cinematic motion, 3D models, and icons. • Save documents right to Microsoft OneDrive or another cloud provider to access them on any device and at any time you have internet access. • Dark Mode allows you to focus on creating presentations in low-light environments. Accomplish more together • Whether it’s a school project, sales pitch, or family slideshow, seamlessly work with others with real-time co-authoring to bring your ideas and plans together faster. • Share your documents with the click of a button to invite others to edit in real time. Easily manage permissions and see who’s currently working in a document. • Add comments or assign tasks to people in your group for clean editing and organization. Learn more about Microsoft 365 Microsoft 365 is a cloud-based subscription service that brings together premium versions of Word, Excel, PowerPoint, Outlook and OneDrive, with the best tools for the way people work today. Please visit: http://go.microsoft.com/fwlink/?linkid=2015120 for information on Licensing Terms. Unlock the full Microsoft Office experience with a qualifying Microsoft 365 subscription for your phone, tablet, PC, and Mac. Microsoft 365 annual subscriptions purchased from the app will be charged to your App Store account and will automatically renew within 24 hours prior to the end of the current subscription period unless auto-renewal is disabled beforehand. You can manage your subscriptions in your App Store account settings. This app is provided by either Microsoft or a third-party app publisher and is subject to a separate privacy statement and terms and conditions. Data provided through the use of this store and this app may be accessible to Microsoft or the third-party app publisher, as applicable, and transferred to, stored, and processed in the United States or any other country where Microsoft or the app publisher and their affiliates or service providers maintain facilities. Please refer to the Microsoft Software License Terms for Microsoft Office. See “License Agreement” link under Information. By installing the app, you agree to these terms and conditions.
Version 16.83
• Bug fixes
Ratings and Reviews
383.7K Ratings
Canvas Rearranges Design Elements when Uploading
If you are a college student and you create a PPT on Mac and you save and then upload itt as an assignment on Canvas, a lot tof tthe design elements get moved around and it makes a mess of the presentaion. pics and texts boxes are no longer where you placed hem, so your design looks bad. What I have to do no is export the presentation to a PDF an dupload that as the assignment, and then email the instructor to tell them that Canvas is wrecking my presentaion so I sent a pdf instead. My college moved from Moodle to Canvas last year and I have had this trouble ever since. When the PPT presentation is saved as a PDF, you lose all the extras you added like voice narration and sound effects, music, notes, etc.
You're getting better but the product still has many frustrating parts. For instance the open folder is now gone on this version and on other versions I use with different customers, it's there and useful. The library of icons and art that you can use is also lacking. Why don't you allow all the types of icons that Visio uses? It would make it usable. Also, the section part is great but it's clumbsy and when you open you always have to collapse. Why can't you select a flag that lets you open collapsed. that would make the tool much more usable. Integration with teams is still terrible and with email if the product is open, you can't send the file. Why? just version it and send. Theres' much more but it's useful but not a product that has the power of things like Lucid, or visio, but it could be much more usable, so you get a three for teasing me with function and ideas, then falling short when I try to use it my way as the main unit. It's keeping this type of work, design and developent documentation, a dark art...who knows maybe AI might help you.
Printing Slides is a Joke
To my knowledge, this is mainly an issue with PowerPoint for Mac as my colleagues who use PCs don't have this issue. When you go to print the slides, they look fine if there are multiple on a page or if you print the notes version, but if you try to print 1 slide per page the images blur when printing! And not just a little fuzzy, they turn out with lines going through them and just look like they never completed loading. This also happens when exporting to a PDF. The PDF looks fine on the screen, and then as soon as you go to print it, a random image will blur out like that. Is it the same image everytime? NOPE! It picks and chooses which image it wants to blur out each time it prints. There is no rhyme or reason to this issue. I exported to PDF, Exported each slide to jpeg, even took screen shots as a last resort and had to just deal with the fact that the color was completely different on the printed screen shot slides. This has been an issue for MONTHS and is all over every forum - the fact that this hasn't been addressed by the MS team is unacceptable! If I'm printing client copies of proposal presentations it shouldn't take me all day due to troubleshooting!
App Privacy
The developer, Microsoft Corporation , indicated that the app’s privacy practices may include handling of data as described below. For more information, see the developer’s privacy policy .
Data Linked to You
The following data may be collected and linked to your identity:
- Contact Info
- User Content
- Identifiers
- Diagnostics
Privacy practices may vary, for example, based on the features you use or your age. Learn More
Information
English, Arabic, Czech, Danish, Dutch, Finnish, French, German, Greek, Hebrew, Hungarian, Indonesian, Italian, Japanese, Korean, Norwegian Bokmål, Polish, Portuguese, Russian, Simplified Chinese, Slovak, Spanish, Swedish, Thai, Traditional Chinese, Turkish
- Microsoft 365 Personal $69.99
- Microsoft 365 Personal Monthly $6.99
- Microsoft 365 Family $99.99
- Microsoft 365 Family $9.99
- Microsoft Copilot Pro $20.00
- Microsoft 365 Personal $119.99
- Developer Website
- App Support
- Privacy Policy
Featured In
More by this developer.
Microsoft Outlook
Microsoft Teams
Microsoft Authenticator
Microsoft Word
Microsoft Excel
- Is a New iPad Pro Coming Soon?
- Get It Now: Spring Tech Deals at Amazon
How to Get PowerPoint on a Mac
Get the widely used presentation tool
:max_bytes(150000):strip_icc():format(webp)/SamCostello-d7fcf106ec2048ccb06d1e2190b3396d.jpg "how to do powerpoint presentation in macbook")
- Ithaca College
:max_bytes(150000):strip_icc():format(webp)/ryanperiansquare-de5f69cde760457facb17deac949263e-180a645bf10845498a859fbbcda36d46.jpg "how to do powerpoint presentation in macbook")
- Western Governors University
What to Know
- From the Mac App Store: Apple Menu > App Store > search for PowerPoint > Get > Install > enter Apple ID if prompted > Open .
- PowerPoint requires a subscription from Microsoft. You can sign up via In-App Purchase or at the Microsoft website.
- Keynote, Apple's alternative to PowerPoint, comes pre-installed on new Macs (and can be downloaded from the Mac App Store).
This article explains how to get PowerPoint on Mac, its requirements—including a subscription—and some free alternatives available on the Mac.
How Do I Get PowerPoint on Mac?
Getting PowerPoint on your Mac is very easy. Just a few clicks, and you'll be ready to start making slides and building presentations. Here's what to do:
Open the Mac App Store by going to the Apple menu > App Store or the Applications folder > App Store .
You can also download PowerPoint directly from Microsoft , but these instructions focus on the Mac App Store.
Search for PowerPoint .
On the search results screen, click Get .
Click Install .
Enter your Apple ID password when prompted.
When the download is finished, click Open to launch PowerPoint.
Once you've opened PowerPoint, you'll need to sign into your Microsoft account or use a free trial.
Is PowerPoint Free for the Mac?
PowerPoint is not free on the Mac (or on Windows, for that matter). Microsoft offers a free, 30-day trial after you download PowerPoint. Once the free trial expires, you need to pay to keep using the app. Options include a one-time purchase price or a monthly or annual subscription , which provides cloud storage features and ongoing technical support. You can subscribe through Microsoft's website or use in-app purchases via your Apple ID.
Do Macs Come With PowerPoint?
No. To get PowerPoint on your Mac, you need to download and install it using the steps from the first section of this article (or, as noted before, directly from Microsoft).
What Is the Mac Version of PowerPoint?
While PowerPoint may be the most well-known program for making slides and creating presentations, it's far from the only one. Your Mac probably came with one of the alternatives pre-installed.
Apple makes a program called Keynote which is a direct competitor to PowerPoint. It offers all of the core features of PowerPoint—creating slides and presentations, animations, templates, presenter mode, etc. It integrates tightly with Apple's other software and services like iCloud.
Keynote comes pre-installed for free on all modern Macs. It's likely in your Applications folder as you read this. If it's not, and if your Mac and version of the macOS are compatible with it, you can download it for free from the Mac App Store by searching for "Keynote."
Need to make slides and want to avoid both PowerPoint and Keynote? There are many other PowerPoint alternatives , but one place to start is Google Slides , which is free, web-based, and integrates with your Google account and other Google productivity tools.
To print PowerPoint slides with Notes on a Mac, open your presentation and select Print . In the Print dialog box, select Show Details . In the Layout box, select Notes . Configure the rest of your printing options and select Print .
The easiest way to record a voiceover in PowerPoint on a Mac is to record by slide. Select the slide where you want to add the narration, then select Insert from the menu bar and click Audio > Record Audio . Enter a name for the narration, select Record , read your script, and select Stop when you're finished recording.
To convert PowerPoint to video on a Mac, open the presentation you want to save and select File > Export . In the export window, next to File Format , select a file format option, such as MP4 or MOV . Choose your video quality, choose whether you want to include narrations, adjust timing, and select Export .
Get the Latest Tech News Delivered Every Day
- How to Use Microsoft's Free PowerPoint Viewers
- What Is Microsoft PowerPoint and How Do I Use It?
- How to Transfer Files Between an iPhone and a Mac
- How to Fix 'Cannot Be Opened Because the Developer Cannot be Verified' Error on Mac
- How to Use WhatsApp on a Mac
- How to Update PowerPoint on Windows and Mac
- The 10 Best Word Processing Apps for iPad in 2024
- How to Convert PowerPoint to Video
- What Is an Animation in Presentation Software?
- What Is a PPS File?
- What Is Microsoft Word for Mac?
- The 8 Best Free PowerPoint Alternatives
- The 8 Best Microsoft Office Alternatives
- How to Remove Adware From Your Mac
- What Is a PPTX File?
- Microsoft Office vs. iWork
- Skip to main content
- Skip to secondary menu
- Skip to primary sidebar
- Skip to footer
Erin Wright Writing
Writing-Related Software Tutorials
How to Create Handouts in PowerPoint for Mac
By Erin Wright

This tutorial shows how to create printable handouts in PowerPoint for Mac.
If you’re on a PC, please see my other tutorial “ How to Create Handouts in PowerPoint (Printable & Editable) .”
Important Note: PowerPoint for Mac doesn’t offer a way to export handouts to Microsoft Word for further editing, like PowerPoint for the PC does. However, Mac users can save PowerPoint handouts as PDFs, as shown in the Pro Tip at the bottom of this tutorial.
This tutorial is also available as a YouTube video showing all the steps in real time.
Watch more than 100 other writing-related software tutorials on my YouTube channel .
The images below are from PowerPoint for Microsoft 365 for Mac. These steps also apply to older versions back to PowerPoint 2016 for Mac.
How to Create Printable Handouts in PowerPoint for Mac
- Select the File menu.

- Select Print from the drop-down menu.

- (Optional) Enter the number of copies you want to print into the Copies text box in the Print dialog box.

- (Optional) Choose the slides you want to include from the Slides options.
- All is the default option.
- From and to let you enter a page range into the text boxes.
- Selected slides includes the slides currently selected in your presentation.
- Custom Range lets you enter individual pages and ranges into the text box. Separate individual pages with commas and ranges with hyphens (e.g., 2,5,7-10).

- Select an option from the Layout menu.
- Slides (This option prints one slide per page.)
- Handouts (2 slides per page)
- Handouts (3 slides per page) (This option prints lines for writing notes next to the slide images.)
- Handouts (4 slides per page)
- Handouts (6 slides per page)
- Handouts (9 slides per page)
- Notes (This option prints one slide per page with the presenter’s notes below each slide.)
- Outline (This option prints the slide text without images.)

- (Optional in PowerPoint for Microsoft 365 for Mac) Uncheck Print slide numbers on handouts if you don’t want to include slide numbers.

- Select the Print button.

Pro Tip: You can also select the PDF menu for additional options such as Save as PDF, Send in Mail, or Save to iCloud Drive.

Related Resources
How to Convert PDFs to PowerPoint Slides in Adobe Acrobat (PC & Mac)
How to Save Tables and Figures as Images in Microsoft Word (PC & Mac)
- Microsoft Word Tutorials
- Adobe Acrobat Tutorials
- PowerPoint Tutorials
- Writing Tips
- Editing Tips
- Writing-Related Resources
- PDFelement for Windows
- PDFelement for Mac
- PDFelement on Mac App Store
- PDF Reader for Windows
- PDFelement for iPhone/iPad
- Get from App Store
- PDFelement for Android
- Get from App Google Play
- InstaScan - PDF Scanner for iPhone
Cloud & SDK
- Document Cloud
- PDFelement Pro DC
- PDFelement SDK

Educational Users
- Annotate PDF
- Combine PDF
Personal Users
- Convert PDF
- Compress PDF
- Organize PDF
Professional Users
- Protect PDF
- Extract PDF Data
- AI-Powered PDF Tool
- eSign PDFs Legally
- Mac Software
- OCR PDF Tips
- Sign PDF Tips
- Edit PDF like Word
- PDF Converter Tips
- PDF Compressor Tips
Why PDFelement
- Customer Stories
- PDF Software Comparison
- Contact Support
- PDFelement for iOS
- InstaScan for iPhone
Explore More
- Reviews See what our users say.
- Free PDF Templates Edit, print, and customize free templates.
- PDF Knowledge PDF-related information you need.
- Download Center Download the most powerful and simple PDF tools.
- Download Download Pricing Pricing
How to Make a PowerPoint on Mac OS 10.15 Catalina

Elise Williams
2024-03-21 12:05:15 • Filed to: PowerPoint Tips • Proven solutions
The software that can be used to create a presentation on Mac includes, PowerPoint and keynote among others. In this case, we are going to learn how to make a PowerPoint on mac . There are a number of ways to go by on making a presentation on Mac which includes using Microsoft PowerPoint for Mac, creating a presentation using keynote, or Google docs and export as PowerPoint file (ppt or .pptx).
How to Make a PowerPoint on Mac
In this article, we will use Keynote on Mac to make a presentation and then export it to PowerPoint.
Step 1. Launch Keynote
Click on the “Keynote icon in the Launchpad to open it. A window displaying various theme templates “Theme chooser” will appear. In the case it does not appear, click the option key and on the “File” menu select “new” to open a new presentation template.
Step 2. Choose the Theme of the Presentation
Scroll to navigate in the theme chooser and choose the type of presentation you want to make then double click on it to open.

Step 3. Change the Layout
To change to a different layout, you can click on the “Layout” button, and then select your desired layout.

Step 4. Add Content
There are a number of activities you might need to perfume on the presentation which involves adding your content.
- To add a slide, click on "Add Slide" in the toolbar and then select a layout.
- To add text, there is a placeholder text on the slide which you should double click and type to replace it with your own.
- To add an image, drag and drop or copy and paste an image to the slide from your computer or webpage.
Step 5. Save the File
After you are done with adding your content to the slide and your presentation is ready, you can click on "Save" and enter the file name. Meanwhile, you need to choose the location to save your file, and finally click “Save”.
Step 6. Export to PowerPoint
It is always important to try playing your presentation by yourself before you present it to other people to familiarize with it and make any necessary changes.
- Step 1. To export the file, you can click on “Share” on the menu, and then select “export”.
- Step 2. Click on "PPT" from the menu and then click “Next”.
- Step 3. Navigate to the location you want to save your file and change name if necessary.
- Step 4. Click on “export”. Last but not least, you can open the exported PowerPoint file to confirm the content.

The Best PDF Software for Mac
Wondershare PDFelement - PDF Editor is the best PDF editor which can be described as an All-in-One PDF Editor. It is attributed to powerful features that can edit PDF text and images, convert documents to various formats, and also create fillable forms, protect and share documents. It has become one of the commonly used and preferred document software owing to its advanced features, flexible prices, and perfect performance. PDFelement offers full control of your work on editing and modifying with its custom tools without forgetting its easy-to-use interface. The following are some popular features of PDFelement.
Launch PDFelement on your Mac computer, and click "Open File" and search for the file you want to open. Then you can choose the "Edit" option, and then you can add text, crop, watermark, change font or background, add page numbers among others.

• Convert PDF
Launch PDFelement on your Mac computer and import the PDF document to this program. And you can click the "File" > "Export To" option, then you select the format in which you want to convert the file like excel, word, and image, and finally click "Save".

• Create PDF Forms
Open your PDFlelement program and click on "File" > "Create", and then choose the "Blank Document" option.

Now click on "Form" on the left column, and pick one of the displayed elements and move the cursor to the blank area of the document to execute it.

After that, you can set the properties of the form by double-clicking on it to either align, modify, adjust size or delete. Once you have drawn your forms, you can type in your text content. To open the created fields, you can double click on it, and then you can also open the properties window to set either calculation, options, or appearances. Finally, you can click “Save” when you are done.

Free Download or Buy PDFelement right now!
Buy PDFelement right now!
chief Editor
Speak Your Mind
Related articles.
- How to Add Border in PowerPoint
- How to Add Page Numbers in PowerPoint
- Quicktime Not Available in PowerPoint? Solve It.
- How to Change Background in PowerPoint
- How to Create Video from PowerPoint
Other Popular Articles From Wondershare
We explain and teach technology, solve tech problems and help you make gadget buying decisions.
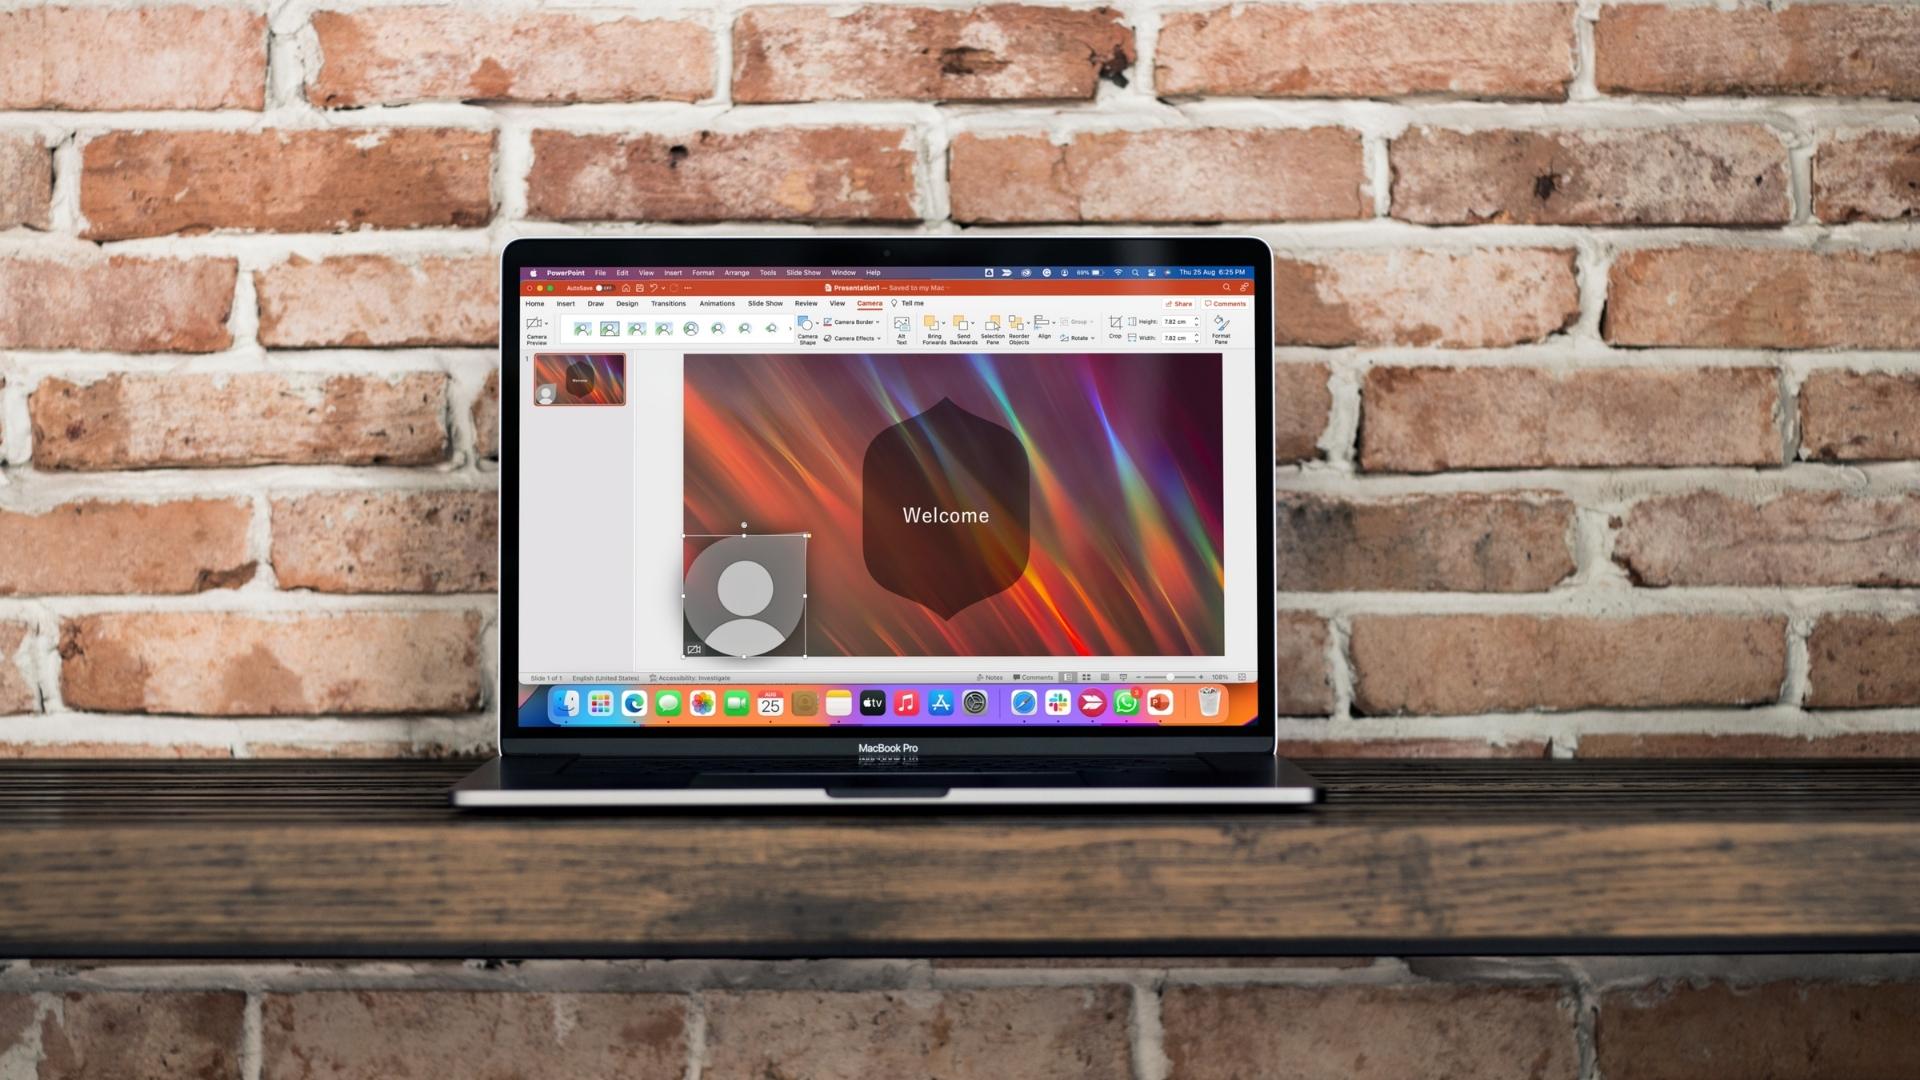
How to Insert Live Camera Feed in Microsoft PowerPoint on Mac
To make your presentations more interactive and engaging, you can insert YouTube videos in a PowerPoint presentation. Microsoft rolls out a new feature to add a Live Camera Feed in your PowerPoint presentation on Mac. That way, your audience can see your video during the presentation without leaving the PowerPoint app. You can either add it before starting your presentation or save it in the PowerPoint file.
There are many options to customize your Live Camera Feed in PowerPoint. We will show you how to insert Live Camera Feed in Microsoft PowerPoint on Mac.
The Live Camera Feed feature is available in Microsoft PowerPoint app v16.64 for macOS. We recommend checking whether you are using the same version of the app on your Mac or not.
Update PowerPoint for Mac
How to Enable Live Camera Feed in PowerPoint
Microsoft PowerPoint has added a feature called Cameo to add a Live Camera Feed in individual slides of your presentation. We will show you the various steps to enable and customize it for your presentation. If you want to run your PPT file from a different Mac or Windows PC, make sure that the latest version of PowerPoint is installed on that Mac or Windows PC to support Live Camera Feed functionality.
Firstly, here’s how to enable it in your slide.
Step 1: Press Command + Spacebar to open Spotlight Search, type PowerPoint, and press Return.

Step 2: Open your presentation file or create a new one.
Step 3: Once the presentation opens, click on Insert in the top Menu Bar.

Step 4: Click on Cameo at the top-right corner under Insert.

You will see the camera window appear on your current slide.

Step 5: Select the camera window and click on the Camera tab in the top Menu Bar.

Step 6: Click on Camera Preview at the top-left corner to turn on the webcam of your Mac.

You will see your Live Camera Feed appear in the current slide.

You can now control the webcam by simply clicking the camera icon inside the camera window.

You can use these steps to add a Live Camera Feed to your PowerPoint presentation slide – whether you or someone else is presenting it.
How to Change the Alignment of Live Camera Feed in PowerPoint
Let us show you the different ways of customizing your Live Camera Feed in PowerPoint. Here’s how you can change the alignment of your Camera Feed in a slide.
Step 1: Press Command + Spacebar to open Spotlight Search, type PowerPoint, and press Return.
Step 2: Open your presentation that contains the Live Camera Feed.
Step 3: Click the Live Camera Feed window in any of your slide to select it.
Step 4: Click the Camera tab at the top Menu Bar.

Step 5: Click the Align option under Camera.

Step 6: Select an alignment of your choice.

How to Change the Shape of Live Camera Feed in PowerPoint
You change the shape of the frame of your Live Camera Feed. Here’s how to do it.
Step 2: Open your presentation that contains the live camera feed.
You will see the Live Camera Feed Frame options next to Camera Preview under Camera.

Step 5: Select a frame shape of your choice.
The frame shape of your live camera feed will change in your slide.

You can also click the Camera Shape option to reveal more frame shape suggestions.

How to Add Border of Live Camera Feed in PowerPoint
You can also add and customize the border of your live camera feed frame like how you add a border to an image. Here’s how to do it.
Step 5: Select the Camera Border option.

Step 6: Select the border color from the list of options.

You can also click on Weight to change the border thickness of your camera feed.

You will notice your customized border added to your live camera feed.

Improve Your Presentation Style
Microsoft PowerPoint gives you ample options to create stunning presentations. Adding a Live Cam Feed option in your presentation makes the process fluid instead of switching between apps. Besides, you can also convert a PowerPoint file to a video if needed. You can also check out our guide to fix PowerPoint not opening on Mac if you face any issues.
Last updated on 26 August, 2022
The above article may contain affiliate links which help support Guiding Tech. However, it does not affect our editorial integrity. The content remains unbiased and authentic.

DID YOU KNOW

Paurush Chaudhary
Paurush dabbles around iOS and Mac while his close encounters with Android and Windows. Before becoming a writer, he produced videos for brands like Mr. Phone and Digit and worked briefly as a copywriter. In his free time, he satiates his curiosity about streaming platforms and devices like Apple TV and Google TV. On weekends, he is a full-time cinephile trying to reduce his never-ending watchlist, often bumping it longer.
More in Mac

How to Change the Default Opening Folder in Finder

How to Change Display Settings on Mac
Join the newsletter.
Get Guiding Tech articles delivered to your inbox.
Free All-in-One Office Suite with PDF Editor
Edit Word, Excel, and PPT for FREE.
Read, edit, and convert PDFs with the powerful PDF toolkit.
Microsoft-like interface, easy to use.
Windows • MacOS • Linux • iOS • Android

- Articles of PPT
How to Make A PowerPoint on Macbook [Totally Free]
Many users wonder how to make PowerPoint presentations on a MacBook without Microsoft Office. While some of PowerPoint’s features are only available on Windows, Mac users have great alternatives through Apple's Keynote app or the impressive WPS Office suite. This guide will walk through your options to easily create PowerPoints on a Mac.
Microsoft PowerPoint Version: Windows vs Mac
PowerPoint was originally created by Microsoft for Windows operating system. The Mac version was released later and had limited capability compared to the Windows version for a long time.
Over the years, Microsoft has considerably improved PowerPoint for Mac, bringing it closer to feature parity with Windows. But there are still some differences:
Presenter View Differences: Certain elements in Presenter View operate uniquely on Mac, providing a distinct user experience.
Additional Mac Features: Mac boasts exclusive features such as AppleScript and automator support, enhancing user capabilities.
Dynamic Reorder: a noteworthy addition on Mac, facilitates seamless adjustment of layered objects in presentations.
Missing Features on Mac : Notable omissions on Mac include the absence of Animation Painter, the inability to enter correctly formatted equations, the lack of support for video or animation triggers, and video trimming.
Zoom Functionality Discrepancy: Zoom, a valuable PowerPoint tool, is currently exclusive to PCs, posing a limitation for Mac users. Future availability on Mac is anticipated with Office updates.
Color Representation Variations: When opening the same Microsoft Office file on both platforms, subtle differences in color representation may be observed due to the distinct ways Macs and PCs interpret colors.
The distinctions between PowerPoint on Mac and Windows result in subtle variations in user experience.
Keynote – PowerPoint on Mac
Keynote is a presentation software developed by Apple, designed to create stunning and memorable presentations. Its powerful tools, dazzling effects, and intuitive interface stand out. Keynote enhances presentations by offering over 40 eye-catching themes, animations, and dynamic backgrounds. It allows real-time collaboration across Apple devices, including Mac, iPad, iPhone, and PC.
Keynote stands out with its user-friendly design, featuring Apple Pencil integration for illustrations and animations. It's compatible with PowerPoint – presentations can seamlessly switch between the two platforms, ensuring smooth collaboration for users of Microsoft PowerPoint.
How to Create a PowerPoint on Mac
Here are step-by-step instructions to make a PowerPoint presentation using Keynote on your Mac:
Step 1 : Open Keynote, located in the Applications folder on your Mac. You can choose a theme or start with a blank presentation when launched.
Step 2 : If using a theme, click to select one that fits your presentation style. Themed slides will automatically populate.
Step 3: Customize slides by adding text, changing layouts, inserting images, and more. Edit and arrange slides from the left sidebar.
Step 4: When finished, export your Keynote project to PowerPoint format. Go to File > Export To > PowerPoint.
Step 5: In the Export Your Presentation window, select a file format from the Advanced Options field and then click Next to save your presentation.
And that's it! You now have a PowerPoint presentation created completely on your Mac. The process is very intuitive for both new and experienced users.
Create a Presentation Using a Theme
Keynote offers many professionally designed themes to jumpstart your presentation building. Themed slides provide layouts, fonts, colors, and graphics matching your selected style.
Explore themes efficiently in the theme chooser by browsing categories. Double-click the one that aligns closely with your vision. Refine your options by selecting a category from the left sidebar.
Using a theme saves tons of time designing layouts and formatting – you can focus on the content! And themes are easy to make your own by tweaking fonts, colors, and images.
Free Alternatives to Make a PowerPoint – WPS Presentation
If you want a free Office suite that works seamlessly across Windows and Mac, WPS Office is an excellent choice. The WPS Presentation software has all the key features of PowerPoint for creating stunning slide decks.
Compared to older versions of Microsoft Office, WPS offers significant advantages:
Lightweight and Feature-Rich: WPS Office is a lightweight and feature-rich office suite.
High Compatibility: Recommended for low-configuration computers, ensuring widespread usability.
Comprehensive Suite: Includes Writer, Presentation, Spreadsheet, and PDF editing functionalities in one platform.
Effortless Creation and Collaboration: Users can effortlessly create, edit, and collaborate on Word, Spreadsheets, Presentations, and PDFs in a unified environment.
Airpage Cloud Documents: Real-time synchronization and seamless collaboration across platforms.
Extensive Template Library: Over 100,000 professional templates across categories for creative document designs.
User-Focused Segmentation: Tailored features for students, teachers, business users, and finance professionals.
How to Create a Presentation Using WPS on Mac
Follow these simple steps to make presentations using WPS Presentation on your Mac:
Step 1: Open WPS Office, and click on New.
Step 2: Choose Presentation.
Step 3 : Select a blank presentation or template.
Step 4: From now on, you can edit slides by adding text boxes, images, shapes, and charts using WPS Presentation.
Multiply Templates of WPS Presentation
WPS Presentation offers a wide selection of professional templates and themes for free. Some of the noticeable themes are:
Blue Business Strategy Planning

This template is likely for business presentations focusing on strategic planning. Expect a professional, blue-themed design with elements conducive to illustrating business strategies.
Green Business Activity Planning

This template seems suitable for business activity planning presentations. A green color scheme might convey a sense of growth and productivity, aligning well with business-oriented content.
Blue Technology Big Data Product Display

This template likely targets presentations related to technology and big data. Anticipate a blue-themed design, possibly with futuristic and data-centric visual elements to convey a tech-savvy vibe.
Business Style Investment Analysis

Enhance your investment pitches with our sophisticated business template designed for in-depth analysis. Boasting a significant download record, expect compelling financial charts and visuals for clear communication of intricate investment ideas.
Browse all the templates at: https://template.wps.com/
How to Download WPS Office
Step 1: Go to https://www.wps.com/download/
Step 2: Select your operating system – Windows, Mac, Linux, Android, iOS and click on the Free Download button.

Step 3: Click on the downloaded file to open WPS Office Installer.

Step 4: Click on Install Now and follow the prompts to complete the installation.

Use Word, Excel, and PPT for FREE, No Ads.
Edit PDF files with the powerful PDF toolkit.
Microsoft-like interface. Easy to learn. 100% Compatibility.
Boost your productivity with WPS's abundant free Word, Excel, PPT, and CV templates.
How do I open PowerPoint on my Mac keyboard?
To open PowerPoint on your Mac, press Command + Space to open Spotlight, type "PowerPoint," and hit return when it appears in the results.
As for useful shortcuts, here are some for Mac:
Open a new PowerPoint: Command + N
Open existing PowerPoint: Command + O
Open print preview: Command + Option + P
View and Zoom: Command + 1 (Normal), Command + 2 (Outline), Command + 3 (Slide Sorter), Command + Plus or Minus (Zoom In/Out)
Presenting: Shift + Command + Enter (Start Slideshow)
What are the disadvantages of using Keynote?
Keynote slides have limited compatibility with Microsoft systems, potentially causing issues when exporting to PPT format. Transitioning from PowerPoint to Keynote can be time-consuming and frustrating, especially for experienced PowerPoint users.
Can I collaborate on presentations with KeyNote or WPS Presentation?
Yes, both KeyNote and WPS Presentation offer collaboration features, making it easy for multiple users to work on a presentation simultaneously.
Mac users can create PowerPoint-style presentations, including Office for Mac, Keynote, or the free WPS Presentation. WPS provides a full-featured alternative with hundreds of free templates and easy compatibility for exporting PowerPoint files. Any Mac user can quickly make professional presentations by following the step-by-step instructions.
- 1. 5 Best Free Fonts That Make Your PowerPoint Presentations Visually Appealing
- 2. How to Make a Shape Transparent in PowerPoint
- 3. How to Make A Beautiful Slideshow in PowerPoint-- Make Your Presentations Better
- 4. How to Make a PowerPoint on Mac (Easy Tutorial)
- 5. How to make a timeline in PowerPoint
- 6. Professional Tips to Make Your PowerPoint Slides Appealing to the Audience

15 years of office industry experience, tech lover and copywriter. Follow me for product reviews, comparisons, and recommendations for new apps and software.

How To Get Free Access To Microsoft PowerPoint
E very time you need to present an overview of a plan or a report to a whole room of people, chances are you turn to Microsoft PowerPoint. And who doesn't? It's popular for its wide array of features that make creating effective presentations a walk in the park. PowerPoint comes with a host of keyboard shortcuts for easy navigation, subtitles and video recordings for your audience's benefit, and a variety of transitions, animations, and designs for better engagement.
But with these nifty features comes a hefty price tag. At the moment, the personal plan — which includes other Office apps — is at $69.99 a year. This might be the most budget-friendly option, especially if you plan to use the other Microsoft Office apps, too. Unfortunately, you can't buy PowerPoint alone, but there are a few workarounds you can use to get access to PowerPoint at no cost to you at all.
Read more: The 20 Best Mac Apps That Will Improve Your Apple Experience
Method #1: Sign Up For A Free Microsoft Account On The Office Website
Microsoft offers a web-based version of PowerPoint completely free of charge to all users. Here's how you can access it:
- Visit the Microsoft 365 page .
- If you already have a free account with Microsoft, click Sign in. Otherwise, press "Sign up for the free version of Microsoft 365" to create a new account at no cost.
- On the Office home page, select PowerPoint from the side panel on the left.
- Click on "Blank presentation" to create your presentation from scratch, or pick your preferred free PowerPoint template from the options at the top (there's also a host of editable templates you can find on the Microsoft 365 Create site ).
- Create your presentation as normal. Your edits will be saved automatically to your Microsoft OneDrive as long as you're connected to the internet.
It's important to keep in mind, though, that while you're free to use this web version of PowerPoint to create your slides and edit templates, there are certain features it doesn't have that you can find on the paid version. For instance, you can access only a handful of font styles and stock elements like images, videos, icons, and stickers. Designer is also available for use on up to three presentations per month only (it's unlimited for premium subscribers). When presenting, you won't find the Present Live and Always Use Subtitles options present in the paid plans. The biggest caveat of the free version is that it won't get any newly released features, unlike its premium counterparts.
Method #2: Install Microsoft 365 (Office) To Your Windows
Don't fancy working on your presentation in a browser? If you have a Windows computer with the Office 365 apps pre-installed or downloaded from a previous Office 365 trial, you can use the Microsoft 365 (Office) app instead. Unlike the individual Microsoft apps that you need to buy from the Microsoft Store, this one is free to download and use. Here's how to get free PowerPoint on the Microsoft 365 (Office) app:
- Search for Microsoft 365 (Office) on the Microsoft Store app.
- Install and open it.
- Sign in with your Microsoft account. Alternatively, press "Create free account" if you don't have one yet.
- Click on Create on the left side panel.
- Select Presentation.
- In the PowerPoint window that opens, log in using your account.
- Press Accept on the "Free 5-day pass" section. This lets you use PowerPoint (and Word and Excel) for five days — free of charge and without having to input any payment information.
- Create your presentation as usual. As you're using the desktop version, you can access the full features of PowerPoint, including the ability to present in Teams, export the presentation as a video file, translate the slides' content to a different language, and even work offline.
The only downside of this method is the time limit. Once the five days are up, you can no longer open the PowerPoint desktop app. However, all your files will still be accessible to you. If you saved them to OneDrive, you can continue editing them on the web app. If you saved them to your computer, you can upload them to OneDrive and edit them from there.
Method #3: Download The Microsoft PowerPoint App On Your Android Or iOS Device
If you're always on the move and need the flexibility of creating and editing presentations on your Android or iOS device, you'll be glad to know that PowerPoint is free and available for offline use on your mobile phones. But — of course, there's a but — you can only access the free version if your device is under 10.1 inches. Anything bigger than that requires a premium subscription. If your phone fits the bill, then follow these steps to get free PowerPoint on your device:
- Install Microsoft PowerPoint from the App Store or Google Play Store .
- Log in using your existing Microsoft email or enter a new email address to create one if you don't already have an account.
- On the "Get Microsoft 365 Personal Plan" screen, press Skip For Now.
- If you're offered a free trial, select Try later (or enjoy the free 30-day trial if you're interested).
- To make a new presentation, tap the plus sign in the upper right corner.
- Change the "Create in" option from OneDrive - Personal to a folder on your device. This allows you to save the presentation to your local storage and make offline edits.
- Press "Set as default" to set your local folder as the default file storage location.
- Choose your template from the selection or use a blank presentation.
- Edit your presentation as needed.
Do note that PowerPoint mobile comes with some restrictions. There's no option to insert stock elements, change the slide size to a custom size, use the Designer feature, or display the presentation in Immersive Reader mode. However, you can use font styles considered premium on the web app.
Method #4: Use Your School Email Address
Office 365 Education is free for students and teachers, provided they have an email address from an eligible school. To check for your eligibility, here's what you need to do:
- Go to the Office 365 Education page .
- Type in your school email address in the empty text field.
- Press "Get Started."
- On the next screen, verify your eligibility. If you're eligible, you'll be asked to select whether you're a student or a teacher. If your school isn't recognized, however, you'll get a message telling you so.
- For those who are eligible, proceed with creating your Office 365 Education account. Make sure your school email can receive external mail, as Microsoft will send you a verification code for your account.
- Once you're done filling out the form, press "Start." This will open your Office 365 account page.
You can then start making your PowerPoint presentation using the web app. If your school's plan supports it, you can also install the Office 365 apps to your computer by clicking the "Install Office" button on your Office 365 account page and running the downloaded installation file. What sets the Office 365 Education account apart from the regular free account is that you have unlimited personal cloud storage and access to other Office apps like Word, Excel, and Outlook.
Read the original article on SlashGear .

- Slidesgo School
- PowerPoint Tutorials
How to print PowerPoint notes

Crafting an impactful PowerPoint slideshow and delivering a captivating presentation are distinct skills. The first focuses on designing appealing visuals to convey a clear message, while the second involves employing effective presentation techniques to ensure the audience grasps the idea.
The content of this article will help you with the latter part of this process, guiding future presenters on how to print PowerPoint with speaker notes to enhance your presentations success and effectiveness .
What are notes in PowerPoint?
How to print powerpoint with speaker notes.
The information included in the notes section of a PowerPoint is meant for the presenter's eyes only. While the slides themselves display all the visuals and text required to build a compelling visual experience for the audience, notes often contain crucial details the presenter should keep in mind during their talk.
In PowerPoint, you’ll find the notes section right beneath each slide. Just click on “Notes” along the taskbar at the bottom of the PowerPoint window to get started. This article provides you a step-by-step guide to learn how to add speaker notes in PowerPoint.
During presentations, some may prefer to use Speaker Notes so they can see their notes on a second screen. However, if you’re more comfortable holding your notes or if a second screen isn't available, printing your notes is a fantastic alternative.
Printing your PowerPoint slides along with the speaker notes attached to each is straightforward, though the steps can vary slightly whether you're using Windows, Mac, or Word. Let’s explore each one of these processes.
How to print slides with notes on Windows
Printing slides with notes on Windows involve a few simple steps:
- Open the presentation with your speaker notes.
- Go to “File” in the top left corner.
- Choose “Print” from the sidebar menu.
- Specify the number of copies in the “Copies” field.
- Select the printer you want to use in the “Printer” field.
- For extra printing settings, click on “Printer Properties”.
- Underneath “Settings”, select “Full Page Slides” to open the dropdown menu.
- Choose“Notes Pages”.
- Hit “Print” to start printing your slides with notes.

How to print a PowerPoint with notes on Mac
Printing notes from your Apple device is not rocket science. Here’s how to print PowerPoint with lines notes on Mac:
- Open your presentation with speaker notes.
- Click “File” in the top left corner.
- Select“Print”.
- Choose your printer under “Printer”.
- Go to “Show Details” at the bottom of the Print window.
- From the “Layout” menu, select “Notes”.
- Finally, click “Print” to obtain your PowerPoint slides with notes.

How to print a PowerPoint using Word
If you want to print notes in PowerPoint by using Word, here’s how to do it if you’re working on a PC:
- Open your PowerPoint presentation that includes your speaker notes.
- Go to “File”.
- Choose “Export”.
- From the Export panel, select “Create Handouts”.
- A “Send to Microsoft Word” dialog box will pop up. Here, you can pick either “Notes Next to Slides” or “Notes Below Slides”.
- Click the “Paste” option from the same dialog box.
- Click “OK”.
- Word will automatically open the document for you. Once open, go to “File”.
- Select “Print”.
- Adjust the printing settings as needed.
- Finally, hit “Print” to get your document with notes ready.

Everyone has their unique style when it comes to giving presentations. Having your speaker notes printed out is an awesome technique to keep track of the key messages you’d like to convey. You can even hand out to your audience these prints afterward so they can get further insight on your topic.
No matter which operating system you’re using, printing PowerPoint speaker notes is a pretty straightforward process. The important thing is to continually seek out new methods to elevate your presentation skills and find more dynamic and engaging ways to communicate with your audience.
Do you find this article useful?
Related tutorials.

Discover Our Online Presentation Software for Free
We have great news for you today! If you’ve been a Slidesgo fan for years (or months, or weeks, or days, or mere hours, we welcome everyone!), you’ll probably know for now that our templates are available mostly in two formats: for use in Google Slides and PowerPoint.Google Slides is a free tool, since you only need a Google account in order to use it. PowerPoint, on the other hand, is part of the Microsoft Office suite, so it’s not a free program, but that didn’t stop it from being one of the most popular options in the world!What if we...

Webinar: Presentation Audit
With more than 15,000 templates released on Slidesgo and a user base composed of millions of people, we estimate that the total number of presentations created adds up to… um, a lot! Our team of professional designers work very hard to provide you with editable slides so that the only thing you need to do is, well, customize the elements to your liking. Starting from any given template, the results may vary a lot depending on the person who edited the contents.Have you ever wondered “Is my presentation good enough?” and wished that an expert on presentations looked at your template...

How to Change Slides Orientation in Google Slides
A change of perspective is always good! Do you want your public to look at your slides in a new way? Changing slides orientation will do the work. In this tutorial you’re going to learn how to go from horizontal slides, to vertical ones (and vice versa!).

How to Add or Change Fonts in Google Slides
Some experts recommend that you include just the right amount of text in your presentations. Too much, and the audience will be reluctant to read it. Too little, and the audience will just refrain from looking at the screen. Let’s say you already have the right amount of text. In order to maximize your chances of success, you need to choose a good font. Combining a nice readability with a nice visual hierarchy of all the components of your design will make an impression on everybody. They will be more than delighted at how your text looks. So, in this tutorial, you’ll learn...
Contribute to the Microsoft 365 and Office forum! Click HERE to learn more 💡
March 14, 2024
Contribute to the Microsoft 365 and Office forum!
Click HERE to learn more 💡
Top Contributors in PowerPoint: Steve Rindsberg - Jim_ Gordon - John Korchok ✅
March 11, 2024
Top Contributors in PowerPoint:
Steve Rindsberg - Jim_ Gordon - John Korchok ✅
- Search the community and support articles
- Microsoft 365 and Office
- Search Community member
Ask a new question
How to get my powerpoint file to open on mac when it keeps sending error message?
I am trying to open a PowerPoint file on my Mac, but the file won't open and keeps saying the error message "webpage might be temporarily down or it may have moved permanently to a new web address". I have tried restarting my computer and opening the file on different devices and through the app. When opening the app on my iPad, I managed to open the file, but it does not have all the recent changes synced.
- Subscribe to RSS feed
Report abuse
Replies (2) .
- Microsoft Agent |
Dear Friends ,
Good morning!
Thank you for posting in the Microsoft Community. We will be happy to help you. We are investigating your situation and will let you know soon.
Appreciate their patience and understanding and thank them for their time and cooperation.
Was this reply helpful? Yes No
Sorry this didn't help.
Great! Thanks for your feedback.
How satisfied are you with this reply?
Thanks for your feedback, it helps us improve the site.
Thanks for your feedback.
Hi Mackenzie_138,
Thanks for posting in the community. We are happy to help you.
According to your description, to troubleshoot the problem further, please try to access the online location where the file is stored.
1. Open the InPrivate browser window
2. Go to www.office.com and sign into your account.
3. Please select the OneDrive/SharePoint icon in the left sidebar.
4. After that, please go to the corresponding location and check if you can open the PowerPoint file in the browser.
If you can access OneDrive for Web or SharePoint in the browser but can't find this file, please point it out and let us know.
If you can open the PowerPoint file in the browser, please click the Editing button in the upper right corner> choose " Open in Desktop App ".

If you can't access OneDrive for Web or SharePoint in the browser, the issue you reported seems to be related to the Service Incident. This issue was posted to the Service Health Dashboard (SHD) as incident OD730433 or incident MO737187 .
Incident OD730433 - Users may be unable to access the OneDrive for Business service
Incident MO737187 - Users in Africa may be unable to access multiple Microsoft 365 services or features
I suggest you report the issue to your tenant admin or IT department and wait for the fix. Your tenant administrator can view current information and updates on SHD at the link here.
https://admin.microsoft.com/Adminportal/Home#/homepage
If your tenant is not affected by one of the above incidents, but you still cannot access OneDrive, please let your Microsoft 365 Administrator try raising a support ticket from the Microsoft 365 Admin Center: Get support for Microsoft 365 for business .
Sorry for the inconvenience that happened to you. Appreciate your understanding and patience.
Sincerely,
George | Microsoft Community Moderator
Question Info
- Norsk Bokmål
- Ελληνικά
- Русский
- עברית
- العربية
- ไทย
- 한국어
- 中文(简体)
- 中文(繁體)
- 日本語
IMAGES
VIDEO
COMMENTS
Step 2: Open PowerPoint. Open PowerPoint and choose a template or open a blank presentation. PowerPoint offers a variety of templates to suit different presentation styles. If you choose to start with a blank slate, you'll have complete creative freedom.
Making a PowerPoint on a Mac is easy. First, open up the Pages application on your Mac. Then, select the File menu and choose New from Template. From there, you can select a PowerPoint template and customize it to fit your needs. When you are finished, you can save your presentation and share it with others.
Apply or change slide layouts. Customize a slide master. Change the page orientation of your PowerPoint presentation. Create and use your own presentation template. Create your own theme in PowerPoint. Learn about SmartArt graphics. Compress the picture size. Crop a picture. Add a transparent picture (watermark) to your slides.
How to Make a PowerPoint Presentation on a Mac. Part of the series: Using Apple Computers. Making a PowerPoint presentation on a Mac computer can be done usi...
On the " PowerPoint " menu, click " Preferences ", and then set up PowerPoint the way you want. Change your layout. Good presentations adapt their structure to the points that are being presented. Switch things around on the fly to make them fit — literally or figuratively.
PowerPoint 2021 for Mac lets you create compelling content with the addition of features including co-authoring, Ink Replay, better support for SVG, and more rich media content from the Office Premium Creative Content collection. If you're upgrading to PowerPoint 2021 for Mac from PowerPoint 2019 for Mac, you'll still have all the features you ...
Microsoft PowerPoint is a presentation design software that is part of Microsoft 365. This software allows you to design presentations by combining text, images, graphics, video, and animation on slides in a simple and intuitive way. Over time, PowerPoint has evolved and improved its accessibility to users.
Open the Mac App Store application on your computer. Type in "PowerPoint" in the search bar and click search. The result from your search should show you the application, but if that isn't the case, scroll through the results till you see Microsoft PowerPoint. Click "Get" and then begin installation by clicking "Install".
@ComputerScienceVideos New Channel: https://www.youtube.com/c/ComputerScienceVideos/ How to use PowerPoint on a Mac // PowerPoint Tutorial - How to Use Appl...
Whether you need to show off your school project, business plan, or family vacation photos, PowerPoint is your go-to app for presentations. Kickstart your creativity. • Achieve more and enhance your documents with access to a growing catalog of premium templates for Word, Excel, and PowerPoint. • Advanced formatting and layout options ...
Step 1: Open the App Store on your Mac. App Store Icon on Mac Launcher. Step 2: In the search bar at the top right, type in "PowerPoint" and press Return. App Store Search Bar. Step 3: The Microsoft PowerPoint app should appear as the first result. Click on the Get button and then Install.
To convert PowerPoint to video on a Mac, open the presentation you want to save and select File > Export. In the export window, next to File Format , select a file format option, such as MP4 or MOV .
How to create a powerpoint on Apple products of iMac or MacBook or MacBookAir
From there, here are the steps you need to follow: Launch the Microsoft PowerPoint app from the app store on your Mac. To do this, head to the search bar and type in "PowerPoint." The first option should be Microsoft PowerPoint, but it will be near the top if it isn't. Once you find it, select "Get" and then "Install."
Figure 1. File menu. Select Print from the drop-down menu. Figure 2. Print option. (Optional) Enter the number of copies you want to print into the Copies text box in the Print dialog box. Figure 3. Copies text box. (Optional) Choose the slides you want to include from the Slides options.
Step 2. Choose the Theme of the Presentation. Scroll to navigate in the theme chooser and choose the type of presentation you want to make then double click on it to open. Step 3. Change the Layout. To change to a different layout, you can click on the "Layout" button, and then select your desired layout. Step 4.
Here's how to do it. Step 1: Press Command + Spacebar to open Spotlight Search, type PowerPoint, and press Return. Step 2: Open your presentation that contains the live camera feed. Step 3 ...
This is achieved through the Send a Copy feature. Tap the Presentations option in the top left corner to take you back to the main Keynote menu. Here you'll see all your files. In the upper ...
Follow these simple steps to make presentations using WPS Presentation on your Mac: Step 1: Open WPS Office, and click on New. create new file in wps office. Step 2: Choose Presentation. open wps presentation. Step 3: Select a blank presentation or template.
Answer. You should get a Presenter Remote. There are so many to choose from! This link search for "presenter remote Macintosh" has over 4 million results. Another approach would be for you to use the free PowerPoint broadcast service. You play your presentation on your MacBook and everyone else can watch the slides on whatever device they have ...
To switch accounts: In PowerPoint, use the Menu Bar. Choose PowerPoint > Sign Out. Restart your Mac. When you start PowerPoint (or any office app) it will prompt you to enter your credentials. Use the credentials for the co-pilot license. Be sure to include the version number and OS version when asking your question.
I have seen several videos and tutorials about using PowerPoint for recording videos. It records the slideshow, your audio, and allows you to write or draw on the screen. I cannot figure out how to get it to work on my Mac. I am using the desktop version for Mac. I have a teacher O365 account. Note: I know about Zoom, Screencastify ...
Microsoft offers a web-based version of PowerPoint completely free of charge to all users. Here's how you can access it: Visit the Microsoft 365 page.; If you already have a free account with ...
Here's how to print PowerPoint with lines notes on Mac: Open your presentation with speaker notes. Click "File" in the top left corner. Select"Print". Choose your printer under "Printer". Go to "Show Details" at the bottom of the Print window. From the "Layout" menu, select "Notes". Finally, click "Print" to obtain ...
Do you want to be able to record your PowerPoint presentations with audio on Mac? 👉In this tutorial, we'll show you two easy methods for recording audio on ...
Dear Friends,. Good morning! Thank you for posting in the Microsoft Community. We will be happy to help you. We are investigating your situation and will let you know soon.. Appreciate their patience and understanding and thank them for their time and cooperation.. Sincerely