
Cloud Storage

Custom Business Email

Video and voice conferencing

Shared Calendars

Word Processing

Spreadsheets
Presentation Builder

Survey builder

Google Workspace
An integrated suit of secure, cloud-native collaboration and productivity apps powered by Google AI.

Tell impactful stories, with Google Slides
Create, present, and collaborate on online presentations in real-time and from any device.
- For my personal use
- For work or my business

Jeffery Clark
T h i s c h a r t h e l p s b r i d g i n g t h e s t o r y !

E s t i m a t e d b u d g e t

Make beautiful presentations, together
Stay in sync in your slides, with easy sharing and real-time editing. Use comments and assign action items to build your ideas together.

Present slideshows with confidence
With easy-to-use presenter view, speaker notes, and live captions, Slides makes presenting your ideas a breeze. You can even present to Google Meet video calls directly from Slides.

Seamlessly connect to your other Google apps
Slides is thoughtfully connected to other Google apps you love, saving you time. Embed charts from Google Sheets or reply to comments directly from Gmail. You can even search the web and Google Drive for relevant content and images directly from Slides.

Extend collaboration and intelligence to PowerPoint files
Easily edit Microsoft PowerPoint presentations online without converting them, and layer on Slides’ enhanced collaborative and assistive features like comments, action items, and Smart Compose.

Work on fresh content
With Slides, everyone’s working on the latest version of a presentation. And with edits automatically saved in version history, it’s easy to track or undo changes.

Make slides faster, with built-in intelligence
Assistive features like Smart Compose and autocorrect help you build slides faster with fewer errors.

Stay productive, even offline
You can access, create, and edit Slides even without an internet connection, helping you stay productive from anywhere.
Security, compliance, and privacy

Secure by default
We use industry-leading security measures to keep your data safe, including advanced malware protections. Slides is also cloud-native, eliminating the need for local files and minimizing risk to your devices.
Encryption in transit and at rest
All files uploaded to Google Drive or created in Slides are encrypted in transit and at rest.
Compliance to support regulatory requirements
Our products, including Slides, regularly undergo independent verification of their security, privacy, and compliance controls .
Private by design
Slides adheres to the same robust privacy commitments and data protections as the rest of Google Cloud’s enterprise services .

You control your data.
We never use your slides content for ad purposes., we never sell your personal information to third parties., find the plan that’s right for you, google slides is a part of google workspace.
Every plan includes

Collaborate from anywhere, on any device
Access, create, and edit your presentations wherever you are — from any mobile device, tablet, or computer — even when offline.

Get a head start with templates
Choose from a variety of presentations, reports, and other professionally-designed templates to kick things off quickly..

Photo Album

Book Report

Visit the Slides Template Gallery for more.
Ready to get started?
- PRO Courses Guides New Tech Help Pro Expert Videos About wikiHow Pro Upgrade Sign In
- EDIT Edit this Article
- EXPLORE Tech Help Pro About Us Random Article Quizzes Request a New Article Community Dashboard This Or That Game Popular Categories Arts and Entertainment Artwork Books Movies Computers and Electronics Computers Phone Skills Technology Hacks Health Men's Health Mental Health Women's Health Relationships Dating Love Relationship Issues Hobbies and Crafts Crafts Drawing Games Education & Communication Communication Skills Personal Development Studying Personal Care and Style Fashion Hair Care Personal Hygiene Youth Personal Care School Stuff Dating All Categories Arts and Entertainment Finance and Business Home and Garden Relationship Quizzes Cars & Other Vehicles Food and Entertaining Personal Care and Style Sports and Fitness Computers and Electronics Health Pets and Animals Travel Education & Communication Hobbies and Crafts Philosophy and Religion Work World Family Life Holidays and Traditions Relationships Youth
- Browse Articles
- Learn Something New
- Quizzes Hot
- This Or That Game New
- Train Your Brain
- Explore More
- Support wikiHow
- About wikiHow
- Log in / Sign up
- Computers and Electronics
- Website Application Instructions
- Google Applications
How to Create a Presentation Using Google Slides
Last Updated: November 30, 2023
wikiHow is a “wiki,” similar to Wikipedia, which means that many of our articles are co-written by multiple authors. To create this article, 17 people, some anonymous, worked to edit and improve it over time. This article has been viewed 233,475 times. Learn more...
This tutorial will show you how to make a PowerPoint-like presentation using Google Slides. Presentations can be used for school, business, and so much more.

- You can also just type in https://slides.google.com , log in if you haven't already, and will be taken to the Slides page.
- If you don't have a Google account, learn to create one now!

- For more options, hover over the arrow on the right edge of the Google Slides option, where a smaller drop-down menu will appear. From here you can select to create a presentation from a template or a blank slide.

- Be sure to add a title and subtitle by clicking where you are prompted to add text.

- You can also change a pre-existing slide's layout by clicking the layout option on the upper editing bar.

- As you add animations to each element by clicking the blue "+ Select an object to animate", they will begin to pile up. Click on each one to edit it.
- Change the transition from slide to slide by clicking the default "Slide: No transition" at the top of the sidebar. You can choose whether to apply to all slides or just one.
- Preview your animations by clicking Play at the bottom of the sidebar.
- Remove an animation by clicking the small x on its rectangle, and drag each animation up or down to change the order.

Community Q&A
wikiHow Video: How to Create a Presentation Using Google Slides
- If you have a pop-up blocker, make sure to disable it so Slides can work properly. Thanks Helpful 0 Not Helpful 0
- Hover over each tool to see its keyboard shortcut and function. Thanks Helpful 0 Not Helpful 0
- Remember, these are the basic functions- Google Slides contains many more tools that you can work with as you explore the creator. Thanks Helpful 0 Not Helpful 0

You Might Also Like

About This Article
To create a new Google Slides presentation, open a web browser and go to Slides.Google.com. If you want to start from a template, you can choose one from the template gallery. Otherwise, click "Blank" to create a new blank presentation. Your blank presentation starts with a single simple slide with space to enter a title and subtitle. You can personalize this slide, as well as other slides you add, by editing the placeholder text, as well as choosing a slide theme from the panel to the right. To insert another slide, click the "Insert" menu and select "New Slide," or press "Control M" for a quick keyboard shortcut. You'll also find other things you can add to your slide on the Insert menu, including the option to add an image, a text box for typing, videos, shapes, charts, and other features. After adding a new slide, click the "Layout" menu to choose a slide layout—you can give each slide its own layout or reuse the same layout as much as necessary. Edit the placeholder text, and then insert objects from the Insert menu. To move an object, click the arrow in the toolbar, hover the mouse cursor around the object's border line until it turns to a 4-point arrow, and then click and drag it. Each slide you add will have a thumbnail in the left panel—click a slide's thumbnail to open that slide for editing. To see your presentation as a viewer would, click your first slide in the left panel, and then click "Present" at the top corner. Click the Escape key to go back to editing. Google Slides also has some built-in effects you can access from the "Transition" menu—here you can animate a slide's transition into the next slide, as well as animate individual objects. To apply an effect, background, theme, layout, or any other setting to more than one slide at once, select the slides in the left panel by holding down the Control key as you click each thumbnail. Your presentation will automatically save to your Google Drive as you work—type a name for the presentation in the top-left corner so you can easily find the file when you need it. Did this summary help you? Yes No
- Send fan mail to authors
Is this article up to date?

Featured Articles

Trending Articles

Watch Articles

- Terms of Use
- Privacy Policy
- Do Not Sell or Share My Info
- Not Selling Info
wikiHow Tech Help Pro:
Level up your tech skills and stay ahead of the curve
- Google Classroom
- Google Workspace Admin
- Google Cloud
Get started with Google Slides
Learn how to use Google Slides to create engaging presentations, make fewer class copies, and more.
Find tips and tricks from teachers like you
Explore topics one-by-one.
- What is Google Slides
- Accessing Google Slides
- Creating a presentation in Google Slides
- Adding and editing content
- Presenting Google Slides
- Sharing Google Slides
Discover training lessons and related resources to accelerate your learning
Error loading content :( Please try again later
- {[ item.label ]}
{[ collectionContentCtrl.activeTopic.label ]} All resources ({[ collectionContentCtrl.totalItemsCount ]})
{[ item.eyebrow ]}
{[ item.name ]}
{[ item.description ]}
{[ item.featured_text ]}
No results matching your selection :( Clear filters to show all results
Begin your training with Google Slides
Get support from our help center, you're now viewing content for united states..
For content more relevant to your region, choose a different location:
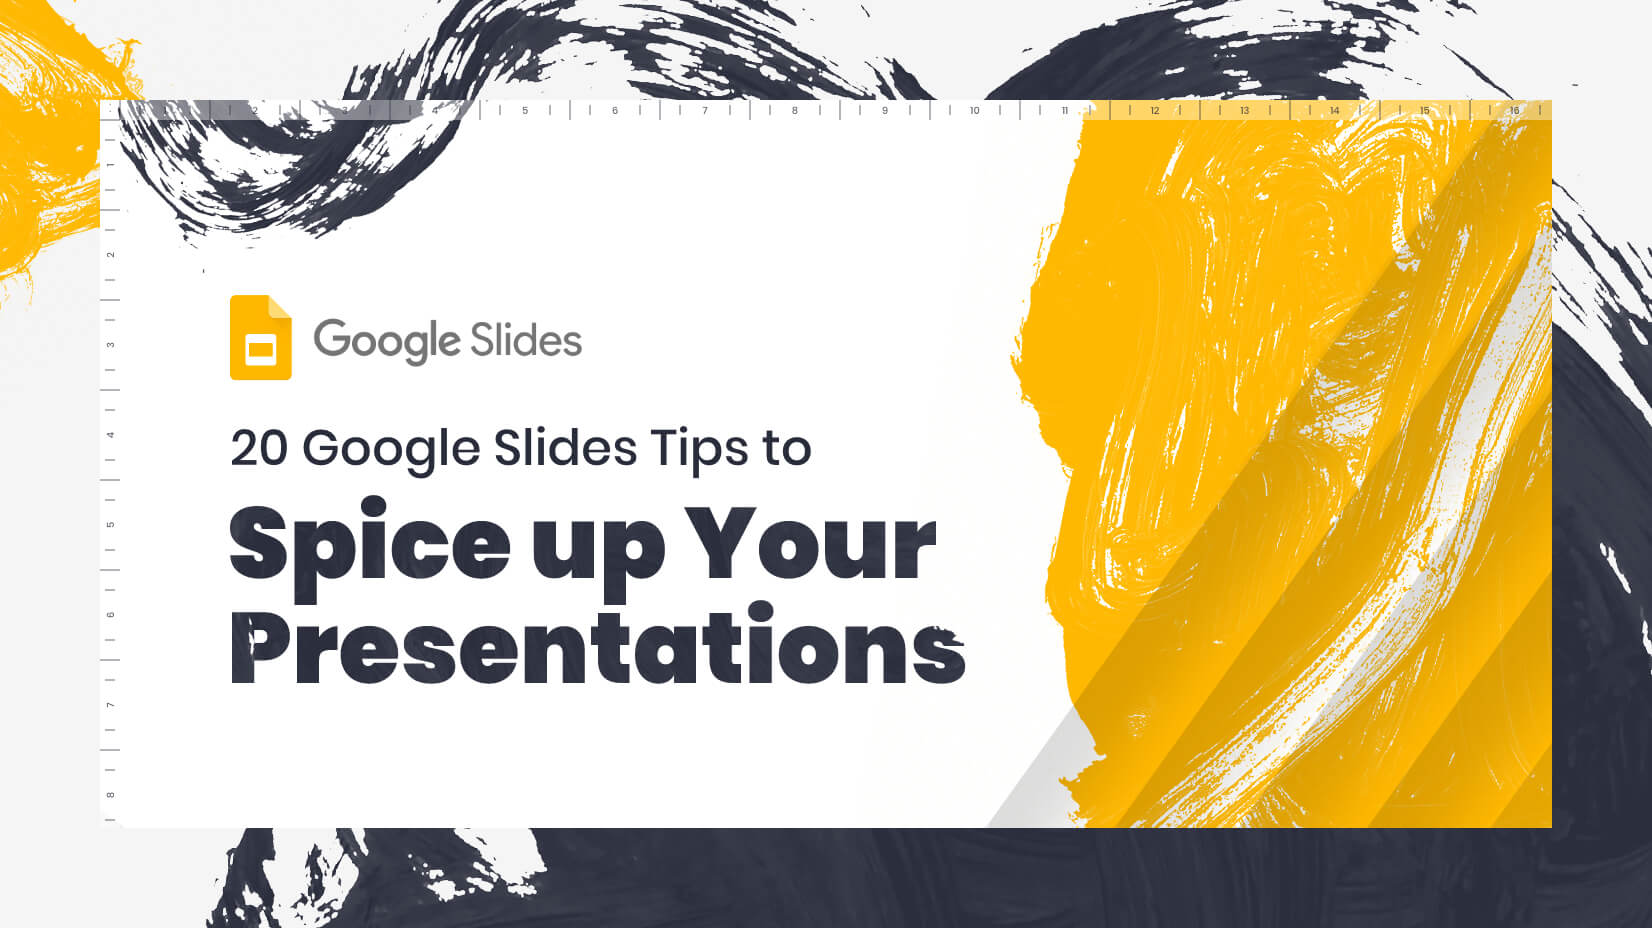
20 Google Slides Tips to spice up your Presentations
Google Slides tips, 20 great tips to push your presentation slide show to the top of the list, make people listen and get your message across clearly, professionally and with style.
- Share on Facebook
- Share on Twitter
By Lyudmil Enchev
in Insights
4 years ago
Viewed 15,475 times
Spread the word about this article:
If you need to make a presentation, you want to give yourself the best chance of success. To sell the product or yourself, to inform, to get your message across – the better the presentation the better the chances. Slide show presentations are a common way of doing this, but they are no less useful for that. They have many advantages, it’s why they are so popular, they can get the information across clearly, concisely, and memorably if done well. One of the most important decisions is which software to use. One option is Google Slides, but the software alone will not a great presentation make. In this article, we’ll give you some tips on how to really spice up that Google Slides presentation to create something you are proud of and more importantly will get the job done.
What is Google Slides?
Google Slides is a specialized presentation program that is part of the Google Drive service and it is free or there is a paid-for business option – G suite. It is available as a desktop application and also as a web app or mobile app, so it can be used in pretty much any situation by anybody with computer access.
Put simply Google Slides enables anyone to create a presentation and edit it , and significantly can allow you to collaborate with other users in real-time . It is designed for online use and is regularly updated with new, fresh features. Crucially, it is also incredibly easy to use .
You’ve got the resource, you’ve got the concept, so the only question that remains is how do you make it something special? Here are the top 20 design tips to consider when using Google Slides:
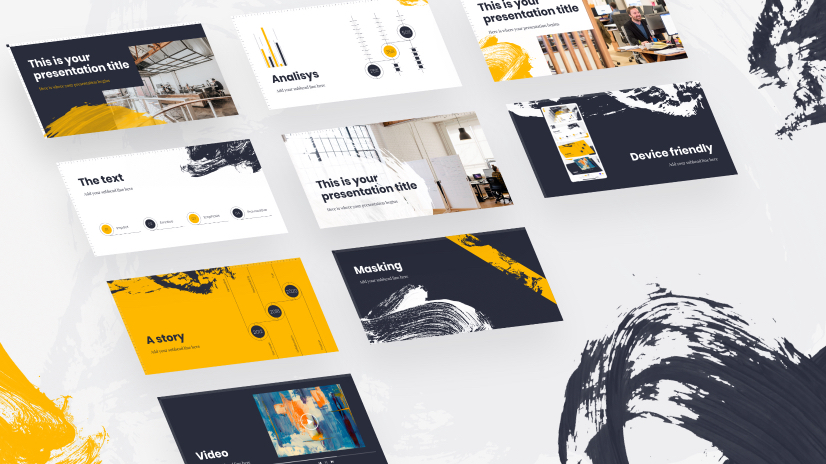
Tip 1: Use templates Tip 2: Use plenty of images Tip 3: Experiment with typography Tip 4: Add diagrams and infographics Tip 5: Get creative with your images Tip 6: Be careful with color Tip 7: Add animated transitions Tip 8: Collaborate with your team Tip 9: Add videos Tip 10: Hold back on the text
Tip 11: Make it a story Tip 12: Make reference Tip 13: Add links Tip 14: Take questions Tip 15: Make notes Tip 16: Add bullet points Tip 17: Make it device friendly Tip 18: Use numbers Tip 19: Finish with C.T.A Tip 20: Don’t extend too much
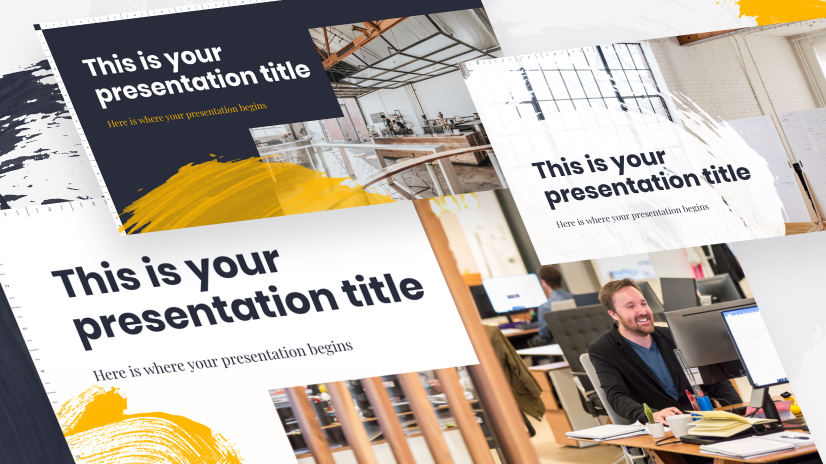
Tip #1: Use templates
The theme of your presentation should be represented by the theme of your slideshow. It will hold everything together.
Unless you are a designer yourself, it can be tricky and time-consuming to design a presentation from scratch that looks the part. The professional designers know what they are doing and give you plenty of options. It isn’t lazy, it doesn’t reflect on your design skills (you aren’t a designer anyway), and nobody questions your creativity.
In actual fact, using the numerous professionally designed templates available on Google Slides does two really useful jobs, if, in fact, they notice at all. Firstly it shows the audience that you know your limits and more importantly, it gives you time to focus on the content of the presentation. It is after all the content that is your principal goal. Plus it gives you extra time to concentrate on your all-important presentation skills.
The templates are all exceptionally designed, and completely and easily editable including the addition of images, layout, color, and background color. Really what more could you need?
Tip #2: Use plenty of images
Presentations need to be visual. We remember images, we understand images, we recognize and associate with images, and we are brief visual creatures. You need to use images, but we wish it was that simple. don’t just throw them in for the sake of it!
The images you use have a huge effect. The key is to use powerful and appropriate images such as photos and illustrations that help you get your message through. Images that emphasize and enhance your words, stoke up emotion and clarify a complex issue, all these images are useful and powerful. They help you deliver what you want, they help you get your message across and you need to get them into the presentation as thoughtfully as possible.
So you know, you want images so then you need to decide on the right ones. Either use your own images previously downloaded or created and saved and insert them or use Google image search. If you use Google’s image search which has a tremendous number of options, we’re talking in the millions here, it isn’t even necessary to download them first, just add them via your browser tab, insert, image, type in keywords and search away then click on your choice and it’s done.
The type of images you add is important and well worth thinking about. Illustrations can show creativity, originality, and imagination. They are great for illustrating more abstract or complex ideas. You can choose between artistic, hand-drawn, graphic, geometric, simple outlines, etc, all will generate a different tone and feel. Photographic images can present reality, credibility, and honesty. With either choice, you can get really creative, grab the attention, hold the attention, and be remembered.
Be aware that heavy files can result in lagging, which is the last thing you need. Run the presentation through, to check it’s smooth.
Tip #3: Experiment with typography
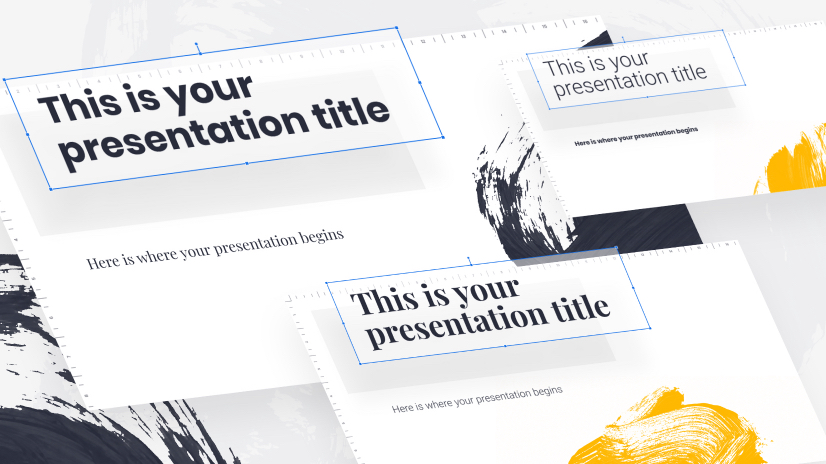
If you’ve got great content, and we’re sure you have, why go with a bog-standard font. Let’s get creative and choose the font that will suit your theme, your content, and your style, a font that will catch the eye and set you apart. In Google Slides when you click on a text box you get a font option, including size, color, etc. There is a great range but selecting “more fonts” at the top will direct you to the free Google Fonts service. Here you can get really funky. Don’t be afraid an unusual font can have a wow effect but remember it needs to be readable too. You can add your own custom fonts too.
And that’s not all, clicking on the More option on the menu bar (far right) gives you room to play with the text you have, from the usual rotation, size, text fitting, and positioning to the more interesting drop shadow and reflection options. (including opacity, and translucency slide bars.) These add interest and an extra dimension and look like you’ve really made an effort.
Tip #4: Add diagrams and infographics
As with the images above, infographics and diagrams are ideal for presentations. They convey masses amount of information in accessible chunks in a visual way. If you’ve got stats and data or even a complex idea to explain there is little as confusing and frankly dull as long lists of figures or long-winded explanations. This is where the latest craze for infographics really comes into its own.
You can create infographics independently of Google Slides and simply insert it, in the correct spot. Alternatively, you can create a chart or graph, a flowchart, or a diagram straight in Slides, using google sheets or one of the standard menu options. Again these are flexible and editable.
Tip #5: Get creative with your images

We’ve already established that you need images, right? If you’ve selected the appropriate powerful ones, now is the time to put in a tiny bit of effort to add a little extra style. Google Slides contains an option for masking images, meaning you can play with the edges, round off the corners, change image shape and add other stylistic elements. These little things make a huge difference so get creative and experiment, you can always undo, the many options by simply clicking on the image, then the Mask image icon (the little triangle).
Tip #6: Be careful with color
We all know colors can improve a presentation but it is equally true that they can ruin it too. A tendency to throw colors around willy-nilly can look childish and distract from your main aim, so think carefully.
Colors carry associations and are emotive(be aware that they are also culture-sensitive) and can be a great psychological tool when presenting. But you have to make some decisions about what, where, and how much.
- Brand Colors – if you’re presenting your brand, colors are a fantastic way of creating a strong flow of identity throughout. You can stick to the exact colors or use tonal variations and still keep the consistency.
- Bright Colors – catch the attention, but don’t overdo it. Combinations work well, especially regarding images and texts.
- One dominant color – A theme that eases from slide to slide, when used cleverly focuses the eye and highlights key points.
- Black and White – a classic for a reason, dramatic yet clear, elegant yet simple, and you can add grey or occasional pops of color that really stand out.
- Trends of 2022 – colors go in fashions too, check out the most trendy colors and combinations in 2022 .
- Gradients – Gradients and color transitions are very popular.
- Backgrounds – full or part, transparent or semi-transparent, plain, pattern or texture – background really help draw the eye to a particular section. You can also add your own.
Google Slides makes it easy to edit colors into your work, the difficult bit is making the decision in the first place.
Tip #7: Add animated transitions

The visual effect given when moving from one slide to the next, transitions is one of the simplest methods of adding a professional feel to the overall presentation. In Google Slides, just click on the “Transitions” button on the menu and choose from the many options available. The rule of thumb is to find one you like and stick to it during the whole presentation, there are lots of options but don’t be tempted to mix them up. A great transition will keep the interest and create a dynamic flow, a cacophony will distract.
It’s worth noting you should try to keep the number of slides and therefore transitions as low as possible, too many slides is too much movement and not enough focus.
Tip #8: Collaborate with your team
A great advantage of Google Slides is that as it’s online, anyone with permission can see where you are at with the design and even edit it. If you are working with a design team or content writers this is ideal, if you want another opinion it’s a great option too. Another set of eyes can offer insights, and advice, and often see mistakes that you haven’t even noticed. And always get your presentation proofread to avoid potential embarrassment, the last thing you need is to be talking over a glaring typo, hours spent putting together a great presentation can be lost in an instant.
All edits are tracked by the user and indicated by color coding and you can give various levels of permissions. With a revision history that tracks changes to the presentation.
Tip #9: Add videos
It may be appropriate to do something a little different and add a video, it will cause a stir. If you think this is an option that will add to your presentation and isn’t just there because you can do it, then it’s easy to do in Google Slides.
By clicking on “Insert” then “video”, you can add either form your own saved video to your Google Drive account or search YouTube videos. Be sure to watch the video before embedding it, you don’t want an embarrassing surprise. Then edit or format your video as you wish, you can change position or size and playback options, it’s easy but a great way of impressing the audience.
Tip #10: Hold back on the text
Your presentation is an aid to your speech, a guide, and in addition, it is not a document to be read. A text overload will do one of two things either people will focus on the writing and you’ll lose their attention, or worse you’ll lose them altogether and they’ll focus on neither.
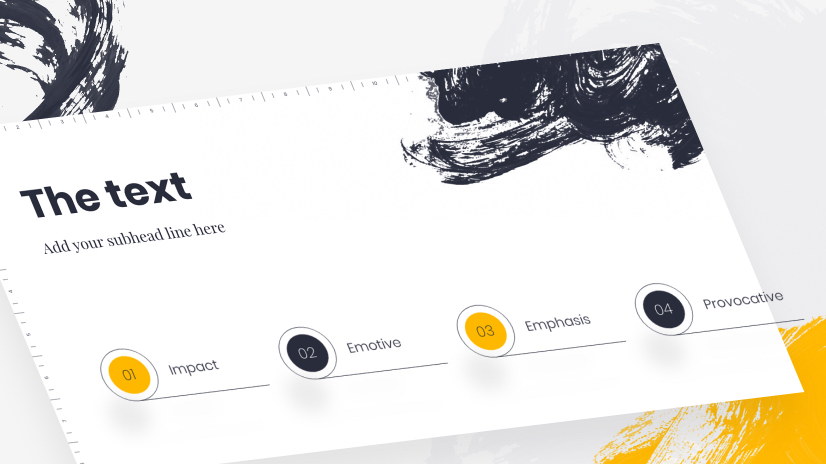
The rule is to be brief, the shorter the better. Strong impacting, emotive, emphasizing, provocative – these are the words you are looking for, nobody wants long explanatory texts (that’s what your images are for).
Experts recommend up to six words per slide is enough to gain the attention and get the audience to listen to what you have to say.
Tip #11: Make it a story
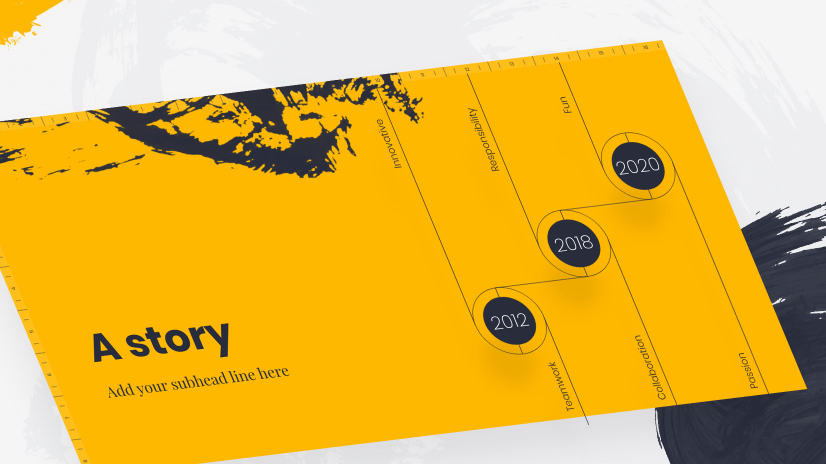
We are surrounded by stories from the earliest fairy tales of childhood to the binge-watched Netflix dramas of present times. If you want your presentation to really strike a chord, storytelling is the way to go. Stories, anecdotes, and personal snippets all will allow your key communicative aim to be understood. They also give you a chance to show your personality, humor, humility, experience, and knowledge, and liven things ups.
The slide show is used as a guide through your story, a background that will hold the key concepts and arguments, keep them clear, and hold the focus. But essentially they supplement and add whilst you do the work.
Tip #12: Make reference
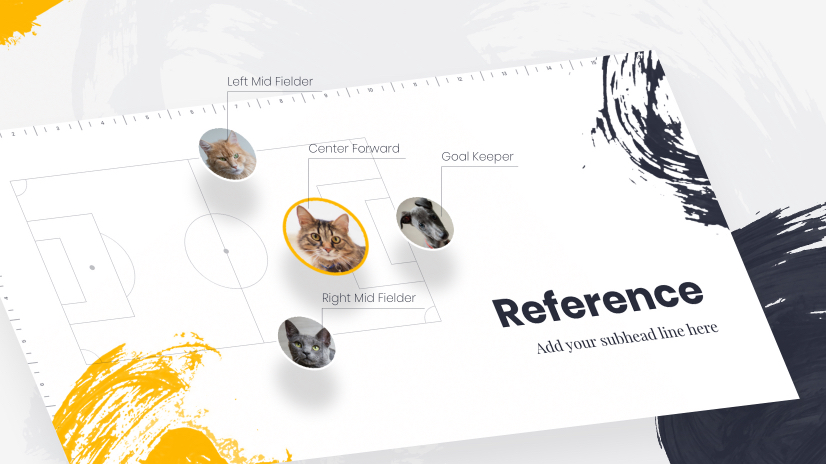
By referring to current events, and culture you kill two birds with one stone. Firstly, the audience can relate to your message and can link your ideas to what they are familiar with. Secondly, it keeps things topical, relevant, and up-to-date and that includes the images of you. It forms a vital link with the audience, you are part of them and not apart from them.
But beware you need to know your stuff, what you may think is topical could fall on deaf ears. Research and know your audience, think of age and cultural differences – you don’t want your witty observation to fall on stony ground. And everything should be focused back on your main point, link it to the presentation.
Tip #13: Add links
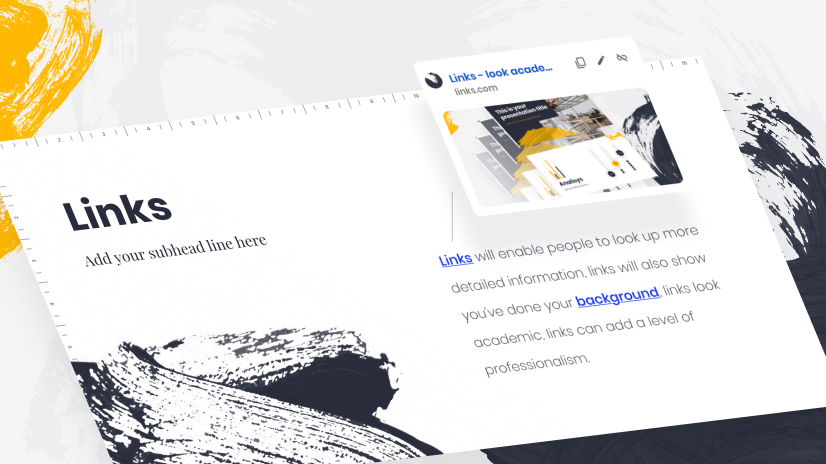
Links will enable people to lookup more detailed information, links will also show you’ve done your background, links look academic, and links can add a level of professionalism.
With Google Slides there is a research tool, which makes it simple to add links to websites but also to images or additional files in your Drive account. A very useful way of allowing you to be brief and focused but supplying all information that is needed. You can even type into the Google Slides to search for relevant images and sites.
Tip #14: Take questions (often)

Don’t wait until the end to invite questions, people often forget what they were going to ask or are just desperate to get to the free buffet! Questions should be invited throughout, interaction is good, and it makes the audience feel part of the process. In a physical presence in a meeting room or conference hall, this should be scheduled into your time, it is easy to forget and move on.
Google Slides has a Presenters notes section that only you can during the presentation, this is an excellent place to remind yourself to ask for questions.
If your presentation is virtual then Google Slides can create a link for you to send to your audience. Through this link, the viewers can post questions which then appear in the box. An excellent way of increasing active viewing.
Tip #15: Make notes
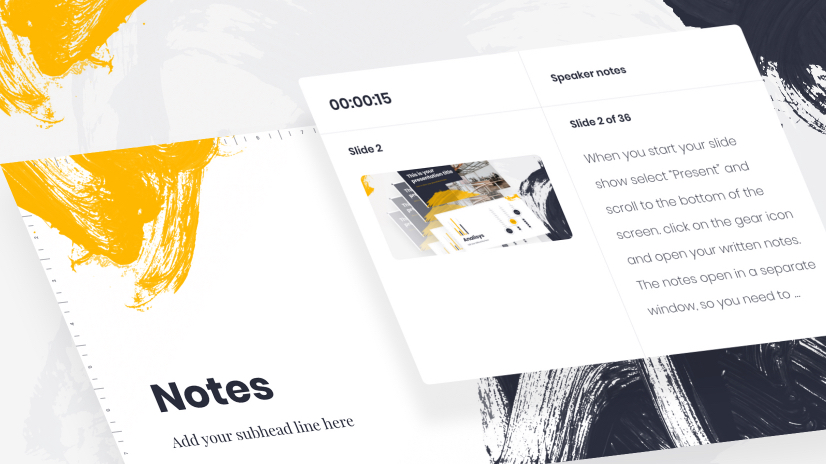
As we’ve established your slide show is not a complete presentation, your skills are absolutely vital. You need to be prepared for the pressure and the performance. Google Slides provides a “Presenter Notes” option where you can create a guide for each slide, or a script if you wish. There is a good chance you will forget something or get lost at some point unless you really know your stuff – and even then it’s more than possible.
When you start your slide show select “Present” and scroll to the bottom of the screen. Click on the gear icon and open your written notes. The notes open in a separate window, so you need to arrange your setup so you have different screens meaning the audience doesn’t see the notes. The notes follow the slide you are on, forwards or backward, and at whatever speed you are working.
Tip #16: Add bullet points
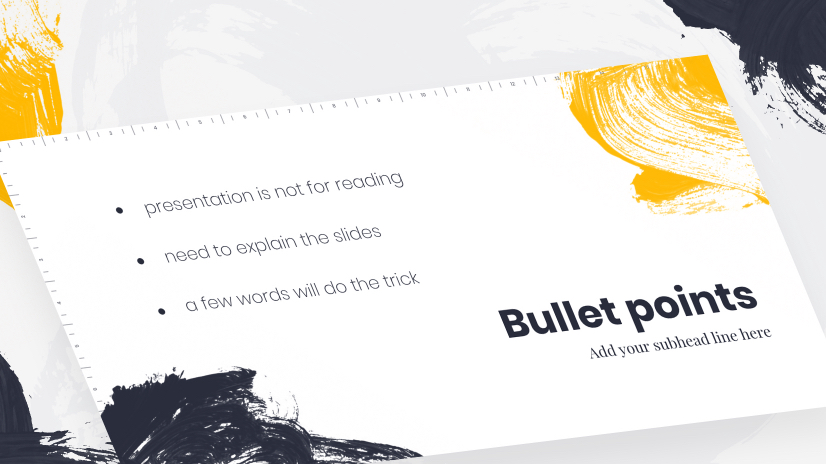
In an article, proposal, or report, bullet points are great, they break up texts, highlight key points, and make scanning easier but these are text for reading. A presentation is not for reading. You need to explain the slides, the bullets don’t. If it’s worth a bullet point it’s worth a slide of its own. Don’t patronize your audience with obvious point breakdowns when a few words will do the trick. If they need a breakdown, or explanation add a link.
Tip #17: Make it device friendly

You may well be using your presentation slide show in a very standard, typical way, perhaps projecting it onto a screen behind you from your laptop. Remember Google Slides is online so you can access it from a mobile device or tablet. This means that it is possible to cast from your device to a screen. You don’t necessarily have to carry around your laptop for your presentation.
It is also great for working on your presentation remotely, where ever you may be. You get a great idea on the train, take out your phone and access your presentation.
It’s also worth bearing in mind that others can access your presentation from their device too, so remember when doing the design that your presentation needs to look at the part on the small screen.
Tip #18: Use numbers
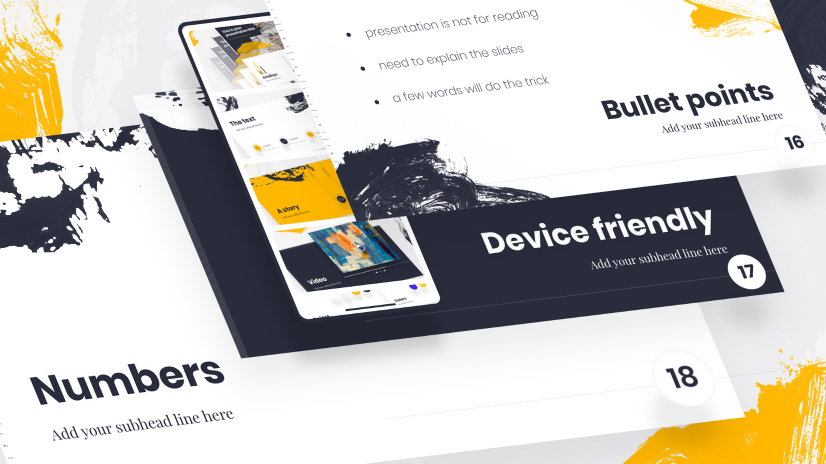
Numbers add clarity, help the listeners know where you are, act as a guide through the process, and make it feel like you are progressing. If you number each slide there is a sense of drawing to a goal, it’s a simple rule but one of the best. They take seconds to add on Google Slides and are proven to help.
Tip #19: Finish with C.T.A
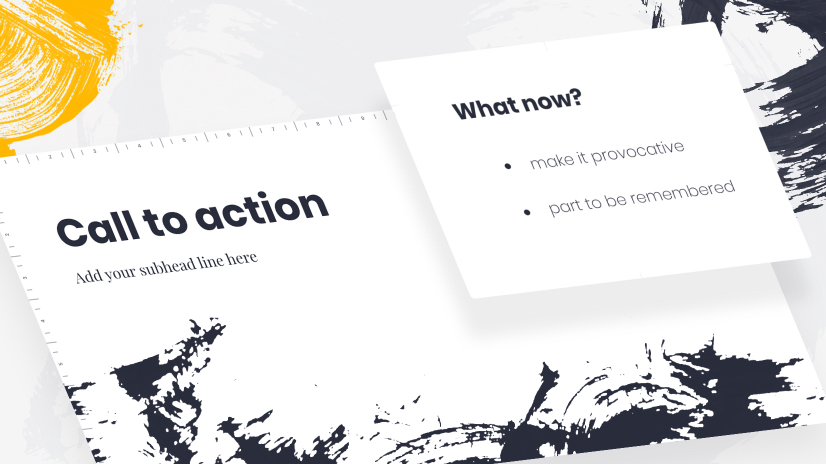
A call to action is a great way to finish. It has the dual function of closing the presentation and opening the next dialogue. Devote a whole slide to it, make it provocative, you want this part to be remembered.
Thank your audience, of course, it pays to be polite… but please don’t waste a slide on this. Your ending needs to be dramatic and memorable. The questions you need to pose at the end of your presentation, and the questions the audience needs to be asking themselves is… what now? Tell them what you want them to do – directly.
Tip#20: Don’t extend too much
We’ve left it to the end, it’s so important but be brief. Nobody will thank you for needlessly extending, you sat in presentations yourself and you know exactly what everybody is thinking. Let’s get this over and done, yes? This is what the experts say and who are we to argue.
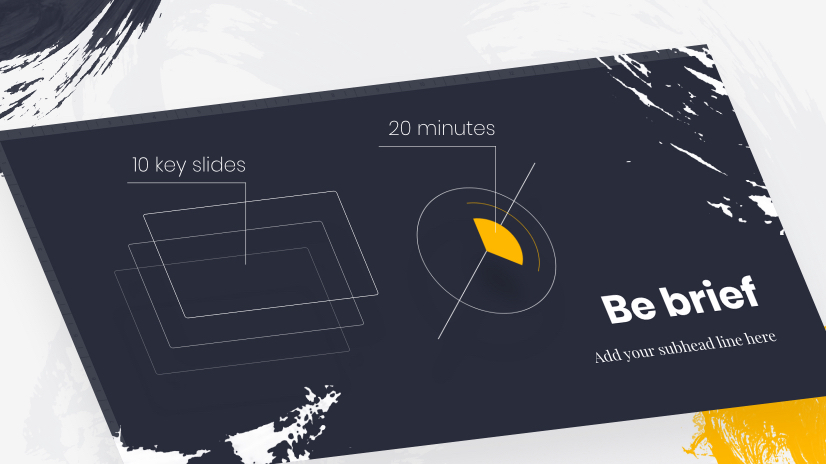
- Ten key slides – Seems harsh and obviously, it’s only a guide but it’s a good guide. This is the optimal number of slides in a Slide Show presentation, as most people don’t cope well with more than ten key ideas in one session.
- Twenty minutes – If your presentation talk is planned for 20 solid informative minutes it’s plenty. You can have a brief intro (but keep it brief) and clearly, it’s flexible for additional questions and discussions but your actual presentation time should be around 20 minutes.
Presentation construction and the presentations themselves are not necessarily dull. These key tips are both general and Google Slide specific. The idea is to create something that will wow your audience, look professional, create a buzz, and most importantly of all – achieve your main goal. Substance and style rather than one over the other.
You and your design are a team, working together to get the information and message across. The design should, of course, look the part and these tips will help you there – but it shouldn’t dominate.
You are a focal point too, and here are some things to remember:
- Have energy – if you are not enjoying it, no one will.
- Practice – eye contact, voice, and gestures, they all go a long way to selling the message and keeping people with you. Practice in front of a mirror, in front of friends and family, even a pet -it makes a difference when you do it in front of an audience – you’ll get the feel.
- Prepare – double-check the equipment, and proofread the presentation (better get it to proofread).
- Feel Comfortable – get there in good time, check the room and facilities, wear clothes you feel good in, it all helps your confidence.
- You can’t please all the people all the time – remember some people will always be bored, and won’t react, hit the majority and you’ll be fine.
These Google Slides tips are exactly that tips, you use what you want, what you think will work for you, and you will work for your audience. The Slides will help, they are the magic wand but you are the one waving it and speaking the magic words.
You may also be interested in these related articles:
- 35 Free Google Slides Infographic Templates to Grab Now
- 39 Free Google Slides Templates For Your Next Presentation
- 70 Inspiring Presentation Slides with Cartoon Designs

Add some character to your visuals
Cartoon Characters, Design Bundles, Illustrations, Backgrounds and more...
Like us on Facebook
Subscribe to our newsletter
Be the first to know what’s new in the world of graphic design and illustrations.
- [email protected]
Browse High Quality Vector Graphics
E.g.: businessman, lion, girl…
Related Articles
Top adobe photoshop alternatives in 2022, how to create a character profile for your brand mascot [+ free character design template], 46 fun facts about google slides that will raise your eyebrows, adobe character animator: everything you need to know + free puppets, composition in design – 15 things you can’t afford not to know, 500+ free and paid infographic templates compatible with google slides:, enjoyed this article.
Don’t forget to share!
- Comments (0)

Lyudmil Enchev
Lyudmil is an avid movie fan which influences his passion for video editing. You will often see him making animations and video tutorials for GraphicMama. Lyudmil is also passionate for photography, video making, and writing scripts.

Thousands of vector graphics for your projects.
Hey! You made it all the way to the bottom!
Here are some other articles we think you may like:
Visual Storytelling: What It Is and How to Do It Right
by Bilyana Nikolaeva

Visuals for Kids : Enhancing Communication and Learning

What Is Data Visualization: Brief Theory, Useful Tips and Awesome Examples
by Al Boicheva
Looking for Design Bundles or Cartoon Characters?
A source of high-quality vector graphics offering a huge variety of premade character designs, graphic design bundles, Adobe Character Animator puppets, and more.
- Slidesgo School
- Google Slides Tutorials
How to Use the Presenter View in Google Slides

Google Slides, like PowerPoint, has different presentation modes that can come in handy when you’re presenting and you want your slideshow to look smooth. Whether you’re looking for slides only, speaker notes or the Q&A feature, in this new Google Slides tutorial, you’ll learn about these and their respective settings. Ready? Then let’s explore the presenter view!
Types of presentation modes in Google Slides
Presenter view, start from beginning, present on another screen.
There are three presentation modes in Google Slides.
If you click the “Slideshow” button or press Ctrl/Cmd + F5, your presentation will start directly without any speaker notes. This is the most widely used and the simplest option.
Next to the “Slideshow” button, there’s a drop-down arrow. Click on it to see the different presentation modes:
In this mode, you’ll be able to see the speaker notes, check the timer and adjust other settings, such as questions from the audience. For more information about the speaker notes, please refer to this Google Slides tutorial .
To view the different tools, after clicking “Presenter View”, move your mouse to the lower left-hand corner of the screen. You’ll see the slide number, previous and next slide arrows and three dots. Click on the dots and here are your options:
Open speaker notes
This enables the speaker notes and makes them visible. If you click this button, you might exit fullscreen mode. To go back to fullscreen, press Ctrl/Cmd + Shift + F or click the “Fullscreen” button. For more information, please refer to this Google Slides tutorial .
Turn on the laser pointer
You’ll see a red dot on the screen, which you can move around to point out any element from your presentation.
Full screen
Click this button (or press Ctrl+Shift+F) to enter or exit fullscreen mode.
Click this button to finish the presentation or just press Esc.
If you click on “Auto-play,” more options will appear: Click “Play” and the slides will advance automatically (by default, every two seconds, but there are other options available. You can also choose to play the slideshow on a loop).
Captions preferences
If you have a mic set up, you can enable captions. Click the drop-down arrow to adjust the size of the text and its position on the screen.
If you click on “more”, you can enable the Audience Q&A panel by clicking on the first option that appears. For more information, please refer to this Google Slides tutorial .
More: Downloads, printing, info and options
Under the “More” tab, you can also choose different download formats for your slideshow or print it out. This tab also contains a handy list of keyboard shortcuts (if you prefer handling keys to using your mouse) and the possibility to report problems.
Your presentation will begin from the first slide (Ctrl/Cmd + Shift + F5).
Your presentation will be shown on a different screen via a media display device, such as Chromecast. This option will be available only if there’s another screen available.

Now you’ve mastered the presenter view in Google Slides, which, with a bit of practice, will be a game-changer! Not only will it make you look like a presentation pro, but it will also streamline the process of nailing those crucial talking points. So go out there and strut your stuff – with presenter view on your side, you are unstoppable! And if you’ve found this tutorial helpful, check out more of them on our blog !
Do you find this article useful?
Related tutorials.

Top 10 tips and tricks for creating a business presentation!
Slidesgo is back with a new post! We want your presentations and oral expositions to never be the same again, but to go to the next level of presentations. Success comes from a combination of two main ingredients: a presentation template suitable for the topic and a correct development of the spoken part. For templates, just take a look at the Slidesgo website, where you are sure to find your ideal design. For tips and tricks on how to make a presentation, our blog contains a lot of information, for example, this post. We have focused these tips on business presentations, so that, no matter what type of company or...

How to present survey results in PowerPoint or Google Slides
A survey is a technique that is applied by conducting a questionnaire to a significant sample of a group of people. When we carry out the survey, we start from a hypothesis and it is this survey activity that will allow us to confirm the hypothesis or to see where the problem and solution of what we are investigating lies.We know: fieldwork is hard work. Many hours collecting data, analyzing and organizing it until we have our survey results.Well, we don't want to discourage you (at Slidesgo we stand for positivism) but this is only 50% of the survey work....

Best 10 tips for webinar presentations
During the last couple of years, the popularity of webinars has skyrocketed. Thousands of people have taken advantage of the shift to online learning and have prepared their own webinars where they have both taught and learned new skills while getting to know more people from their fields. Thanks to online resources like Google Meet and Slidesgo, now you can also prepare your own webinar. Here are 10 webinar presentation tips that will make your speech stand out!

How to create the best presentation for an onboarding process
Slidesgo was once a small project with a handful of people working on it. We’re not making this up! But our passion and effort has brought us to where we are today. In the process, our staff has also grown, and let us tell you: it has grown a lot!Do you remember that time when you were the newly-hired employee? You went to the office and thought that everything was too much for you to handle. Lots of faces you’ve never seen before. Lots of tasks that are suddenly your responsibility. Nearly as much new information as a library could...
How to View Your Presentation in Google Slides: A Step-by-Step Guide
Google Slides is a fantastic tool for creating presentations, whether for work, school, or personal projects. But once you’ve put together your slides, how do you view them as a presentation? It’s simple, just a few clicks and you’re good to go. After reading this brief overview, you’ll have a clear understanding of how to view your presentation in Google Slides.
Step by Step Tutorial: Viewing Your Presentation in Google Slides
Before we jump into the steps, let’s understand what we’re aiming for. Following these steps will allow you to view your Google Slides presentation in full-screen mode, making it look professional and clean for your audience.
Step 1: Open your presentation in Google Slides
Begin by opening the Google Slides presentation you wish to view.
When you have your presentation open in Google Slides, make sure you’re logged into your Google account. This will allow you to access all the features you need to properly view your presentation.
Step 2: Click on the “Present” button
Locate and click on the “Present” button, which is typically found in the top-right corner of the screen.
The “Present” button is usually represented by a play-like icon. Once you click it, your presentation will start from the beginning and you can navigate through your slides using your keyboard or mouse.
Step 3: Navigate through the slides
Use the arrow keys on your keyboard or click to move forward or backward through your slides.
As you navigate through the slides, you can also use the “Escape” key to exit full-screen mode at any time.
After completing these steps, your presentation will be displayed in full-screen mode, allowing you to deliver your content effectively.
Tips for Viewing Your Presentation in Google Slides
- Ensure your internet connection is stable before starting your presentation to avoid any disruptions.
- Familiarize yourself with the keyboard shortcuts for a smoother presentation experience.
- Always preview your slides before presenting to check for any errors or formatting issues.
- Use the speaker notes feature to keep track of what you want to say on each slide.
- Practice your presentation a few times to build confidence and ensure smooth delivery.
Frequently Asked Questions
How do i start my presentation from a specific slide.
To start from a specific slide, simply select the slide you want to begin with and then click on the “Present” button.
Can I use a remote clicker to navigate through my slides?
Yes, many remote clickers are compatible with Google Slides, allowing you to advance through your presentation wirelessly.
Is there a way to loop my presentation automatically?
Yes, you can set your presentation to loop by clicking on the “Slide” menu, selecting “Change transition,” and then checking the “Auto-advance slides” box.
How can I share my presentation with others?
You can share your presentation by clicking on the “Share” button and choosing the appropriate sharing settings for your audience.
Can I present to a remote audience using Google Slides?
Yes, Google Slides allows you to present your slides via video conferencing tools or by sharing a link to your presentation.
- Open your presentation in Google Slides.
- Click on the “Present” button.
- Navigate through the slides.
Now that you’ve got the hang of it, viewing your presentation in Google Slides should be a breeze! Remember, the key to a great presentation is not just in the content but also in the delivery. By following the steps outlined in this article, you can ensure that your presentation looks professional and runs smoothly.
Don’t forget to take advantage of the tips provided, like practicing your presentation and using speaker notes. And if you ever run into any issues, the frequently asked questions section should help clear things up.
As you become more familiar with Google Slides, you’ll find that it’s a highly versatile tool that can aid in creating impactful, engaging presentations. So go ahead, give it a try. Create, present, and wow your audience with your newfound Google Slides expertise!

Matt Jacobs has been working as an IT consultant for small businesses since receiving his Master’s degree in 2003. While he still does some consulting work, his primary focus now is on creating technology support content for SupportYourTech.com.
His work can be found on many websites and focuses on topics such as Microsoft Office, Apple devices, Android devices, Photoshop, and more.
Share this:
- Click to share on Twitter (Opens in new window)
- Click to share on Facebook (Opens in new window)
Related Posts
- How to Add a New Slide in Google Slides: A Step-by-Step Guide
- How to Make Google Slides Vertical (5 Quick Steps)
- How to Delete Multiple Slides in Google Slides: A Step-by-Step Guide
- How to Add a Hyperlink on Google Slides
- How to Print 4 Slides Per Page in Google Slides: A Step-by-Step Guide
- How to Do a Powerpoint Google Slides Presentation Conversion
- How to Rotate a Powerpoint Slide Presentation
- How to Download a Google Slides Presentation as a Powerpoint File
- How to Insert a Google Slides Page Number: Step-by-Step Guide
- Can You Print a Google Slide?
- How to Save a Slide from Google Slides as a Picture: A Step-by-Step Guide
- How to Delete a Slide in Powerpoint 2010: Step-by-Step Guide
- How to Hide a Slide in Powerpoint 2010: A Step-by-Step Guide
- How to Remove Slide Numbers in Powerpoint 2019: Easy Steps
- How to Make a Powerpoint Slide Vertical in Powerpoint 2013: A Step-by-Step Guide
- How to Exit Slide Master View in Powerpoint 2010: A Step-by-Step Guide
- How to Bring an Image to the Front in Google Slides
- How to Show Speaker Notes in Google Slides: A Step-by-Step Guide
- How to Add Page Numbers in Powerpoint 2010: A Step-by-Step Guide
- How to Hide the Speaker Notes in Google Slides: A Step-by-Step Guide
Get Our Free Newsletter
How-to guides and tech deals
You may opt out at any time. Read our Privacy Policy
How-To Geek
How to autoplay and loop a google slides presentation.
Play your presentation without touching a thing.
Quick Links
Set up autoplay and loop when presenting, set up autoplay and loop when publishing to the web.
If you don't want to worry about clicking through your slideshow, you can set up Google Slides to play your presentation automatically. Plus, you can have the slideshow loop, so it starts over at the beginning when it ends.
You might be playing your slideshow at a kiosk, during a conference, or publishing it to the web. These are the ideal times to use AutoPlay and Loop in Google Slides . You can automatically present the show and choose the timing between slides. Then, restart the presentation at the beginning each time it ends.
If you plan to start the slideshow and then let it play, you can set up AutoPlay and Loop , or simply one or the other.
Related: How to Loop a PowerPoint Presentation
Start the presentation by clicking "Slideshow" at the top of Google Slides. You can also use the arrow to pick either "Presenter View" or "Start From Beginning" per your preference.
When the slideshow opens, display the Presenter Toolbar by hovering your cursor over the bottom left corner of the presentation.
Click the three dots on the right of the Presenter Toolbar, then move to AutoPlay. You'll see a pop-out menu that lets you select the advance timing for the slides. You can pick from every second up to every minute.
If you also want to loop the slideshow, select "Loop" at the bottom of the pop-out menu.
When you finish, click "Play" to automatically play your presentation.
To stop the slideshow, simply click on a slide. You can then resume AutoPlay from the Presenter Toolbar by selecting "Play" again.
Maybe you plan to publish your slideshow to the web or embed it on a website rather than play it locally. You can set up AutoPlay and Loop as part of the publish settings.
Related: How to Share a Google Docs, Sheets, or Slides File as a Web Page
Go to File > Publish to the Web in the menu.
Choose either "Link" or "Embed" per your intent. Then use the Auto-Advance Slides drop-down box to choose the timing for the slides. Here again, you can pick from every second up to every minute.
To loop the slideshow, check the box for Restart the Slideshow After the Last Slide.
You can then mark the checkbox for Start Slideshow as Soon as the Player loads if you like, so that the viewer doesn't have to take any action to begin the presentation.
When you finish, click "Publish" and confirm to obtain the link or embed code for the slideshow.
To share a Google Slides presentation that doesn't require you to walk viewers through it, remember these steps to automatically play and loop the slideshow.
TechRepublic
Account information.

Share with Your Friends
How to Record a Video Presentation With Google Slides
Your email has been sent

Google Slides now lets you record a presentation with inset video from your webcam. Each recording may be a maximum of 30 minutes long. No longer do you need to turn to a third-party tool or web meeting app, such as Google Meet , to record a presentation. Instead, you can start and finish the task with nothing more than Google Slides on a laptop.
As of March 2024, slide recordings may be made by customers who use Google Workspace Business Standard or Plus; Enterprise Starter, Essentials, Essentials Plus, Standard or Plus; and Education Plus editions.
How to make a basic slide recording in Google Slides
To create a slide recording, you’ll need to use Google Chrome on a computer that has a camera and microphone.
- Go to Google Slides and open your presentation.
- Select the Rec button in the upper right area, then select the Record new video button ( Figure A ).
The system will switch to the screen recording interface, with recording controls displayed below your slides. By default, the system will display your inset (picture-in-picture) video in medium size in the lower right corner of a slide, since this portion of a slide is often empty.

- Optionally, before you start recording, you might adjust three settings:

- Modify the size of the inset video frame. Select the size icon, found to the right of the video inset location icon, then choose either a small, medium or large video frame size.
- Open speaker notes with the button found to the immediate left of the back slide (<) icon. This will display speaker notes for your reference while recording. (Ideally, you would not need to refer to speaker notes, so that you could instead look directly at the camera as you record.)
- When you are ready to record, select the large red button at the bottom of the screen.
- If prompted, you may need to allow access ( Figure C ) to the tab, along with the camera and microphone. For example, when recording on a Chromebook, you may be prompted to “Allow docs.google.com to see this tab?” and “Also allow tab audio.” Select Allow, if prompted.

In a few cases, you may need to visit the following links in Chrome to adjust permissions for:
- Camera: chrome://settings/content/camera.
- Microphone: chrome://settings/content/microphone.
- A brief countdown should display (i.e., 3, 2, 1), then your recording will begin. Record your video, advancing your slides as desired.
- To pause recording, press the large red button at the bottom of the screen.
- Once paused, you may select from two options ( Figure D ):

After you select Save to Drive, wait a bit until the system indicates the file has been saved. If you leave or close the tab too soon, you may lose your recording.
How to select inset video shapes and sizes
On any slide, you may use the Insert | Speaker spotlight option ( Figure E ), then select a shaped video frame. This inserts a frame where the speaker video will display on that slide. You may reposition or resize the frame: Select the shape, and then drag-and-drop it to move it to a different place on your slide, or select a corner and drag it to resize it.

When you insert a speaker spotlight shape, that supplants the position and size you might have selected on a basic recording. In other words, the speaker’s video will display in one of the corners or the center, and in the small, medium or large shape chosen with the settings — unless you’ve inserted a speaker spotlight shape on a page ( Figure F ). Use the speaker spotlight option to convey the most polished professional effect, since it allows precise control over the shape, size and location of a video frame.

How to play, share and manage slide recordings
You may access slide recordings within Google Slides on a computer. However, unlike recording, which requires you to use Google Chrome, you may access and play existing recordings within Google Slides on a variety of modern browsers. For example, the following steps all work when you use Google Slides within either Google Chrome or Apple’s Safari browser.
To access recordings associated with a Google Slides presentation, follow these steps.
- Select the Rec button in the upper right area. The recordings you’ve made of the presentations will display. Importantly, the system shows both the date and duration of each recording.
- To view, share or download a recording, click anywhere on the playback icon or title of the recording ( Figure G ). It should open in a new tab. Within this tab, you might:
- Select the Play icon in the center of the video image to play the recording.
- Select the Share button in the upper right corner of the screen to modify access settings and give other people access to the file.
- Select the Download icon in the down arrow above a tray icon in the upper right area of the screen to download the file.

- Select the three dot menu to the right of a listed recording to:
- Rename a file something other than the default recording title.
- Remove a previously made recording you no longer need.
- Copy link and obtain the Google Drive URL for the recorded file.
All Google Slides recordings are stored in a Slides recordings folder on Google Drive. The recordings are saved as .webm files, which is a widely supported web video format. You may easily open and play .webm files on both Apple and Android mobile phones. Any recordings you make using Google Slides should be easy to view on almost any device.
Does the ability to record a presentation within Google Slides streamline your workflow? What sorts of video presentations will you create with this new capability? Mention or message me on X ( @awolber ) to let me know how you use screen recording within Google Slides.
Subscribe to the Google Weekly Newsletter
Learn how to get the most out of Google Docs, Google Cloud Platform, Google Apps, Chrome OS, and all the other Google products used in business environments. Delivered Fridays
- How to share video with Google Sites
- How to present Google Slides in Google Meet
- Prezi announces Google Slides integration
- Google Meet: A cheat sheet to the app and platform features
- Google Meet: 3 presenter controls for smoother presentations
- Best software for businesses and end users

Create a TechRepublic Account
Get the web's best business technology news, tutorials, reviews, trends, and analysis—in your inbox. Let's start with the basics.
* - indicates required fields
Sign in to TechRepublic
Lost your password? Request a new password
Reset Password
Please enter your email adress. You will receive an email message with instructions on how to reset your password.
Check your email for a password reset link. If you didn't receive an email don't forgot to check your spam folder, otherwise contact support .
Welcome. Tell us a little bit about you.
This will help us provide you with customized content.
Want to receive more TechRepublic news?
You're all set.
Thanks for signing up! Keep an eye out for a confirmation email from our team. To ensure any newsletters you subscribed to hit your inbox, make sure to add [email protected] to your contacts list.
Home Blog Google Slides Tutorials How to Share a Google Slides Presentation
How to Share a Google Slides Presentation

Google Slides provides various methods to share your presentation with different levels of privileges. You can share your Google Slides templates and presentations online, which helps lessen the need to carry your PC around to deliver a presentation.
In this article, we will present different methods for sharing Google Slides in different formats: viewers and editing modes. Please keep in mind that this procedure can also be used for any PowerPoint templates you might have uploaded to Google Slides.
How to Share via Google Slides
Google Slides has a Share button that provides sharing options to set the access level, generate a sharing link, and email the slide deck to recipients.

Once you click the button, a dialog box will appear. You can enter the email addresses of people you want to share the slide deck with select editing privileges (Viewer, Commenter, or Editor). To directly email someone the slide deck with a selected level of access, simply enter their email address with optionally a message and click Send . Alternatively, copy the link with your selected level of access to share with others via different mediums such as WhatsApp, Facebook Messenger, Microsoft Teams, email, etc.

By default, Google Slides has restricted access; however, you can make it available to anyone with a specific link to make the slide deck unrestricted.

This unrestricted link can be sent by entering an email or by copying the link and sharing it with the recipient(s).

To refine the access, go to the cog icon ( Settings ) via the Share menu to see the access level information and adjust the settings. From here, you can disable change and sharing permissions by Editors and turn off download, print, and copy for Viewers .

You can also publish your presentation via File -> Share -> Publish on the web .

Publishing your presentation online via a link or embed code can be shared and embedded on a website for others to see.

Final Words
While you can share Google Slides in normal mode, if you’re wondering how to share Google Slides in presentation mode, it can’t be done directly. You can download the document as a PowerPoint or PDF file in presentation mode that can be shared later. However, you can’t directly generate a link or email the presentation until you exit presentation mode.
Alternatively, you can publish your slides on the web and share the link with your audience. However, it’s best to share the link with the audience beforehand if you wish to allow them to view the slide deck as you present your slides.

Like this article? Please share
Google Slides, Presentation Tips Filed under Google Slides Tutorials
Related Articles

Filed under Education , Presentation Ideas • January 1st, 2024
How to Create Presentations with AI using ChatGPT
We tested ChatGPT for helping us create better presentations. Join us in this article to know a first-hand experience on AI content generators and their potential role for presenters.

Filed under Presentation Ideas • December 21st, 2023
Presentation Aids: A Guide for Better Slide Design
Learn how we can elevate the quality of our speech by introducing presentation aids. A detailed guide explaining each type, tactics and more.

Filed under Google Slides Tutorials • December 20th, 2023
How to Convert PDF to Google Slides
Tired of piling up PDF presentations without any future use? Why not learning how to convert those PDFs into Google Slides format. Follow this tutorial for detailed instructions in this process.
Leave a Reply

Google Slides: How to change the size of your presentation slides
G oogle Slides has an impressive number of templates for creating beautiful presentations. It's been the go-to choice for many users who don't use Microsoft PowerPoint and an easy-to-access alternative for well-equipped Chromebooks . If your slides are too small or too wide, they may not scale well to the content shown on the screen. This guide teaches you how to change the size of the slides in your Google Slides presentation on a browser to ensure you use the correct size.
What's the difference between Google Slides templates and themes?
Which size works best with google slides.
It depends on where the presentation is viewed. Most computers use a 16:9 aspect ratio, but mobile devices prefer a 4:3 ratio. If unsure, test the slideshow on multiple devices and decide which gives the most optimal viewing experience.
How to resize your Google Slides on a Windows computer
You can decide the size of your slides before creating your presentation. Alternatively, open an old presentation and choose to resize your slides. Check the steps below to get started.
Changing Google Slides size on a new presentation
- Open a web browser and sign in to Google Slides .
- Go to File .
- Click Page setup .
- Click the drop-down box in the Page setup window to select the aspect ratio. Choose Standard 4:3 , Widescreen 16:9 , Widescreen 16:10 , or Custom .
- After making your selection, click Apply .
All the slides maintain the same aspect ratio you selected. If you're uncertain whether any default options suit your presentation, tweak the ratio by choosing Custom .
Changing Google Slides size on a saved presentation
- Navigate to File > Open .
- Select a saved Google Slides presentation and click Open .
- In the opened Google Slides presentation, go to File and select Page setup .
- In the Page setup window, choose another aspect ratio option from the drop-down menu and click Apply .
After swapping the aspect ratio, you may need to adjust your Google Slides presentation. In this example, we swapped the aspect ratio from Standard 4:3 to Widescreen 16:9, which changes the alignment of images and text on each slide.
How to resize your Google Slides on a Chromebook
You're likely sticking to Google's ecosystem while working on a Chromebook. Google Slides becomes an essential tool when building a presentation. Google Slides works like the Windows computer version, so changing the slides' size is simple. Here's how to do it:
- On a Chromebook, open Google Slides on a Chrome tab.
- Start a new presentation or open an existing one by going to File > Open .
- Click File > Page setup .
- In the Page setup window, select the drop-down box and choose Standard 4:3 , Widescreen 16:9 , Widescreen 16:10 , or Custom .
- Click Apply .
The Google Slides app works on Chromebooks but has the same (limited) functionality as the mobile app (the app you download from the Google Play Store is the Android app ported to Chromebooks).
How to expand the size of your Google Slides presentation
Sometimes, presentations can start in the wrong view. Fullscreen mode ensures the set aspect ratio of the slideshow remains the same on the screen. However, the audience may see another view if you select the wrong mode before starting your presentation. The view you can accidentally click is Presenter View.
Inside Presenter View, the audience sees a fullscreen presentation of your Google Slides (if presented on a different screen), while you see the speaker notes written below the slides and some settings. Seeing a busier screen can distract the speaker, especially if the slides remain in autoplay . As a result, you may prefer to set up fullscreen mode. Below are the steps to ensure your Google Slides start in fullscreen mode.
How to enter fullscreen mode on Google Slides
- Open a saved Google Slides presentation on your computer.
- Click the arrow at the bottom of the Slideshow button and select Start from beginning .
Clicking the Slideshow button also puts your presentation in fullscreen mode.
How to resize your Google Slides on mobile
The slide size in Google Slides on the Android and iOS mobile apps cannot be manually changed. To get around this, open Google Slides on a computer and follow the steps above to adjust the size of your slides.
Revamp your Google Slides presentation
Does your current Google Slides presentation need a boost? Check out the best templates for Google Slides . Spice up your presentation to look more professional or change it to something more colorful and snappy. Google Slides also supports audio files from your Google Drive, so add audio to keep your audience engaged. Google Slides has several tools to make your slideshow stand out.

Android Police
How to convert a pdf to google slides.
From static to dynamic, converting PDFs to Google Slides
You can display PDFs as-is by sharing your new Chromebook's screen with your audience, but scrolling through pages isn't engaging. With a little touch-up in Google Slides, you can make a great presentation out of a PDF file. This step-by-step guide shows you how to convert a PDF to Google Slides to keep your audience engaged.
Google Slides: Perfect for collaborative presentations
With Google Slides, part of Google's free online office suite, creating and sharing presentations has never been easier. You can access it anywhere through a web browser, Android and iOS mobile apps, or a ChromeOS desktop.
Thanks to its compatibility with Microsoft PowerPoint, it's one of the best presentation tools. Moreover, every edit is recorded in a detailed revision history, so you and your team can work on presentations simultaneously. Each editor has its own colors and cursors, plus a permissions system to make teamwork easier.
The benefits of choosing Google Slides over PDFs for Presentations
While PDFs are popular for their ease of shareability and compact nature, they can be limiting for presentations. Google Slides offers a compelling way to present projects with engaging visuals and annotations.
What's more, PDFs hinder real-time teamwork on crucial projects, whether in business or academia. Google Slides solves this, allowing access and collaboration from any device, anywhere, as long as you're connected to your Google account.
The best Google Slides templates for work, school, and home
Converting pdf to powerpoint for google slides.
Since Google Slides doesn't support inserting a PDF, you must convert your PDF file to a PowerPoint file. This may change the formatting, but you can adjust the PowerPoint file as needed.
You can use several tools, such as PDFelement for Windows or Mac. Many online website tools like ILovePDF and CloudConvert convert files without installing an app. For demonstration purposes, we use CloudConvert.
- Visit the CloudConvert website at cloudconvert.com .
- Go to the Presentation menu, select PDF as the input format, and select PPT or PPTX as the output format.
- Upload the PowerPoint file to Google Slides and edit it.
If your PDF is in Google Drive, add CloudConvert to your Google Workspace. With it, you can open and convert PDF files from your Google Drive. You can also open the file with Google Slides after the conversion. Here's how to get it done:
- Navigate to the file you wish to convert from your Google Drive and right-click it.
- Select your Google account to link it with CloudConvert.
- Click Convert to start the conversion process from PDF to PowerPoint.
After conversion, you can open the downloaded file in Google Slides if you initiated the conversion from Google Drive. This step allows you to bypass the manual download and upload process, streamlining your workflow.
Converting PDF to images for Google Slides
If editing the text in your converted files isn't a priority, convert your PDFs into images and insert them into your Google Slides presentations. The easiest way to do this is with software like Adobe Acrobat or alternative online tools.
This keeps the original formatting of your PDFs when inserting them into Google Slides. For this tutorial, Adobe Acrobat is our tool of choice. Here's a step-by-step guide to converting your PDFs into images:
- Navigate to the Adobe Acrobat Convert PDF to JPG online tool.
- Download the ZIP file that contains your newly converted JPG images.
- Unzip the file to access your images. Choose a designated folder for easy access.
- Navigate to where you unpacked your images and select the ones to include in your slides.
You can also add your converted images from Google Drive or another online platform.
Convert PDFs to Google Slides by sharing them as links
You can insert the PDF file as a link in Google Slides. End users can use the hyperlinked image or text in your presentation as a reference point to view the PDF file. You can do this by following these steps:
- Copy the shared link provided by Google Drive.
- Select the element (for example, an image or text) you want to hyperlink. Then, click the Insert menu, choose Link , and paste the copied URL into the field. Alternatively, after selecting the element, use the shortcut Ctrl + K ( Cmd + K on Mac).
Take your presentations to the next level with AI tools
Now that you know how to convert a PDF to a Google Slides presentation, put your skills to the test and brag in front of your peers. Generative AIs like Google Gemini can make your presentations look even better, resulting in an informative and eye-catching presentation that leaves a lasting impression.
Google Slides
How to Lock an Image or an Object in Google Slides?

Table of Contents
Google Slides, a helpful online presentation tool, keeps adding new features to make slides better. One new feature they’ve added lets you lock images and objects in place, which means they won’t move around by mistake when you’re working on a presentation with others.
Locking objects in Google Slides is a great way to keep your slides looking just the way you want them. It helps prevent things like text, pictures, or other design elements from getting changed accidentally when you’re working together on a presentation.
This feature makes it easy for you to keep your slides neat and tidy, so your message comes across clearly. Google has made it simple to use, and we’ll show you how to lock images or objects step by step in this blog.
Why Do You Need to Lock an Image or Object in Google Slides?
There are a few key reasons why you might want to lock an image in Google Slides.
Primarily, it’s about keeping your image exactly where you want it. This prevents accidental movements if you or someone else is editing the slide. Locking also allows you to use an image as a fixed background layer, letting you place text and other elements on top without accidentally moving the image itself.
Finally, locking images is essential if you’re creating a template in Google Slides, as it ensures important design elements remain in place and helps guide anyone using the template.
How to Lock an Image in Google Slides: Taking a Look at the Best 3 Methods
Locking images or objects is super simple and handy for users. You can do it in three different ways when working on your Google Slides presentation :
- Use the Master Slide to lock an object
- Group objects together to lock them
- Turn an image into a background to lock it in place
Method 1 – Lock an Object Using the Master Slide
Want to make sure specific objects or images stay put in your Google Slides presentation? This method utilizes the Master Slide to effectively lock down elements, preventing accidental edits and maintaining a consistent layout throughout your work. Follow these steps to achieve this:
Step 1 : Open your presentation in Google Slides.
Step 2 : Click on “Slide” and then “Edit theme.”
Step 3 : Right-click on any layout and choose “Duplicate Theme.” This makes a copy of the layout that you can change.
Step 4 : Paste any object you want to keep in place onto the duplicated layout. You can also adjust its appearance and position.
Step 5 : Click the “X” to finish editing the layout.
Your objects or images are now locked. They can’t be moved or deleted unless you make changes to the Master Slide.
Method 2 – Lock Multiple Objects by Grouping Them
While the Master Slide approach is ideal for individual elements, you might need to lock down a group of objects working together. This method utilizes the “grouping” functionality to create a collective unit that remains unmovable across your slides. Follow these steps to achieve this:
Step 1: Open your presentation in Google Slides and go to the slide with what you want to group.
Step 2: Click and hold the “Shift” key on your keyboard.
Step 3: Click on each item you want to group.
Step 4: Once you’ve selected them all, right-click on one of them.
Step 5: Choose “Group” from the menu that pops up. You can also use a keyboard shortcut “Ctrl+Alt+G” to group the selected objects.
Step 6: To ungroup them later, right-click again and select “Ungroup.” You can also press “Ctrl+Alt+Shift+G” to ungroup them.
Remember, when you lock things in your Google Slides, it’s like making them stay put. Grouping them is good if you don’t want to change a bunch of stuff at once. Just make sure everything is spaced out right before you lock it.
Method 3 – Lock an Image Using it as a Background
While it’s not technically possible to “lock” an image as a background in Google Slides, there are alternative methods to achieve a similar effect, preventing accidental edits and keeping the image in place. Here’s how:
Step 2 : Go to “Slide” and choose “Change Background.”
Step 3 : Click “Choose Image” to pick a picture from your computer, Google Drive, or the internet. You can also use one of Google’s photos.
Step 4 : Select the background you like.
Step 5 : Click “Insert” to add the image to your slide background.
Now, your slide’s background image will be locked.
How to Lock Aspect Ratio in Google Slides?
Step 1 : Choose the image on your slide.
Step 2 : Go to “Format options.”
Step 3 : In the “Size & Rotation” section, check the box that says “Lock aspect ratio” to keep it on.
Step 4 : To unlock it, simply click on the checkbox again to remove the checkmark.
Benefits of Adding a Lock to an Image in Google Slides
1. Preserving Design and Avoiding Mishaps: During editing, especially in collaborative settings, images can be accidentally moved or resized, disrupting your layout and design. Locking the image ensures it stays in its intended location, maintaining visual consistency and preserving your design integrity .
2. Facilitating Seamless Collaboration: Sharing presentations often involves granting editing access to others. Locking crucial images prevents unintended modifications, ensuring your core message remains clear and visuals stay consistent. This also streamlines the editing process, as collaborators can focus on specific content areas without accidentally altering the layout.
How do you lock content in Google Slides?
You can lock content in Google Slides easily. Just click the lock icon on the toolbar or press CTRL+SHIFT+L.
How do you unlock an object in Google Slides?
Unlocking a locked object in Google Slides is straightforward:
- Select the locked object.
- Right-click to open the context menu.
- Choose the “Unlock” option that matches the type of lock applied.
Can I edit objects once they’re locked?
Yes. You can unlock an image or object to make changes. Here’s how:
- Individual Objects Right-click the object and select “Unlock”.
- Master Slide Elements: Edit the Master Slide to make changes.
Will locked objects show up in presentations?
Yes, locked objects will still be visible during a presentation. Locking them only stops you from changing their appearance or position on the slide.
Can I lock multiple images or objects at once?
Yes! Here are a couple of ways:
- Grouping: Select the objects, right-click, and choose “Group.” This creates a single unit that can be locked.
- Master Slide: Anything added to the Master Slide layout will be locked across all slides using that layout.
How do I lock an image on just one slide in Google Slides?
There’s no direct “lock” for individual slides. Here’s the best workaround:
- Take a screenshot of the slide.
- Set the screenshot as the slide’s background image. This makes all elements uneditable.
Is there a way to lock everything on a Google Slide?
No, there’s no single-click “lock all” option.
Save Time and Effortlessly Create Presentations with SlidesAI

Brilliant Minds. Breakthrough Discoveries.
Explore the 2024 GTC AI conference.
Thank You for an Amazing GTC
The GTC AI conference is over, but registrants still have exclusive access to on-demand sessions through April 8. From the highly anticipated keynote by NVIDIA CEO Jensen Huang to over 900 inspiring sessions, 300+ exhibits, 20+ technical workshops, and tons of unique networking events, GTC delivers has something for every technical level and interest area.
Jensen Huang | Founder and CEO | NVIDIA
Don’t miss this transformative moment in ai.
Watch Jensen Huang’s keynote as he shares AI advances that are shaping our future.

GTC Keynote | Monday, March 18 | 1–3 p.m. PDT
Watch Jensen Huang live on-stage at the SAP Center as he shares AI advances that are shaping our future.
*In-person registration is required.
Check Out Sessions Chosen Just for You
- Robotics in the Age of Generative AI
Learn how gen AI is revolutionizing automated common-sense reasoning, task planning, and perception, as well as synthetic data generation...
- Insights From NVIDIA Research
The talk will feature a wide variety of highlights from NVIDIA Research over the past year.
- Accelerating Automotive Workflows With Large Language Models
This session will demonstrate and discuss LLM solutions for vehicle engineering, connected vehicle analytics, manufacturing, legal...
- Intellectual Property Challenges in the Age of Generative AI
Generative AI is challenging traditional concepts of intellectual property rights for content and emerging technology, including copyright, trade...
Digitalizing the World's Largest Industries With OpenUSD and Generative AI
Every industry has an opportunity to leverage the 3D internet to accelerate their path to automation and digitization. Hear this panel of...
Regulating AI: Global Perspectives
Governments around the world are grappling with how to regulate the development, deployment, and use of AI. This panel explores different...
Lessons from a Year of Bringing Runway's Video-Generation Models From Research to Production
We'll describe the journey of bringing Runway's Gen-1 and Gen-2 video generation models to production. We’ll start with the research efforts...
Machine Learning has Taken Weather Forecasting by Storm. How About Climate Modeling?
Machine learning may soon become a backbone of climate modeling, saving time and money and making reliable, customized, local climate...
- The Magic of Innovation: A Conversation With Disney Studios' CTOs
- Lessons from a Year of Bringing Runway's Video-Generation Models From Research to Production
- Machine Learning has Taken Weather Forecasting by Storm. How About Climate Modeling
See the Transforming AI Panel, Hosted by Jensen Huang
See the transformer ai panel, hosted by jensen huang.
Don't miss unique insights from all eight authors of Attention Is All You Need , the groundbreaking paper that introduced transformers to the world and revolutionized AI.
The panel is moderated by NVIDIA CEO Jensen Huang , and features
- Ashish Vaswani and Niki Parmar , Essential AI
- Noam Shazeer , Character.AI
- Jakob Uszkoreit , Inceptive
- Llion Jones , Sakana AI
- Aidan Gomez , Cohere
- Lukasz Kaiser , OpenAI
- Illia Polosukhin , NEAR Protocol
The panel is moderated by NVIDIA CEO Jensen Huang , and features Ashish Vaswani and Niki Parmar , Essential AI, Noam Shazeer , Character.AI, Jakob Uszkoreit , Inceptive, Llion Jones , Sakana AI, Aidan Gomez , Cohere, Lukasz Kaiser , OpenAI, Illia Polosukhin , NEAR Protocol.
Check Out These Groundbreaking Panels
")
The Big Bang of Universal Scene Description (OpenUSD)
Hear a panel of distinguished technical leaders from Pixar, Adobe, Apple, Autodesk, and NVIDIA discuss the potential of OpenUSD across industries.

Driving Enterprise Transformation: CIO Insights on Harnessing Generative AI's Potential
See an esteemed panel of chief information officers discuss how they use generative AI in their organizations. Hear how they structure AI and transformation programs, acquire essential skills, and establish guardrails for data...

AI-Driven Drug Discovery: Unravelling Biological Complexities
Exploring the intersection of biology and artificial intelligence, this panel delved into the transformative role of AI in drug discovery—from graph machine learning to large language models.

Driving Innovation: Generative AI and Industrial Digitalization in the Automotive Industry
Join senior leadership from renowned automotive companies, including Jaguar Land Rover, Waabi, and Wayve as they discuss their experiences in incorporating generative AI and industrial digitalization across their organizations.

The Role of Generative AI in Modern Medicine
This panel will explore how generative AI technologies aren't just tools, but critical drivers for redefining healthcare delivery, discovering new medicines, and enhancing patient outcomes.

Governments around the world are grappling with how to regulate the development, deployment, and use of AI. This panel explores different policy and regulatory approaches being considered and how companies should interpret this rapidly shifting...

Every industry has an opportunity to use the 3D internet to accelerate its path to automation and digitization. Hear this panel of major enterprise leaders and luminaries provide an update on their industrial metaverse projects—what...

Retrieval Augmented Generation (RAG): Overview of Design Systems, Data, and Customization
Discover the potential of RAG systems with NVIDIA technologies. They combine information retrieval and generative models by referencing relevant document passages from a large corpus, and then using them as context for...

AI Secrets I Wish I Knew
Our esteemed panel—consisting of seasoned professionals, educators, and academic researchers—will shed light on the transformative role of generative AI in shaping contemporary educational practices. With a focus on sharing valuable...
Hear Big Ideas From Global Thought Leaders

Joelle Pineau
Vice President of AI Research

Brad Lightcap
Chief Operating Officer

Vincent Vanhoucke
Distinguished Scientist and Senior Director of Robotics
Google DeepMind

Sequoia Professor of Computer Science & Denning Family Co-Director, Stanford Institute for Human-Centered AI (HAI)
Stanford University

Igor Babuschkin

Arthur Mensch
Chief Executive Officer

Salesforce AI

Sébastien Bubeck
Vice President
Microsoft GenAI
Diamond Elite Sponsors
Diamond sponsors, learn, connect, and be inspired, get hands-on training.
Want to develop key skills in AI, accelerated data science, or accelerated computing? Get hands-on instructor-led training from the NVIDIA Deep Learning Institute (DLI) and earn a certificate showcasing your subject-matter expertise.
Get hands-on training.
Want to develop key skills in AI, accelerated data science, or accelerated computing? Get hands-on instructor-led training from the NVIDIA Deep Learning Institute (DLI) and earn a certificate demonstrating subject matter competency.
Access SDKs, Training, and Connect With Experts Events
Take advantage of 600+ SDKs, AI models, free training, forums, and tech resources to accelerate your work and advance your skills.
Accelerate Your Startup
Explore training, expert panels, and presentations from leading AI startups who are disrupting key markets with GPU-accelerated applications. All presenters are members of NVIDIA Inception , the leading acceleration platform for AI, data science, gaming, HPC, and other advanced industries.
See What Attendees Say About GTC
It is always amazing to hear about the rapid development that is paving the way for more exciting AI/ML innovation
— GTC attendee
The company's GTC has always been a platform to promote its hardware for the AI world—now it's practically a celebration of how well-positioned NVIDIA is to take advantage of this moment.
— Devindra Hardawar, Engadget (U.S.)
GTC gives enormous insights into the development of new technology. It gives a broader idea about what is coming in the near future and prepares one for adopting new technologies.
[NVIDIA] is going all in on AI technology at its GTC 2023 developer conference, rolling out new services and hardware geared toward powering a host of AI offerings set to capitalize on the frenzy surrounding generative artificial intelligence.
— Dan Howley, Yahoo Finance (U.S.)
GTC registration is now closed. Current registrants will have exclusive access to sessions through April 8.

Add To Calendar
Share gtc 2024.
The Conference for the Era of AI
- Workshops & Training
- Connect With the Experts
- Peer Networking
- Bring Your Teams
- Session Catalog
- Schedule at a Glance
- Sponsors & Exhibitors
- Exhibit Hall
- Poster Gallery
- Travel Info
- Code of Conduct
- Privacy Policy

- Manage My Privacy
- Do Not Sell or Share My Data
- Terms of Service
- Accessibility
- Corporate Policies
- Product Security
- Help Center
- Google Docs Editors
- Privacy Policy
- Terms of Service
- Submit feedback
- Google Slides
Use slides recording in Google Slides
You can only record your presentations in Google Chrome Browsers. However, you can view, share, and delete recordings from any browser.
Record a slideshow
- There's a 30-minute limit to every recording.
- Information about Slides recordings isn't available in Revision History.
- If you exceed your Drive Storage quota, you can’t create more recordings.
- You must have edit access to the slides in order to create a new recording.
- To open your presentation, go to Google Slides .
- To start over, pause and click Re-record .
- To save your recording, pause and click Save to Drive .
Find your recording
- On your computer, go to Google Slides .
- Open the presentation where you created the recording.
- Select your recording from the list that appears.
Tip: Recordings are saved into a My Drive folder called Slides recordings.
Share your recording
Recordings can be shared to collaborators on the document immediately after creation.
- To share your recording, click the title of the recording from the list.
- The video in the full-screen player layout appears.
- Select the user, audience, or URL visibility rules.
Tip : Alternatively, you can share a recording like you would share any file in Drive. Learn how to share files from Google Drive .
Remove a recording
- If you created the recording, you also have the option to move the recording file in Drive to Trash. If the recording in Drive isn't moved to Trash, the recording stays visible in Drive to anyone with access.
- If you didn't create the recording, it's still visible in the creator's Drive and anyone to with access.
Use external device
You can use a microphone or camera that isn't built into your computer, such as a USB-based external camera or wireless earbuds.
To get started, set up your camera or microphone device like you would normally use it with your computer.
- Open your presentation.
- When the recording studio opens, at the bottom toolbar, click Settings .
- If your external microphone or camera is available, it's listed in the dropdown of devices available to use while recording.
Troubleshoot camera & microphone
When you create a Slides recording for the first time, it asks for a series of permissions to use the camera and microphone of your computer.
Tip: Camera and microphone access isn't required to start recording.
If you decide not to grant access to your camera or microphone, you can change it later.
- On your computer, open Chrome.
- chrome://settings/content/microphone
- chrome://settings/content/camera
- Adjust the settings to grant access.
Need more help?
Try these next steps:.
Using Google products, like Google Docs, at work or school? Try powerful tips, tutorials, and templates. Learn to work on Office files without installing Office, create dynamic project plans and team calendars, auto-organize your inbox, and more.
IMAGES
VIDEO
COMMENTS
Step 2: Edit and format a presentation. You can add, edit, or format text, images, or videos in a presentation. Insert and arrange text, shapes, and lines; Add, delete & organize slides; Add animations to a slide; Step 3: Share & work with others. You can share files and folders with people and choose whether they can view, edit, or comment on ...
This Google Slides tutorial for beginners is a complete crash course, taking you by the hand and showing you step by step how to make some amazing and mesmer...
How to Create a Blank Presentation. Now that you have a Google account, it's time to create your first presentation. Head over to Google Slides and place the cursor on the multicolored "+" icon in the bottom-right corner. The + turns into a black pencil icon; click it. Pro Tip: Type.
Use Google Slides to create online slideshows. Make beautiful presentations together with secure sharing in real-time and from any device.
Community Answer. 1) Go to drive.google.com and log in. 2) Click the blue "New" button toward the top left corner of the page. 3) Select "Google Slides" next to the orange icon on the drop-down menu. 4) Drive will open your new presentation. Just start editing!
Rename your presentation—Click Untitled presentation and enter a new name.. Add images—Click Insert Image to add images from your computer, the web, Google Drive, and more. You can also move, delete, or resize images. Add text—Click Insert Text box to add new text boxes. Then, click a text box to enter text. You can move, delete, or re-size text boxes.
How to Use Google SlidesGoogle Slide is a powerful presentation tool from Google to help you create slideshows and presentations.It's part of Google Drive an...
This is a complete overview of All the options and features of Google Slides. Slides is Google's answer to presentation Software. It's fast, cloud based, wor...
Quickly learn how to create and edit a presentation, move to Slides from another online presentation processor, and more. Get started with Slides Switch to Slides. ... Switch from Microsoft PowerPoint to Google Slides; 4 of 6. Google Slides cheat sheet; 5 of 6. Tips for great presentations; 6 of 6.
Go to File > Version history > See version history. When you click this, Google Slides will launch the Version history sidebar. On it, you'll see a list of all the versions of your slide deck from the past. Use the Version history panel to revert to older versions of your Google Slides presentation.
Step 5. Select the File > Publish to the web menu option to unpublish your Google Slides presentation. The Publish to the web dialog box displays again: You can unpublish a presentation if you need to. This time you'll see the Stop publishing button in the lower left corner.
Get started with Google Slides. Jump to content. ... Creating a presentation in Google Slides; Adding and editing content; Presenting Google Slides; Sharing Google Slides; Teachers' Lounge Find tips and tricks from teachers like you Load more videos Lessons and Resources
Here are the top 20 design tips to consider when using Google Slides: Tip 1: Use templates. Tip 2: Use plenty of images. Tip 3: Experiment with typography. Tip 4: Add diagrams and infographics. Tip 5: Get creative with your images. Tip 6: Be careful with color.
There are three presentation modes in Google Slides. If you click the "Slideshow" button or press Ctrl/Cmd + F5, your presentation will start directly without any speaker notes. This is the most widely used and the simplest option. Next to the "Slideshow" button, there's a drop-down arrow. Click on it to see the different presentation ...
Step 2: Click on the "Present" button. Locate and click on the "Present" button, which is typically found in the top-right corner of the screen. The "Present" button is usually represented by a play-like icon. Once you click it, your presentation will start from the beginning and you can navigate through your slides using your ...
Learn all of the basics of using Google Slides. This tutorial covers everything you need to know to create professional presentations.🕒 Timestamps- 0:00 Cre...
Go to File > Publish to the Web in the menu. Choose either "Link" or "Embed" per your intent. Then use the Auto-Advance Slides drop-down box to choose the timing for the slides. Here again, you can pick from every second up to every minute. To loop the slideshow, check the box for Restart the Slideshow After the Last Slide.
Open a presentation in Chrome, then record with video inset as you present for up to 30 minutes. Google Slides now lets you record a presentation with inset video from your webcam. Each recording ...
On your browser, open a presentation in Google Slides. At the top right corner, click Slideshow . At the bottom left, click Options Enable pen tool. To draw or annotate, click and drag on your slide. To change the pen color, at the bottom, click Pen tool Select a color. To erase annotations on the current slide, at the bottom, click Erase Erase ...
Google Slides provides various methods to share your presentation with different levels of privileges. You can share your Google Slides templates and presentations online, which helps lessen the need to carry your PC around to deliver a presentation.. In this article, we will present different methods for sharing Google Slides in different formats: viewers and editing modes.
Open a saved Google Slides presentation on your computer. Click the arrow at the bottom of the Slideshow button and select Start from beginning . Clicking the Slideshow button also puts your ...
0:00 Intro0:22 Creating a presentation00:58 Formating a presentation01:36 Navigating Google Slides02:45 Adding media03:27 Adding animation04:39 Presenting an...
With a little touch-up in Google Slides, you can make a great presentation out of a PDF file. This step-by-step guide shows you how to convert a PDF to Google Slides to keep your audience engaged.
Differentiation: Using vertical slides sets your presentation apart from the crowd, signaling to your audience that you've put thought into the design and layout of your content. READ MORE: 3 Easy Ways to Convert a PDF to Google Slides [2024] How to Make Google Slides Vertical. Follow these steps to make Google slides vertical:
To present a full-screen presentation in Google Slides: Open a presentation in Google Slides. In the top right, click Slideshow . For best results, present with Google Chrome. From the current slide, the presentation will become full screen. To change slides, use the arrow keys on your keyboard or click the arrows at the bottom of the presentation.
Today, I want to show you guys how I make my presentations on Google Slides! I didn't use a template for this video but there are template resources that I'v...
Step 1: Open your presentation in Google Slides and go to the slide with what you want to group. Step 2: Click and hold the "Shift" key on your keyboard. Step 3: Click on each item you want to group. Step 4: Once you've selected them all, right-click on one of them.
Explore networking opportunities, training, expert panels, and presentations from leading AI startups who are disrupting key markets with GPU-accelerated applications. All presenters are members of NVIDIA Inception, the leading acceleration platform for AI, data science, gaming, HPC, and other advanced industries.
You can use Google Slides to make stunning presentations. And one of the easiest ways to create slides is using templates or themes.Google Slides templates ...
You must have edit access to the slides in order to create a new recording. To open your presentation, go to Google Slides. To record your slideshow, in the top right, click Rec Record new video. To start recording, in the middle, click the red record button. To start over, pause and click Re-record. To save your recording, pause and click Save ...